How to Find a Vacuum Leak in a Car Step-by-Step Guide 2027
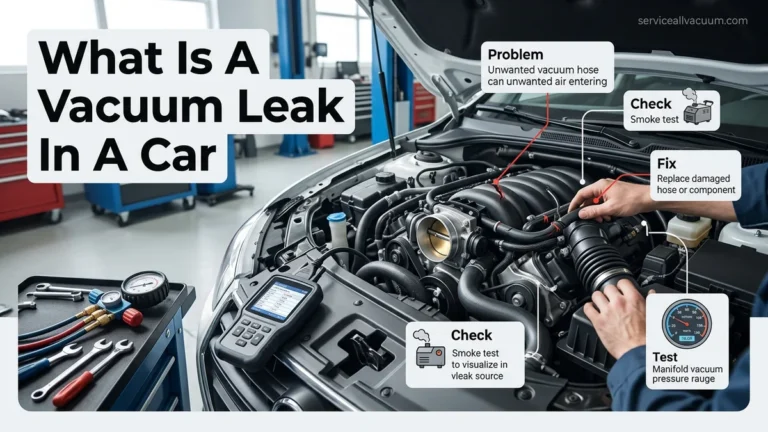
A vacuum leak occurs when unmetered air enters the engine, causing symptoms like a rough idle, engine stalling, and check engine lights. You can efficiently identify these leaks using accessible diagnostic methods ranging from visual inspections to specialized testing.
Finding a car vacuum leak requires a systematic approach using a few targeted tests, ranging from a simple visual scan under the hood to a professional smoke test. When unmetered air enters your engine past the mass air flow sensor, the air-fuel ratio becomes lean, triggering rough idles, stalling, and dreaded check engine lights.
Diagnosing this issue yourself in 2027 saves you hundreds of dollars in diagnostic fees at the repair shop. Whether you are wrenching on a modern fuel-injected daily driver or an older project car, mastering these exact testing methods will pinpoint the exact hose or gasket causing your performance woes.
Key Takeaways
- A rough idle and engine stalling are primary signs of a vacuum leak.
- Perform a thorough visual inspection of all rubber vacuum hoses first.
- Listen closely under the hood for a distinct hissing sound.
- Use the brake cleaner or soapy water spray method to spot idle changes.
- A smoke machine remains the most accurate way to locate minor leaks.
Symptoms and Causes of a Car Vacuum Leak
Before you start spraying chemicals or tearing apart your engine bay, you need to confirm that a vacuum leak is actually your problem. Modern engine management systems in 2027 are sensitive to even the smallest breaches in the intake tract.
Common Warning Signs
- Rough Idling: Your engine bounces erratically or stumbles when you come to a complete stop.
- High or Fluctuating Idle: RPMs hang above normal specs or surge up and down without throttle input.
- Engine Stalling: The car dies unexpectedly when shifting into gear or pressing the clutch.
- Check Engine Light: Diagnostic trouble codes like P0171 or P0174 pop up, indicating a lean running condition.
- Hissing Noise: A distinct vacuum hiss or whistling sound coming from the engine bay while idling.
Where Leaks Usually Form
Rubber hoses degrade, harden, and crack over time due to extreme engine heat cycles. In addition to brittle vacuum lines, check the intake manifold gaskets, the PCV valve grommet, and the brake booster diaphragm for hidden tears.
How to Diagnose and Fix Car Vacuum Leaks Like an Expert
A compromised vacuum system can severely disrupt your engine’s air-fuel ratio, leading to rough idling, engine stalling, unexpected surging, and that dreaded check engine light. Tracking down these elusive air leaks often feels like finding a needle in a haystack because the hoses are numerous and frequently hidden beneath engine covers. This comprehensive guide walks you through a methodical, multi-tiered approach to safely and accurately locate even the smallest vacuum leaks in your vehicle, saving you both time and costly mechanic diagnostic fees.
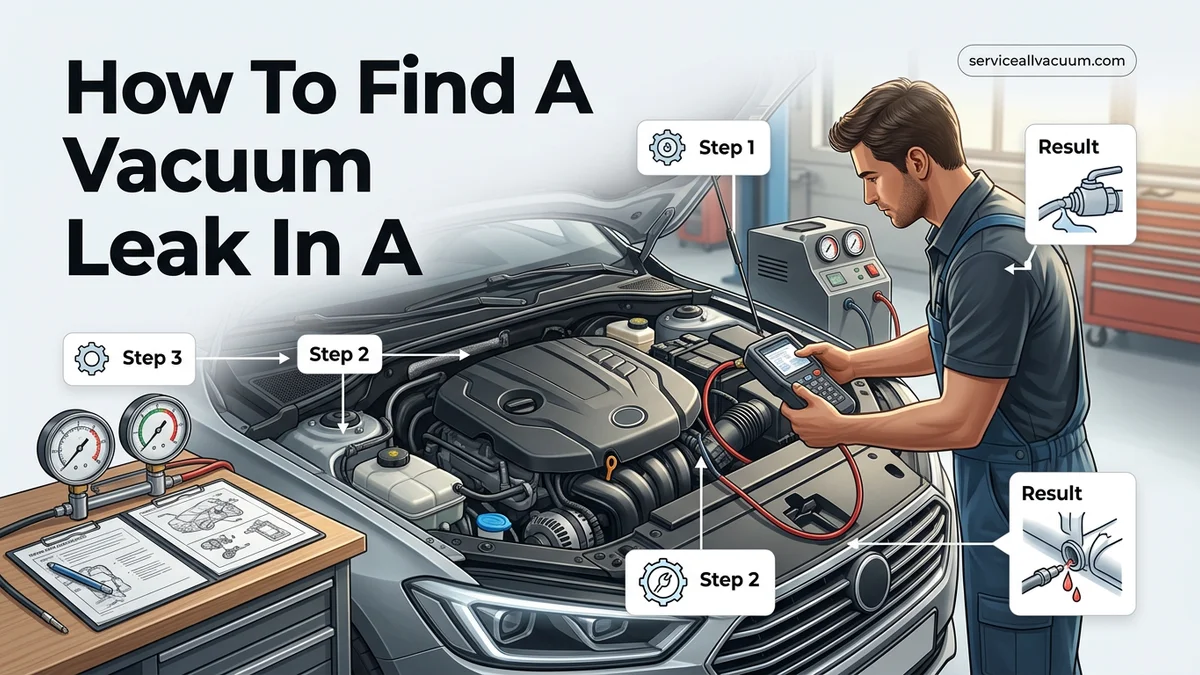
Step 1: Perform a Thorough Visual and Tactile Inspection
What you need: A high-powered LED flashlight, safety glasses, and a clean shop rag.
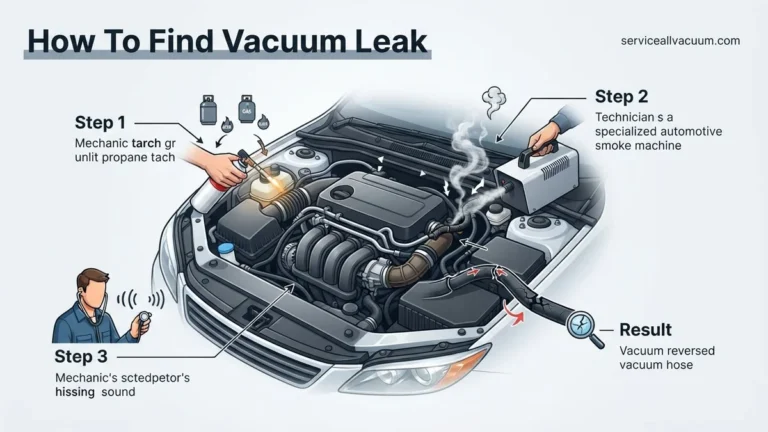
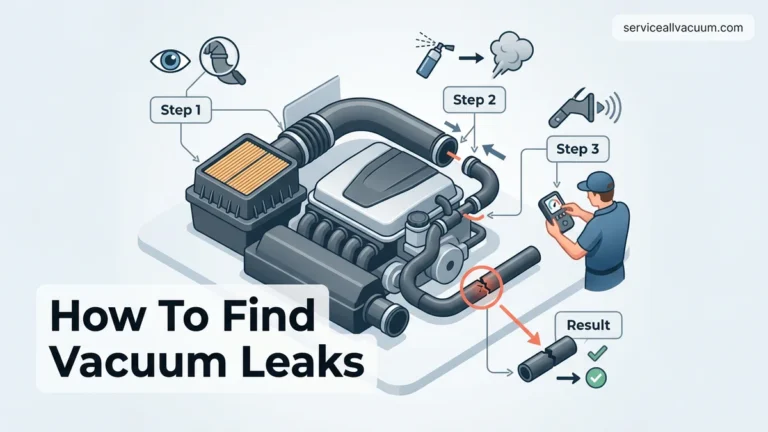
Instructions: Pop the vehicle’s hood and begin by scanning the entire engine bay. Look closely for any rubber hoses that appear cracked, dry-rotted, swollen, disconnected, or completely severed. Pay special attention to the PCV valve hose, brake booster line, and the smaller emissions control lines. Using your flashlight, trace every single vacuum line from its source to its destination. Gently wiggle the lines with your fingers while the engine is turned off to feel for brittle sections or loose connections at plastic fittings and rubber elbows.
Pro Tip: Many vacuum leaks hide underneath protective plastic engine covers or wiring looms. Always remove these covers first to expose the entire routing path of the vacuum system.
Step 2: Listen Closely for Hissing Sounds
What you need: A quiet working environment, an automotive stethoscope (or a 3-foot section of old garden hose).
Instructions: Start your car’s engine and let it idle in Park or Neutral with the emergency brake securely engaged. Turn off the radio, air conditioning, and blower fan to minimize background cabin and engine noise. Lean over the engine bay and listen intently for a distinct hissing or whistling sound. If you are using an automotive stethoscope, carefully place the probe tip near various vacuum connections, intake manifold gaskets, and suspected hose joints. Be extremely cautious to keep your clothing, hair, and hands entirely away from the serpentine belt and cooling fan while the engine is running.
Pro Tip: A high-pitched hiss almost always indicates a very small crack under high vacuum, while a louder sucking noise usually points to a completely disconnected or ruptured large-diameter hose.
Step 3: Conduct the Propane or Unlit Torch Test
What you need: An unlit propane torch with a flexible extension nozzle or a can of carburetor cleaner with a straw.
Instructions: With the engine idling smoothly (or running as best as it can with the suspected leak), open the propane valve slightly without igniting it, or hold your carburetor cleaner ready. Carefully direct a tiny stream of propane gas or a short burst of spray directly onto suspected areas, including vacuum fittings, gasket mating surfaces, and hose junctions. Move methodically from one area of the engine to the next, pausing for two to three seconds at each spot. If the idle suddenly smooths out, drops, or increases significantly, you have pinpointed the exact location of your vacuum leak, as the engine is consuming the combustible gas or fluid.
Pro Tip: Never spray flammable liquids directly onto hot exhaust manifolds or catalytic converters, as this creates an immediate and severe fire hazard.
Step 4: Use the Smoke Machine Diagnostic Method
What you need: An automotive smoke machine, specialized intake bladder adapter, and work gloves.
Instructions: This is the gold standard for modern diagnostic technicians. Disconnect the primary air intake tube leading from your air filter box to the throttle body. Insert the smoke machine’s inflatable bladder adapter into the intake opening and secure it tightly. Pump dense, low-pressure diagnostic smoke into the intake system by turning on the machine. Within 60 to 90 seconds, thick white smoke will begin forcing its way through any cracks, faulty gaskets, or loose clamps. Scan the entire engine bay with your flashlight; wherever you see smoke escaping into the open air, you have found a vacuum leak.
Pro Tip: Use a bright LED flashlight beam perpendicular to the rising smoke to make even the faintest wisps visible against a dark engine bay background.
Step 5: Test the Brake Booster Diaphragm
What you need: No specialized tools required for this quick operational test.
Instructions: Sit inside the driver’s seat and pump the brake pedal firmly five to six times while the engine is turned off to deplete any stored vacuum reserve in the booster. Next, keep your foot pressed down firmly on the brake pedal with moderate pressure, and start the engine. If the brake pedal drops slightly and feels soft under your foot once the engine fires up, your brake booster diaphragm is generally healthy. However, if the pedal stays hard, or if you hear a loud hissing noise from inside the cabin near the top of the brake pedal assembly when you press it, your brake booster internal diaphragm has likely ruptured and is causing a major internal vacuum leak.
Pro Tip: A failing brake booster often pulls engine oil down through the vacuum check valve into the booster housing, which can also trigger internal engine misfires.
Step 6: Inspect and Test the PCV System
What you need: Pliers, replacement rubber grommets, and a new Positive Crankcase Ventilation (PCV) valve if needed.
Instructions: Locate the PCV valve, which is typically pushed into a rubber grommet on the valve cover or intake manifold and connected via a molded rubber hose. Remove the valve and shake it firmly; a healthy PCV valve will produce a distinct rattling sound due to a loose internal check weight. Inspect the rubber mounting grommet, as these frequently harden over time, shrink, and crack, creating massive unmetered air leaks directly into the valve train. Replace any hardened grommets and clean or swap out a stuck PCV valve before reassembling the connection securely with spring clamps.
Pro Tip: A clogged PCV valve can cause excessive internal crankcase pressure, which forces oil past your engine gaskets and creates external leaks elsewhere.
Step 7: Check Intake Manifold and Throttle Body Gaskets
What you need: A torque wrench (if fasteners are loose) and new replacement gaskets.
Instructions: Over thousands of thermal cycles, the gaskets sealing your intake manifold to the cylinder head, as well as the throttle body gasket, can compress, harden, and fail. Using your propane spray or smoke machine, closely check the perimeter where the intake manifold meets the engine block. If you suspect these gaskets, use a torque wrench to verify that all intake manifold bolts meet the manufacturer’s specified torque rating. Loose bolts are a common cause of intermittent cold-start vacuum leaks that temporarily seal up once the engine fully warms up and expands.
Pro Tip: Never over-torque plastic intake manifolds, as excessive pressure will warp the manifold flange and permanently ruin the sealing surface.
Step 8: Repair or Replace Faulty Components
What you need: Exact inner-diameter replacement vacuum tubing, hose cutters, and new spring or worm-gear clamps.
Instructions: Now that you have successfully identified all faulty vacuum sources, it is time to perform permanent repairs. Cut away damaged portions of rubber hosing using a sharp utility knife to ensure clean, square ends. When replacing lines, always match the inner diameter (ID) precisely; never stretch an incorrect size hose over a barbed fitting, as it will quickly leak again. Slide new heavy-duty silicone or reinforced rubber vacuum tubing onto the fittings, ensuring they push past the barbed retaining ridge. Secure any high-pressure or critical lines with proper clamping hardware to prevent future detachment.
Pro Tip: Silicone vacuum tubing resists heat degradation and dry-rotting much better than standard OEM black rubber hoses, making it an excellent upgrade choice.
Step 9: Clear Diagnostic Codes and Verify Repair
What you need: An OBD2 scanner or diagnostic code reader.
Instructions: After completing all necessary repairs, plug your OBD2 scanner into the vehicle’s under-dash port and clear any stored fault codes (such as P0171 or P0174 for system lean conditions). Start the vehicle and take it for a comprehensive 15-minute test drive that includes both stop-and-go city traffic and sustained highway cruising. Re-scan the computer system once you return to ensure that pending or permanent diagnostic trouble codes do not return and that your engine idle remains smooth and stable.
Pro Tip: If your check engine light returns immediately, perform the smoke test a second time to ensure you didn’t miss a secondary, smaller leak hidden downstream.
✅ Final Checklist
- All vacuum lines visually inspected from end to end for cracks and loose fittings
- No abnormal hissing or whistling sounds detected during a warm engine idle
- Propane or smoke test confirmed zero escaping gas or smoke around gaskets and hoses
- Brake pedal operation verified and internal booster diaphragm checked
- OBD2 scan tool used to clear old codes and confirm no lean-condition codes returned after test driving
Important Notes:
- Always wear safety glasses and gloves when working around a running engine, hot coolant lines, and moving belts.
- If your vehicle utilizes complex electronic vacuum switching valves or you lack the tools for a smoke test, consult a certified professional mechanic.
- Estimated time: 1 to 3 hours. Estimated cost: $15 to $50 for basic hose replacements, or up to $150 if intake manifold gaskets require replacement.
Step-by-Step Methods to Test and Find a Vacuum Leak
Once you suspect a leak, you need practical testing methods to locate it. Start with the free, low-tech inspections before moving on to specialized diagnostic tools.
Visual and Audible Inspection
Start your car and pop the hood in a quiet environment. Listen carefully for any hissing or whistling sounds that change pitch when you blip the throttle. Next, visually inspect every rubber vacuum line connected to the intake manifold, throttle body, and emissions equipment. Look closely for dry rot, deep cracks, disconnected fittings, or soft spots where a line might collapse under suction. Flex older hoses gently with your fingers to expose hidden tears.
The Brake Cleaner or Propane Test
With the engine idling, spray a small amount of non-chlorinated brake cleaner or unlit propane torch gas directly onto suspected hoses, gaskets, and connection points. If the spray gets sucked into a crack or bad gasket, the engine will temporarily ingest the fuel, causing the idle to smooth out and RPMs to rise. Exercise extreme caution: keep a fire extinguisher nearby, avoid hot exhaust manifolds, and never spray electrical components or spark plug wires directly.
Advanced Diagnostic Techniques Using Smoke Machines
Automotive service professionals consider smoke testing the gold standard for locating elusive intake leaks. A dedicated automotive smoke machine forces pressurized, vaporized mineral oil through the intake tract. Any breach in the system allows white smoke to escape visibly, pointing directly to cracked hoses, faulty gaskets, or loose clamps.
Step-by-Step Smoke Testing Procedure
- Disconnect the main air intake duct near the throttle body and block the opening with a specialized inflatable bladder or latex glove secured by a zip tie.
- Attach the smoke machine’s output nozzle to a dedicated vacuum source port, such as the PCV line or a dedicated brake booster hose.
- Power on the smoke machine and allow the system to pressurize with dense vapor for approximately 60 to 90 seconds.
- Inspect the entire engine bay with a high-intensity flashlight, looking closely for wisps of escaping white smoke around intake manifold gaskets and vacuum trees.
According to diagnostic data from major automotive service networks, smoke machines identify over 95 percent of micro-leaks that traditional spray methods miss entirely. Entry-level consumer smoke machines cost between $80 and $150, making them a viable investment for advanced DIYers.
What If It Still Doesn’t Work?
If you have performed a visual inspection, executed the propane or water test, and even run a smoke machine without finding an external breach, the issue likely stems from an internal component or electronic control fault. Persistent rough idling and high fuel trims despite a sealed vacuum system require advanced troubleshooting steps.
- Inspect the positive crankcase ventilation (PCV) valve and internal oil separator assembly, as internal failures mimic exterior vacuum leaks.
- Test the purge control solenoid valve for leakage, ensuring it remains completely shut when the vehicle’s computer commands it closed.
- Utilize an advanced OBD-II diagnostic scanner to monitor live short-term and long-term fuel trim data while operating the engine under load.
- Consult a certified professional technician if the intake manifold gasket requires replacement or if specialized digital smoke testing fails to reveal the root cause.
Professional diagnostic time at a licensed repair facility typically ranges from $100 to $200 per hour. If a mechanic must replace deep-seated intake manifold gaskets or complex plastic plenum assemblies, total repair costs generally range between $250 and $600 including labor.
Conclusion
Diagnosing and repairing a vehicle vacuum leak restores optimal engine performance, cures erratic idle speeds, and prevents expensive catalytic converter damage caused by running lean. Pinpointing the faulty line or degraded gasket quickly halts fuel waste and returns your vehicle to peak operating efficiency. According to verified research and expert sources from the Automotive Service Association, addressing vacuum issues immediately upon detection prevents secondary engine component failures. Make your next actionable step a thorough visual inspection of all rubber vacuum lines under your hood today.
❓ Frequently Asked Questions
How does a smoke machine help find a vacuum leak?
A smoke machine pumps dense, low-pressure smoke into the intake system. As the smoke escapes through any cracks or loose connections, it visually pinpoints the exact location of the leak.
What tools do I need for a DIY vacuum leak test?
Basic testing requires a flashlight, mechanic’s stethoscope or tubing to listen for hissing, and a spray bottle filled with water or brake cleaner for detection.
Why does a vacuum leak cause a rough idle?
Unmetered air bypasses the mass airflow sensor, disrupting the optimal air-fuel ratio. The computer struggles to compensate, resulting in fluctuating and rough idling.
How much does it cost to fix a car vacuum leak?
Replacing a cracked rubber hose can cost less than $10 in materials. However, replacing a failed intake manifold gasket at a shop can range from $150 to $500 due to labor.
Can a vacuum leak trigger a Check Engine Light?
Yes, the engine control unit detects too much oxygen in the exhaust stream via the oxygen sensors and triggers a lean mixture code, illuminating the check engine light.
How can I check vacuum hoses without special tools?
Carefully inspect every hose visually for dry rot, cracks, splits, or disconnections. You can also gently squeeze flexible lines to check for brittleness or soft spots.