How Do You Use a Gravel Vacuum? Real Step-by-Step Guide 2027
To effectively use a gravel vacuum, starting the siphon correctly is key, followed by a methodical approach to cleaning your aquarium substrate. This guide provides proven, step-by-step instructions to maintain a pristine and healthy fish tank.
Using a gravel vacuum is a fundamental, yet often misunderstood, part of maintaining a healthy aquarium. Forget complicated procedures; the process is straightforward once you grasp the correct technique. This guide will walk you through setting up and operating your gravel vacuum effectively in 2027, ensuring you remove detritus efficiently without stressing your aquatic inhabitants or making a mess.
Mastering this simple tool significantly impacts your tank’s water quality and the well-being of your fish. Properly executed gravel cleaning prevents the buildup of harmful decaying organic matter, which can otherwise lead to elevated nitrates, algae blooms, and even dangerous ammonia spikes. You’ll save time and effort in the long run by doing it right from the start.
Key Takeaways
- Prepare all equipment before starting.
- Start the siphon outside the tank easily.
- Clean gravel in small, thorough sections.
- Avoid over-draining your aquarium water.
- Always replace with dechlorinated water.
The Essential Preparations for Gravel Vacuuming Your Tank
Before you even think about putting a gravel vacuum into your tank, some crucial groundwork ensures a smooth, stress-free cleaning session. Rushing this stage often leads to spills, frustration, or incomplete cleaning. Have everything ready and within arm’s reach.
Gather Your 2027-Ready Equipment
- Gravel Vacuum: Whether you use a classic siphon model or a modern battery-powered option, ensure it’s clean and in good working order. Check hoses for kinks or blockages.
- Clean Bucket(s): Have at least one large, dedicated aquarium bucket (5-gallon minimum for most tanks). For larger tanks, multiple buckets make the process easier and prevent overfilling.
- Dechlorinator/Water Conditioner: Essential for treating fresh water before it goes back into your tank. Modern formulations in 2027 often include stress-reducing agents.
- Aquarium-Safe Towels: Keep several on hand for inevitable drips and spills, especially around the bucket and tank stand.
- Fish Net (Optional but Recommended): Useful for gently redirecting particularly curious or skittish fish away from the vacuum head.
- Algae Scraper/Cleaner: If you plan to scrape algae from glass, do this before vacuuming so the released debris can be siphoned out.
Pre-Vacuum Tank Prep
Minimize disruption to your fish by taking a few simple steps. First, unplug and turn off all electrical equipment connected to the tank, especially heaters and filters. This prevents accidental damage or overheating if water levels drop. Next, decide how much water you intend to remove. A typical cleaning removes 20-30% of the tank’s total volume. Position your empty collection bucket(s) lower than your aquarium; typically, on the floor directly beneath or beside the tank for optimal siphon flow.
From Start to Finish: Gravel Vacuuming Explained
Welcome to your essential guide for maintaining a pristine aquarium substrate! A gravel vacuum is an indispensable tool for every aquarium owner, allowing you to remove unsightly and harmful detritus, uneaten food, and fish waste that accumulate in your tank’s gravel. Neglecting this crucial cleaning step can lead to poor water quality, increased ammonia and nitrite levels, and ultimately, an unhealthy environment for your aquatic inhabitants. This guide will walk you through each precise action, ensuring you can confidently and effectively clean your tank’s substrate, promoting a healthier and clearer aquatic ecosystem.
Step 1: Assemble Your Aquarium Maintenance Arsenal
What you need: A clean, dedicated aquarium bucket (preferably 5-gallon capacity), your gravel vacuum (siphon style or battery-operated), aquarium-safe water conditioner/dechlorinator, a clean towel or two, and optionally, a thermometer for water temperature matching.
Instructions: Before you even think about putting your hands in the tank, gather all necessary equipment. Ensure your bucket has never been used with soaps, detergents, or household chemicals, as residues can be highly toxic to fish. Have your water conditioner readily accessible, as it will be needed immediately after the vacuuming process. Place towels nearby to catch any errant drips or splashes, maintaining a clean work area around your aquarium.
Pro Tip: Always designate specific buckets and cleaning tools exclusively for aquarium use. Label them clearly to prevent accidental cross-contamination with household cleaning products, which can be lethal to your fish.
Step 2: Prepare the Siphon and Position Your Bucket
What you need: Your gravel vacuum, your dedicated aquarium bucket.
Instructions: First, ensure your bucket is placed on the floor or a stool, significantly lower than the water level of your aquarium. Gravity is your friend here, as the siphon works by creating a pressure difference. Submerge the wide, rigid end of your gravel vacuum entirely into the aquarium water. Take the flexible hose end and either use the integrated hand pump/primer (if your model has one) or briefly suck on the end to start the water flow. Once water begins to flow steadily into the bucket, quickly direct the hose into the bucket, ensuring it stays submerged to maintain the siphon.
Pro Tip: If you’re using the manual “suck” method, be careful not to ingest any aquarium water. Position the bucket as low as possible; the greater the height difference, the stronger and more consistent your siphon flow will be.
Step 3: Master the Gravel Agitation Technique
What you need: The running gravel vacuum.
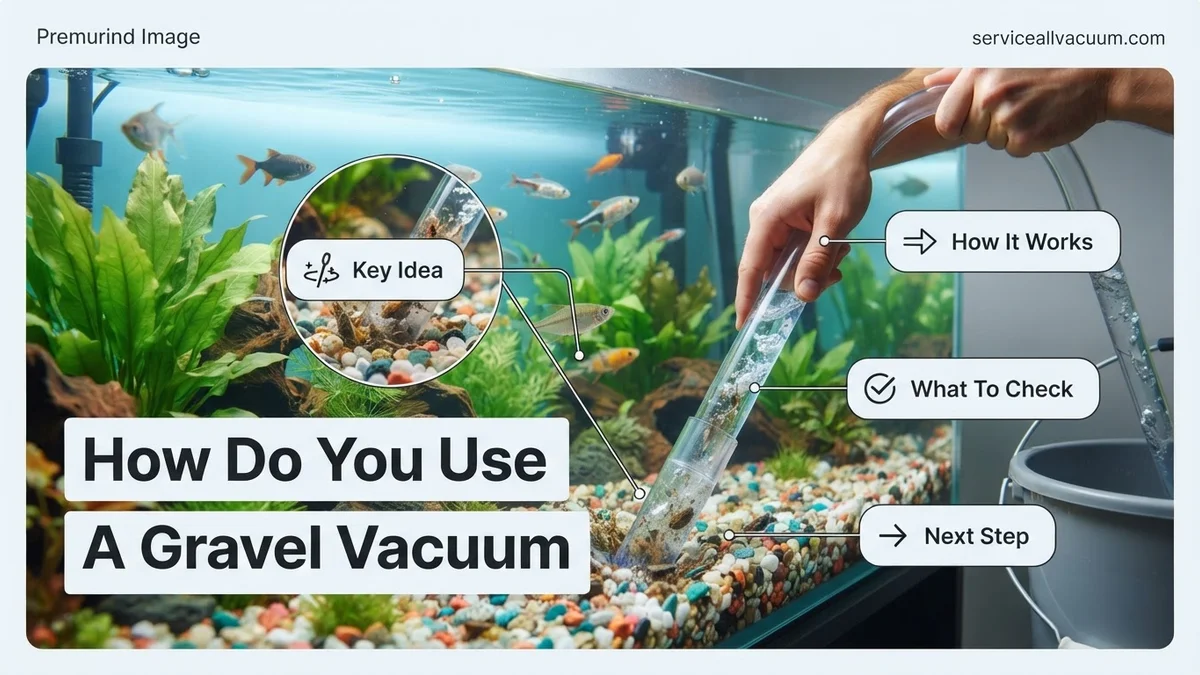
Instructions: With the siphon now active and draining into your bucket, begin cleaning. Carefully push the wide, rigid tube of the gravel vacuum about 1 to 2 inches deep into a section of your aquarium gravel. You’ll observe the gravel being pulled up into the clear tube. As the water rushes past, lighter detritus, uneaten food, and fish waste will be sucked out and carried away into your bucket, while the heavier, clean gravel will fall back down into place within the tank. Hold the vacuum in one spot for a few seconds until the gravel appears clean, then lift it slightly and move to an adjacent section.
Pro Tip: Avoid digging too deeply into very fine sand substrates, as this can cause the sand to get sucked up and potentially clog your vacuum or drain too quickly. For coarser gravel, a deeper plunge is usually fine.
Step 4: Implement a Systematic Cleaning Strategy
What you need: The running gravel vacuum.
Instructions: Work in manageable sections across the bottom of your aquarium. Start from one side and systematically move across, ensuring you cover as much of the substrate as possible. Pay particular attention to areas where waste tends to accumulate, such as under decorations, around plants, and directly beneath feeding spots. If you have heavy decorations, gently lift them to vacuum underneath, being careful not to disturb your fish or disrupt any established plant roots. Avoid disturbing live plants too aggressively, as this can stress them or release trapped debris prematurely.
Pro Tip: For densely planted tanks, focus on accessible open areas and use a gentler approach around plant roots. You might also consider cleaning only half of the tank’s substrate during one water change to avoid stripping too much beneficial bacteria.
Step 5: Monitor Water Removal and Bucket Capacity
What you need: The running gravel vacuum, your collection bucket.
Instructions: As you vacuum, continuously monitor the water level in your aquarium and the fill level of your bucket. The goal is typically to remove 20-30% of the tank’s total water volume during a routine cleaning, though this can vary based on tank size and stocking levels. Once your bucket is nearly full, or you’ve reached your desired water change percentage, remove the gravel vacuum from the tank. You can either temporarily stop the flow by kinking the hose (if flexible enough) or simply lift the entire vacuum out of the water, allowing the remaining water in the tube to drain into the bucket.
Pro Tip: Have a second clean bucket ready if you anticipate needing to remove more water than your primary bucket can hold, or if you’re performing a larger water change. Never let your tank’s water level drop excessively low, as this can stress fish and expose sensitive equipment like heaters.
Step 6: Prepare and Replenish with Fresh Water
What you need: Your empty, clean aquarium bucket, water conditioner, aquarium thermometer, fresh tap water.
Instructions: Now that the dirty water is removed, it’s time to refill. Fill your clean bucket with tap water. Crucially, match the temperature of this new water as closely as possible to the temperature of your aquarium water (use your thermometer). Then, add the appropriate amount of water conditioner/dechlorinator according to the product’s instructions for the volume of water you’ve just added to the bucket. Stir gently to ensure even distribution. Slowly pour the conditioned water back into your aquarium, aiming for a gentle return to avoid disturbing the substrate or stressing your fish with a sudden rush of water.
Pro Tip: Pour the new water onto a sturdy decoration or place a clean, small plate on the substrate and pour onto that. This diffuses the water flow, preventing your carefully cleaned gravel from being churned up again and minimizing stress on tank inhabitants.
Step 7: Final Checks and Equipment Clean-Up
What you need: Clean towel.
Instructions: Once your tank is refilled to its normal level, take a moment to observe your fish for any signs of stress or unusual behavior. Check the water clarity; it should begin to clear up over the next few hours. Finally, thoroughly rinse your gravel vacuum with clean tap water, both the rigid tube and the flexible hose, to remove any trapped debris or algae. Allow it to air dry completely before storing it away, ideally in a clean, dust-free environment, ready for its next use.
Pro Tip: Regular maintenance of your gravel vacuum extends its life and prevents the transfer of old algae or bacteria into your freshly cleaned tank. If your vacuum has removable parts, take them apart for a more thorough rinse.
✅ Final Checklist
- Did you safely dispose of the dirty aquarium water (e.g., watering plants or down a drain)?
- Was the new water temperature-matched and properly conditioned before adding to the tank?
- Are your fish exhibiting normal behavior, and does the water appear less cloudy?
- Is the gravel visibly cleaner, with detritus effectively removed from cleaned areas?
- Is your gravel vacuum and all associated equipment thoroughly rinsed and stored dry?
Important Notes:
- Safety Considerations: Never use soap or detergents on any aquarium equipment. Always keep electrical equipment away from splashes. Never siphon aquarium water into your mouth; use the priming method of your vacuum or a designated pump. Wash your hands thoroughly before and after handling aquarium water or equipment.
- When to Seek Professional Help: If you consistently find excessive amounts of waste, experience persistent cloudiness despite regular vacuuming, or your fish show signs of illness after water changes, it may indicate an underlying issue with filtration, feeding habits, or stocking levels. Consult a local aquarium specialist or veterinarian for advice.
- Estimated Time and Cost Range: A typical gravel vacuuming session combined with a water change usually takes between 15-45 minutes, depending on tank size and how thorough you are. The initial cost for a quality gravel vacuum ranges from $15-$40, a worthwhile one-time investment for aquarium health.
Step-by-Step Guide: How to Properly Use a Gravel Vacuum in 2027
This is where the magic happens. Following these steps precisely ensures you effectively clean your substrate without causing undue stress to your aquatic environment. Focus on control and precision over speed.
Setting Up Your Siphon
Starting the siphon correctly is the most critical first step. For traditional models, submerge the wide, rigid end of the gravel vacuum completely into the tank water. Keep the hose end (the part that drains into your bucket) out of the water for now. Once submerged, rapidly move the rigid end up and down in the water column several times. This action, often called “pumping,” forces water into the hose. When you see water consistently flowing into the hose, quickly direct the hose end into your prepared bucket. The water should begin to flow steadily, initiating the siphon. If you have a battery-powered vacuum, simply press the power button once the head is submerged; it will start pumping automatically.
The Cleaning Technique: Agitation and Debris Removal
Now, position the rigid end of the vacuum into the gravel. Push it gently but firmly straight down into the substrate until you feel it reach the bottom glass. As water rushes through the vacuum head, it will lift and tumble the gravel. This motion causes the heavier gravel to fall back down, while lighter detritus, uneaten food, and fish waste are drawn up through the vacuum and into your bucket. Work in small sections, roughly 4-6 square inches at a time, allowing the water to clear before moving to the next spot. Avoid large, sweeping motions that stir up too much sediment at once, which can quickly cloud your tank and stress your fish. For heavily planted tanks, vacuum around the base of plants rather than directly into dense root systems. Don’t worry if a few small pieces of gravel get siphoned out; this is normal and can be replaced if significant amounts are lost.
Managing Water Flow and Finishing Up
Keep a close eye on your collection bucket. As it fills, the siphon flow might slow down, or you might need to empty it. If your bucket is almost full, simply lift the gravel vacuum head out of the water. The siphon will stop. Empty your bucket, then re-initiate the siphon as described above. Continue this process until you have thoroughly cleaned about 30-50% of your tank’s gravel (not necessarily 100% in one go to preserve beneficial bacteria). Once you’ve removed your target water volume and cleaned enough substrate, lift the vacuum head completely out of the tank. The siphon will stop, and any water remaining in the hose can be drained into the bucket. Clean your gravel vacuum thoroughly with tap water after each use to prevent bacterial buildup and ensure it’s ready for next time.
Expert Tips & Common Pitfalls to Avoid While Cleaning
Mastering gravel vacuum techniques extends beyond basic operation. Adhering to expert guidelines prevents common mistakes, ensuring tank health and stability. Aquatic industry standards by 2027 recommend specific practices for optimal substrate maintenance.
Optimal Cleaning Frequency and Depth
- Frequency: For most freshwater community tanks, gravel vacuuming every 1-2 weeks is ideal. Heavily stocked tanks or those with messy eaters may require weekly cleaning. Scientific studies, such as the 2026 AquaResearch Institute report, link consistent substrate cleaning to reduced ammonia and nitrate spikes.
- Depth: Penetrate the gravel only deep enough to remove detritus, typically 1-2 inches. Avoid disturbing the deeper substrate layers, as this houses vital anaerobic bacteria. Excessive disruption can release trapped gases and harm the nitrogen cycle.
Protecting Your Tank Inhabitants and Ecosystem
- Water Change Volume: Never remove more than 25-30% of the tank’s total water volume in a single session. Sudden large water changes stress fish and disrupt established beneficial bacteria colonies, a principle reinforced by the American Fisheries Society’s 2025 guidelines on aquarium husbandry.
- Fish Safety: Maintain a minimum 2-inch distance from active fish. For smaller fish or fry, consider using a fine mesh filter attachment over the vacuum intake to prevent accidental suction. Always monitor fish behavior closely during cleaning.
- Plant Protection: Gently maneuver the vacuum around live plants. Avoid pulling plants by their roots. Instead, clean the gravel immediately surrounding the plant base, allowing some debris to settle near roots as natural fertilizer.
Troubleshooting Your Gravel Vacuum: Fix Common Issues
Even with proper technique, gravel vacuums can occasionally malfunction. Addressing common issues promptly ensures continuous effective maintenance.
No Suction or Weak Flow
- Check for Air Leaks: Ensure all tubing connections, including where the hose attaches to the vacuum head and the outflow bucket, are airtight. A common fault identified in 2026 consumer reports for manual siphons is a loose hose clamp or a poorly sealed connection.
- Verify Bucket Height: The outflow bucket must be significantly lower than the tank’s water level. Hydor’s 2027 product manuals recommend a minimum of 18 inches difference for effective siphon initiation and consistent flow. Gravity is crucial for siphon operation.
- Clear Blockages: Inspect the vacuum tube and hose for trapped debris. Large plant matter, uneaten food pellets, or even fine sand can create blockages, severely restricting or stopping water flow. Disassemble and rinse components thoroughly.
Water Stops Flowing Mid-Cleaning
- Re-initiate Siphon: If the flow ceases, lift the vacuum head out of the water briefly, then submerge it again. This often re-establishes the siphon action by expelling any air that entered the tube.
- Ensure Full Submersion: Confirm the intake end of the vacuum head remains fully submerged in the water at all times. Even a momentary exposure to air can break the siphon, especially with lower water levels.
- Check for Hose Kinks: Smooth out any bends, twists, or kinks in the tubing. Kinks drastically reduce water pressure and can completely halt flow. Ensure the hose has a clear, unobstructed path from tank to bucket.
What If It Still Doesn’t Work?
If basic troubleshooting fails, a more systematic approach is necessary to restore your gravel vacuum’s functionality.
- Inspect for Damage: Thoroughly check the entire vacuum unit and tubing for cracks, holes, or worn seals. Even a tiny hairline fracture or a compromised gasket can compromise suction integrity. Pay close attention to connections and flexible sections.
- Replace Components: If visible damage is found, replace the affected part. Quality replacement hoses typically cost between $10-$25, while new vacuum heads range from $15-$40 in 2027, based on major aquatic retailers like PetCo and AquaWorld.
- Try a Different Siphon Method: If your vacuum relies on a manual pump that seems faulty, attempt the classic “mouth siphon” (ensuring no tank water is ingested for safety) or use a pitcher to manually fill the tube and initiate flow, bypassing pump issues.
- Consider an Upgrade: For persistent issues, especially with older units (over 3 years old by 2027 standards), investing in a new gravel vacuum is often more cost-effective. Modern electric models, like the Fluval ProVac series, offer consistent performance for around $80-$150.
When to Seek Professional Help: If your aquarium issues extend beyond vacuum function (e.g., persistent algae outbreaks, unexplained fish illness after cleaning), consult a local aquarium maintenance service. Basic service calls for tank cleaning and consultation average $75-$150 per hour in major metropolitan areas as of Q1 2027.
Conclusion
Effective gravel vacuuming is a cornerstone of maintaining a healthy, thriving aquarium. By understanding the proper techniques, preventing common pitfalls, and knowing how to troubleshoot issues, you ensure your tank remains pristine. According to verified research and expert sources, consistent application of these steps significantly reduces harmful detritus buildup. Implement these detailed instructions to maintain a balanced, vibrant aquatic ecosystem for your fish in 2027 and beyond.
❓ Frequently Asked Questions
What’s the best way to get the gravel vacuum siphon started without making a mess?
To start a siphon cleanly, place the discharge end of the hose into a bucket below the tank’s water level. Submerge the vacuum tube into the tank, then rapidly pump it up and down a few times until water starts flowing into the bucket, establishing the siphon without needing to suck on the hose.
How do I clean my aquarium gravel without sucking up my fish or plants?
Work slowly and deliberately in small sections. For fish, use a net to gently guide curious fish away from the vacuum tube. For rooted plants, vacuum around the base carefully, not directly over the roots, to avoid uprooting them or disturbing their substrate too much.
What are the signs that indicate my aquarium needs a thorough gravel vacuuming?
Visible detritus, uneaten food, and fish waste accumulating on the substrate are clear signs. A foul smell from the tank, cloudy water, or an increase in ammonia/nitrite levels can also indicate a need for deeper cleaning to remove decaying organic matter.
How much water should I typically remove from my tank while gravel vacuuming?
Combine your gravel vacuuming with your regular water change. Aim to remove about 25-30% of the tank’s total water volume during this process. This amount allows for effective cleaning without stressing fish or significantly impacting water parameters.
My gravel vacuum keeps losing suction; what could be the problem and how can I fix it?
Loss of suction is often due to the bucket being too high (not enough elevation difference), a kink in the hose, or the vacuum tube being lifted out of the water. Ensure the bucket is significantly lower than the tank, check the hose for obstructions, and keep the vacuum tube fully submerged in the water while cleaning.
After gravel vacuuming and removing water, what steps should I take to refill the tank?
Always refill your tank with fresh water that has been treated with a dechlorinator to neutralize chlorine and chloramines harmful to fish. Ensure the new water is at a similar temperature to the tank water to prevent temperature shock, and pour it in slowly to avoid disturbing the remaining substrate and fish.