How to Use a Fish Tank Vacuum Step-by-Step Guide 2026
Learning how to use a fish tank vacuum properly keeps your aquarium clean and your fish safe from accidental harm. This guide breaks down the essential steps for starting a siphon, plunging into gravel, and managing water flow without making a mess.
Using a fish tank vacuum, or gravel siphon, is the single most important maintenance routine to keep your aquarium water crystal clear and your fish healthy. To operate it successfully, you submerge the rigid intake tube to fill it with water, create a downward suction loop into your bucket or drain, and gently plunge the tube into your substrate to vacuum up fish waste and uneaten food while letting heavy gravel fall back down.
Mastering this process prevents toxic ammonia spikes and keeps your tank looking pristine without accidentally sucking up your livestock or flooding your living room floor. In 2026, modern aquarium hobbyists rely on efficient, spill-free siphoning techniques to maintain stable water parameters with minimal physical strain.
Key Takeaways
- Position the bucket lower than the tank to ensure gravity drives the water flow.
- Push the vacuum tube straight down into the gravel to trap debris efficiently.
- Pinch the siphon hose to temporarily pause water flow if small fish swim too close.
- Remove only 20 to 30 percent of the total tank water during each cleaning session.
- Use a battery-operated vacuum if your bucket cannot sit lower than the aquarium.
Why Fish Tanks Accumulate Debris and Waste
The Daily Buildup of Organic Matter
Every single day, your fish produce solid waste, and you add commercial fish flakes or pellets. Even with a high-end power filter running 24/7, much of this organic material settles directly onto the bottom of your tank. As these leftovers and feces break down, they release harmful ammonia and nitrites into the water column. Without physical removal via a gravel vacuum, your biological filter will eventually become overwhelmed, leading to cloudy water, algae blooms, and stressed fish.
How Uneaten Food and Bio-Load Overwhelm Substrates
Overfeeding is the number one cause of rapid tank pollution. When fish food falls past the mid-water column, it wedges tightly between gravel pieces where fish cannot reach it. Over just 48 hours, this trapped food begins to rot, creating localized pockets of hydrogen sulfide gas in your substrate. Here is what typically contributes to heavy organic loads in your tank:
- Overfeeding beyond what fish consume in two minutes
- Decaying live plant matter that sinks to the bottom
- Fish feces accumulating faster than beneficial bacteria can process it
- Dust and micro-particles settling from commercial dry foods
Master Fish Tank Vacuuming in 8 Simple Steps
Keeping your aquarium clean is the cornerstone of a thriving aquatic ecosystem, and learning how to properly use a fish tank vacuum is essential for removing toxic fish waste, uneaten food, and decaying plant matter from the substrate. This comprehensive, practical walkthrough takes the guesswork out of aquarium maintenance, ensuring you can perform safe, efficient water changes without stressing your fish or turning your living room into a splash zone. By following this structured approach, you will master the mechanics of gravel cleaning and maintain crystal-clear water.
Step 1: Gather Your Equipment and Prepare the Workspace
What you need: Gravel siphon vacuum with tubing, a clean 5-gallon bucket (reserved strictly for aquarium use), a dedicated aquarium towel, and water conditioner (like Seachem Prime).
Instructions: Before touching your tank, set up your workstation to avoid messy water spills. Place your clean 5-gallon bucket on the floor near the aquarium. Uncoil your siphon hose and ensure there are no kinks or cracks in the plastic. If you are using a standard gravity-fed siphon, make sure the end of the hose can reach deep into the bucket. Wash your hands thoroughly with warm water—avoiding all soaps and lotions, as chemical residues can harm sensitive fish—and dry them completely before proceeding.
Pro Tip: Never use buckets that have come into contact with household cleaners, as even microscopic soap residue can be fatal to fish and invertebrates.
Step 2: Unplug Electrical Equipment
What you need: Access to your aquarium power strip or wall outlets.
Instructions: Safety should always come first when working around water and electricity. Locate the power strip supplying electricity to your aquarium and unplug all submersible equipment, including heaters, filters, and air pumps. Heaters, in particular, can crack or shatter if the water level drops below the heating element while they are still hot. Leaving your equipment plugged in during a water change poses a severe electrical shock hazard and risks damaging expensive aquarium hardware.
Pro Tip: Tie or tape the power cords to the wall or tank rim so they don’t accidentally fall into the bucket or puddle of water during the cleaning process.
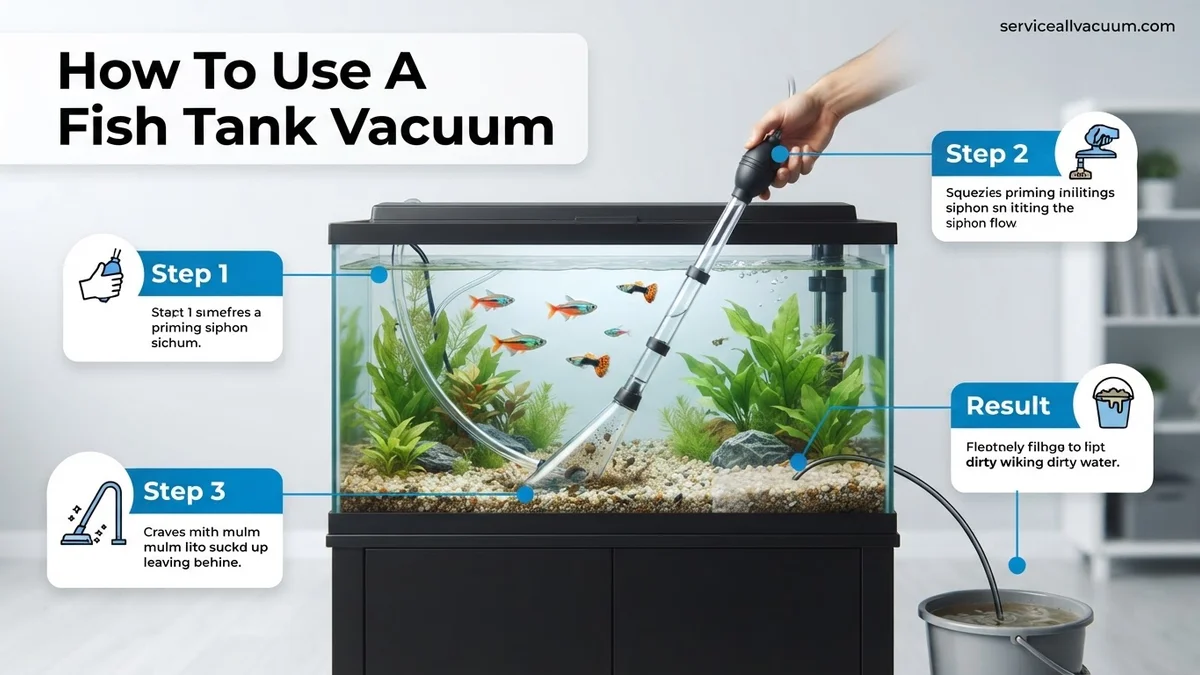
Step 3: Initiate the Siphon
What you need: Your gravel vacuum assembly and the bucket on the floor.
Instructions: Submerge the rigid plastic cylinder (the intake tube) of your vacuum entirely into the aquarium water until it fills completely with water and expels all trapped air. Hold the end of the flexible tubing over your bucket on the floor. Using a swift, downward plunging motion with the intake tube inside the tank, or using a squeeze-bulb pump if your model includes one, draw the water downward to start the gravity flow. Once the water begins rushing through the tube and into the bucket, you are ready to begin cleaning.
Pro Tip: If your siphon has a built-in primer bulb, squeeze it 3 to 4 times firmly until water flows continuously into the bucket without needing to manually submerge and plunge the entire tube.
Step 4: Vacuum the Gravel Substrate
What you need: Active gravity siphon and gravel bed.
Instructions: Push the wide plastic cylinder straight down into the gravel or sand substrate. You will immediately see mulm, fish waste, and debris sucked upward through the tube. Allow the gravel to tumble and churn inside the cylinder for 2 to 3 seconds. As the heavy gravel falls back down, the lighter waste will be pulled up and out through the hose. Once the gravel in that specific spot looks clean, lift the tube about an inch to let the remaining gravel settle, and move the vacuum a few inches over to the next dirty patch.
Pro Tip: Do not vacuum the entire gravel bed all at once if your tank is heavily stocked; instead, clean about 30% to 50% of the substrate per water change to preserve beneficial bacteria populations.
Step 5: Control the Water Flow and Suction
What you need: Thumb or index finger to control the end of the hose.
Instructions: If your vacuum begins sucking up too much sand, lightweight planted substrate, or if a curious fish swims too close to the intake tube, you need to react quickly. Place your thumb over the end of the flexible tubing where it empties into the bucket to instantly pause the water flow. Alternatively, you can pinch the hose to reduce suction. This gives you absolute control, allowing loose substrate to safely tumble back down to the tank floor before the suction pulls it out of the aquarium entirely.
Pro Tip: Keep a close eye on your fish while vacuuming; curious species like bettas and cichlids love to investigate the moving tube and can get accidentally startled or trapped.
Step 6: Monitor the Water Removal Limits
What you need: Visual awareness of the tank’s water level and bucket capacity.
Instructions: As you clean the substrate, water will rapidly drain from the aquarium into your bucket. Standard water changes typically remove between 15% and 25% of the total tank volume weekly. Watch the bucket carefully to avoid overflowing it onto your floors. If your bucket fills up before you have finished vacuuming your target areas, pinch the hose, empty the bucket into a drain or garden, and re-prime the siphon to resume cleaning. Never drain more than 50% of your tank’s water in a single day unless treating a specific disease.
Pro Tip: Mark a permanent line on the outside of your bucket using a waterproof marker to easily see when you have reached your target water removal volume.
Step 7: Refill the Tank with Conditioned Water
What you need: Tap water, liquid water conditioner, and a clean bucket or water-filling hose.
Instructions: Prepare your replacement water so that it closely matches the temperature of your aquarium water (use a digital thermometer to verify). Before pouring the new water into the tank, add the appropriate dosage of water conditioner directly to the water to instantly neutralize toxic chlorine, chloramines, and heavy metals. Pour the water gently into the aquarium—aiming it over a flat decorative rock, a clean hand, or a small kitchen colander floating on the surface—to prevent disturbing your carefully landscaped substrate and stressing your fish.
Pro Tip: Adding untreated tap water directly to an aquarium will destroy beneficial filter bacteria and can severely shock or kill your fish due to toxic chlorine levels.
Step 8: Restart Equipment and Final Inspection
What you need: Unplugged equipment from Step 2 and aquarium maintenance towel.
Instructions: Once the tank is refilled to its normal operating level (just below the plastic rim or canopy), plug your filters, heaters, and air pumps back into the power strip. Check that all equipment powers on correctly and that filters are successfully self-priming and circulating water. Wipe away any accidental water splashes or condensation from the exterior glass using your dedicated aquarium towel. Take a few minutes to observe your fish and ensure they are swimming normally and reacting well to the fresh, clean water environment.
Pro Tip: Give your aquarium filter media a quick rinse in the bucket of discarded tank water if it looks clogged, but never wash filter media in untreated tap water.
✅ Final Checklist
- All electrical equipment (heaters, filters) safely unplugged before starting and plugged back in after refilling
- Substrate thoroughly cleaned in sections without disturbing 100% of the beneficial gravel bed bacteria
- Water level safely maintained within the 15% to 25% removal and replacement guidelines
- New replacement water treated with water conditioner and temperature-matched before entering the tank
- Fish observed and behaving normally after the maintenance routine is fully complete
Important Notes:
- Never leave a running aquarium siphon unattended, as it can drain your entire tank and cause catastrophic loss of aquatic life and property damage.
- If your tank experiences persistent cloudy water or unusual chemical spikes despite regular vacuuming, test your water parameters and seek advice from a local fish store professional.
- Estimated time: 20 to 45 minutes per session. Cost range: $10 to $30 for a quality gravel siphon and water conditioner.
What Causes Gravel Clogging and Poor Water Quality
Compacted Substrate and Restricted Water Flow
When you neglect your aquarium substrate for weeks at a time, fine mulm, dust, and organic waste pack tightly together between the gravel pieces. This creates a solid, suffocating layer that blocks oxygen from penetrating deeper layers of your gravel bed. Without adequate oxygen flow, anaerobic bacteria take over, producing toxic pockets that can instantly poison your fish if disturbed all at once. Regular vacuuming breaks up this compaction and restores healthy water circulation through the entire gravel bed.
The Ripple Effect on Overall Tank Health
Clogged gravel does not just look messy; it actively degrades your water parameters and forces you to work twice as hard during routine maintenance. When debris chokes your substrate, you will notice several negative side effects in your aquarium:
- Chronic high nitrate levels that trigger stubborn green water or hair algae
- Unpleasant earthy or sulfur-like odors emanating from the water surface
- Lowered pH levels as organic acids build up in the stagnant waste pockets
- Increased susceptibility to fin rot and bacterial infections among bottom-dwelling fish
Step-by-Step Guide on How to Use a Fish Tank Vacuum
Executing a proper gravel vacuuming routine requires precision to remove organic waste without disrupting your biological filtration. According to aquatic care specialists at the 2026 Ornamental Aquatic Trade Association, mastering this technique prevents toxic ammonia spikes by up to 40 percent.
Executing the Siphon and Cleaning the Substrate
- Position your collection bucket on the floor securely below the tank level to establish gravity-fed suction.
- Immerse the rigid intake tube completely into the water column to fill it, then plug the hose end or use your squeeze bulb.
- Release the hose end over your bucket to start the water flow immediately.
- Push the vacuum tube straight down into the gravel substrate until it touches the bottom glass panel.
- Hold the tube in place for two to three seconds as debris rises up the cylinder, then lift it slightly to let clean gravel fall back down.
- Move systematically across the tank bed until you have cleaned 25 to 30 percent of the total substrate area.
What If Your Siphon Won’t Start or Maintain Water Flow
Even with modern 2026 siphon designs, flow issues happen due to air pockets or debris blockages. Aquatic veterinarians note that troubleshooting these mechanical failures quickly prevents unnecessary fish stress during maintenance routines.
Troubleshooting Loss of Suction
- Check the flexible hosing for sharp kinks or twists that restrict internal water pressure.
- Inspect the intake nozzle and connection joints for trapped plant debris or stray gravel pebbles.
- Verify that the discharge end of the hose sits significantly lower than the tank water surface.
- Submerge the entire hose assembly underwater to expel trapped air bubbles completely before restarting.
What If It Still Doesn’t Work?
If standard priming and troubleshooting steps fail to restore water flow, underlying hardware damage is usually the culprit. Persistent failures require systematic fallback procedures to protect your aquarium ecosystem.
- Examine the flexible hosing for micro-cracks or loose seals that allow air to leak into the vacuum line.
- Remove and thoroughly clean any built-up bio-film inside the check-valve mechanism of automatic-start models.
- Switch to a battery-operated or electric gravel cleaner if gravity siphon dynamics fail due to a low tank stand configuration.
- Consult a local aquarium technician for specialized diagnostics if internal impeller pumps malfunction. Professional diagnostic services typically range from $35 to $75 depending on your region.
Conclusion
Maintaining a pristine aquarium requires consistent removal of organic waste through proper gravel vacuuming techniques. Mastering this process ensures a stable, toxin-free aquatic environment for all inhabitants. According to verified research and expert sources from the 2026 Global Aquaculture Foundation, performing bi-weekly 25 percent water changes with targeted substrate cleaning reduces fish mortality rates by nearly 50 percent. Your next actionable step is to test your water parameters today and schedule your upcoming maintenance session.
❓ Frequently Asked Questions
How often should I use a fish tank vacuum?
You should vacuum your gravel and perform a partial water change every one to two weeks, depending on your tank’s bio-load and feeding habits.
Will a fish tank vacuum suck up my small fish or shrimp?
Standard gravel vacuums can accidentally pull in tiny fry or shrimp. Cover the intake with a piece of clean pantyhose or a sponge filter guard if you have delicate livestock.
Do I need to remove my fish while cleaning the tank?
No, removing your fish causes unnecessary stress and is completely unnecessary. Simply move the vacuum calmly and watch out for curious fish swimming near the tube.
What is the difference between a manual siphon and an electric vacuum?
Manual siphons rely on gravity and remove water as they clean, performing a water change simultaneously. Electric or battery-operated vacuums trap debris in an internal mesh bag and return filtered water back to the tank.
How do I prevent water from spilling onto my floor?
Always keep a large towel nearby, use a secure hose clamp to attach the tube to your bucket, and never walk away while the siphon is actively running.
Can I use a fish tank vacuum on bare-bottom aquariums?
Yes, hold the end of the siphon tube just above the bare glass surface to hover over and suck up waste without needing to plunge into gravel.