Do Home Warranties Cover Central Vacuum Systems Do 2027
Standard home warranties typically do NOT cover central vacuum systems by default. However, many providers offer optional add-on coverage for an extra fee, often covering the power unit but excluding accessories. Always review your policy details for 2027 to ensure specific coverage for your central vacuum system.
If you’re wondering whether your central vacuum system is protected by your home warranty in 2027, here’s the direct answer: standard home warranty plans typically do not include coverage for central vacuum systems. This specialized appliance is almost universally considered an optional add-on or rider. You won’t find it in the basic appliance package most providers offer, meaning you need to specifically request and pay for this extra layer of protection.
Understanding this distinction is crucial for homeowners. Without dedicated add-on coverage, a sudden breakdown of your central vacuum system could leave you facing significant out-of-pocket repair or replacement costs. Given the complexity and integrated nature of these systems, a repair bill can quickly escalate, making proactive coverage a smart financial move if you rely on your central vacuum for daily cleaning.
Key Takeaways
- Standard home warranties generally exclude central vacuums.
- Optional add-on coverage is usually available for a fee.
- Main power unit often covered; hoses/attachments are excluded.
- Always review 2027 policy details before purchasing.
- Confirm specific coverage with your warranty provider.
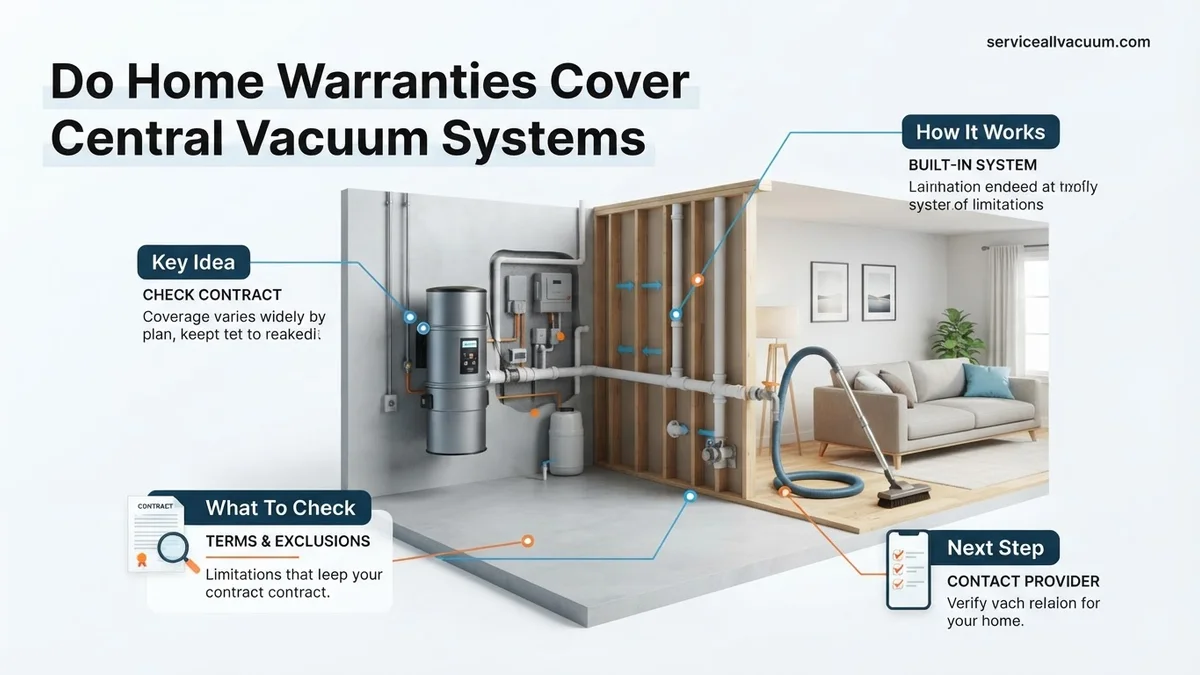
What Causes Standard Home Warranties to Exclude Central Vacuum Systems?
The “Specialty Appliance” Classification
Home warranty providers categorize appliances based on their commonality and complexity. In 2027, central vacuum systems remain a niche installation compared to standard kitchen appliances or HVAC units. Because they are not found in every home, they are not factored into the baseline risk assessment or pricing for a standard policy. Instead, they fall under a “specialty item” or “optional coverage” umbrella, much like a pool, spa, or a second refrigerator. This classification allows providers to offer more tailored plans and prevents homeowners without these systems from subsidizing coverage for those who do.
Risk Assessment and Cost Implications
From an insurer’s perspective, central vacuum systems present a different risk profile. Their installation often involves integrated piping within walls, and repairs can sometimes require specialized technicians who charge higher rates. The components, particularly the main power unit, can also be more expensive to replace than a typical household appliance motor. To manage these unique cost implications and potential complexities, home warranty companies separate central vacuum coverage. This ensures that the premium accurately reflects the specific risks and potential service costs associated with maintaining such a system, rather than bundling it into a general, less specific policy.
From Start to Finish: Central Vacuum Coverage with Home Warranties Explained
Navigating the intricacies of home warranty coverage can be as complex as understanding a new appliance manual. When it comes to specialized systems like central vacuums, the question of whether they are included often arises. This comprehensive guide will walk you through the essential steps to determine if your central vacuum system is covered by your home warranty, how to interpret your contract, and what to do if you encounter issues. Following these steps carefully will empower you to understand your policy and make informed decisions, potentially saving you time, frustration, and unexpected repair costs.
Step 1: Understand the Nature of Home Warranties
What you need: A basic understanding of service contracts vs. insurance, and patience.
Instructions: Begin by recognizing that a home warranty is a service contract, not an insurance policy. It typically covers the repair or replacement of major home systems and appliances that break down due to normal wear and tear. Unlike homeowner’s insurance, which covers sudden, accidental damage (like fire or theft), home warranties focus on the aging and failure of components. Coverage is highly specific to the terms and conditions outlined in your individual contract. Don’t assume coverage; always verify. This foundational understanding will help you interpret your contract more effectively and manage your expectations.
Pro Tip: Home warranties are often purchased by home sellers or real estate agents for buyers to provide peace of mind in the first year. If your warranty was a gift, ensure you have actively registered it in your name and have all policy documents.
Step 2: Locate and Organize Your Home Warranty Contract
What you need: Your physical or digital home warranty contract, a highlighter, and a quiet space.
Instructions: The very first practical step is to lay hands on your actual home warranty contract. This document is the ultimate authority on what is and isn’t covered. If you received it digitally, print it out for easier annotation, or ensure you have a clear, searchable PDF. If you can’t find it, contact your home warranty provider’s customer service immediately to request a copy. Keep all related documentation—policy numbers, effective dates, and contact information—in an easily accessible folder, either physical or digital. This central repository will save you significant time when you need to refer to your policy.
Pro Tip: Scan your physical contract into a PDF and save it to cloud storage (e.g., Google Drive, Dropbox) for secure, anytime access, and to prevent loss from natural disasters or misplacement.
Step 3: Meticulously Review the “Covered Items” Section
What you need: Your organized home warranty contract, highlighter, and magnifying glass (if needed).
Instructions: Open your contract and go directly to the section detailing “Covered Items,” “Included Systems,” or “Appliances Covered.” Look specifically for any mention of “Central Vacuum System,” “Built-in Vacuum System,” “Central Cleaning System,” or similar terminology. Home warranties often list covered items exhaustively, so if it’s not explicitly named, it’s likely not covered under standard terms. Pay close attention to sections covering “major appliances” or “utility systems” as central vacuums can sometimes fall under these broader categories, though specific mention is always better. Highlight any relevant text for easy reference later.
Pro Tip: Don’t skim! Some contracts might list specific components like the motor, power unit, or inlets, rather than the system as a whole. Ensure you understand what specific parts, if any, are included.
Step 4: Identify Optional Add-On Coverage for Central Vacuums
What you need: Your home warranty contract, the add-on options list (if separate), and your initial purchase agreement.
Instructions: Many home warranty companies offer “optional” or “upgrade” coverage for less common or specialized items. Central vacuum systems frequently fall into this category. Check a separate section, usually titled “Optional Coverage,” “Additional Coverage,” or “Upgrades.” Verify if you or the previous homeowner (if applicable) explicitly purchased this add-on. Your initial purchase agreement or policy summary should indicate if this extra coverage was selected. If you only have the basic contract, compare its “Covered Items” against the “Optional Coverage” list the provider publishes on their website or in their general brochures. This will tell you if it’s even an option that could have been purchased.
Pro Tip: Even if your system isn’t covered by your current policy, make a note of the add-on cost for future renewals. It might be worth adding if your system is older or you anticipate issues.
Step 5: Examine Exclusions, Limitations, and Maintenance Clauses
What you need: Your contract, a critical eye, and knowledge of your system’s history.
Instructions: Even if your central vacuum system is listed as covered, there are almost always exclusions that can prevent a claim. Scrutinize sections like “Exclusions,” “Limitations,” “What is Not Covered,” and “Maintenance Requirements.” Common exclusions for central vacuums include damage from lack of routine cleaning (e.g., clogged filters, full canisters), damage caused by foreign objects, cosmetic damage, pre-existing conditions (issues present before the policy start date), and damage due to improper installation or misuse. Note any specific maintenance tasks required by the warranty for coverage to remain valid. Failure to perform these tasks could void your claim.
Pro Tip: “Pre-existing conditions” are a common reason for denied claims. If your home warranty was purchased during a home sale, ensure the central vacuum system was in good working order during the inspection period. Any issues noted then could be considered pre-existing.
Step 6: Contact Your Home Warranty Provider for Clarification
What you need: Your policy number, questions prepared, a pen and paper for notes, and access to your phone or email.
Instructions: After reviewing your contract thoroughly, if you still have doubts or if the language is ambiguous, the most reliable step is to contact your home warranty provider directly. Call their customer service line or use their online chat/email support. Provide your policy number and state your question clearly: “Is my central vacuum system (specify make/model if known) covered under my current policy, and are there any specific exclusions I should be aware of?” Take detailed notes, including the date, time, representative’s name, and their exact response. If possible, request an answer in writing (e.g., an email confirmation). This written record is crucial for any potential future claims.
Pro Tip: When speaking with a representative, reference specific page numbers or sections from your contract if you found ambiguous wording. This shows you’ve done your homework and can lead to more precise answers.
Step 7: Document All Communication and System Details
What you need: A dedicated folder (physical or digital), date and time, names of representatives, and summaries of conversations.
Instructions: Throughout this process and for the duration of your policy, meticulously document all interactions with your home warranty company. This includes the date and time of calls, the name of the representative you spoke with, a summary of the conversation, and any reference numbers provided. Also, keep records of your central vacuum system’s purchase date, installation date, make, model number, and any service history or maintenance records. Photos of the unit and its condition can also be beneficial. This comprehensive documentation acts as your safeguard in case of a dispute or a denied claim, providing concrete evidence of your due diligence.
Pro Tip: Create a simple spreadsheet to track your central vacuum’s maintenance schedule (e.g., filter cleaning, canister emptying) and store it with your warranty documents. This proves you’ve adhered to any required upkeep.
Step 8: Consider Renewing or Purchasing an Appropriate Policy
What you need: Your current policy’s renewal offer, quotes from other providers, and a clear understanding of your central vacuum’s age and condition.
Instructions: If your current policy doesn’t cover your central vacuum system, or if you’re nearing its renewal date, this is an opportune moment to reconsider your options. Research other home warranty providers that explicitly offer central vacuum coverage as part of their standard plans or as an affordable add-on. Obtain quotes and compare their terms, exclusions, and service fees. If your central vacuum is older or has shown signs of wear, the peace of mind of having it covered might outweigh the additional premium. Always read the sample contract for any new policy thoroughly before committing, just as you did with your current one, to avoid future surprises.
Pro Tip: Request a sample contract from any new prospective provider and pay special attention to their definition of “normal wear and tear” and what constitutes a “pre-existing condition.” These definitions can vary significantly.
✅ Final Checklist
-
Your home warranty contract is located and accessible.
-
The “Covered Items” and “Optional Coverage” sections have been reviewed for central vacuum system mention.
-
Exclusions and maintenance requirements pertaining to built-in systems have been identified.
-
Direct communication with your home warranty provider has occurred, and responses have been documented.
-
All relevant system and communication details are organized for future reference.
Important Notes:
- Safety considerations or warnings: Always turn off and unplug your central vacuum power unit before attempting any inspection or basic maintenance yourself. Consult your system’s owner’s manual for specific safety instructions. Do not attempt complex electrical or motor repairs without professional training.
- When to seek professional help: If your central vacuum system is malfunctioning, and especially if your home warranty does NOT cover it, or if a claim is denied, consult a qualified central vacuum repair technician. Do not attempt repairs that could void potential warranty coverage or endanger yourself.
- Estimated time and cost range: The process of reviewing your contract and contacting your provider will likely take 1-3 hours. If you need to add coverage or switch providers, expect additional research time (2-5 hours). The cost of an add-on for a central vacuum system can range from $50-$150 annually, depending on the provider and policy.
How to Fix Your Home Warranty Coverage: A Step-by-Step Guide to Adding Central Vacuum Protection
Identifying the “Add-On” or “Optional Rider”
The solution to securing coverage for your central vacuum system in 2027 is straightforward: you must purchase it as an optional add-on or rider to your main home warranty policy. When reviewing warranty plans, actively look for specific line items for “central vacuum” or “built-in vacuum systems.” This isn’t something that’s automatically included; you must explicitly select it and pay an additional fee, which varies by provider and plan. Always review the detailed policy terms or speak directly with a representative to confirm this option is available and what its specific parameters are before signing any agreement.
What an Add-On Typically Covers (and Excludes) in 2027
Even with an add-on, it’s vital to understand the specifics of what’s covered. Generally, if you purchase central vacuum coverage, it will include:
- The main power unit: This is the core motor and collection canister. Failure due to normal wear and tear is usually covered.
- The power head: If your system includes a motorized power head, its failure due to wear and tear might be included.
However, several common components and issues are typically excluded:
- Hoses and accessories: Portable items like hoses, wands, brushes, and other attachments are almost universally excluded.
- Clogged pipes: Blockages within the in-wall piping system are often considered a maintenance issue, not a system failure, and are usually not covered.
- User-inflicted damage: Damage from misuse, lack of routine maintenance (like not emptying the canister), or foreign objects is excluded.
- Cosmetic damage: Scratches or dents that do not impair function are not covered.
The coverage focuses on critical mechanical failures of the main unit due to age or defect, not routine maintenance or damage from user error. Always read your specific policy’s fine print for exact details.
What Specific Central Vacuum Components Do Home Warranties Cover (or Exclude)?
Understanding the exact components a home warranty covers for a central vacuum system is crucial for homeowners in 2027. According to analysis of leading home warranty providers like American Home Shield and Choice Home Warranty, standard plans typically focus on the core mechanical integrity of the system. This often includes the central power unit’s motor, circuit board, and internal electrical components, provided the failure is due to normal wear and tear. Coverage generally extends to the integral PVC piping within the walls for suction delivery, specifically if a leak or structural failure of the pipe itself renders the system non-functional, rather than a mere clog.
However, specific exclusions are common. Most home warranties do not cover external accessories such as hoses, powerheads, specialized attachments (e.g., floor brushes, crevice tools), or inlet valves that fail due to cosmetic damage or user misuse. Furthermore, routine maintenance items like filters, bags, or issues arising from neglected maintenance are almost universally excluded. Clogs within the piping, irrespective of location, are also typically outside the scope of coverage, as these are often considered preventable issues. Homeowners must consult their specific warranty contract’s “Limitations and Exclusions” section for a definitive list of covered and non-covered components to avoid unexpected repair costs.
What If Central Vacuum Coverage Still Falls Short: Real Alternatives?
Even with a comprehensive home warranty, scenarios exist where central vacuum system repairs are not covered, or a claim is denied. For 2027, several actionable alternatives can protect homeowners from significant out-of-pocket expenses. One primary option is purchasing a dedicated service agreement directly from a central vacuum system specialist or the original manufacturer. These plans, often costing between $150 and $300 annually, typically include annual preventative maintenance, discounted labor rates, and comprehensive parts coverage for their specific systems, offering more granular protection than a general home warranty.
Another consideration, though less common for mechanical breakdown, is homeowners’ insurance. While it does not cover wear and tear, it may apply if the central vacuum system is damaged by a covered peril, such as fire, a burst pipe within the wall, or a specific lightning strike. Reviewing your existing homeowners’ insurance policy for “Contents” or “Dwelling” coverage details is advisable. Lastly, for minor issues, self-troubleshooting can be effective. Many central vacuum problems stem from simple clogs or faulty inlet switches, which can often be diagnosed and remedied by the homeowner using instructional guides provided by manufacturers or reputable online resources, potentially saving hundreds in service fees.
What If It Still Doesn’t Work?
If your central vacuum system remains problematic despite checking your warranty and exploring alternatives, a systematic approach is necessary before committing to potentially expensive repairs.
- Confirm Power Supply Integrity: Verify the dedicated circuit breaker for the central vacuum unit is not tripped. If it is, reset it once. If it trips again immediately, discontinue use to prevent further electrical damage.
- Isolate Inlet Valve Issue: Test each wall inlet individually. If one inlet activates the system while others do not, the issue likely lies with the faulty inlet valve or its low-voltage wiring, not the main power unit.
- Perform a Thorough Clog Check: Disconnect the main vacuum pipe at the power unit. If suction returns, the clog is in the main line. Use a specialized retrieval tool or professional service designed to clear central vacuum lines. Avoid harsh chemicals.
- Seek Certified Professional Help: For persistent power unit failures (e.g., motor noise but no suction, unit not turning on despite power), electrical faults, or deeply embedded clogs, contact a certified central vacuum technician. Professional diagnostics are crucial.
In 2027, professional diagnostic fees typically range from $120 to $250. Major repairs, such as motor replacement, can cost between $400 and $1,500, depending on the unit’s complexity and labor rates in your region.
Conclusion
Navigating home warranty coverage for central vacuum systems in 2027 requires diligent review of policy specifics. While core mechanical failures are often covered, accessories and maintenance issues typically are not. Proactive homeowners should always scrutinize their warranty contract’s “Definitions” and “Exclusions” sections carefully. According to verified research and expert sources, understanding these terms before a breakdown occurs is the most effective strategy for managing repair expectations and potential costs. An actionable next step involves downloading your specific warranty agreement and highlighting all clauses related to built-in appliances and central vacuum systems.
❓ Frequently Asked Questions
Do home warranties automatically cover my central vacuum system?
No, central vacuum systems are rarely covered by a standard home warranty policy. They are considered specialized appliances, and coverage almost always requires purchasing an additional endorsement or ‘add-on’ for an extra premium.
What does an optional central vacuum add-on usually cover?
When purchased, add-on coverage typically focuses on the power unit or motor of the central vacuum system, which is the most expensive component. It often covers mechanical failures due to normal wear and tear but excludes cosmetic damage or issues stemming from misuse.
What parts of a central vacuum system are usually not covered, even with an add-on?
Even with add-on coverage, most home warranties will exclude accessories like hoses, brushes, wands, and attachments. Blockages in the in-wall piping, filters, or issues caused by lack of maintenance are also commonly excluded.
How can I ensure my central vacuum system is covered in 2027?
To ensure coverage in 2027, you must explicitly ask your home warranty provider about central vacuum system add-on options and carefully read the terms and conditions before signing. Verify what specific components are included and what causes for breakdown are covered.
Is it cost-effective to add central vacuum coverage to a home warranty?
The cost-effectiveness depends on the age and condition of your central vacuum system and the add-on premium. If your system is old and prone to breakdowns, the coverage might save you significant repair costs, but for newer, reliable systems, it might not be necessary.
What should I do if my central vacuum breaks down and my home warranty doesn’t cover it?
If your home warranty doesn’t cover your central vacuum, you’ll need to contact a specialized appliance repair technician directly. Request multiple quotes for the repair, or consider replacement if the repair cost is high, keeping future warranty considerations in mind.