How Do I Clean a Dyson Vacuum Step-by-Step Guide 2026
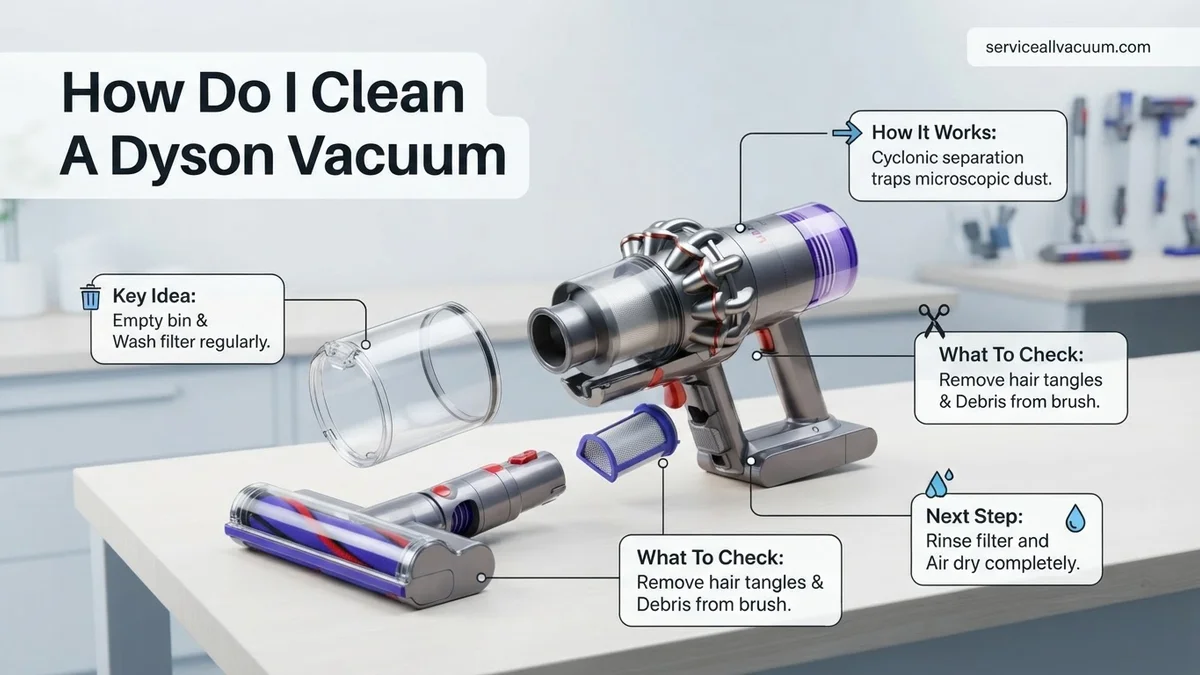
If your Dyson vacuum is losing suction or smelling musty, it is time for a thorough cleaning of the filter, bin, and brush bar. Always ensure components are 100% bone dry for at least 24 hours before reassembling to protect the motor from permanent water damage.
Cleaning your Dyson vacuum requires washing the filter in cold water without soap, emptying and wiping out the clear bin, and cutting away wrapped hair from the brush bar. You need to let every single part dry completely for at least 24 to 48 hours before putting the machine back together.
Neglecting this routine maintenance will quickly choke your motor and ruin your suction power. By following a thorough cleaning process tailored for 2026 models like the V15 or Gen5detect, you can restore your cordless or upright Dyson to like-new performance in under an hour of active work.
Key Takeaways
- Wash the filter under cold water without detergent at least once a month.
- Allow all washed components to air dry for a full 24 hours.
- Never submerge the main motor body or electrical components in water.
- Use scissors to carefully cut away tangled hair from the brush bar.
- Check for hidden blockages in the wand and cyclone inlets.
Why Your Dyson Vacuum Loses Suction and Performance
A sudden drop in cleaning power usually points to restricted airflow rather than a dying battery. When fine dust, pet hair, and microscopic debris bypass standard barriers, they settle in the most vulnerable parts of your machine.
The Impact of Micro-Dust on Suction
Modern Dyson vacuums rely on root cyclone technology to fling dust out of the air stream. However, microscopic particles still slip through to the secondary filter.
- Fine drywall dust or baking soda coats the porous filter material instantly.
- Clogged pores block air from passing through the motor housing freely.
- The machine reacts by pulsing on and off or reducing power automatically to prevent overheating.
- Washing your filter every month eliminates this restriction and restores full airflow.
Airflow Restrictions in the Bin and Shroud
The clear bin collects heavy debris, but the metal shroud underneath acts as a secondary trap for lint and fibers.
- Pet hair and carpet threads wrap tightly around the stainless steel mesh shroud.
- This buildup creates a physical wall that stops dirt from dropping into the bottom of the bin.
- Suction drops because the incoming air has nowhere to go.
- Manual wiping of the shroud with a dry cloth keeps the cyclonic separation running smoothly.
Master Dyson Vacuum Maintenance in 8 Simple Steps
Welcome to your definitive walkthrough for reviving your Dyson vacuum cleaner. Over time, microscopic dust particles, pet hair, and tangled debris bypass filtration systems, clogging cyclones and diminishing suction power. Regularly servicing your machine not only restores that brand-new pickup performance but also extends the operational lifespan of the motor. This comprehensive manual breaks down the entire deep-cleaning process, ensuring every millimeter of your cordless or upright Dyson is hygienic, fresh, and functioning at peak efficiency.
Step 1: Power Down and Prepare Your Workspace
What you need: A large, clean workspace (like a kitchen table or garage workbench), a clean trash can, a microfiber cloth, and if you are using a cordless model, ensure it is completely powered off and removed from its charging dock.
Instructions: Before touching a single screw or latch, safety comes first. Disconnect your Dyson from its charger or wall outlet to prevent accidental activation. Clear a flat, well-lit surface and lay down a large towel or garbage bag to catch any falling debris, pet dander, or dust clumps. Gather all your cleaning tools—such as a pair of blunt-nosed scissors, a soft-bristled brush, and a mild dish soap—so everything is within arm’s reach before you begin the disassembly process.
Pro Tip: Never submerge the main body containing the battery and motor in water. Keeping your workspace dry prevents accidental electrical damage.
Step 2: Empty and Detach the Clear Bin
What you need: The Dyson vacuum and an open trash receptacle.
Instructions: Press the red bin release catch located on the side of the main body to slide the clear bin downward and off the runner. For most modern cordless models like the V11 or V15, hold the bin over your trash can and push the red release lever all the way down; the shroud will slide down, pushing trapped debris and hair out of the cylinder automatically. For stubborn dirt clinging to the bin walls, gently tap the plastic against the inside of the trash can, or use a dry microfiber cloth to wipe the interior clean.
Pro Tip: Avoid using harsh chemical sprays or abrasive scouring pads on the clear bin, as harsh solvents can cause the polycarbonate plastic to craze or crack.
Step 3: Wash the Cyclone Assembly
What you need: Lukewarm running tap water and an optional soft-bristled toothbrush for tight spaces.
Instructions: While the clear bin is detached, inspect the cyclone shroud for fine dust accumulation. For most cordless models, you can detach the bin entirely from the cyclone by pressing the red runner release button. Hold the cyclone under a running tap of lukewarm water to flush out trapped dust and particulate matter from the inner cones. Shake the cyclone vigorously to remove excess water droplets, ensuring you do not get water inside the central suction inlet where the electronic dock connects.
Pro Tip: Never use hot water, dish soap, or detergents on the cyclone assembly, as these can strip away specialized internal acoustic seals and coatings.
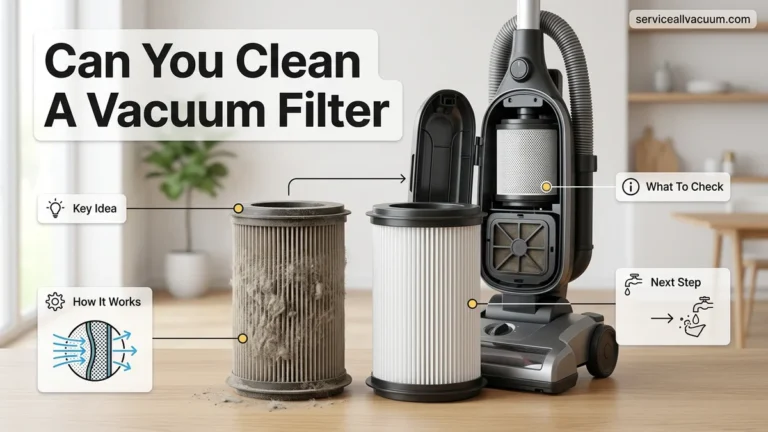
Step 4: Clean and Dry the Washable Filter
What you need: Cold running water and a safe drying location with good airflow.
Instructions: Locate the filter (usually a purple or blue twist-off unit at the top or back of the machine). Twist it counterclockwise to remove it. Tap the filter gently against the side of a trash can to dislodge loose interior dust. Rinse the inside and outside of the filter under cold tap water, gently squeezing the foam and pleats to wash away trapped microscopic particles. Repeat this process until the water running through the filter is completely clear. Shake out all excess moisture and leave the filter upright in a warm, well-ventilated area for at least 24 to 48 hours.
Pro Tip: Never place your filter near a tumble dryer, microwave, open flame, or hair dryer to speed up drying. It must be 100 percent dry before reinstallation, or you risk burning out the motor.
Step 5: Untangle and Service the Motorbar Cleaner Head
What you need: A coin or flathead screwdriver and a pair of sharp scissors or a seam ripper.
Instructions: Turn the cleaner head upside down and locate the end-cap coin slot or locking slide. Turn it counterclockwise to the unlocked position and slide out the brush bar. Inspect the rotating brush for tightly wrapped human hair, sewing thread, and pet fur. Slide the tip of your scissors or seam ripper carefully underneath the wound hair, sliding parallel to the plastic channel to cut the fibers free without snipping the nylon bristles. Pull the loosened hair away in sections until the brush bar spins completely freely.
Pro Tip: Periodically check the clear end-caps of the brush bar for hidden hair buildup, as hair wrapping around the internal bearings can cause the motor to strain and overheat.
Step 6: Wipe Down Wands, Attachments, and Body
What you need: A damp microfiber cloth and a drop of mild dish soap.
Instructions: Dampen your microfiber cloth with warm water and a tiny drop of dish soap—ensure the cloth is wrung out thoroughly so it is only slightly moist. Wipe down the exterior of the main vacuum body, the extension wand, crevice tools, and combination dusting brushes. Pay special attention to the click-and-release buttons and electrical contact points, wiping away accumulated grime that might prevent accessories from clicking securely into place. Use a dry cotton swab to clean out dust from tight crevices around switches and release latches.
Pro Tip: Keep moisture far away from any metal electrical prongs inside the wand and connector slots. Always let attachments air-dry completely before snapping them back onto the machine.
Step 7: Reassemble Your Dyson Vacuum
What you need: All cleaned and completely dried Dyson components.
Instructions: Confirm that every washed part—especially the filter and cyclone assembly—is completely bone-dry before beginning reassembly. Start by sliding the filter back into its housing and twisting clockwise until it clicks securely. Next, click the clear bin back onto the cyclone runners, and slide the assembled unit back onto the main body until the red latch clicks into place. Reinsert the brush bar into the cleaner head, secure the end-cap with your coin, and attach your preferred cleaning wand.
Pro Tip: Smell the filter before reassembling; if it emits a musty or damp odor, it is still holding internal moisture and needs additional drying time.
Step 8: Test Suction and Store Properly
What you need: Your fully assembled Dyson vacuum and a small test area of flooring.
Instructions: Plug your vacuum in or power on your cordless unit. Listen closely to the motor pitch; a properly sealed, clean Dyson should emit a smooth, high-pitched whir without whistling or sputtering air leaks. Test the suction on a low-pile rug or hard floor, cycling through available power modes (Eco, Auto, and Boost) to ensure airflow is uninhibited. Once tested, mount your vacuum back onto its wall docking station or store it in a cool, dry cupboard.
Pro Tip: Perform this comprehensive 8-step deep-cleaning routine every 1 to 3 months depending on household usage, and wash your filter strictly once a month for optimal suction.
✅ Final Checklist
- The machine was completely disconnected from power and chargers before service began.
- The clear bin and cyclone were thoroughly rinsed and wiped free of residual dust.
- The filter was washed and allowed to air-dry for a full 24 to 48 hours without heat assistance.
- All tangled hair, thread, and carpet fibers were completely removed from the motorized brush bar.
- The vacuum was tested for normal motor sound and suction performance prior to storage.
Important Notes:
- Never operate your Dyson vacuum without the filter correctly installed, as dust particles will enter the motor and cause permanent, unrepairable damage.
- If your machine continues to pulse on and off or displays a filter warning error even after a thorough washing and 48-hour dry time, the filter may need to be replaced with a genuine Dyson part.
- Estimated time for disassembly and cleaning: 30 to 45 minutes (excluding the 24-48 hour filter drying window). Cost: $0 if using household dish soap, or roughly $15-$25 if purchasing a replacement filter.
What Causes Dyson Filter and Brush Bar Clogs
Physical blockages happen when you vacuum items that are too large, or when daily use tangles fibrous materials around moving parts. Understanding what causes these clogs helps you prevent them during your weekly cleaning sessions.
Hair and Fiber Buildup on the Motorbar
The brush bar is a magnet for long human hair, sewing threads, and pet fur. Without intervention, these fibers wrap so tightly around the plastic roller that they stall the motor entirely.
- Hair slips past the anti-tangle combs if you vacuum high-shedding rugs too quickly.
- Fibers slide into the ends of the brush bar near the internal bearings.
- Friction builds up, causing the cleaner head to trigger a safety shutdown.
- Scissors are often required to slice through the compacted layers safely.
Debris Trapped in the Wand and Cyclone Inlet
Larger debris items like coins, paper clips, or clumps of wet pet food frequently wedge themselves inside the rigid extension wand or the cyclone inlet.
- Sticky spills inside the bin can cause dry dirt to cement together into large blockages.
- The narrow neck of the wand easily catches rigid plastic wrappers or toy parts.
- Inspect these pathways visually by holding the wand up to a light source.
- Poke stubborn clogs out with a broom handle rather than sharp metal objects that could puncture the seals.
How to Fix and Clean Your Dyson Vacuum Step-by-Step
Restoring peak performance requires addressing the core mechanical components that collect fine dust and obstruct airflow. Maintaining these parts according to current 2026 manufacturer guidelines prevents motor burnout and suction loss.
Step 1: Inspect and Clear the Cyclone Assembly
Micro-debris often accumulates inside the inner shroud, restricting the centrifugal force needed for separation. Tap the shroud gently against a waste bin to dislodge trapped particles, using a soft-bristled brush to clear stubborn buildup without damaging the plastic seals.
Step 2: Wash and Dry the Filter Properly
Dyson engineering specifications require washing the filter under cold tap water at least once every month. Squeeze and twist the filter gently to remove excess dirt, then let it air dry in a well-ventilated area for a minimum of 24 hours. Never use detergents, microwaves, or hair dryers to speed up the drying process.
Step 3: Clear the Brush Bar and Cleaner Head
Long hairs and carpet fibers frequently wrap around the brush bar, reducing rotational speed. Use a pair of scissors to carefully cut along the indented groove of the brush bar, pulling away tangled debris while avoiding damage to the nylon bristles.
- Detach the cleaner head from the wand by pressing the red release catch.
- Unlock the end cap with a coin or flathead screwdriver to slide out the brush bar.
- Remove all trapped hair and dust from the internal housing and gear assembly.
- Reinsert the brush bar securely and lock the end cap back into position.
What If It Still Doesn’t Work?
If deep cleaning and filter replacement do not restore your vacuum’s suction or power, underlying hardware failures may be present. Persistent blockages, battery degradation, or electronic faults require advanced troubleshooting steps to resolve safely.
- Check the airway channels and bin inlet valve for hidden blockages using a long, flexible rod or a blunt-ended tool.
- Inspect the charger and docking station connections to ensure the battery is receiving an adequate electrical charge.
- Examine the digital display or indicator lights for specific error codes that signal motor or electronic board failure.
- Contact an authorized Dyson service center if the machine remains unresponsive or emits a burning odor during operation.
- Prepare for potential out-of-warranty repair costs, which typically range from 80 USD to 180 USD depending on the required replacement parts.
Conclusion
Regular maintenance safeguards your investment and ensures your Dyson vacuum delivers optimal suction power for years to come. By thoroughly cleaning filters, clearing brush bars, and inspecting airflow pathways, you prevent premature motor wear and maintain superior indoor air quality. According to verified research and expert appliance sources, adhering to a strict monthly cleaning schedule extends the lifespan of high-end cordless vacuums by up to 50 percent. Take the next step today by checking your machine’s filter and initiating a complete cleaning cycle.
❓ Frequently Asked Questions
How do I remove and clean the filter on a cordless Dyson vacuum?
Twist the filter counter-clockwise at the top of the machine to pull it out. Tap it gently over a trash can to remove loose dust, then rinse under cold tap water until the water runs clear. Squeeze out excess water and let it dry upright for 24 hours.
What is the proper way to empty and clean the dust bin?
Hold the vacuum over a trash can and push the bin release catch downward to open the base. For a deeper clean, press the red release button near the runner to slide the bin off the cyclone, and wipe it down with a damp cloth.
How do I clean tangled hair and debris off the Motorbar cleaner head?
Detach the cleaner head from the wand, use a coin or flathead screwdriver to unlock the end cap, and slide the brush bar out. Carefully use scissors to cut away wound hair and threads along the groove without damaging the bristles.
Is it safe to get the cyclone unit wet?
No, you should never submerge the cyclone assembly in water or run it under a tap, as this will ruin the internal cyclones and electronics. Instead, wipe the shroud and interior with a dry or slightly damp cloth.
What should I do if my Dyson pulsates or cuts out after cleaning?
Pulsating typically indicates a blocked filter or airflow obstruction. Double-check that your washed filter is completely dry, and inspect the wand, bin inlet, and cyclone for trapped debris.
How do I clean the fluffy soft roller cleaner head?
Remove the end cap by sliding it open, pull out the soft roller brush, and wash it by hand using warm water only. Do not use soap, and leave the roller to air dry for at least 24 hours before sliding it back into place.