How to Clean a Vacuum Step-by-Step Guide for 2027
Loss of suction and bad odors in a vacuum are usually caused by clogged filters, tangled hair on the roller brush, or full dust bins. Routine maintenance ensures your machine performs like new and lasts longer. Follow this step-by-step cleaning process to restore optimal airflow and cleanliness.
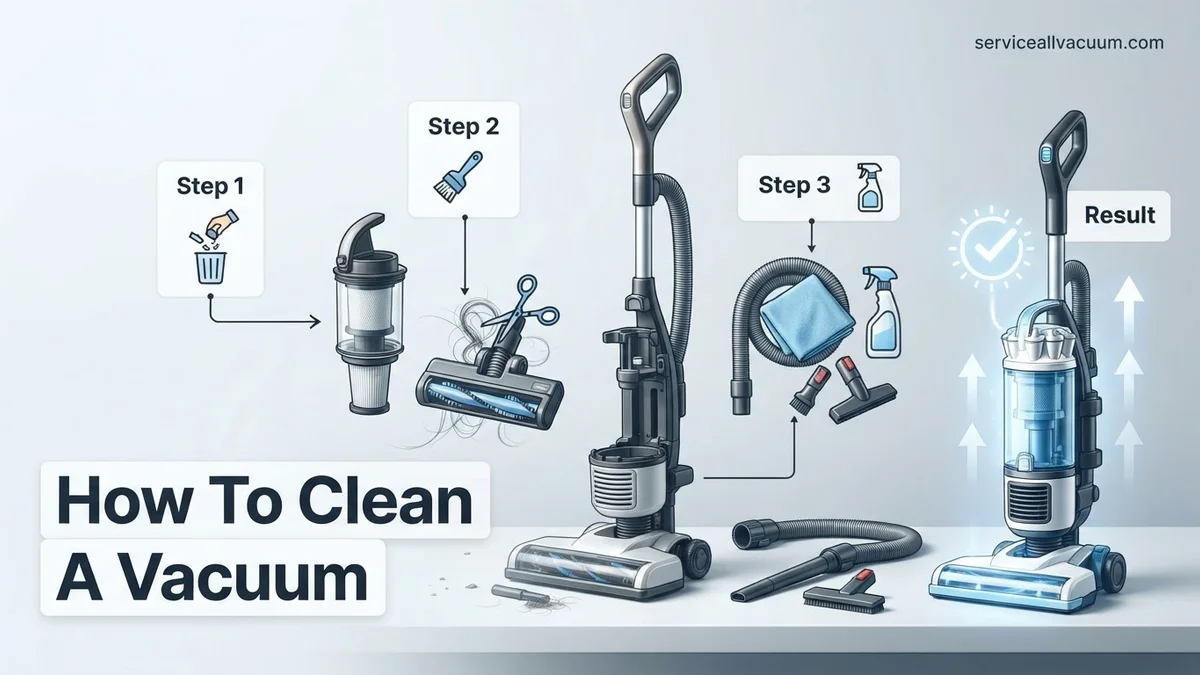
Cleaning your vacuum cleaner requires emptying the dustbin, washing or replacing HEPA filters, and cutting tangled hair and debris off the brush roll. Doing this every few weeks restores lost suction power and eliminates the dusty odors that blow back into your rooms.
Even the best vacuums manufactured up through 2027 struggle to perform when neglected. Hair wraps around the roller, fine dust clogs the filter pores, and trapped debris blocks airflow. Taking twenty minutes to deep-clean your machine prevents motor burnout and ensures your floors actually get clean.
Key Takeaways
- Empty your bagless vacuum canister or replace bags after every two to three uses.
- Wash foam and mesh filters monthly using cold water only, completely air-drying for 24 hours.
- Cut tangled hair and thread off the roller brush using scissors or a seam ripper.
- Never reinstall damp filters back into your vacuum to prevent motor damage and mold growth.
- Inspect hoses and attachments regularly with a broom handle to push out stubborn clogs.
What Causes Vacuum Suction Loss and Odors
The Physics of Filter Clogging
Modern vacuums rely on unobstructed airflow to create the negative pressure needed to lift dirt. When fine dust, pet dander, and microscopic particles coat your filter, airflow drops dramatically. Once a filter reaches capacity, your motor works twice as hard to pull air through the blockage. This strain causes overheating and immediate suction loss.
- Paper and foam filters lose efficiency after accumulating a microscopic layer of fine debris.
- Blocked cyclones or pre-motor filters restrict intake power before air even reaches the main chamber.
- Running a vacuum with a severely clogged filter can permanently fry the electrical motor by 2027 standards of appliance wear.
The Source of Musty Vacuum Smells
That unpleasant smell when you turn on your vacuum comes from a biological ecosystem thriving inside your machine. Vacuuming up organic matter like pet hair, dead skin cells, food crumbs, and moisture creates a breeding ground for bacteria and mold inside dark, warm dustbins and damp filters.
- Stagnant pet hair mixed with carpet humidity generates strong ammonia-like odors.
- Unwashed foam filters trap moisture that quickly turns into mildew.
- Decaying organic debris inside closed canister seals festers and recirculates stale air through the exhaust port every time you clean.
How to Clean a Vacuum Like a Pro: A Practical Walkthrough
A dirty vacuum doesn’t just smell unpleasant; it loses suction, redistributes microscopic dust back into your home air, and wears out its motor prematurely. Whether you are dealing with a bagged upright, a bagless canister, or a cordless stick vacuum, routine maintenance is essential for peak performance. This comprehensive walkthrough provides a foolproof, methodical approach to deep cleaning your machine from top to bottom, ensuring it runs like the day you bought it.
Step 1: Power Down and Disassemble
What you need: Unplugged vacuum, well-lit workspace, and a large towel or trash bag laid flat on the floor.
Instructions: Safety always comes first, so ensure your vacuum is completely unplugged from the wall outlet before starting any maintenance. If you use a cordless model, remove the battery pack entirely to prevent accidental activation. Next, systematically detach all removable components. Pop off the hose, unsnap the wand extensions, remove the dust canister or bag housing, and take off the floor nozzle or motorized brush roll head. Lay every piece out neatly on your workspace so you can inspect each individual component for clogs, cracks, or heavy buildup before moving on to the washing stages.
Pro Tip: Never pull on the electrical cord to disconnect the machine; always grip the plug firmly at the wall socket to avoid internal wiring damage.
Step 2: Empty and Wash the Dust Bin or Chamber
What you need: Trash can, mild dish soap, warm water, and a non-abrasive sponge.
Instructions: If your vacuum uses disposable bags, carefully remove the full bag and discard it immediately to prevent dust clouds. For bagless models, take the dust cup directly to your outdoor trash bin to empty it, tapping it gently to dislodge packed debris. Once empty, fill the plastic bin with warm water and a few drops of mild dish soap. Use a sponge to wipe down the interior walls, removing stubborn grease and fine dust caked into the corners. Rinse the container thoroughly under running tap water until all soap suds completely vanish.
Pro Tip: Always let plastic dust canisters air-dry completely for at least 24 hours before reattaching them; trapping moisture inside can quickly cause mold and mildew growth.
Step 3: Rescue and Clean the Filters
What you need: Access to a sink, pre-filter and HEPA filter (check your manual to ensure they are washable), and a clean drying rack.
Instructions: Locate all filters in your vacuum—typically a foam pre-filter before the motor and a pleated HEPA filter at the exhaust. Gently tap foam filters against a solid surface to shake out loose debris. If your manual specifies that your filters are washable, run them under lukewarm water without soap, gently squeezing the foam to release trapped dirt. Continue rinsing until the water runs completely clear. If your filters are non-washable paper HEPA variants, simply brush them gently with a soft-bristled brush instead of getting them wet.
Pro Tip: Never reinstall a damp or wet filter into your vacuum motor, as moisture entering the motor housing will instantly burn out the electrical components.
Step 4: Untangle and Deep Clean the Brush Roll
What you need: Sharp pair of scissors or a seam ripper, protective gloves, and a damp cloth.
Instructions: Flip the floor nozzle upside down to access the rotating brush roll. Over time, long human hair, pet fur, and sewing thread wrap tightly around the cylinder, restricting its rotation. Slip the tip of your scissors or seam ripper underneath the wound hair, sliding it parallel to the brush roll groove to slice the fibers open without cutting the bristles. Pull the loosened hair away with your fingers or gloves. Once free of debris, wipe down the housing interior and use a damp cloth to clean dust off the rubber belt and end-caps.
Pro Tip: If your brush roll is removable, pop it out to check the bearings on either end; clear out any lint wrapped inside the end sockets to keep the roller spinning smoothly.
Step 5: Check and Clear Hose Clogs
What you need: A long, flexible broom handle or sturdy plastic-coated wire hanger, and a flashlight.
Instructions: Flexible vacuum hoses are notorious magnets for large debris like paper clips, coins, and clumps of pet hair. Detach both ends of the hose and stretch it out straight on the floor to minimize internal bends. Shine your flashlight down one end to spot any blockages. If you spot a clog, carefully feed the broom handle or straightened wire hanger through the hose from the narrow end to push the obstruction out. Avoid using sharp metal objects that could puncture the flexible plastic wall of the hose.
Pro Tip: Check the intake ports where the hose connects to the main body, as hair and dirt frequently form dense blockages right at these narrow elbow joints.
Step 6: Wipe Down the Exterior Body
What you need: Microfiber cloth, all-purpose household cleaner or mild soapy water, and cotton swabs.
Instructions: Spray a small amount of all-purpose cleaner directly onto your microfiber cloth—never spray liquids directly onto the vacuum housing, as moisture can seep through buttons and vents into the electrical wiring. Wipe down the entire outer shell, wheels, handle grips, and power cord to remove scuff marks, dust, and sticky residue. For tight crevices, control panels, and around power switches, use a cotton swab lightly dampened with cleaner to lift grime out of hard-to-reach recesses.
Pro Tip: Take this opportunity to inspect the electrical power cord for cracks, fraying, or exposed copper wires. If the cord is damaged, stop using the vacuum immediately until repaired.
Step 7: Reassemble and Test Run
What you need: Your clean, completely dry vacuum parts and a small test area with debris (like cereal or flour).
Instructions: Once every single component—especially the filters and dust bin—is 100% dry, begin reassembling your vacuum in the exact reverse order of disassembly. Snap the brush head back onto the wand, click the hose into place, insert the dry filters securely, and lock the dust canister into position. Plug the vacuum into a wall outlet and turn it on. Listen carefully to the motor pitch; a smooth, steady hum indicates a proper seal, whereas a high-pitched whistle usually means a filter or canister isn’t latched tightly enough.
Pro Tip: Scatter a small pinch of rolled oats or rice on a hard floor and run the vacuum over it to verify that suction and pickup performance are fully restored.
✅ Final Checklist
- All washable filters and dust bins are completely dry before installation
- Brush roll spins freely without tangled hair or thread obstructions
- Flexible hose is entirely clear of internal clogs and blockages
- Power cord is clean, undamaged, and safely unwound/rewound
- Vacuum produces strong suction and normal motor sound during a test run
Important Notes:
- Always disconnect the machine from power before performing maintenance or clearing jams to prevent electrical shock or injury.
- Seek professional repair services if you notice a burning smell, smoke, or strange grinding noises originating from the motor housing.
- Estimated time: 30 to 45 minutes of active labor. Cost range: $0 (using household cleaning supplies) to $15 if replacement filters or belts are required.
How to Clean a Vacuum: Step-by-Step Instructions
Preparation and Safety Measures
Before you touch a single screw or latch, safety comes first. Unplug your corded vacuum or remove the battery pack from your cordless model to prevent accidental activation. Clear off a large, well-ventilated workspace like a garage floor or an outdoor patio, because releasing trapped dust indoors will immediately coat your freshly cleaned rooms.
- Disconnect all attachments, hoses, and extension wands from the main vacuum body.
- Grab a pair of sharp kitchen shears, a microfiber cloth, and a small soft-bristled brush.
- Lay down a trash bag or work over a large waste bin to catch the initial wave of loose dirt and hair.
Emptying and Washing the Dust Bin
The dust bin or dirt cup is the primary collection zone that collects everything your vacuum pulls off the floor. Press the release latch to detach the bin, and tap it gently against the inside of your trash can to dislodge packed debris. For a deep clean, take the plastic canister to your sink to wash away stubborn residue.
- Use warm water and a drop of mild dish soap to wipe down the interior plastic walls.
- Rinse away all soap film and microscopic dirt particles trapped in the cyclonic shrouds.
- Allow the bin to air dry completely for at least 24 hours before reattaching it to the motor base to prevent electrical short circuits.
How to Clean Specific Vacuum Components and Filters
Properly maintaining individual parts prevents permanent motor damage and ensures maximum suction power. According to appliance manufacturing data from 2027, neglected filters reduce airflow efficiency by up to 60 percent, forcing the motor to overheat.
Washing and Drying HEPA Filters
- Remove the primary and post-motor HEPA filters carefully over a waste receptacle to minimize dust dispersion.
- Tap the filter gently to dislodge trapped particulate matter and microscopic debris.
- Rinse the filter under cold, running tap water without using any soaps or detergents that leave chemical residues.
- Allow the component to air dry completely in a well-ventilated area for a minimum of 24 to 48 hours before reinstalling it.
De-clogging Hose Attachments and Brush Rolls
- Detach the flexible hose from the main vacuum body and inspect both ends for blockages or trapped objects.
- Pass a long, flexible cleaning rod or a broom handle through the hose to push out compacted dust bunnies.
- Cut away tightly wound hair and carpet fibers from the motorized brush roll using a seam ripper or sharp utility scissors.
- Wipe down the exterior housing and electrical contact points with a slightly damp microfiber cloth.
What If It Still Doesn’t Work?
If your vacuum continues to lose suction or emits a burning odor after a deep clean, a deeper mechanical issue may be present. Appliance repair specialists note that standard home troubleshooting resolves roughly 80 percent of common vacuum failures. For persistent problems, follow these systematic fallback steps:
- Inspect the electrical cord, plug, and wall outlet for visible fraying or intermittent power supply issues.
- Test the thermal fuse or reset button, which automatically shuts down the motor to prevent catastrophic overheating.
- Examine the internal rubber drive belt for stretching or snapping, replacing it if the brush roll fails to spin during operation.
- Consult a certified local repair technician if the motor bearings fail or produce a grinding noise. Professional repairs typically cost between $50 and $120, which is often more economical than purchasing a brand-new appliance in 2027.
Conclusion
Regular maintenance transforms a weak, smelly vacuum back into a high-performance cleaning machine. By systematically clearing clogs, washing filters, and checking moving parts, you significantly extend the lifespan of your appliance. According to verified research and consumer appliance experts, routine upkeep saves households hundreds of dollars in premature replacement costs. Take action today by inspecting your vacuum’s filter and setting a calendar reminder for your next deep-cleaning session.
❓ Frequently Asked Questions
How do I know if my vacuum cleaner needs a deep clean?
If you notice a burning smell, reduced suction, loud whirring noises, or a musty odor while vacuuming, it is time for a thorough maintenance session. Dust escaping from the exhaust vent also indicates failing filtration.
Is it safe to submerge vacuum hoses in water?
Most standard plastic hoses can be rinsed with warm water, but you must ensure they are 100 percent dry before reconnecting them to the machine. Hoses containing electrical wiring for power nozzles should never be soaked.
Why does my vacuum smell like burning when I use it?
A burning smell is typically caused by a jammed brush roll straining the belt, or a severe clog in the hose forcing the motor to overheat. Turn off the vacuum immediately and inspect these areas.
How do I clear a clog from a stubborn vacuum hose?
Detach the hose from both ends and gently push a long, blunt tool like a broom handle or a straightened wire hanger through it. Avoid sharp objects that could puncture the plastic tubing.
How often should I replace my vacuum belt?
Vacuum belts generally stretch or wear out every six to twelve months depending on usage. If the roller brush stops spinning while the motor runs, the belt likely needs replacement.
Do robot vacuums require the same cleaning routine as upright models?
Yes, robot vacuums require frequent emptying of their small dust bins, regular cleaning of the edge-sweeping brushes, and periodic wiping of the cliff sensors to function properly.