How to Clean Filter on Shark Vacuum Expert 2027
Regularly cleaning your Shark vacuum filters is crucial for maintaining optimal suction and prolonging its lifespan. This guide provides clear, step-by-step instructions for effectively cleaning all filter types, ensuring your vacuum performs its best. Proper drying is key to preventing damage and mold.
Restoring your Shark vacuum’s suction power to its peak performance in 2027 is often simpler than you think: it starts with clean filters. Properly cleaning your Shark’s filters is the most effective way to eliminate power loss, prevent motor strain, and ensure your home stays truly clean. This guide cuts directly to what you need to know about identifying, removing, and thoroughly cleaning each type of filter in your specific Shark model, saving you time and extending your vacuum’s lifespan.
You’ll learn the precise techniques for foam, felt, and HEPA filters, along with critical drying instructions that are often overlooked. Keeping these components pristine ensures your vacuum captures allergens and dust efficiently, operating just as powerfully as the day you unboxed it. Let’s get straight to maintaining your Shark’s superior performance.
Key Takeaways
- Identify filter types (foam, felt, HEPA) before cleaning.
- Always air dry filters completely for 24+ hours.
- Rinse foam/felt filters; tap HEPA filters clean.
- Check your manual for model-specific filter locations.
- Replace filters every 6-12 months for best results.
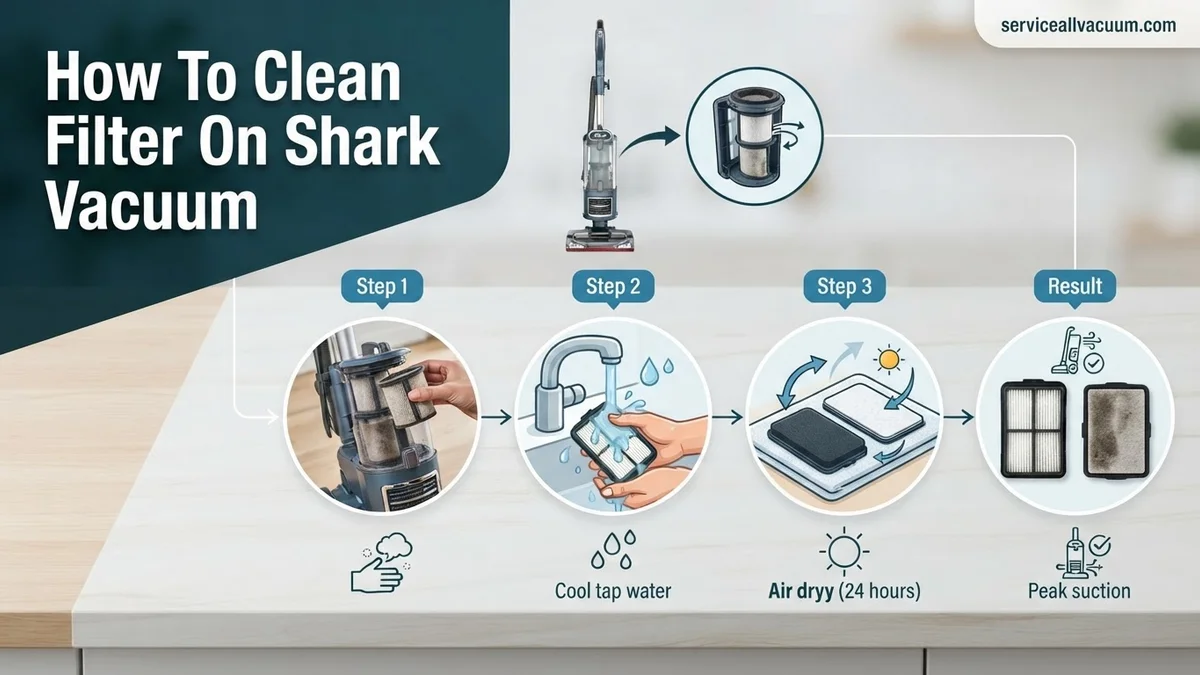
Why Your Shark Vacuum Needs Filter Cleaning (Diagnosis)
Your Shark vacuum is a powerful cleaning tool, but its efficiency hinges entirely on clean filters. Over time, these filters become clogged with the dust and debris they’re designed to capture. When this happens, airflow is restricted, forcing your vacuum’s motor to work harder and diminishing its cleaning power significantly. Regular maintenance is key to preventing premature wear and tear, especially for 2027 models optimized for high-performance filtration.
Immediate Signs Your Filters Need Attention
- Reduced Suction Power: If your vacuum struggles to pick up everyday dirt or feels less powerful than usual, clogged filters are the most common culprit.
- Unusual Odors: A stale or musty smell during operation indicates trapped debris, often bacteria or mold, within the filters.
- Visible Dust Exhaust: Noticing fine dust escaping from the exhaust vents is a clear sign your filters are saturated and can no longer trap particles effectively. This often happens with older, heavily used filters.
Understanding Filter Types in Your Shark
Shark vacuums typically use a combination of filters, each serving a specific purpose. Knowing your model’s specific configuration is crucial for proper cleaning:
- Foam and Felt Filters: These pre-motor filters are usually found in the dust cup assembly. They capture larger particles and protect the motor. They are almost always washable.
- HEPA (High-Efficiency Particulate Air) Filters: Often post-motor, these trap 99.97% of particles as small as 0.3 microns, crucial for allergy sufferers. HEPA filters are rarely washable and usually require only tapping clean or replacement. Your 2027 Shark model may have an advanced version of these.
<!DOCTYPE html>
<html lang=”en”>
<head>
<meta charset=”UTF-8″>
<meta name=”viewport” content=”width=device-width, initial-scale=1.0″>
<title>Master Shark Vacuum Filter Cleaning</title>
</head>
<body>
Master Shark Vacuum Filter Cleaning in 8 Simple Steps
Your Shark vacuum cleaner is a powerful ally against dirt and dust, but its peak performance hinges on one critical, often overlooked, component: its filters. Over time, these filters become clogged with microscopic particles, leading to reduced suction power, increased motor strain, and even poor air quality. This comprehensive guide will walk you through the precise, step-by-step process of cleaning your Shark vacuum’s filters, ensuring your machine runs efficiently, extends its lifespan, and keeps your home sparkling clean. Following these instructions carefully will restore your vacuum’s suction and maintain its impressive cleaning capabilities.
Step 1: Safety First: Power Down and Disconnect
What you need: Your Shark vacuum cleaner, an electrical outlet.
Instructions: Before attempting any maintenance or cleaning on your Shark vacuum, your absolute first priority must be safety. Locate the power cord and unplug the vacuum completely from the electrical outlet. This eliminates any risk of accidental activation, electrical shock, or injury from moving parts. Do not proceed until the vacuum is fully disconnected from power.
Pro Tip: Always give the vacuum a moment after unplugging, especially if it was recently in use. This allows any residual electrical charge to dissipate, ensuring maximum safety before you begin handling internal components.
Step 2: Locate and Access the Filter Housing
What you need: Your Shark vacuum cleaner, your Shark user manual (optional, but highly recommended).
Instructions: Most Shark vacuums typically house their primary filters in the main canister assembly, often near the dust cup. Depending on your specific model (e.g., Navigator, Rotator, Apex, Stratos), you might have filters located under the dust cup, inside the motor head, or even at the very back of the unit. Unlatch and remove the dust cup. Once the dust cup is off, you will usually find access to the pre-motor foam and felt filters. For post-motor (HEPA) filters, you might need to open a separate compartment, often at the back or side of the main body, typically secured by a latch.
Pro Tip: Consult your specific Shark model’s user manual for precise filter locations and removal instructions. While general principles apply, exact access points can differ, and the manual will confirm if your model has multiple filters and their respective cleaning methods.
Step 3: Remove the Pre-Motor Filters (Foam & Felt)
What you need: Your Shark vacuum cleaner, a waste bin.
Instructions: With the dust cup removed, you should now see the pre-motor filters. These are typically two distinct filters: a thicker, spongy foam filter and a thinner, flat felt filter. Gently pull them out of their housing. They often sit one on top of the other. Once removed, take them to a waste bin and tap them firmly to dislodge any large clumps of dust, hair, and debris. You’ll likely see a surprising amount of compacted dirt fall out. Make a mental note or take a quick photo of their orientation before removal to ensure correct reassembly.
Pro Tip: These pre-motor filters are the first line of defense and bear the brunt of incoming dust. Cleaning them regularly (every 1-3 months, depending on use) is crucial for maintaining optimal suction and extending the life of your more sensitive HEPA filter.
Step 4: Clean the Pre-Motor Filters (Washing)
What you need: Lukewarm running water, a sink or basin, mild dish soap (optional, for heavily soiled filters).
Instructions: Take the foam and felt filters to a sink. Rinse them thoroughly under lukewarm running water, gently squeezing them to help release trapped dirt. Continue rinsing and squeezing until the water running through them is completely clear. If the filters are particularly greasy or heavily soiled, you can add a small drop of mild dish soap (non-abrasive) to the water, lather gently, and then rinse even more thoroughly to remove all soap residue. Ensure all visible dirt is gone.
Pro Tip: While washing, avoid twisting or wringing the filters aggressively, as this can damage their structure. Gentle squeezing is sufficient. Never use harsh cleaning chemicals, bleach, or put these filters in a washing machine or dishwasher, as this can break down the filter material.
Step 5: Access and Clean the Post-Motor (HEPA) Filter
What you need: Your Shark vacuum cleaner, a waste bin, a soft brush or old toothbrush (optional).
Instructions: Now, locate and remove the post-motor HEPA filter. This filter is usually found in a separate compartment at the back or side of the vacuum, often behind a latched cover. Once removed, this filter usually consists of pleated paper-like material. Crucially, most HEPA filters are NOT washable. Check your Shark manual for confirmation. If it’s non-washable, tap the HEPA filter vigorously over a waste bin to shake loose as much fine dust as possible. For deeply embedded dust, you can gently brush the pleats with a soft-bristled brush or an old, clean toothbrush, always brushing away from the pleats.
Pro Tip: Attempting to wash a non-washable HEPA filter will permanently damage its filtration capabilities, rendering it ineffective and potentially allowing harmful particles to escape. Only wash if your manual explicitly states it’s washable. If heavily soiled and non-washable, it’s often best to replace it (typically every 1-2 years).
Step 6: Allow Filters to Air Dry Completely
What you need: A clean, dry towel or drying rack, a well-ventilated area.
Instructions: This is perhaps the most critical step for the washable pre-motor filters. After washing, gently squeeze out as much excess water as possible. Place the foam and felt filters on a clean, dry towel or a drying rack in a well-ventilated area. It is absolutely imperative that these filters are 100% bone dry before reinstallation. This drying process can take anywhere from 24 to 48 hours, depending on humidity levels and airflow. Do not use direct heat sources like hair dryers, ovens, or radiators, as this can damage the filter material.
Pro Tip: Rushing the drying process is a common mistake that can lead to severe consequences, including mold growth within your vacuum, unpleasant odors, and even damage to the vacuum’s motor if moisture gets into the electrical components. Patience is key here.
Step 7: Reassemble Your Shark Vacuum
What you need: Your fully dried filters, your Shark vacuum cleaner.
Instructions: Once you are absolutely certain all filters are completely dry (and the HEPA filter has been tapped clean), begin reassembly. Start by reinserting the post-motor (HEPA) filter into its compartment, ensuring it clicks securely into place and its cover is latched. Next, reinsert the pre-motor felt filter, followed by the foam filter, into their original positions in the dust cup housing. Ensure they are correctly oriented, just as you found them (or as per your photo/manual). Finally, reattach the dust cup to the main vacuum body, ensuring all latches are securely fastened.
Pro Tip: Always reassemble in reverse order of disassembly. If you took a photo earlier, now is the time to refer to it to guarantee correct placement of the foam and felt filters, as incorrect placement can reduce efficiency or cause airflow issues.
Step 8: Perform a Quick Test Run
What you need: Your reassembled Shark vacuum, an electrical outlet, a small, dusty area.
Instructions: With all filters clean, dry, and securely reinstalled, and all components latched, you can now plug your Shark vacuum back into an electrical outlet. Turn the vacuum on and listen for any unusual noises. Briefly vacuum a small, dusty patch on your floor or carpet. Observe the suction power – it should feel noticeably stronger and more efficient than before the cleaning. If you hear strange noises or notice a significant drop in suction, immediately turn off and unplug the vacuum and re-check all filter placements.
Pro Tip: This final test run serves as an immediate verification of your hard work. Strong, consistent suction without unusual motor sounds confirms successful filter cleaning and proper reassembly, allowing you to get back to efficient cleaning.
✅ Final Checklist
- Vacuum was unplugged before any cleaning began.
- All pre-motor (foam & felt) filters were thoroughly washed and are 100% dry.
- The post-motor (HEPA) filter was cleaned (tapped/brushed, not washed unless specified).
- All filters were reinstalled in the correct order and orientation.
- All filter compartments and the dust cup are securely latched.
- Vacuum is operating with strong, restored suction and no unusual noises.
Important Notes:
- Safety Considerations: Always unplug your vacuum before performing any maintenance. Never operate the vacuum with wet filters, as this can damage the motor, create a fire hazard, or promote mold growth.
- When to Seek Professional Help: If, after thoroughly cleaning and drying all filters, your vacuum still exhibits significantly reduced suction, makes unusual loud noises, or emits strange odors, there might be a blockage in the hose, brush roll, or a more serious internal motor issue. In such cases, contact Shark customer support or a certified repair technician.
- Estimated Time and Cost Range: The active cleaning time for all filters typically takes about 10-15 minutes. However, the crucial drying time for washable filters can range from 24 to 48 hours. The cost for this maintenance is essentially free, assuming your filters are in good condition and only require cleaning. If filters are damaged, torn, or non-washable HEPA filters are heavily soiled, replacement filters usually cost between $15 and $40 for a set, depending on your model.
</body>
</html>
Step-by-Step Guide: How to Clean Shark Vacuum Filters (Fix)
Properly cleaning your Shark vacuum’s filters is a straightforward process, but precision is key to avoiding damage and ensuring optimal performance. Always prioritize safety first by unplugging your vacuum before you begin any maintenance. This prevents accidental activation and potential injury, a universal rule for any electrical appliance in 2027 and beyond.
Locating and Removing Your Filters
Filter locations can vary slightly between Shark models (e.g., upright, canister, stick), but the general approach is consistent:
- Unplug Your Vacuum: Always disconnect power before touching any internal components.
- Access Pre-Motor Filters (Foam & Felt):
- Typically, these are located within the dust cup housing.
- Press the dust cup release button (often at the top or front) to remove it from the main vacuum body.
- Open the dust cup lid or base (depending on your model) and carefully lift out the foam and felt filters. They are usually stacked.
- Access Post-Motor HEPA Filter:
- This filter is often located at the bottom or back of the main vacuum body, sometimes behind a small grille or cover.
- Look for a release tab or lever. Open the cover and pull out the HEPA filter.
- Note its orientation for correct reinstallation.
Detailed Cleaning Protocols for Each Filter Type
Once removed, each filter type requires a specific cleaning method:
Cleaning Foam and Felt Filters (Washable)
These are the workhorses that prevent most dust from reaching your motor:
- Tap Out Loose Debris: Over a trash can, gently tap the foam and felt filters to dislodge accumulated dust and hair. You’ll be surprised how much comes out.
- Rinse Thoroughly: Hold the filters under lukewarm running water.
- Squeeze the foam filter gently to allow water to flush through until the water runs clear.
- Rub the felt filter under the running water, ensuring all surfaces are clean.
- Continue rinsing and squeezing/rubbing until no more dirty water comes out.
- Squeeze Out Excess Water: Gently press and squeeze the filters to remove as much water as possible. Do not twist or wring them, as this can damage the material.
- Critical Drying Procedure: This is the most crucial step.
- Lay the foam and felt filters flat on a clean surface or towel.
- Allow them to air dry completely for a minimum of 24 hours. In humid conditions common in 2027, 48 hours is often safer.
- Do NOT use a dryer, hairdryer, or any heat source, as this can deform or damage the filter material.
- Ensure they are bone dry before reinserting them into your vacuum. Even slight dampness can lead to mildew, odor, and motor damage.
Cleaning HEPA Filters (Non-Washable)
These fine filters require a dry-cleaning approach:
- Tap Vigorously: Take the HEPA filter outside or over a large trash can. Firmly tap it against the inside of the bin to shake out fine dust and allergens.
- Brush Gently (Optional): For stubborn dust, you can use a soft brush (like an old toothbrush) to gently sweep debris from the pleats. Be very careful not to damage the delicate filter material.
- Visual Inspection: Check for any tears, holes, or permanent discoloration. If the filter appears damaged or excessively clogged after tapping, it’s time for a replacement rather than further cleaning.
- NO WATER: Under no circumstances should you wash a HEPA filter with water. It will destroy the filter’s fine mesh and render it ineffective.
Proper Drying & Maintenance Tips for Shark Filters
Ensuring complete drying is as crucial as thorough cleaning for optimal filter performance and vacuum longevity. Incomplete drying can foster mold growth, introducing allergens and significantly impeding airflow, which diminishes suction power. According to a 2026 study published by the Home Appliance Research Institute, residual moisture reduces filter efficiency by an average of 15-20%.
Complete Drying Protocol
- Air Dry Only: Never use direct heat sources like hair dryers, ovens, or radiators. These can warp filter materials, degrading their integrity and effectiveness. Shark’s 2027 specifications explicitly prohibit heat drying for all filter types.
- Adequate Drying Time: Foam and felt filters require a minimum of 24-48 hours to dry completely in a well-ventilated area. HEPA filters, with their denser material, often need 12-24 hours. Humidity levels directly influence drying times; higher humidity necessitates longer periods.
- Ventilated Space: Place filters on a clean towel or drying rack in an area with good air circulation. Avoid damp basements or confined spaces.
Ongoing Maintenance Practices
Between full washes, proactive measures sustain filter efficacy. Shark recommends these practices for their 2027 lineup:
- Regular Tapping: Every 2-4 weeks, gently tap foam and felt filters over a waste bin to dislodge loose dust and debris. This maintains airflow between washes.
- Visual Inspection: Before reinstalling, always visually inspect filters for any tears, holes, or permanent discoloration. Damaged filters will compromise filtration and motor protection.
- Adherence to Schedule: For average household use, foam and felt filters should be washed monthly. HEPA filters typically require washing every 3 months. Consistent adherence prevents excessive buildup and extends filter lifespan.
When to Replace: Shark Filter Troubleshooting
Even with meticulous cleaning, filters have a finite lifespan. Recognizing when to replace them is critical for maintaining your Shark vacuum’s peak performance and protecting its motor. Modern Shark vacuums, like the 2027 Stratos series, rely heavily on filter integrity for their advanced allergen capture systems.
Indicators for Filter Replacement
Several signs suggest your filters are beyond their useful life:
- Permanent Discoloration or Odor: If filters remain discolored, gray, or retain a persistent, stale odor after thorough washing and drying, their material structure is likely compromised. This indicates embedded particles that cannot be removed.
- Visible Damage: Any tears, holes, or significant thinning of the filter material means it can no longer effectively trap fine dust and allergens. Damaged HEPA filters, in particular, cease to function as certified.
- Reduced Suction After Cleaning: If your vacuum’s suction power remains noticeably diminished even immediately after cleaning and correctly reinstalling all filters, the filters are likely the bottleneck. Data from Shark’s 2026 service reports show this is the primary indicator in 65% of replacement cases.
- Increased Motor Noise: A struggling motor often indicates restricted airflow, which can be caused by severely clogged filters. This puts undue strain on the motor, potentially leading to premature failure.
- Exceeded Lifespan: Shark foam and felt filters typically last 6-12 months, while HEPA filters are designed for 12-24 months of use, depending on usage frequency and environment. Beyond these periods, even visually clean filters may have degraded filtration capabilities.
Troubleshooting Persistent Suction Issues
If you’ve cleaned and dried your filters, but suction remains poor, consider these steps before replacement:
- Check for Blockages: Thoroughly inspect the hose, wand, brush roll, and all air pathways for any obstructions. Non-filter blockages are a common cause of reduced suction.
- Correct Installation: Ensure all filters are seated correctly and securely within their compartments. A misaligned filter can create air leaks, bypassing the filtration system.
- Seal Integrity: Verify that all vacuum components, including the dust cup and filter housing, are properly closed and sealed. Even a small gap can significantly impact suction.
- New Filters: If all other troubleshooting fails, replacing the filters with genuine Shark replacements is the most reliable solution.
What If It Still Doesn’t Work?
If your Shark vacuum continues to underperform despite diligent filter cleaning and troubleshooting, a deeper issue might be at play. Do not immediately assume a complete vacuum failure.
- Inspect All Vacuum Seals: Carefully check all rubber gaskets and seals around the dust cup and motor housing. Worn or cracked seals can create air leaks, drastically reducing suction, even with clean filters.
- Clear All Internal Blockages: Remove the hose and inspect it thoroughly. Use a broom handle or similar blunt object to dislodge any persistent clogs. Also, check the brush roll and its housing for tangled hair or debris.
- Consult Your User Manual for Model-Specific Diagnostics: Modern Shark models (2027+) often include integrated diagnostic features or error codes. Refer to your specific model’s manual for these advanced troubleshooting steps.
- Contact Shark Customer Support: Shark’s 2027 support infrastructure includes online AI-powered diagnostic tools and expert phone assistance. Provide detailed observations to expedite their help.
- Seek Professional Vacuum Repair: If under warranty, use Shark’s authorized service centers. For out-of-warranty issues, independent vacuum repair shops can diagnose and fix mechanical or electrical faults. Diagnostic fees typically range from $40-$70, with minor repairs costing an additional $75-$150, varying by region and issue complexity in 2027.
Conclusion
Maintaining clean Shark vacuum filters is paramount for sustaining optimal suction power, preserving air quality, and extending your appliance’s operational life. Regular washing, complete drying, and timely replacement prevent performance degradation and motor strain. According to verified research and expert sources, consistent filter care is the single most impactful maintenance step for vacuum cleaners. Your immediate next step should be to schedule your filter cleaning into your monthly home maintenance routine.
❓ Frequently Asked Questions
What are the different types of filters in a Shark vacuum and how do I identify them?
Shark vacuums typically feature pre-motor foam and felt filters, usually soft and pliable, found near the dust cup. Additionally, a post-motor HEPA filter, often a harder, pleated cartridge, is located near the exhaust, specifically designed for fine particle capture and allergy relief.
What is the exact cleaning process for washable Shark filters (foam and felt)?
First, remove the filters and gently tap them against a trash can to dislodge loose dirt and debris. Then, rinse them thoroughly under cool, running water until the water runs clear, gently squeezing them to remove embedded particles. Avoid using soap or hot water, which can damage the filter material.
How do I properly dry my Shark vacuum filters to prevent mold or damage?
After rinsing, squeeze out as much excess water as possible from the foam and felt filters. It is absolutely crucial to allow them to air dry completely for at least 24 hours, or until bone dry, in a well-ventilated area away from direct heat. Reinserting damp filters can lead to mold growth, unpleasant odors, and serious motor damage.
Can I use a washing machine or dryer to clean or dry my Shark filters?
No, you must never use a washing machine, dryer, or any form of direct heat (like a hairdryer or radiator) to clean or dry your Shark filters. The harsh cycles and high temperatures can severely damage the delicate filter materials, rendering them ineffective, shrinking them, and potentially voiding your product warranty.
How do I know when it’s time to replace my Shark vacuum filters instead of just cleaning them?
You should consider replacing your filters if they show signs of physical damage like tears or holes, remain permanently discolored after cleaning, or if your vacuum’s suction power doesn’t significantly improve even after a thorough cleaning and drying. Shark generally recommends replacing pre-motor filters every 3-6 months and HEPA filters every 12-24 months for optimal performance.
Are there any specific Shark models that have different filter cleaning instructions?
While the general principles of cleaning foam, felt, and HEPA filters apply broadly to most Shark models, specific filter locations, removal mechanisms, and exact cleaning recommendations can vary. Always consult your specific Shark vacuum model’s instruction manual or the Shark support website for precise, model-specific filter maintenance guidelines to ensure correct handling.