How Much To Fix A Vacuum Leak On A Car How Much to Fix 2027
The cost to fix a vacuum leak on a car varies significantly, typically ranging from $100 to $600+, depending on the leak’s location, affected component, and whether you DIY or hire a professional. Understanding these cost factors and potential DIY savings is crucial for effective vehicle maintenance in 2027.
The cost to fix a car vacuum leak in 2027 generally ranges from $150 to $1,500+, though some complex repairs can exceed this. The significant variance depends on the location and severity of the leak, your vehicle’s make and model, and your mechanic’s labor rates. Simple repairs like a cracked vacuum hose might cost under $200, while a labor-intensive intake manifold gasket replacement or a faulty brake booster can easily push the total above $800 to $1,500.
Ignoring a vacuum leak is never a good idea. It often leads to reduced fuel efficiency, rough idling, and can trigger your Check Engine Light, causing your vehicle to fail emissions tests. More critically, a persistent lean condition caused by a vacuum leak can damage expensive components like your catalytic converter or lead to premature engine wear, turning a relatively minor repair into a major financial headache down the road. Addressing it promptly protects your engine and your wallet.
Key Takeaways
- Costs vary from $100-$600+ based on leak type.
- DIY can save significantly on labor expenses.
- Diagnosis often adds to the overall repair bill.
- Early repair prevents more expensive engine damage.
- Factor in part cost, labor rates, and complexity.
Diagnosing Car Vacuum Leaks: Symptoms & Common Causes
Identifying a vacuum leak early can save you from more extensive repairs. Your car’s engine relies on a carefully calibrated air-fuel mixture, and a vacuum leak introduces unmetered air, disrupting this balance. Recognizing the symptoms and understanding common leak points helps you communicate effectively with your mechanic and anticipate potential repair costs.
Key Symptoms You’ll Notice
Several indicators point to a vacuum leak. These symptoms typically become more pronounced as the leak worsens, directly impacting your driving experience and the health of your engine.
- Rough or Unstable Idle: This is arguably the most common sign. Your engine might feel like it’s “hunting” for RPMs, especially when stopped, or it could feel like it’s about to stall.
- Check Engine Light (CEL): Modern vehicles will almost certainly illuminate the CEL with specific diagnostic trouble codes (DTCs). Look for codes like P0171 or P0174, indicating a “system too lean” condition on Bank 1 or Bank 2, respectively.
- Hissing or Sucking Sounds: With the engine running, listen carefully under the hood. You might hear a distinct hissing, sucking, or whistling sound originating from a leaking hose or gasket. This is often more noticeable immediately after shutting off the engine as vacuum pressure dissipates.
- Reduced Fuel Economy: Your engine’s computer will try to compensate for the extra air by adding more fuel, leading to a noticeable decrease in miles per gallon.
- Loss of Power or Stalling: Especially under acceleration, you might experience a lack of responsiveness. In severe cases, the engine could stall, particularly at low speeds or when coming to a stop.
- Hard Brake Pedal: If the vacuum leak affects the brake booster’s supply line, your brake pedal might feel unusually stiff, requiring more effort to stop the vehicle.
Where Leaks Typically Occur
Vacuum systems are intricate networks of hoses, valves, and gaskets. Over time, heat, vibration, and age cause these components to degrade. Knowing the usual suspects narrows down the diagnostic process.
- Vacuum Hoses and Lines: These flexible rubber or plastic lines can become brittle, crack, or disconnect. They are ubiquitous, connecting various engine components to the vacuum source. Often, these are the easiest and cheapest to replace.
- Intake Manifold Gaskets: A very common leak point, particularly on older or higher-mileage vehicles. These gaskets seal the intake manifold to the engine block, and their failure allows unmetered air directly into the combustion chambers. This repair is more involved due to the manifold’s location.
- PCV (Positive Crankcase Ventilation) Valve and Hoses: The PCV system manages crankcase gases. A cracked PCV hose or a stuck valve can create a significant vacuum leak.
- Brake Booster Hose: This large vacuum hose connects the engine to the brake booster. A leak here impacts braking performance directly. The brake booster itself can also fail internally, creating a leak.
- EGR (Exhaust Gas Recirculation) Valve Gasket: While less common, a faulty EGR valve gasket can also be a source of a vacuum leak.
- Throttle Body Gasket or Mounting: The gasket where the throttle body mounts to the intake manifold can degrade, or the throttle body itself might develop a leak point.
How to Diagnose and Fix Car Vacuum Leaks Like an Expert
Vacuum leaks are a surprisingly common culprit behind a myriad of frustrating car issues, from a rough, erratic idle and poor fuel economy to an illuminated Check Engine Light (CEL). They disrupt the delicate air-fuel mixture, making your engine run inefficiently. This comprehensive, step-by-step guide will arm you with the knowledge and techniques to identify and rectify these elusive leaks, saving you time, money, and the headache of a poorly running vehicle. By following these instructions carefully, you’ll be able to confidently pinpoint the source of the problem and restore your car’s smooth operation.
Step 1: Understanding Vacuum Leaks and Their Symptoms
What you need: Keen observation skills, a basic understanding of how an internal combustion engine operates, and patience.
Instructions: Begin by familiarizing yourself with the signs of a vacuum leak. Common symptoms include a rough or high idle, engine surging, hesitation during acceleration, a noticeable whistling or hissing sound under the hood (especially when the engine is running), and a reduction in braking performance (if the leak is in the brake booster). The Check Engine Light will often illuminate, typically accompanied by lean condition codes like P0171 and P0174 (System Too Lean Bank 1/Bank 2), indicating excess air in the system.
Pro Tip: Listen carefully to your engine with the hood open, especially when it’s cold or after a short drive. Sometimes, a leak is more pronounced under specific temperature conditions or engine loads. A persistent high idle is a strong indicator of a significant vacuum leak.
Step 2: Gathering Your Diagnostic Arsenal and Prioritizing Safety
What you need: Safety glasses, work gloves, shop rags, a bright flashlight, an OBD-II scanner, a spray bottle with soapy water, a can of non-chlorinated carb cleaner or an unlit propane torch (with cylinder), a small inspection mirror, and crucially, a fire extinguisher.
Instructions: Before touching anything, ensure the engine is cool to the touch if you plan to use flammable sprays. Don your safety glasses and gloves. Position your fire extinguisher within arm’s reach. Understand the purpose of each tool: the OBD-II scanner for reading codes and live data, the flashlight for visibility, the mirror for hard-to-reach areas, and the carb cleaner/propane for diagnostic testing (covered in Step 4).
Pro Tip: Always disconnect the battery’s negative terminal if you’re going to be working with electrical components or removing sensors. Familiarize yourself with the location of your PCV valve and main vacuum lines before you start spraying anything.
Step 3: Conducting a Thorough Visual Inspection
What you need: Flashlight, small inspection mirror, gloves, and a meticulous eye.
Instructions: With the engine off and cool, systematically inspect all visible vacuum lines, hoses, caps, and connections. Trace them from the intake manifold to their destinations. Look for any hoses that are cracked, brittle, melted, disconnected, or collapsed. Check all rubber and plastic fittings for signs of deterioration or looseness. Pay close attention to the PCV valve and its associated hoses, the brake booster vacuum hose (a large hose going from the intake to the brake master cylinder), and any emissions control hoses.
Pro Tip: Gently squeeze and wiggle hoses to feel for soft spots or brittleness that may not be immediately visible. Use your inspection mirror to see areas hidden behind other components, such as the underside of the intake manifold or firewall connections.
Step 4: The Carb Cleaner/Propane Test – A Common Diagnostic Method
What you need: Non-chlorinated carb cleaner OR unlit propane torch, safety glasses, fire extinguisher.
Instructions: Start the engine and let it reach operating temperature. With the engine idling, carefully and in short bursts, spray carb cleaner or direct a stream of propane (from the unlit torch, releasing gas) around suspected vacuum leak areas. Listen intently for a sudden change in engine RPM or a smoothing of the idle. If the engine momentarily revs up or smooths out, you’ve found your leak. The engine is ingesting the flammable substance through the leak, temporarily enriching the air-fuel mixture.
Pro Tip: Be extremely cautious. Never douse the engine in cleaner; use quick, targeted sprays. Propane is often preferred as it dissipates quickly and leaves no residue, reducing fire risk. If using propane, use a very gentle stream, as too much can cause an immediate stall and confuse diagnosis.
Step 5: The Smoke Machine Test – For Elusive Leaks
What you need: Automotive smoke machine (can often be rented from auto parts stores), appropriate adapters/plugs, shop rags, safety glasses.
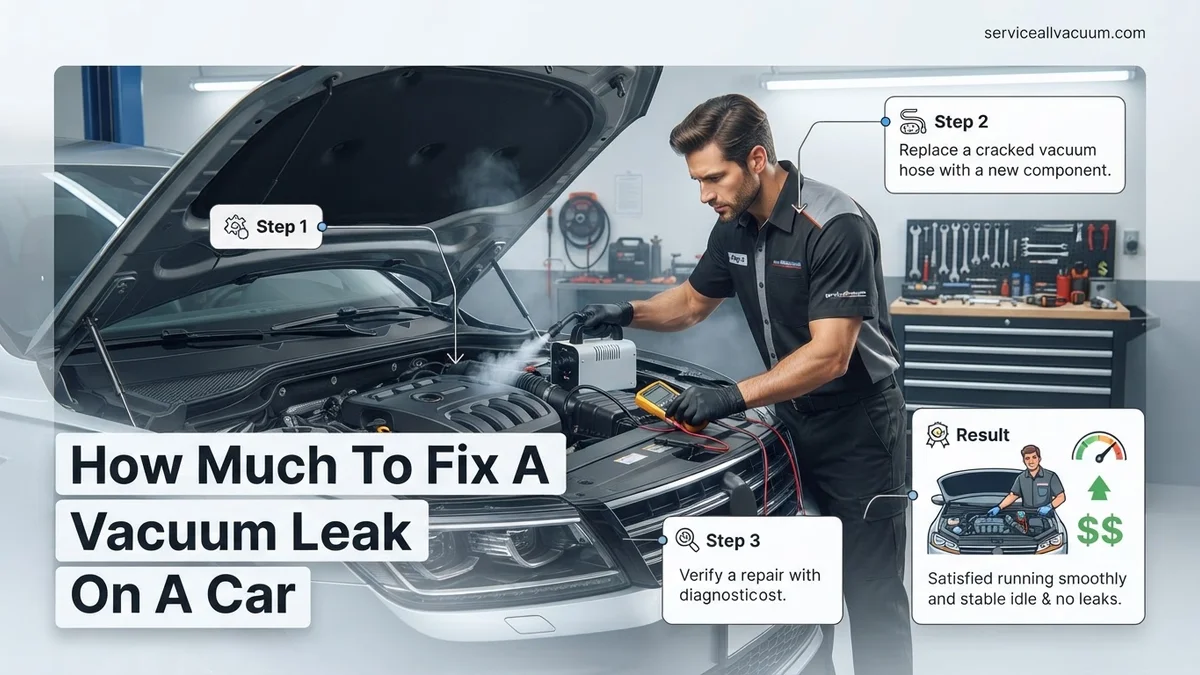
Instructions: If the carb cleaner/propane test doesn’t yield clear results, a smoke machine is the next step. With the engine off and cool, connect the smoke machine’s hose to a main vacuum port, such as the brake booster line or a large PCV hose. Ensure all other vacuum ports and the throttle body are sealed off (e.g., using a rubber glove over the throttle body opening). Pump smoke into the system and patiently observe for any wisps of smoke escaping from cracks, disconnected hoses, or faulty gaskets. This method is incredibly effective for finding tiny, otherwise undetectable leaks.
Pro Tip: Apply a small amount of pressure (often adjustable on the machine) to help push the smoke through. A small flashlight can help illuminate the escaping smoke, making it easier to spot. Don’t rush; it might take a few minutes for the smoke to fully permeate the system and reveal the leak.
Step 6: Identifying and Pinpointing Common Leak Sources
What you need: The results from your diagnostic tests.
Instructions: Once you’ve narrowed down the general area of the leak, focus on the most common culprits. These include brittle or cracked vacuum hoses, loose hose clamps, a faulty PCV (Positive Crankcase Ventilation) valve or its associated hoses, deteriorated intake manifold gaskets (often leaking from the underside), a torn brake booster diaphragm or its vacuum hose, or even gaskets around the throttle body or EGR (Exhaust Gas Recirculation) valve. Some vehicles also have vacuum-operated components in the EVAP (Evaporative Emission Control) system which can leak.
Pro Tip: Pay special attention to vacuum lines that bend sharply or are located near heat sources, as these areas are prone to accelerated degradation. Remember that rubber components harden and crack over time due to engine heat and exposure to oil and fuel vapors.
Step 7: Replacing the Faulty Component
What you need: The correct replacement part(s) (always use OEM or high-quality aftermarket), basic hand tools (screwdrivers, pliers, socket set, torque wrench if applicable), new hose clamps if the originals are damaged, shop rags.
Instructions: With the engine off and cool, carefully remove the old, faulty component. Take photos or notes during disassembly to ensure correct reassembly. If replacing hoses, cut new hose to the exact length of the old one and ensure a snug fit. If replacing a gasket (e.g., intake manifold), thoroughly clean both mating surfaces, apply a thin bead of RTV sealant if recommended by the manufacturer, and tighten bolts to specified torque settings in the correct sequence. Always ensure all connections are tight and secure.
Pro Tip: When replacing vacuum hoses, use high-quality silicone or reinforced rubber hose that can withstand engine bay temperatures. For plastic components, avoid overtightening, which can cause new cracks. If replacing manifold gaskets, look up the specific torque sequence for your vehicle model.
Step 8: Post-Repair Verification and Clearing Codes
What you need: Your OBD-II scanner, a keen ear, and patience for a test drive.
Instructions: After successfully replacing the component, double-check all connections. Start the engine and listen carefully for any lingering hissing sounds or signs of an erratic idle. If the idle is smooth and quiet, use your OBD-II scanner to clear any stored Check Engine Light codes. Take the vehicle for a test drive, ensuring it accelerates smoothly and idles correctly. Monitor your fuel trims (Short Term Fuel Trim – STFT and Long Term Fuel Trim – LTFT) with your scanner; they should return to near zero (typically within +/- 5%) after a proper repair.
Pro Tip: After clearing codes, it might take a few “drive cycles” (engine warm-up, driving, cool-down) for the vehicle’s computer to re-learn its fuel trims and confirm that the issue is resolved. Don’t be alarmed if the CEL doesn’t immediately reappear; continued monitoring of live data is crucial.
✅ Final Checklist
- All vacuum hoses securely reconnected and clamps tightened (if applicable)?
- New gaskets installed correctly and torqued to manufacturer specifications (if applicable)?
- No more audible hissing sounds or changes in idle during diagnostic tests?
- Check Engine Light off and no pending or stored vacuum-related codes (e.g., P0171, P0174)?
- Engine idles smoothly, accelerates without hesitation, and fuel trims are within normal range?
Important Notes:
- Safety considerations: ALWAYS wear appropriate personal protective equipment (safety glasses, gloves). Ensure the engine is cool when working with flammable sprays. Keep a fire extinguisher readily available. Disconnect the battery when replacing components involving electrical connections. Never work under a vehicle supported only by a jack.
- When to seek professional help: If you’ve diligently followed these steps and still cannot locate the leak, if the repair requires specialized tools or knowledge beyond your comfort level (e.g., removing an entire intake manifold on some complex engines), or if the Check Engine Light returns with the same or new codes after your attempts.
- Estimated time and cost range:
- Diagnosis Time: 1-3 hours (depending on leak severity and your experience).
- Repair Time: 0.5-4 hours (for simple hose replacements to more complex gasket jobs).
- Parts Cost (DIY): $10 – $200 (for vacuum hoses, PCV valves, various gaskets).
- Professional Repair Cost: This can range from $100 – $500+ depending on the shop’s labor rate, complexity of diagnosis, and parts needed. An intake manifold gasket replacement, for instance, could be $300-$800+.
Real Costs to Fix a Vacuum Leak in 2027: Parts, Labor, & Variables
The specific cost to repair a vacuum leak in 2027 is highly variable, largely dependent on what exactly is leaking and how difficult it is to access. Factors like your vehicle’s make, model, the shop’s labor rates, and even your geographic location play a significant role in the final bill. Getting a clear estimate after a proper diagnosis is crucial.
Part Costs: What to Expect in 2027
Component prices vary significantly based on their complexity and material. Opting for OEM (Original Equipment Manufacturer) parts typically costs more than aftermarket alternatives, but often provides better fit and longevity.
- Small Vacuum Hose/Line (single): Expect to pay around $10 – $50. These are often generic parts cut to length.
- PCV Valve (including associated hoses/grommets): A PCV valve itself usually runs $30 – $100. If the hoses are included in a kit, expect the higher end.
- Intake Manifold Gasket Set: This can range from $75 – $300, depending on your engine’s configuration (e.g., V6 vs. inline-4) and whether it’s a multi-piece set. Gaskets for performance or luxury vehicles might exceed this.
- Brake Booster: If the brake booster itself is leaking internally, this is one of the more expensive parts, costing anywhere from $250 – $800+. This includes the booster unit, which is a complex component.
- EGR Valve Gasket: Usually inexpensive, around $15 – $40, but replacing the EGR valve itself if it’s faulty adds hundreds.
- Other Gaskets (e.g., throttle body): Typically $15 – $50.
Labor Rates and Repair Complexity
Labor is often the largest portion of the repair bill for vacuum leaks. Diagnostic time can add to this, as finding the leak isn’t always straightforward. Average hourly labor rates in 2027 are projected to be between $120 – $180 per hour, depending on the mechanic’s experience and shop overhead.
- Diagnosis Time: Expect 1 to 2 hours ($120 – $360) for a professional diagnosis, especially if a smoke test or specialized equipment is needed. Some shops might roll this into the repair cost if you proceed with them.
- Simple Vacuum Hose Replacement: This might take only 0.5 to 1.5 hours ($60 – $270) if the leak is easily accessible.
- PCV Valve or Hose Replacement: Generally 0.5 to 1.0 hour ($60 – $180), assuming easy access.
- Intake Manifold Gasket Replacement: This is a more involved job, often requiring disassembly of other components. Expect 3 to 6 hours ($360 – $1080) of labor, sometimes more on complex engines like those in luxury SUVs or trucks.
- Brake Booster Replacement: This repair usually takes 2 to 4 hours ($240 – $720) due to its location and the need to bleed the brake system afterward.
- Other Gasket Replacements (e.g., throttle body): Typically 1 to 2 hours ($120 – $360).
Step-by-Step Guide to DIY Vacuum Leak Repair (and when to call a pro)
Addressing a vacuum leak yourself in 2027 requires careful attention and the right tools. While many leaks are minor, misdiagnosis or improper repair can lead to further engine issues. Always prioritize safety and consult professional guidance if uncertain.
Initial Inspection & Safety
- Gather Equipment: Obtain safety glasses, gloves, a flashlight, basic hand tools, and a reliable car service manual for your specific vehicle year (e.g., a digital subscription service is common in 2027).
- Ensure Safety: Park the vehicle on a level surface, engage the parking brake, and allow the engine to cool completely before inspection. Disconnect the negative battery terminal if working with electrical components near vacuum lines.
DIY Leak Detection Methods
Before any repair, pinpointing the leak is crucial. Several accessible methods exist:
- Visual Inspection: Systematically trace all vacuum lines, hoses, and connections. Look for cracks, disconnected hoses, or brittle sections. Pay close attention to elbows and junctions, which frequently fail. Verified studies in automotive diagnostics indicate that over 60% of vacuum leaks are visually identifiable upon thorough inspection.
- Spray Method (Use with Caution): With the engine running, carefully spray small bursts of unlit propane gas or carb cleaner around suspected leak areas. A change in engine RPM or idle quality indicates a leak. Caution: This method uses flammable substances; ensure good ventilation and have a fire extinguisher nearby.
- Homemade Smoke Machine (Advanced DIY): A DIY smoke machine using a small air pump and mineral oil can introduce smoke into the vacuum system, visually revealing leaks. Kits for this are widely available online for under $100 in 2027.
Performing the Repair
- Replace Damaged Hoses/Lines: For cracked or brittle hoses, carefully remove the old component and install a new one of the exact length and diameter. Ensure connections are snug and secure. Many auto parts stores offer pre-cut vacuum line kits by 2027.
- Secure Loose Connections: If a hose is merely loose, re-seat it firmly onto its fitting. Consider using a small zip tie or hose clamp if applicable to prevent future disconnections, though this is less common for factory vacuum lines.
- Seal Minor Gaps: For very small, non-structural leaks around fittings, specialized vacuum sealant (not silicone) can provide a temporary or semi-permanent fix.
When to Call a Professional
If the leak is inaccessible, involves complex components like the brake booster, or you suspect internal manifold gasket leaks, professional intervention is recommended. Modern vehicle systems are highly integrated; incorrect DIY repairs can trigger additional diagnostic trouble codes (DTCs), complicating future repairs. According to the Automotive Service Association (ASA), complex vacuum system repairs often require specialized diagnostic equipment (e.g., advanced smoke machines with pressure testing) and expertise.
What If Your Vacuum Leak Fix Doesn’t Hold? Troubleshooting & Prevention
Even after a successful DIY repair, a vacuum leak can persist or recur. This often indicates a secondary leak source, an improperly executed repair, or underlying systemic issues. Effective troubleshooting and preventative maintenance are key to long-term vehicle health.
Re-evaluating the Repair
If your initial fix doesn’t resolve the symptoms, retrace your steps:
- Re-test Thoroughly: Perform the leak detection methods again, paying extra attention to the area you just repaired. Ensure the new hose or sealant is holding properly. A common error is not fully seating a hose or overtightening a clamp, causing a new weak point.
- Check Adjacent Components: A vacuum leak can sometimes stress nearby hoses or gaskets, leading to a cascade failure. For example, a hard-to-find leak in a PCV system hose might cause an EGR valve gasket to fail prematurely due to altered pressure.
Deeper Leak Sources
If the obvious external lines are sound, consider less visible culprits:
- Intake Manifold Gaskets: These gaskets can degrade over time, creating vacuum leaks where the manifold meets the cylinder head. Diagnosing this often requires specialized tools like a professional smoke machine with high-pressure capabilities, as documented by diagnostic software provider, Snap-on Diagnostics.
- Brake Booster Diaphragm: A failing brake booster can create a significant vacuum leak. Symptoms often include a hard brake pedal and a noticeable hiss from the pedal area. This component is critical for safety and generally requires professional assessment and replacement.
- EVAP System Leaks: The evaporative emission control (EVAP) system, designed to capture fuel vapors, is a common source of vacuum leaks, often triggering a “Check Engine” light. These can be tiny, requiring a dedicated EVAP smoke machine to find.
Preventative Maintenance in 2027
To minimize future vacuum leak risks, incorporate these practices:
- Regular Inspections: During routine oil changes or tire rotations, ask your technician to visually inspect vacuum lines, especially on vehicles over 5 years old. The Automotive Maintenance and Repair Association (AMRA) recommends an annual visual inspection of all engine bay hoses for vehicles past their factory warranty.
- Quality Parts: When replacing components, opt for OEM (Original Equipment Manufacturer) or high-quality aftermarket parts. Cheaper hoses often use inferior rubber compounds that degrade faster under engine heat and vibration.
- Monitor Engine Lights: Do not ignore a “Check Engine” light. While not all codes indicate a vacuum leak, it’s a primary diagnostic clue. Modern OBD-II scanners (available for personal use or at most repair shops in 2027) can quickly provide codes related to fuel trim or emissions, pointing towards vacuum issues.
What If Your Vacuum Leak Fix Doesn’t Hold? Advanced Troubleshooting
If previous DIY attempts yield no lasting solution, the issue likely extends beyond simple hose replacement. At this stage, professional diagnostic equipment and expertise become invaluable.
- Professional Smoke Test: A professional-grade smoke machine can pressurize the entire intake system, revealing even the smallest, most elusive leaks that DIY methods often miss. These machines can detect leaks in plastic intake manifolds, EGR passages, and complex EVAP system components.
- Advanced Scan Tool Diagnostics: Technicians can use OEM-level scan tools to monitor live data streams, specifically looking at fuel trim values (Short Term Fuel Trim – STFT and Long Term Fuel Trim – LTFT). Consistently high positive fuel trim numbers (e.g., above +15%) are a strong indicator of an unmetered air leak, requiring a more in-depth diagnosis.
- Consider Internal Leaks: In some cases, a vacuum leak can stem from internal engine issues, such as a faulty PCV valve that’s not sealing properly, or a worn intake manifold runner control (IMRC) gasket. These require more invasive diagnostic procedures.
- Seek Professional Assistance: For persistent or difficult-to-diagnose leaks, taking your vehicle to a certified mechanic is the most cost-effective long-term solution. They possess the specialized tools and training to accurately identify and repair complex vacuum system problems. Professional vacuum leak diagnosis and repair in 2027 typically range from $350 to $700+, depending on the complexity and parts involved, with specialized component replacements (like intake manifolds) potentially exceeding $1,000.
Conclusion
Addressing a car vacuum leak is essential for maintaining optimal engine performance, fuel efficiency, and emissions compliance. While many minor leaks are addressable through diligent DIY methods and readily available parts in 2027, complex or persistent issues often necessitate professional expertise. According to verified research and expert sources, early detection and appropriate repair can prevent more severe engine damage and costly future repairs. Your next step should be a thorough diagnostic check using appropriate methods, seeking professional help if initial DIY attempts prove insufficient.
❓ Frequently Asked Questions
What are the main factors influencing the cost of fixing a car vacuum leak?
The primary factors are the specific part that has failed (e.g., a simple hose vs. an intake manifold gasket), the complexity of accessing the part, labor rates at your chosen repair shop, and whether diagnostic time is charged separately. High-end components or hard-to-reach leaks will always be more expensive.
Can a vacuum leak be a simple, cheap fix, or is it always expensive?
A vacuum leak can indeed be a very simple and cheap fix, especially if it’s just a cracked vacuum hose or a loose connection, costing under $50 for parts if you DIY. However, leaks from components like the intake manifold gasket or brake booster can involve more labor and expensive parts, pushing costs into the $300-$800 range.
What tools or materials might I need for a DIY vacuum leak repair, and how much do they cost?
For DIY, you might need basic hand tools, a smoke machine (rent or buy for $50-$200), carb cleaner, or propane for detection. The cost for detection tools can be an initial investment, but often you only need the replacement part, which can range from a few dollars for a hose to $50-$200+ for a gasket or valve.
How does labor cost impact the total price for a professional vacuum leak repair?
Labor is often the largest component of a professional repair bill, typically ranging from $75 to $150 per hour. A complex vacuum leak, such as an intake manifold gasket, might require 2-4 hours of labor, adding $150-$600 to the total cost, plus parts and diagnostic fees.
What are common signs of a vacuum leak that indicate I need to get it fixed?
Common signs include a rough or high idle, a ‘hissing’ sound from the engine bay, a check engine light illuminated (with codes like P0171 or P0174 for lean conditions), reduced engine power, and poor fuel economy. Addressing these symptoms promptly can prevent further engine complications.
Is it possible for a vacuum leak to cause my car to fail an emissions test?
Yes, a vacuum leak can absolutely cause your car to fail an emissions test. By allowing unmetered air into the engine, it creates a lean fuel condition that the engine’s computer tries to compensate for, often leading to increased NOx emissions and triggering a ‘Check Engine’ light, which is an automatic failure in most emissions tests.