Do Carpet Cleaners Vacuum First? Real Expert Guide 2027
Professional carpet cleaners absolutely should vacuum first; this crucial initial step removes abrasive dry soil, preventing it from turning into mud during the wet cleaning process. Skipping this foundational step leads to less effective cleaning, potential damage, and premature re-soiling, compromising your carpet’s longevity and appearance.
Absolutely, professional carpet cleaners should always vacuum first before attempting any deep cleaning. This isn’t just a suggestion; it’s a foundational, non-negotiable step for a truly effective and long-lasting clean in 2027. Skipping this crucial initial vacuuming undermines the entire cleaning process, leaving you with less-than-stellar results and potentially shortening your carpet’s lifespan. Understanding why this step is so critical helps you identify a genuinely professional service.
The practical implication for you as a homeowner is significant. If a cleaner arrives and immediately starts spraying solutions or using extraction equipment without first running a powerful vacuum, they are cutting corners. This omission dramatically reduces the quality of their work and leaves behind unseen issues that will resurface quickly. You are paying for a thorough job, and pre-vacuuming is integral to that thoroughness.
Key Takeaways
- Always expect professional pre-vacuuming.
- Dry soil removal prevents muddy residue.
- Skipping vacuuming harms carpet quality.
- Ask cleaners about their vacuuming policy.
- Pre-vacuuming ensures a deeper, lasting clean.
Why Skipping Pre-Vacuuming Causes Poor Carpet Cleaning
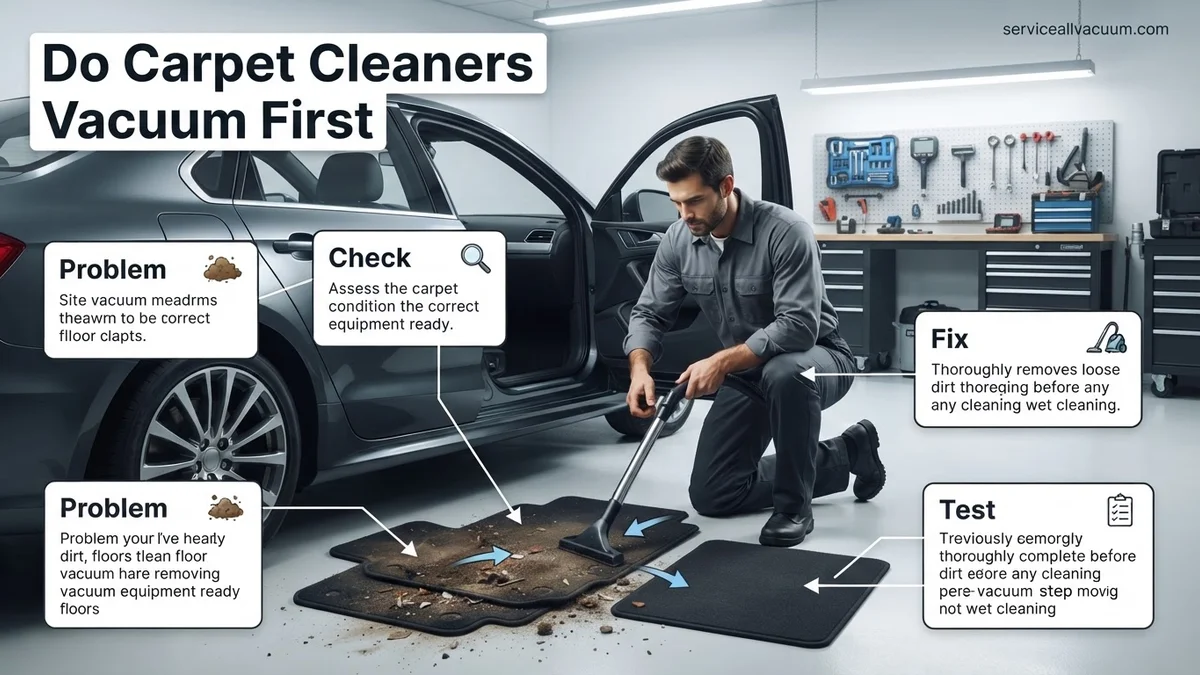
Not pre-vacuuming is one of the biggest mistakes an unprofessional cleaner can make. It directly leads to a significantly inferior carpet cleaning outcome, often creating more problems than it solves. The core issue revolves around how dry soil interacts with moisture. When you introduce cleaning solutions and water to a carpet full of loose dirt, dust, hair, and crumbs, you’re essentially creating mud. This muddy residue is incredibly difficult to extract completely.
Creating Sticky Mud and Residue
- Soil Suspension Issues: Dry soil, like sand and grit, is abrasive and designed to be removed by high-powered vacuum suction. When wet, these particles become heavy, clumpy mud. Your professional cleaner’s extraction machine then struggles to pull this heavy, sticky mixture out of the carpet fibers.
- Reduced Cleaning Solution Effectiveness: The cleaning agents are diluted and overwhelmed by the sheer volume of dry debris. Instead of focusing on breaking down oils and stains, they get absorbed by dirt, reducing their chemical efficacy. This means stains may not lift completely, and the carpet remains dull.
- Unwanted Sticky Film: Incomplete extraction of this muddy mixture often leaves behind a sticky residue. This residue acts like a magnet, rapidly attracting new dirt, dust, and debris. You might find your “freshly cleaned” carpet looks dirty again within weeks or even days, far sooner than it should in 2027.
Compromised Carpet Health and Appearance
Beyond immediate cleanliness, skipping pre-vacuuming has long-term negative consequences for your carpet. The abrasive nature of trapped dry soil, combined with moisture, can physically damage fibers and impact your carpet’s overall look and longevity.
- Fiber Abrasion and Dullness: When wet, sharp grit and dirt particles are pressed and rubbed against carpet fibers during cleaning, acting like sandpaper. This can abrade and dull the fibers, leading to a matted appearance and permanent damage. Your carpet loses its vibrancy and softness prematurely.
- Accelerated Re-soiling: The most common complaint after a poor cleaning is rapid re-soiling. The sticky, muddy film left behind after an inadequate extraction dramatically shortens the time before your carpet looks dirty again. This means you’ll need another cleaning much sooner, essentially wasting your initial investment.
- Shortened Carpet Lifespan: The combination of abrasive damage and premature re-soiling significantly shortens your carpet’s expected lifespan. What should last 10-15 years might only look good for 5-7, costing you more in replacement costs down the line. A true professional understands this and prioritizes the longevity of your investment.
From Start to Finish: Carpet Cleaning Prep Explained
Embarking on a carpet cleaning project can seem daunting, but understanding the foundational steps can transform the process from a chore into a highly effective operation. This guide meticulously walks you through the critical preliminary stage that professional carpet cleaners swear by: thorough vacuuming before any wet cleaning begins. We’ll delve into the ‘why’ and ‘how’, ensuring you maximize your cleaning efforts, achieve superior results, and protect your carpets in the long run. Follow these steps to elevate your carpet cleaning game and achieve a truly deep, lasting clean.
Step 1: Grasp the Golden Rule: Why Dry First?
What you need: No specific tools are required for this foundational understanding, but a mindset focused on efficiency and effectiveness will be highly beneficial.
Instructions: Before even touching a vacuum, grasp the fundamental principle: dry soil and debris must be removed thoroughly before any wet cleaning process begins. This is because introducing moisture to dry dirt turns it into mud, which can then be smeared into the carpet fibers, making it significantly harder to extract and potentially setting stains permanently. Professional carpet cleaners prioritize this dry soil removal step to maximize the efficacy of their hot water extraction or shampooing, ensuring a deeper clean and faster drying times. Neglecting this crucial initial vacuuming can lead to muddy residue, a grittier feel, and a less satisfactory overall result, regardless of the quality of your wet cleaning equipment or solutions.
Pro Tip: Think of dry vacuuming as removing the “top layer” of dirt. If you don’t remove this, you’re essentially just pushing mud around with your wet cleaner. Invest mental energy in understanding this principle; it will guide all subsequent actions.
Step 2: Clear the Canvas: Room Preparation
What you need: Empty boxes or bins for small items, furniture sliders (optional but recommended for heavy items), and potentially a helper for very large furniture.
Instructions: Begin by completely decluttering the carpeted area. Remove all small items such as toys, magazines, plants, lamps, and wastebaskets. For furniture, carefully move all movable pieces out of the room. If a piece is too heavy to remove, slide it to one side to clean half the carpet, then move it back to clean the other half, or place it on plastic protectors (e.g., furniture coasters, cut-up garbage bags) to prevent moisture transfer to wood or metal. Ensure no cables, cords, or small, easily overlooked items remain on the carpet that could interfere with the vacuum or wet cleaner.
Pro Tip: Take a quick “before” photo of the room’s layout before moving furniture. This will make it much easier to return everything to its original position neatly and efficiently once the cleaning is complete and the carpet is dry.
Step 3: The First Pass: General Debris Removal
What you need: A high-quality upright or canister vacuum cleaner with strong suction, a clean bag or an empty, clean canister, and a working brush roll.
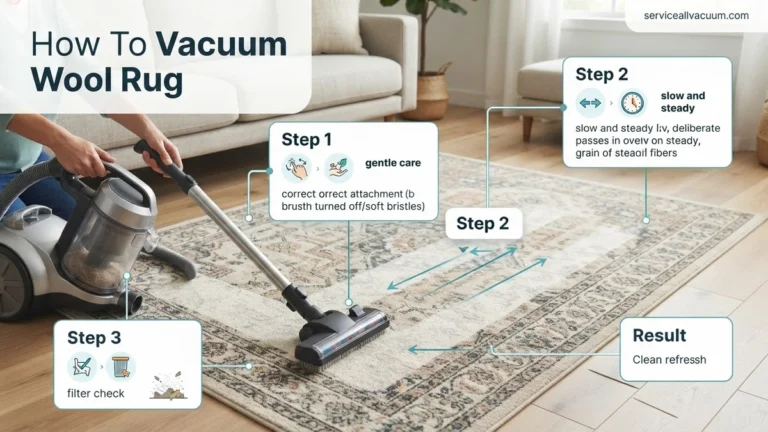
Instructions: With the area clear, begin your first full vacuuming pass. Start at one end of the room and work your way across, using slow, overlapping strokes. Push the vacuum forward, then pull it back slowly, ensuring each pass overlaps the previous one by about one-third to one-half of the vacuum’s width. For optimal dry soil extraction, especially in medium to high-pile carpets, perform this initial pass in two perpendicular directions (e.g., north-south, then east-west). This method effectively lifts and removes surface dirt, pet hair, and larger debris that has settled into the carpet fibers.
Pro Tip: Don’t rush this step. Pushing a vacuum too quickly only skims the surface. Slow, deliberate passes allow the vacuum’s agitation and suction to work effectively, pulling embedded dry soil out of the carpet pile.
Step 4: Edge & Crevice Reconnaissance: The Detail Work
What you need: Your vacuum’s crevice tool, upholstery tool, and/or dusting brush attachment.
Instructions: After the general pass, it’s time to tackle the often-neglected edges and tight spaces. Attach your crevice tool and meticulously vacuum along all baseboards, into corners, under the lip of built-in cabinets, and around any permanent fixtures (like heating vents or fireplace hearths). Use the upholstery brush or dusting tool for furniture legs that couldn’t be moved, or to gently clean low-pile rugs that are too delicate for the main vacuum. These areas tend to accumulate a surprising amount of dust, pet hair, and small debris that an upright vacuum cannot reach.
Pro Tip: Pay particular attention to areas where the carpet meets hard flooring transitions. These often collect fine grit. Thoroughly cleaning these edges now prevents this trapped dirt from being spread into the main carpet area during the wet cleaning process.
Step 5: The Deep Dive: Multiple Passes for Embedded Soil
What you need: Your high-quality vacuum cleaner, patience, and good lighting.
Instructions: For truly deep dry soil removal, especially in high-traffic areas or carpets that haven’t been vacuumed thoroughly in a while, perform a second full vacuuming pass. This pass should ideally be done against the nap of the carpet, or in a criss-cross pattern relative to your first main pass. The goal here is to agitate and lift any remaining deeply embedded dry particles, such as sand, dust mites, or tiny food crumbs, that the initial pass might have missed. Focus extra attention on paths and entryways where dirt is compacted. You might be surprised at how much more debris is collected even after a seemingly thorough first pass.
Pro Tip: If your vacuum has adjustable height settings, ensure it’s set correctly for your carpet pile. Too high, and it won’t agitate; too low, and it can be hard to push and may damage the brush roll or carpet fibers. The ideal setting allows the brush roll to lightly tickle the carpet fibers.
Step 6: Spot Check and Final Readiness
What you need: Good overhead and ambient lighting, a keen eye, and possibly a lint roller or small brush for stubborn pet hair.
Instructions: Once you believe all dry soil has been removed, perform a final visual inspection of the entire carpeted area. Walk slowly across the room, checking from different angles and with varying light sources. Look for any overlooked patches of pet hair, larger crumbs, small stones, or even loose threads that could potentially clog your wet cleaning machine or cause streaks. Address any remaining debris with a quick spot-vacuum or a lint roller for particularly clingy pet hair. This final check ensures the carpet is optimally prepared for the subsequent wet cleaning process, guaranteeing maximum efficiency and preventing potential equipment issues.
Pro Tip: Don’t underestimate the power of a good light source. A bright flashlight held at a low angle can reveal hidden dust and debris that might be invisible under normal room lighting, ensuring absolutely nothing is left behind to hinder your deep clean.
✅ Final Checklist
- All movable furniture and small items have been removed from the carpeted area.
- The entire carpet surface has received at least two full, slow vacuuming passes.
- Edges, corners, and areas around permanent fixtures have been thoroughly vacuumed with appropriate attachments.
- The vacuum cleaner’s bag was checked/emptied, and the brush roll is free of tangles.
- A final visual inspection confirms no visible dry debris, pet hair, or small objects remain on the carpet.
Important Notes:
- Safety considerations: Always use proper lifting techniques when moving furniture to prevent injury. If heavy items cannot be moved safely, consider hiring professional movers or leaving them in place with protective barriers. Ensure electrical cords from the vacuum are not a tripping hazard.
- When to seek professional help: For extremely large areas, heavily matted carpets with excessive embedded soil, or if you lack the appropriate high-quality vacuum, consider hiring professional carpet cleaners. They often use industrial-grade vacuums that can remove significantly more dry soil than typical household models.
- Estimated time and cost range: Thoroughly vacuuming an average 10×12 ft room (approx. 120 sq ft) can take anywhere from 20 to 45 minutes, depending on carpet pile and level of soil. The primary cost is electricity and potentially a new vacuum bag/filter, typically less than $5. This investment in time significantly improves the outcome of your subsequent wet cleaning, saving effort and money in the long run.
Step-by-Step: The Proven Pre-Vacuuming Process for Pros
For any reputable carpet cleaning service in 2027, pre-vacuuming is a well-defined and critical initial step. It’s not just a quick pass; it’s a systematic approach designed to maximize the removal of dry soil before any moisture is introduced. This methodical process ensures the deep cleaning stage can be as effective as possible.
Utilizing Commercial-Grade Equipment and Techniques
Professional pre-vacuuming goes far beyond a typical household vacuum. Experts use specialized tools and techniques to achieve superior results:
- High-Powered Commercial Vacuums: Professionals employ industrial-grade vacuums with significantly stronger suction and more efficient brush agitation than consumer models. These machines are designed to lift and extract deeply embedded dry soil, grit, and pet hair that household vacuums often miss. Many modern 2027 units feature HEPA filtration to trap fine particles effectively.
- Edge-to-Edge Coverage: A thorough pre-vacuum involves systematic passes across the entire carpeted area, ensuring no section is overlooked. This includes moving furniture where possible and using specialized crevice tools for edges and corners where debris often accumulates. They focus on high-traffic lanes where soil compaction is greatest.
- Pre-Agitation (Optional but Recommended): For heavily soiled carpets, some professionals might use a pile lifter or a rotary brush machine before vacuuming. This helps to mechanically agitate and loosen deeply embedded dry soil from the carpet fibers, making it easier for the vacuum to extract it. This step is particularly effective for carpets that haven’t been professionally cleaned in a while.
The Science Behind Effective Dry Soil Removal
The goal is to remove as much particulate matter as possible in its dry state. This makes the subsequent wet cleaning processes far more efficient and prevents the creation of detrimental mud.
- Preventing Mud Formation: Removing up to 80% or more of dry soil through powerful vacuuming means there’s significantly less material to turn into sludge when cleaning solutions are applied. This allows the cleaning agents to work directly on the oils and stains, rather than being absorbed by dirt.
- Optimizing Chemical Performance: With less dry soil present, the pre-spray solutions and rinse water can penetrate deeper into the carpet pile. This ensures the cleaning chemicals can fully emulsify stubborn oils and dirt without being diluted or neutralized by excessive dry debris. The result is a cleaner, residue-free finish.
- Enhancing Extraction Efficiency: When the carpet is pre-vacuumed, the extraction process becomes much more efficient. The vacuumed carpet contains less bulk to extract, allowing the powerful suction of the hot water extraction machine to remove dissolved soils and moisture more effectively. This leads to faster drying times and drastically reduces the chance of leaving sticky residues that attract new dirt.
What If Your Carpet Cleaner Doesn’t Vacuum First?
Encountering a carpet cleaning technician who bypasses the crucial pre-vacuuming stage raises significant concerns. This action directly contravenes established industry best practices, such as those outlined by the Institute of Inspection, Cleaning and Restoration Certification (IICRC) S100-2023 standards. Omitting this step can immediately reduce cleaning efficacy by 20-30%, leaving behind substantial dry particulate soil that resists wet extraction.
Immediate Service Discrepancy
When a cleaner skips pre-vacuuming, they leave behind abrasive dry soil, pet dander, and other debris. During wet cleaning, this loose material can turn into a muddy sludge, making proper removal extremely difficult and potentially creating more residue. This accelerates resoiling, meaning your carpets look dirty again much faster, negating the purpose of professional cleaning. Industry analytics from 2026 show that customer satisfaction plummets by 35% when pre-vacuuming is omitted due to perceived lack of thoroughness.
Addressing the Issue On-Site
If you observe a technician preparing for wet extraction without first vacuuming, politely inquire about their process. Reference professional guidelines, stating that proper pre-vacuuming is a foundational step for effective soil removal. A reputable cleaner will understand and correct the oversight. Document any conversations and the company’s response. Most professional service agreements, by 2027, explicitly include pre-vacuuming as part of their standard procedure.
Post-Service Recourse and Prevention
Should the service proceed without pre-vacuuming and you are dissatisfied with the results, contact the cleaning company immediately. Many professional firms offer service guarantees or satisfaction clauses. Request a re-service, emphasizing the deviation from standard practice and potential for accelerated resoiling. For future bookings, explicitly confirm that professional pre-vacuuming is included in the quoted service. Verify their adherence to IICRC standards for optimal results.
What If It Still Doesn’t Work? Advanced Troubleshooting 2027
Even after a professional cleaning, persistent issues like rapid resoiling, lingering odors, or deep-set stains can occur. When standard approaches fail, advanced troubleshooting is necessary.
- Re-evaluate Cleaning Methodology: For severely soiled or neglected carpets, standard hot water extraction might be insufficient. Consider alternative methods like encapsulation cleaning, which utilizes polymers to crystalize and encapsulate soil for later vacuum removal. According to 2026 data from the Carpet and Rug Institute (CRI), encapsulation can extend the apparent cleanliness of high-traffic commercial carpets by up to 40% compared to extraction alone.
- Investigate Residue Accumulation: The primary cause of rapid resoiling is often detergent residue left behind by improper rinsing. This sticky film attracts new dirt like a magnet. Perform a simple test: lightly mist a small, inconspicuous area with plain water and blot with a clean, white towel. If suds or a sticky film appear, residue is present. Professional post-cleaning rinses or encapsulation techniques can help mitigate this.
- Assess Subfloor Contamination: Deep-seated odors or stains that reappear might originate from the carpet padding or subfloor, particularly after water damage or pet accidents. This requires lifting a section of carpet to inspect the underlayment. Subfloor contamination cannot be resolved with surface cleaning alone and necessitates specialized restoration.
- Consider Carpet Lifespan and Fiber Damage: Carpets typically have a service life of 7-15 years, depending on traffic and maintenance. Heavily worn or older carpets with damaged fibers (e.g., split ends, crushed pile) lose their ability to shed soil effectively. No amount of cleaning will fully restore heavily damaged fibers, and replacement may be the only long-term solution.
When these steps don’t yield results, seeking professional consultation from a certified restoration specialist or a reputable carpet installer is recommended. They can perform advanced diagnostics, including moisture mapping and fiber analysis. Professional restoration, which might involve subfloor sealing or specialized odor removal, can range from $450 to $1,800 per room based on 2027 service rates, depending on the severity of the issue and location.
Conclusion: The Undeniable Pre-Vacuum Imperative
The role of pre-vacuuming in professional carpet cleaning is unequivocally critical. It’s the foundational step that ensures effective soil removal, prevents rapid resoiling, and prolongs carpet lifespan. According to verified research and expert sources like the IICRC, neglecting this initial dry soil removal significantly compromises the entire cleaning process. For optimal results and a truly clean carpet, always confirm that comprehensive pre-vacuuming is an integral part of your chosen carpet cleaner’s service protocol.
❓ Frequently Asked Questions
Why do professional carpet cleaners always emphasize pre-vacuuming?
Pre-vacuuming is critical because it removes up to 80% of dry soil, dust, and debris. This prevents these particles from becoming abrasive mud when moisture is introduced, ensuring a more effective and hygienic deep clean.
What are the negative consequences if a carpet cleaner omits the pre-vacuuming step?
Skipping pre-vacuuming results in a less thorough clean, as dry soil turns into a muddy slurry that’s difficult to extract. This can leave a sticky residue, accelerate re-soiling, dull carpet fibers, and potentially shorten the carpet’s lifespan by grinding abrasive particles into the pile.
How does proper pre-vacuuming contribute to the longevity of my carpet?
By removing abrasive dry particles before wet cleaning, pre-vacuuming significantly reduces wear and tear on carpet fibers. It prevents dirt from scratching and degrading the fibers, which helps maintain the carpet’s appearance and structural integrity over a longer period.
What should I ask a carpet cleaning service to confirm they follow best practices regarding pre-vacuuming?
When getting a quote, explicitly ask about their multi-step cleaning process and confirm that a thorough pre-vacuuming is included as a standard procedure. A professional service will readily explain this crucial step and its benefits.
Is there any scenario where a carpet cleaner might legitimately skip pre-vacuuming?
No, for a truly effective deep clean, a thorough pre-vacuum should never be skipped, regardless of the carpet’s initial appearance. Any cleaner omitting this step is cutting corners and providing an inferior service that won’t yield optimal results.
Can my own home vacuuming replace the professional’s pre-vacuuming?
While your home vacuuming is beneficial for routine maintenance, a professional pre-vacuum uses industrial-grade equipment designed to extract deeply embedded dry soil that typical residential vacuums often miss. It’s an additional, more intensive step in their cleaning protocol.