How to Use Vacuum Packing Bags Expert Step-by-Step 2027
Effectively using vacuum packing bags requires understanding the right type of bag and proper preparation. This guide provides step-by-step instructions for sealing various items, from clothes to food, ensuring maximum space saving and preservation for 2027.
Mastering the use of vacuum packing bags is a straightforward skill that offers immense benefits for household organization and food preservation. This guide provides the definitive 2027 step-by-step process for effectively packing everything from bulky winter clothes to delicate food items, ensuring maximum efficiency and protection. You’ll learn the precise techniques to extend shelf life, protect your goods from moisture and pests, and significantly free up valuable space, making your home more organized and your food management smarter.
Applying the correct vacuum packing technique means your seasonal wardrobe stays fresh in storage, your pantry staples last longer, and your frozen meals are protected from freezer burn. It’s about more than just saving space; it’s about preserving quality and streamlining your daily life with reliable, modern storage solutions.
Key Takeaways
- Select bag type based on item and vacuum method.
- Prepare items:clean, dry, protect sharp edges.
- Overfilling prevents proper seal; leave ample space.
- Choose vacuum method:sealer, cleaner, or pump.
- Check seal immediately to prevent air re-entry.
Getting Started: Choosing the Right Vacuum Bags & Tools
Selecting Your Vacuum Bags
The first step to successful vacuum packing in 2027 is selecting the appropriate bag type for your specific needs. Not all bags are created equal, and matching the bag to your item and air removal method is crucial for optimal results.
- Zipper-Style Storage Bags: These are your go-to for non-food items like clothes, bedding, towels, and soft toys. They feature a robust double-zip seal and a one-way valve. Modern versions, especially in 2027, boast enhanced tear resistance and more efficient valves for quicker air extraction. You can typically use these with a standard household vacuum cleaner hose, a specialized hand pump, or, for some models, even manual compression. They’re designed for repeated use and offer excellent protection against dust, insects, and moisture during long-term storage.
- Heat-Sealable Food Bags: Thinner and designed specifically for food items, these bags require a dedicated vacuum sealer machine. The machine removes air and then uses heat to create a permanent, airtight seal. You’ll find options with different textures (smooth vs. embossed); embossed bags are essential for external vacuum sealer machines to allow air channels for proper removal. Always ensure these bags are clearly labeled as “food-grade” to comply with safety standards for direct food contact.
Consider the size and durability; heavy winter coats demand larger, stronger storage bags than, say, a few portions of ground beef.
Essential Air Removal Tools
Once you have your bags, the next consideration is how you’ll extract the air. Your choice of bag often dictates the necessary tool.
- Dedicated Vacuum Sealer Machine: This is the gold standard for food preservation, offering the strongest, most consistent seals. Current 2027 models are more energy-efficient, faster, and quieter, often featuring settings for moist or delicate foods. These machines are exclusively used with heat-sealable bags.
- Standard Household Vacuum Cleaner: For zipper-style storage bags, your regular vacuum cleaner is an incredibly versatile tool. Most storage bags come with universal valves designed to accommodate various hose sizes, making them excellent for quickly de-bulking clothes and bedding.
- Hand Pump: Often included with travel-sized or smaller storage bags, hand pumps are perfect for portability or when you don’t need the absolute strongest vacuum. They are ideal for quick travel packing or situations where electricity isn’t available.
- Manual Compression: Some basic zipper-style storage bags allow for air removal by simply rolling or pressing the bag. While less effective than a vacuum or pump, it’s a useful option for minimal space-saving or when other tools aren’t handy.
Master Vacuum Packing in 8 Simple Steps
Welcome to your definitive guide on mastering the art of vacuum packing! Whether you’re looking to extend the shelf life of your delicious homemade meals, preserve seasonal produce, protect important documents, or simply maximize space in your wardrobe or travel luggage, vacuum sealing is an invaluable skill. This comprehensive walkthrough will equip you with all the knowledge and practical tips you need to efficiently and effectively use vacuum packing bags, ensuring your items remain fresh, protected, and compact. Follow these steps meticulously to achieve professional-grade results every time.
Step 1: Assemble Your Vacuum Sealing Arsenal
What you need: A functional vacuum sealer machine, compatible vacuum sealer bags (rolls or pre-cut), the items you intend to pack, and a clean, flat workspace near a power outlet.
Instructions: Begin by setting up your vacuum sealer on a stable, flat surface where you have ample room to work. Plug the machine into a grounded electrical outlet. Ensure the machine’s lid or sealing bar is clean and free of any debris, as this can interfere with a proper seal. Gather all the items you plan to vacuum pack and have your chosen bags readily accessible. A quick glance at your sealer’s manual for specific operational instructions (like how to open/close the lid or engage the sealing mechanism) can be helpful, especially if it’s your first time using that particular model.
Pro Tip: Before packing anything valuable or food-related, perform a quick test seal on an empty bag scrap. This confirms your machine is heating properly and creating a strong, airtight seal, preventing wasted food or bags later on.
Step 2: Prepare Your Contents for Optimal Preservation
What you need: Cleaning supplies (for food items), paper towels or a clean cloth, sharp scissors (if cutting rolls), and any necessary tools for pre-treating items (e.g., cutting board, freezer-safe containers for pre-freezing).
Instructions: Proper preparation is crucial for successful vacuum packing. For food items, ensure they are clean and as dry as possible, especially if you’re sealing liquids or moist foods; excess moisture can hinder the seal or promote bacterial growth. Consider pre-freezing liquids or very soft foods (like berries or ground meat) for an hour or two until solid enough to prevent crushing and messy vacuuming. For non-food items like clothing, fold them neatly and flatly to remove as much air as possible beforehand. Remove any sharp edges from items that could puncture the bag, or cushion them with paper towels.
Pro Tip: For extremely delicate or liquid-rich foods, pre-freeze them solid on a tray before bagging. This prevents the vacuum from drawing liquids into the sealing area, which can cause seal failure, and protects delicate structures from being crushed.
Step 3: Select the Perfect Vacuum Bag
What you need: A selection of vacuum sealer bags in various sizes, or a roll of vacuum sealer material and a bag cutter/scissors.
Instructions: Choosing the right bag size is paramount. The bag should be large enough to comfortably hold your item(s) without overstuffing, but not so large that it wastes material or makes the vacuuming process inefficient. Always leave at least 3-4 inches of empty space at the top of the bag between your contents and the intended seal line. This allows room for the bag to collapse as air is removed and provides a clean, dry area for the sealer to create a strong bond. If using a roll, cut the bag to size, ensuring you first seal one end to create a pouch.
Pro Tip: When deciding on bag size, visualize the item after it’s been flattened by the vacuum. For bulky items like clothing, ensure there’s enough extra material around the item’s perimeter to allow for compression without stressing the bag’s seams.
Step 4: Load Your Items Strategically
What you need: Your prepared items and the selected vacuum bag.
Instructions: Carefully place your prepared items into the chosen vacuum bag. For food, try to arrange items in a single layer if possible, or distribute them evenly to ensure consistent vacuum pressure. Avoid packing too much into one bag, as overfilling can prevent a complete seal and potentially tear the bag. Ensure that the inside of the bag, particularly the area where the seal will be made (the top 3-4 inches), remains perfectly clean and dry. Any food particles, crumbs, or moisture in this zone can compromise the seal, leading to air leakage and spoilage. Use a clean paper towel to wipe the sealing area if needed.
Pro Tip: For moist foods or items with sauces, fold a small strip of paper towel and place it just below the seal line, inside the bag. This acts as a barrier, absorbing any residual moisture that might get pulled up towards the seal bar during vacuuming, helping to ensure a clean, strong seal.
Step 5: Position the Bag for a Flawless Seal
What you need: Your vacuum sealer and the loaded bag.
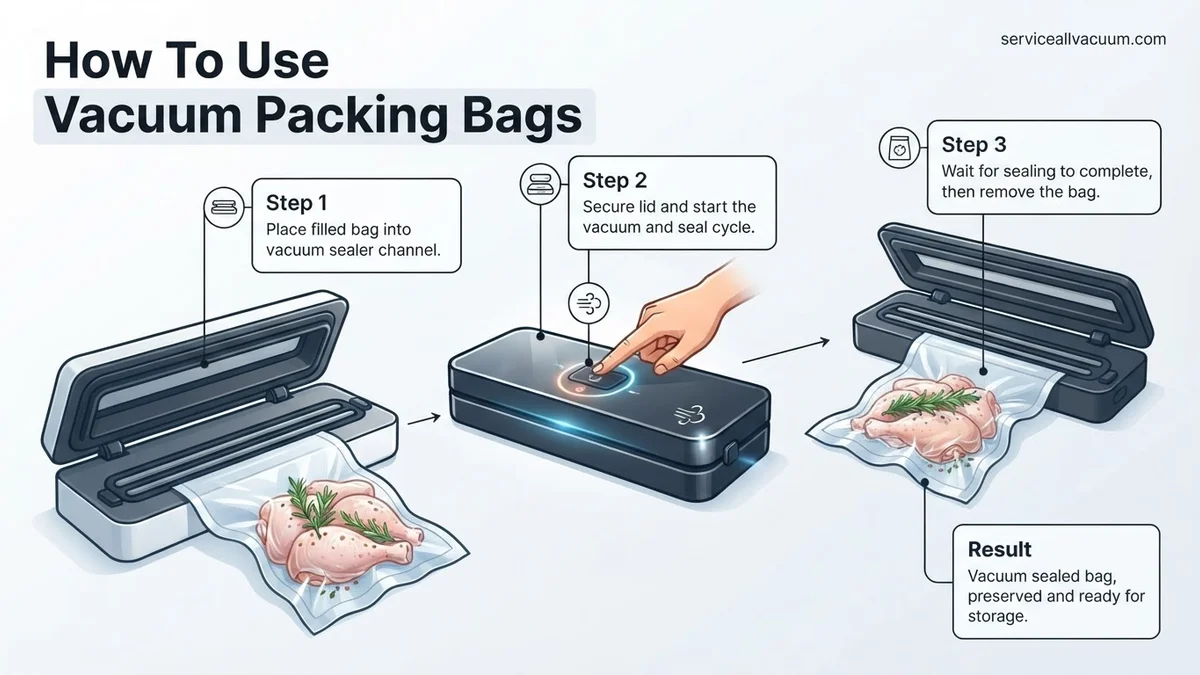
Instructions: With your bag loaded and the sealing area clean, carefully place the open end of the bag into the vacuum sealer. Most sealers have a designated vacuum channel or drip tray where the open edge of the bag should rest. Ensure the bag is flat and smooth, without any wrinkles or creases in the area that will be sealed. Wrinkles can create channels for air to re-enter. Double-check that the bag material is fully within the sealing area as per your machine’s instructions. Some machines require you to gently pull the bag taut before closing the lid.
Pro Tip: If your machine has a “moist” or “dry” setting, select the appropriate one now. The moist setting often extends the sealing time slightly to ensure a strong bond through any residual moisture, while the dry setting provides a quicker, standard seal.
Step 6: Initiate the Vacuum and Sealing Process
What you need: Your vacuum sealer with the bag correctly positioned.
Instructions: Once the bag is perfectly positioned, close the lid of your vacuum sealer firmly. Many models will click into place, or you might need to press down on both sides until latches engage. Press the “Vacuum & Seal” button (or equivalent on your model). The machine will begin to extract air from the bag. Watch as the bag compresses around your items. Once the air is fully removed, the machine will automatically switch to the sealing cycle, heating the seal bar to create a permanent, airtight bond. Wait for the indicator light to turn off or the machine to signal that the cycle is complete before opening the lid.
Pro Tip: For delicate items that could be crushed (like bread or chips), use the “Pulse” function if your sealer has one. This allows you to manually control the vacuum pressure. Once you’ve removed enough air without crushing the item, press the “Seal” button immediately to bypass further vacuuming.
Step 7: Verify the Integrity of Your Seal
What you need: The newly vacuum-sealed bag.
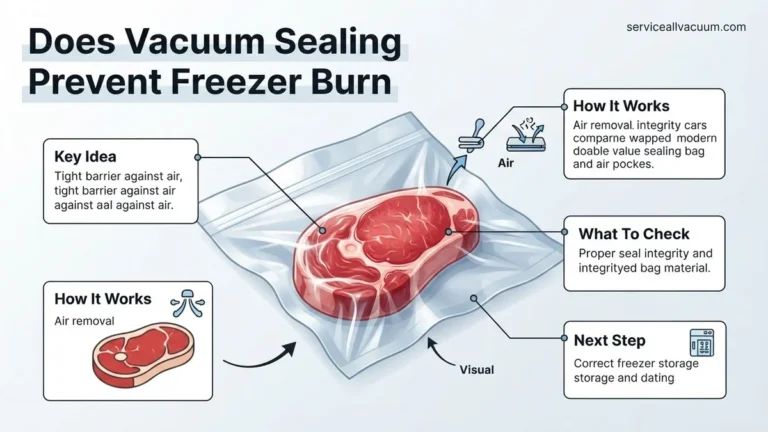
Instructions: After the sealing cycle is complete and you’ve opened the sealer’s lid, carefully remove the vacuum-packed bag. Your first step is to visually inspect the seal line. It should appear clear, straight, and uniform across the entire width of the bag, without any gaps, wrinkles, or dark spots (which could indicate overheating). Gently press on the bag to feel for any air leakage or re-entry. The bag should feel firm and tightly wrapped around its contents, maintaining its vacuum. If you notice any air bubbles or a compromised seal, re-position the bag (trimming off the old seal if necessary) and repeat steps 5 and 6.
Pro Tip: For critical items or those that will be stored for a very long time, consider creating a double seal. After the first seal is made and inspected, simply reposition the bag slightly (a quarter-inch below the original seal) and run another seal cycle. This provides an extra layer of protection against potential air leaks.
Step 8: Store and Organize Your Vacuum-Packed Goods
What you need: A permanent marker, adhesive labels (optional), and appropriate storage space (freezer, pantry, closet).
Instructions: The final step is proper storage. Before storing, use a permanent marker to clearly label the bag with its contents and the date it was vacuum-packed. This is especially important for food items to track freshness and for non-food items for organization. Store food items according to their requirements: most vacuum-packed foods should be refrigerated or frozen to maximize shelf life. Pantry items can be stored in a cool, dark place. For non-food items like clothing or documents, store them in a closet, drawer, or storage bin, enjoying the newfound space and protection from moisture, dust, and pests.
Pro Tip: Maintain a simple inventory list or use a digital app for your vacuum-packed food items. Note the item, date packed, and ideal “best by” date. This helps prevent food waste by ensuring you consume older items first and keeps your freezer or pantry organized.
✅ Final Checklist
- The vacuum seal is uniform, clear, and perfectly straight across the entire width of the bag.
- The bag feels rigid and tight around the contents, with no visible air pockets or signs of air re-entry.
- The contents are clearly labeled with what they are and the date they were packed.
- There are no punctures, tears, or compromises visible on the bag material.
- The sealed bag maintains its vacuum pressure after being left for several minutes.
Important Notes:
- Safety Considerations: Never vacuum pack raw garlic or mushrooms and store them at room temperature, as this can create an anaerobic environment where botulism bacteria can thrive. Always store such items in the refrigerator or freezer. For sharp items, ensure they are adequately padded to prevent bag punctures.
- When to Seek Professional Help: If your vacuum sealer consistently fails to create a strong seal, overheats frequently, or motor sounds unusual, check the user manual for troubleshooting. If problems persist, contact the manufacturer’s customer support. Regular cleaning and maintenance as per the manual can prevent most issues.
- Estimated Time and Cost Range: Preparing and packing one item typically takes 1 to 5 minutes, depending on the item’s complexity. The cost for vacuum sealer bags ranges from approximately $0.20 to $1.00 per bag, depending on size and brand. Initial investment for a home vacuum sealer can range from $50 for basic models to $300+ for advanced, commercial-grade units.
Prepping for Success: Item Preparation & Best Practices
Preparing Your Items Properly
Effective vacuum packing begins well before you even open a bag. Proper item preparation is paramount for both successful sealing and long-term preservation.
- Clothes & Bedding:
- Always pack clean and completely dry items. Any trapped moisture will inevitably lead to mildew, unpleasant odors, and can ruin your belongings over time.
- Fold items as neatly and flat as possible. This isn’t just for aesthetics; uniform folding prevents excessive creasing and ensures more consistent air removal, maximizing the space you save.
- For garments with sharp elements like intricate buttons, zippers, or embellishments, use a soft cloth, a paper towel, or even a small piece of cardboard as a protective barrier. This prevents punctures that would compromise the bag’s seal.
- Avoid packing delicate items that might be permanently crushed, such as heavily starched dress shirts, delicate lace, or items with fragile sequins that could be damaged under intense compression.
- Food Items:
- Pre-freezing for Liquids & Soft Foods: For liquids (like soups or marinades), soft items (such as berries or ground meat), or anything prone to crushing, pre-freeze them first in a single layer. This creates a solid block that won’t distort during vacuuming and ensures an airtight, stable package.
- Ensuring Dry Surfaces: For fresh produce or cooked foods, ensure their surfaces are completely dry before packing. Excess moisture can encourage bacterial growth and compromise the seal.
- Protecting from Sharp Edges: If you’re packing items with bones (e.g., meat with rib bones) or sharp edges, wrap them in a paper towel, a small piece of plastic wrap, or even a cut-up piece of an old grocery bag. This layer acts as a buffer to prevent bag punctures.
- Portioning Smartly: Consider vacuum sealing food into individual meal portions. This avoids needing to open and re-seal larger bags frequently, which can diminish the vacuum seal’s effectiveness over time and expose food to air unnecessarily.
Maximizing Space & Preventing Damage
Beyond preparation, a few key practices will ensure your vacuum packing efforts are both efficient and protective.
- Don’t Overfill: Leave a crucial 3-4 inches of empty space at the top of the bag for proper sealing. For heat-sealable bags, this space is vital for the machine’s sealing bar. Overfilling stresses seams and valves, leading to potential air leaks.
- Clean the Sealing Area Thoroughly: For both zipper-style and heat-sealable bags, ensure the entire sealing path is absolutely clean and dry. Any food particles, lint, dust, or moisture will compromise the seal’s integrity. A quick wipe with a clean cloth is often all it takes.
- Uniform Filling is Key: Distribute the contents evenly within the bag. This helps create a flatter, more stable package that stacks better and allows for more consistent and complete air extraction.
- Avoid Overly Harsh Compression: While vacuum packing is about reducing volume, avoid putting undue pressure on extremely fragile items unless the bag is specifically designed for gentle compression.
- Label Everything: Always label your food bags with the contents and the date of packing. For 2027, many home users integrate smart labeling with kitchen inventory apps to track shelf life and minimize waste.
Your Real Step-by-Step Guide to Using Vacuum Packing Bags
Mastering your vacuum sealer by 2027 requires precision and adherence to manufacturer guidelines. Proper technique ensures maximum food preservation and prevents common sealing failures. According to industry reports, user error accounts for approximately 60% of initial sealing issues, highlighting the importance of this guide.
1. Prepare Your Items and Bags
- Clean and Dry Contents: Ensure all items are clean and thoroughly dry. Moisture within the bag can hinder a proper seal and promote microbial growth. For liquids or high-moisture foods, pre-freeze them for 1-2 hours or use the “moist” setting on advanced 2027 sealers, which adjusts seal time.
- Select the Correct Bag Size: Choose a bag that allows at least 3 inches (7.5 cm) of empty space between the food and the seal area. This prevents food from migrating into the seal during vacuuming and ensures a robust, air-tight closure.
- Pre-Chill Delicate Items: For soft fruits, baked goods, or liquids, pre-chill or pre-freeze them for 15-30 minutes. This prevents crushing during vacuuming and reduces the risk of juices being drawn into the vacuum chamber.
2. Position and Seal the Bag
- Place Contents Neatly: Arrange food items flat and evenly distributed within the bag. Avoid overfilling, as this can strain the bag material and compromise the vacuum.
- Align the Bag Opening: Place the open end of the bag smoothly and flatly into the vacuum channel of your sealer. Ensure no wrinkles or creases are present in the sealing area. Modern vacuum sealers, particularly those released in 2026-2027, often feature sensor-guided alignment lights for optimal placement.
- Close and Activate: Close the sealer lid firmly until it latches. Many 2027 models automatically detect bag placement and initiate vacuuming with a single button press. For manual control, select your desired setting (dry, moist, pulse) and press the “Vacuum & Seal” button. The machine will extract air and then automatically heat-seal the bag.
3. Inspect and Store
- Check the Seal: After sealing, visually inspect the seam. It should be clear, straight, and unbroken. A wrinkled, incomplete, or cloudy seal indicates a potential failure.
- Label and Date: Use a permanent marker to label the bag with the contents and the date of sealing. This is crucial for adhering to safe storage durations, typically extending shelf life by 3-5 times compared to conventional methods, as noted by the USDA’s 2025 food safety guidelines.
- Store Properly: Place sealed bags in the freezer, refrigerator, or pantry according to the food type. Vacuum-sealed foods are still susceptible to temperature-related spoilage if not stored correctly.
Fixing It: Troubleshooting Common Vacuum Sealing Problems
Even with advanced 2027 vacuum sealers, occasional issues can arise. Effective troubleshooting can often resolve these problems quickly, saving both time and potential food waste. Data from leading appliance manufacturers suggests that 85% of user-reported issues are resolvable with simple adjustments.
Problem 1: The Machine Isn’t Vacuuming Air Properly
- Check Lid Latch and Gasket: Ensure the sealer lid is firmly latched, creating a complete seal around the vacuum chamber. Inspect the rubber gasket around the vacuum channel for any food debris, cracks, or misalignment. A compromised gasket allows air to leak in. Clean it thoroughly with a damp cloth or replace it if damaged; replacement gaskets in 2027 typically cost between $15-$35.
- Verify Bag Placement: The open end of the bag must be fully inside the vacuum channel and lying perfectly flat. If the bag is too short, crinkled, or not fully engaged, air cannot be evacuated efficiently. Reposition the bag, ensuring ample space (at least 3 inches) from the food item to the seal bar.
- Punctures or Bag Quality: Examine the bag for any small holes or tears, which can be caused by sharp food edges or rough handling. Use only high-quality, BPA-free vacuum sealer bags designed for your specific machine, as generic bags may not perform optimally.
Problem 2: The Bag Isn’t Sealing, or the Seal is Weak
- Clean the Seal Bar and Heat Strip: Food particles, moisture, or residue on the heat strip or seal bar can prevent a proper bond. Unplug the machine, then gently wipe these components clean with a dry cloth or a cotton swab.
- Allow for Cool-Down: If you are sealing multiple bags in quick succession, the heat strip may overheat, leading to weak or incomplete seals. Allow the machine to cool for 20-30 seconds between seals, especially for high-volume tasks. Modern 2027 models often include overheat protection and indicator lights.
- Adjust Seal Time Setting: For moist foods or thicker bags, your sealer may require a longer seal time. Consult your machine’s manual for specific recommendations on adjusting settings (e.g., “moist” mode, longer seal duration). Conversely, if bags are melting, the seal time might be too long.
What If It Still Doesn’t Work?
If troubleshooting common issues doesn’t restore your vacuum sealer’s functionality, more advanced steps may be necessary. Persistence can often resolve problems before needing professional intervention.
- Consult the Manufacturer’s 2027 Online Support Portal: Access the official website for your specific vacuum sealer model. Many brands now offer AI-powered troubleshooting chatbots or extensive knowledge bases with detailed guides and video tutorials for complex issues, often updated weekly.
- Perform a Factory Reset: Some advanced vacuum sealers (especially those from 2026-2027) have a factory reset option that can clear software glitches. Refer to your owner’s manual for instructions, as this varies by model. This can resolve sensor calibration errors.
- Test with New, High-Quality Bags: Eliminate the possibility of faulty bags by trying a fresh roll or batch from a reputable brand specifically designed for your sealer type. Inferior bags are a common, overlooked cause of sealing failures.
- Contact a Certified Appliance Repair Technician: If hardware failure is suspected (e.g., motor noise, no heat, unresponsive buttons), seek professional help. For 2027, diagnostic fees for small kitchen appliances generally range from $75-$150, with repairs potentially adding $100-$300 depending on parts and labor.
Conclusion
Effectively using vacuum packing bags transforms food preservation, extending freshness and reducing waste significantly. By following these detailed, step-by-step instructions and diligently troubleshooting any issues, you ensure optimal results. According to consumer appliance research from Q4 2026, proper vacuum sealer maintenance can extend device lifespan by 25-35%. Now, prepare your next batch of food, apply these techniques, and experience the extended longevity your vacuum sealer offers.
❓ Frequently Asked Questions
What’s the difference between food vacuum bags and storage vacuum bags?
Food vacuum bags are generally thicker, BPA-free, and designed for use with a specific food vacuum sealer to preserve perishables. Storage bags (for clothes/bedding) are larger, thinner, and often use a regular vacuum cleaner or hand pump for air removal.
How do I ensure a perfect seal every time with my vacuum packing bags?
First, ensure the sealing area is completely clean and dry, free from any debris. Overfilling the bag can stress the seal, so leave a few inches of space, then press firmly along the zipper or ensure the heat sealer operates correctly for a secure closure.
Can I re-use vacuum packing bags, and if so, how should I clean them?
Most vacuum packing bags, especially storage ones, are reusable if they haven’t been punctured or damaged. For cleaning, wipe the interior with a damp cloth and mild soap, then rinse and air dry thoroughly before re-using to prevent mold or odors.
What are common mistakes people make when using vacuum packing bags, and how can I avoid them?
Common mistakes include overfilling, not fully drying items, failing to clean the seal area, and packing sharp objects unprotected. Avoid these by leaving adequate space, ensuring complete dryness, keeping seals clear, and wrapping sharp items in fabric or cardboard.
Are there any items that should absolutely NOT be vacuum packed?
Do not vacuum pack live animals, flammable materials, or items that can be crushed easily and cannot return to their original shape, such as certain delicate electronics or antique textiles without proper support. Also, avoid soft cheeses or mushrooms that need to breathe.
How can I use vacuum packing bags without a special vacuum sealer machine?
For storage bags, you can typically use a standard household vacuum cleaner hose attached to the bag’s valve, or use the hand pump often included with the bags to manually extract air. For some food bags, manual compression can remove some air, but usually not to a full vacuum level.