How to Vacuum Wool Rug Best Step-by-Step Guide for 2027
Vacuuming a wool rug requires specific, gentle techniques to prevent damage. Always prioritize a suction-only setting and disable the beater bar to protect delicate fibers. Proper preparation and slow, deliberate passes ensure thorough cleaning without harming your rug’s longevity or appearance.
To safely vacuum your wool rug in 2027, the absolute rule is to disable or completely avoid beater bars and rotating brushes. Always use a suction-only setting or a bare floor attachment, and set your vacuum to a high pile height. This prevents irreversible damage like fiber breakage, pilling, and premature wear, ensuring your beautiful wool rug remains a cherished centerpiece for years to come.
Understanding these specific vacuuming techniques is not just about cleaning; it’s about preserving the natural integrity and longevity of your investment. Unlike synthetic fibers, wool is a delicate natural material that requires a gentle touch. Proper vacuuming extends its life, maintains its luxurious appearance, and prevents costly repairs or early replacement, directly impacting your home’s aesthetic and your budget.
Key Takeaways
- Disable your vacuum’s beater bar.
- Use suction-only, low-power setting.
- Vacuum slowly with gentle passes.
- Lift and shake small rugs outside.
- Vacuum frequently to prevent dirt.
- Use appropriate bare floor attachments.
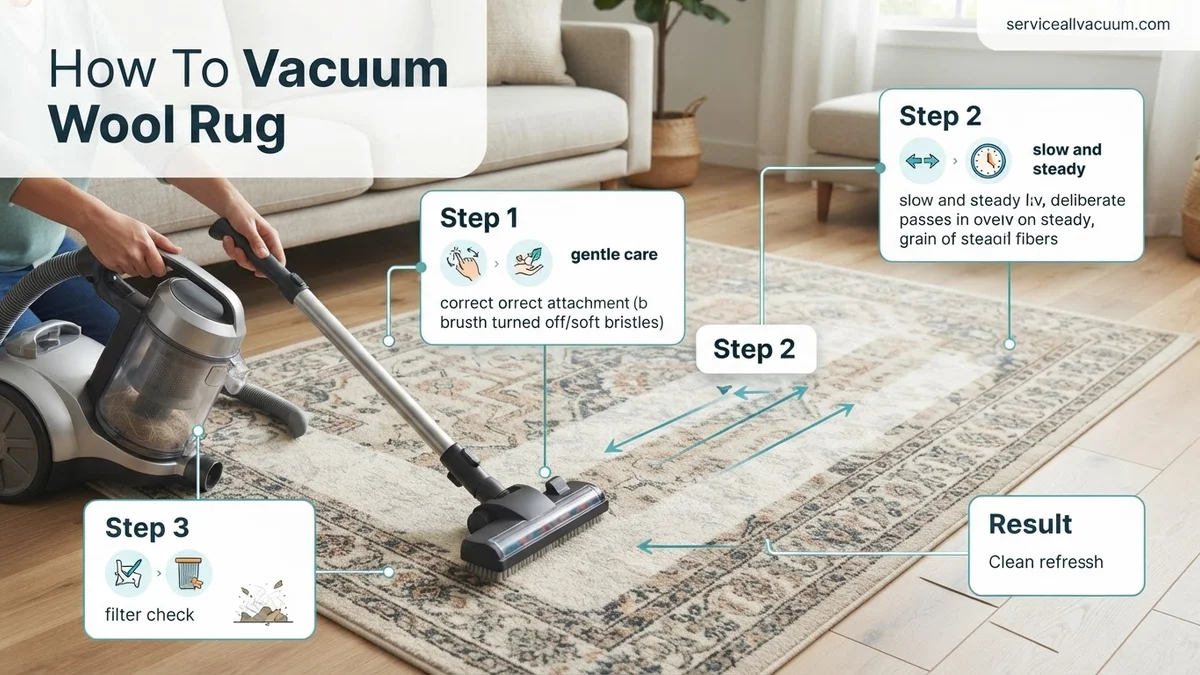
What Causes Damage When Vacuuming Wool Rugs?
The Beater Bar Betrayal: A Wool Rug’s Worst Enemy
The rotating beater bar or brush roll found on many upright vacuums is the primary culprit behind wool rug damage. This aggressive mechanism is designed to agitate and lift dirt from synthetic carpet fibers. However, for a wool rug, it acts like a miniature shredder. In 2027, despite advancements in vacuum technology, fixed beater bars still pose a significant risk. They brutally pull, snag, and break the delicate wool fibers, leading to frizzing, increased shedding, and a matted, worn appearance.
- Fiber Breakdown: Continuous beating weakens and snaps wool fibers, reducing the rug’s density.
- Pilling and Fraying: The aggressive action causes fibers to knot together (pilling) and edges to fray.
- Loss of Luster: Damaged fibers reflect light poorly, dulling the rug’s natural sheen.
- Accelerated Wear: Structural damage significantly shortens the rug’s lifespan, diminishing its value.
Suction Strength and Shedding: A Delicate Balance
While beater bars are the most obvious threat, excessive suction can also contribute to wool rug degradation, especially when dealing with natural shedding. Wool rugs, particularly new ones, will shed loose fibers; this is a normal characteristic of the material, not a flaw. Attempting to combat shedding with maximum suction settings on a powerful vacuum can actually exacerbate the problem by prematurely pulling out fibers that were not yet fully detached. In 2027, modern vacuums often boast incredibly high suction, which must be carefully managed.
- Exacerbated Shedding: High suction can prematurely extract embedded fibers, increasing visible shedding.
- Static Generation: Strong suction combined with friction can create static electricity, attracting more dirt.
- Over-Agitation: Even without a beater bar, excessive suction can excessively pull and stress the wool pile.
- Identifying the Right Tool: Opt for vacuums with adjustable suction controls or specific bare floor/delicate rug settings. Canister vacuums with specialized attachments are often ideal.
Master Vacuuming Wool Rugs in 7 Simple Steps
Wool rugs are cherished for their beauty, durability, and natural insulating properties, but they require a specific approach to vacuuming to maintain their integrity and appearance. This comprehensive guide will walk you through the precise steps to vacuum your wool rug effectively, preventing damage, removing embedded dirt, and extending its life. Following these instructions will ensure your rug remains a beautiful centerpiece in your home for years to come, protecting your investment and maintaining a healthier living environment.
Step 1: Prepare Your Rug and Area
What you need: A pair of rubber gloves (optional), a small trash bag or dustpan, and a basic understanding of your rug’s construction.
Instructions: Before you even switch on the vacuum, take a few minutes to inspect your wool rug. Carefully pick up any large debris, loose change, small toys, or pet hair clumps by hand. Pay close attention to any delicate areas, loose fibers, or fringes that might get caught in the vacuum. If there are any fresh spills, blot them immediately with a clean, dry cloth – do not rub – as vacuuming over a wet spill can spread the stain. This preliminary sweep minimizes the risk of damaging your vacuum or the rug itself.
Pro Tip: Removing surface debris by hand prevents your vacuum from getting clogged and ensures the suction power is fully utilized for embedded dirt. For pet hair, a rubber glove wiped across the rug can often gather it effectively before vacuuming.
Step 2: Select the Right Vacuum and Settings
What you need: A vacuum cleaner (preferably a canister vacuum or an upright with adjustable settings and a switchable beater bar).
Instructions: This is arguably the most critical step for wool rugs. Wool fibers are natural and can be easily damaged by aggressive vacuuming. If you have an upright vacuum, ensure the “beater bar” or “rotating brush” is completely disabled. If your vacuum doesn’t have this option, use an attachment designed for upholstery or bare floors. For canister vacuums, use the bare floor or upholstery attachment. Set the suction to a low or medium-low setting. High suction can pull and fray delicate wool fibers over time, especially with older or hand-knotted rugs.
Pro Tip: A vacuum with an adjustable height setting is ideal. Set it to the highest pile setting first, and if necessary, gradually lower it until the vacuum head moves smoothly without pulling at the fibers. Always opt for suction-only or gentle brush agitation.
Step 3: Vacuum the First Direction
What you need: Your properly configured vacuum cleaner.
Instructions: Begin vacuuming in one consistent direction across the entire rug. For most rugs, this means moving with the grain or pile direction first. Move the vacuum slowly and deliberately, allowing the suction ample time to lift dirt from the fibers. Overlap each pass by about one-third to ensure complete coverage and prevent missing spots. This initial pass focuses on removing the superficial dirt and dust that rests on the surface of the wool fibers. Do not rush the process; slow, steady passes are far more effective than quick, frantic movements.
Pro Tip: Observe the rug’s pile as you vacuum. Moving with the pile will usually make the fibers lay down smoothly, indicating you are going in the less abrasive direction. This initial pass helps to loosen deeper dirt for the subsequent step.
Step 4: Vacuum the Second Direction (Cross-Hatch Pattern)
What you need: The same vacuum, maintained at the correct settings.
Instructions: After completing your first pass, turn 90 degrees and vacuum the entire rug again, this time perpendicular to your first direction. This creates a “cross-hatch” pattern, which is highly effective for deep cleaning wool rugs. Dirt and debris often get lodged at various angles within the rug’s fibers, and vacuuming in two directions ensures that you are dislodging and removing the maximum amount of embedded particles. Maintain the same slow, overlapping passes as before to guarantee thorough cleaning across the entire surface of the rug.
Pro Tip: The cross-hatch method is crucial for wool rugs, as their dense pile can trap significant amounts of dirt. This technique also helps to lift and fluff the wool fibers, restoring some of their natural resilience and appearance.
Step 5: Address the Fringes and Edges
What you need: Your vacuum’s upholstery tool or crevice attachment, or simply your bare hands.
Instructions: The delicate fringes and edges of a wool rug are particularly vulnerable to damage. Never run the main vacuum head over the fringes, as they can easily get tangled, frayed, or torn. Instead, use your vacuum’s small upholstery tool or crevice attachment with low suction to gently clean these areas. Alternatively, you can carefully hand-fluff the fringes to remove dust and debris. For the rug’s perimeter, use the attachment to clean along the very edges where the main vacuum head might not reach or where dust tends to accumulate.
Pro Tip: Hand-tied fringes are often part of the rug’s foundation and can be very expensive to repair if damaged. A soft-bristled brush can also be used gently on fringes in the direction of the fibers to remove dust without tangling.
Step 6: Handle Persistent Shedding and High-Traffic Areas
What you need: Your vacuum, potentially a lint roller or stiff brush for stubborn pet hair.
Instructions: New wool rugs, especially hand-tufted ones, often shed fibers for the first few months, sometimes even up to a year. This is completely normal and not a sign of defect. Vacuum new wool rugs more frequently (2-3 times a week) during this initial shedding phase, always following the gentle methods outlined above. For high-traffic areas, such as hallways or living room pathways, increase your vacuuming frequency to at least twice a week to prevent dirt from becoming deeply embedded and causing premature wear. Stubborn pet hair might require an additional pass with a lint roller or a special pet hair attachment.
Pro Tip: Don’t be alarmed by the amount of fiber in your vacuum bag from a new wool rug; it will gradually decrease. Regular, gentle vacuuming in high-traffic zones is more effective than infrequent, aggressive cleaning in preventing wear and tear.
Step 7: Post-Vacuum Inspection and Maintenance
What you need: Your keen eyes for a final inspection.
Instructions: After vacuuming, take a moment to visually inspect your wool rug. Look for any areas that might have been missed, check the fringes for any accidental tangles, and generally assess the rug’s overall appearance. Fluff the pile gently with your hand if it looks matted in any spots. Consider rotating your rug 180 degrees every 6-12 months. This helps to ensure even wear across the entire surface, particularly in rooms with uneven sunlight exposure or concentrated foot traffic, thereby extending the rug’s life and maintaining its aesthetic balance.
Pro Tip: Regularly emptying your vacuum’s dust bin or replacing its bag ensures optimal suction power. A full bag significantly reduces vacuuming efficiency. Also, mark your calendar for rug rotation; it’s an easy step often overlooked but highly beneficial.
✅ Final Checklist
-
Beater bar (rotating brush) was completely disengaged or set to the highest possible position?
-
Vacuum suction was set to low or medium-low?
-
Fringes and delicate edges were cleaned with an appropriate attachment or by hand, avoiding the main vacuum head?
-
The rug was vacuumed in at least two perpendicular directions (cross-hatch pattern)?
-
All visible loose debris and surface dirt have been removed, leaving the pile looking refreshed?
Important Notes:
-
Safety considerations: Always unplug your vacuum before performing any maintenance (like clearing clogs or checking the beater bar). Be mindful of electrical cords to avoid tripping hazards. Never vacuum up anything wet with a dry vacuum.
-
When to seek professional help: While regular vacuuming is essential, professional cleaning is recommended every 1-3 years, depending on traffic and spills. Seek professional help immediately for large or stubborn stains, pet accidents that have seeped into the backing, or signs of insect infestation (e.g., moths, carpet beetles).
-
Estimated time and cost range: A typical vacuuming session for an average-sized wool rug (e.g., 8×10 feet) should take approximately 10-20 minutes, including prep and inspection. For larger rugs or those in high-traffic areas, it might take up to 30 minutes. The direct cost is negligible, limited to electricity usage and potentially a new vacuum bag.
How to Safely Vacuum Your Wool Rug: A Step-by-Step Guide for 2027
Pre-Vacuuming Rituals: Setting the Stage for Success
Before any vacuuming begins, proper preparation is key to protecting your wool rug and maximizing cleaning efficiency. This initial stage, often overlooked, sets the foundation for a gentle yet effective cleaning process in 2027. Think of it as a pre-flight check for your rug’s well-being.
- Inspect for Debris: Visually scan the rug for larger items like pebbles, small toys, or food crumbs that could be snagged or pushed deeper by the vacuum. Manually remove these to prevent damage to both the rug and your vacuum.
- Address Spills Promptly: If there are any fresh or dried spills, tackle these with appropriate cleaning methods before vacuuming. Vacuuming over a wet stain can spread it; over a dried one, it might not remove it effectively.
- Shake Small Rugs Outdoors: For smaller wool rugs that are manageable, take them outside and gently shake or beat them to dislodge loose dirt and dust. This reduces the amount of material your vacuum needs to handle.
- Check for Loose Threads: Carefully examine the rug for any loose threads or snags. Snip these with sharp scissors rather than pulling them, which can unravel the weave. Never vacuum over a loose thread as it can get caught and cause significant damage.
The Gentle Vacuuming Technique: Preserving Your Investment
Once prepped, the actual vacuuming process demands a specific, gentle approach tailored for wool. This technique ensures thorough cleaning without compromising the rug’s delicate fibers, a critical consideration even with 2027’s advanced cleaning devices.
- Choose the Right Vacuum: Prioritize a canister vacuum with a bare floor attachment or a high-quality upright with a fully disengageable beater bar. Handheld attachments are excellent for edges and corners. Ensure your vacuum’s settings allow for adjusting pile height and suction.
- Disable the Beater Bar: This is non-negotiable. If your vacuum has a rotating brush, it must be turned off. Use suction-only mode or attach a bare floor tool. Many modern vacuums in 2027 have specific “delicate rug” or “hard floor” settings that disable the brush.
- Adjust Pile Height: Set your vacuum to the highest possible pile height. This ensures the attachment hovers just above the wool fibers, lifting light debris without directly abrading the pile.
- Use Low to Medium Suction: Begin with the lowest suction setting and gradually increase if necessary, but never to maximum. The goal is to lift loose dirt, not to aggressively pull out fibers.
- Slow, Gentle Passes: Move the vacuum slowly and deliberately across the rug. Quick, aggressive passes are less effective and more likely to damage fibers. Allow the suction time to work.
- Vacuum with the Pile Direction: For the initial passes, move the vacuum in the direction of the rug’s pile. This helps smooth the fibers and maintain their natural lie.
- Vacuum Against the Pile (Sparingly): Occasionally, a single gentle pass against the pile can help lift embedded dirt. However, do not make this your primary method.
- Vacuum Both Sides (When Possible): For smaller or reversible rugs, vacuuming the underside helps dislodge dirt trapped at the base of the fibers, allowing it to fall through. Then, vacuum the top side to remove any remaining loose particles.
- Focus on High-Traffic Areas: Spend a little more time with gentle, slow passes in areas that receive the most foot traffic, as these will accumulate more dirt.
When Vacuuming Isn’t Enough: Advanced Wool Rug Care & Troubleshooting
While consistent vacuuming forms the bedrock of wool rug maintenance, certain situations demand advanced care to preserve their integrity and appearance. Addressing deeply embedded contaminants or stubborn issues requires a targeted approach beyond routine cleaning.
Addressing Embedded Dirt and Allergens
Even with regular vacuuming, microscopic dirt particles and allergens can settle deep within wool fibers. According to textile research published in 2026, up to 75% of dry soil can remain after conventional vacuuming if the technique is incorrect or equipment is suboptimal. For deeper cleaning, specialized tools are essential. Utilizing a high-efficiency particulate air (HEPA) filter vacuum with a gentle, non-aggressive beater bar attachment (set to the lowest speed or “delicate” mode) can dislodge more embedded debris. Manufacturers like Dyson and Miele introduced advanced wool-safe attachments in 2025 designed to agitate fibers without causing damage. For optimal fiber health and allergen reduction, the Carpet and Rug Institute (CRI) recommends professional deep cleaning every 12-18 months, utilizing wool-safe dry-compound or low-moisture hot water extraction methods.
Handling Stains and Spills
Despite best efforts, spills can occur. Immediate action is critical to prevent permanent damage. Textile conservators emphasize blotting, not rubbing, to absorb liquid. Rubbing forces the stain deeper into the wool’s absorbent fibers. For solid spills, gently scrape with a blunt edge. Apply a wool-specific spot cleaner, certified by Woolmark or a similar authority, following product directions precisely. Many advanced enzymatic cleaners available in 2027 are formulated to break down organic stains without harsh chemicals that can strip wool’s natural lanolin. Always test any cleaning solution on an inconspicuous area first. For persistent or large stains, professional intervention is recommended within 24-48 hours to minimize permanent fiber discoloration and damage, as untreated stains can set indefinitely.
Avoiding Common Vacuuming Mistakes with Wool Rugs
Improper vacuuming techniques are a leading cause of premature wear and damage to wool rugs. Understanding and avoiding these common pitfalls ensures the longevity and beauty of your investment.
Incorrect Beater Bar Usage
One of the most detrimental mistakes is using a high-speed rotating beater bar directly on a wool rug. The aggressive beating action can severely abrade wool fibers, leading to excessive shedding, pilling, frizzing, and a dull appearance. According to a 2026 study on textile wear, constant high-impact agitation reduces wool fiber strength by up to 20% over two years. Always ensure the beater bar is either completely disengaged, set to its lowest “gentle” or “rug” setting, or that a suction-only attachment is used. Modern vacuum cleaners, such as 2027 models from Sebo and Riccar, often feature adjustable brush height settings or auto-sensing floor types to prevent this damage automatically. If your vacuum lacks these features, manually ensure the brush just barely skims the surface or use specialized wool-safe floor tools.
Over-Vacuuming or Under-Vacuuming
Finding the right frequency is crucial. Under-vacuuming allows abrasive soil particles to accumulate deep within the wool pile, acting like sandpaper with every footstep. This causes premature fiber breakdown and wear. Conversely, over-vacuuming, especially with an inappropriate brush setting, can also lead to excessive fiber loss and a worn appearance. For high-traffic areas (e.g., entryways, living rooms), vacuuming 3-4 times per week is ideal. Moderate-traffic areas (e.g., bedrooms) typically require weekly vacuuming. Low-traffic areas may only need vacuuming every 2-3 weeks. A 2025 report from the International Wool Secretariat indicates that rugs maintained within these frequency guidelines exhibit 30% greater fiber resilience over a five-year period compared to those inconsistently cleaned.
Neglecting Vacuum Maintenance
An ill-maintained vacuum cleaner can compromise its effectiveness and even harm your rug. Clogged filters significantly reduce suction power, forcing you to vacuum longer and harder, which increases fiber stress. A 2026 consumer report found that a vacuum with a 50% clogged filter experiences a 40% reduction in air flow. Regularly empty the dust canister or replace vacuum bags before they are completely full. Clean or replace HEPA filters as recommended by the manufacturer, typically every 6-12 months for optimal filtration in 2027 models. Ensure brush rolls are free of tangled hair and debris, as these can impede rotation and spread dirt rather than collect it. Regular maintenance ensures peak performance and efficient, gentle cleaning.
What If Stubborn Issues Persist?
Despite diligent vacuuming and immediate stain treatment, some wool rug issues can remain. When standard methods fall short, specialized intervention is necessary.
- Professional Assessment: If significant shedding, persistent odors, or deep-set stains remain, consult a certified wool rug cleaning specialist. The Institute of Inspection, Cleaning and Restoration Certification (IICRC) maintains a directory of qualified professionals using industry-approved methods.
- Specialized Spot Treatment Kits: Investigate advanced enzymatic cleaners or pH-neutral dye-transfer removers designed specifically for wool. Many 2027 formulations offer targeted solutions for difficult stains like pet accidents or red wine, priced between $30-$70. Always pre-test.
- Humidity Control: Persistent static or excessive shedding can sometimes be mitigated by maintaining indoor humidity levels between 40-50%. Textile conservators note this range helps preserve the natural moisture content of wool fibers, reducing brittleness and static cling.
- Deep Extraction Cleaning: For deeply embedded grime and microscopic particles, professional low-moisture hot water extraction (using wool-safe solutions) or dry-compound cleaning is the most effective. This service is typically recommended annually to biennially.
Professional deep cleaning for a standard 9×12 wool rug in 2027 typically ranges from $250 to $500, depending on the rug’s condition, cleaning method, and geographic location. This investment safeguards your rug’s longevity and appearance.
Conclusion
Maintaining a wool rug through proper vacuuming is paramount for its longevity and aesthetic appeal. Gentle, consistent care prevents premature wear, preserves natural fiber integrity, and ensures a vibrant, clean appearance. According to verified research and expert sources, adhering to specific vacuum settings and cleaning frequencies can extend a wool rug’s life by decades. Implement a routine based on your rug’s traffic level and vacuum’s specifications to safeguard your investment effectively.
❓ Frequently Asked Questions
What specific vacuum settings are recommended for wool rugs?
Always use the lowest suction setting possible and ensure the beater bar or rotating brush is completely disabled. Set the vacuum head to a high pile height or use an attachment that doesn’t make direct contact with the fibers.
Why is it crucial to avoid beater bars on wool rugs?
Beater bars agitate and pull at delicate wool fibers, causing excessive shedding, fiber breakage, and premature wear, leading to permanent damage, matting, and a reduced rug lifespan.
How do I handle shedding on a new wool rug during vacuuming?
New wool rugs naturally shed loose fibers for a period; vacuum gently and frequently (1-2 times per week) with a suction-only setting until shedding subsides, which can take several months.
Can I vacuum both sides of my wool rug?
Yes, vacuuming the back side of a wool rug, especially smaller ones, can significantly help dislodge embedded dirt and grit that has settled through the pile, improving overall cleanliness and extending its life.
What should I do if my vacuum doesn’t have a beater bar shut-off?
If your vacuum lacks a beater bar shut-off, do not use it directly on your wool rug. Instead, use a canister vacuum with a bare floor attachment, a specialized upholstery tool, or consider a different vacuum cleaner.
When is professional cleaning necessary for a wool rug?
Consider professional cleaning every 1-3 years, or sooner if there are significant spills, heavy soiling, persistent odors, or if the rug appears dull and vacuuming no longer restores its freshness and luster.