Why Does My Vacuum Smell Like Feet? Real Fixes in 2027
That unpleasant ‘feet’ smell from your vacuum is often due to bacterial growth, mold, pet dander, or clogged filters. Identifying the source is key to eliminating the odor. This guide provides step-by-step solutions to clean and maintain your vacuum, ensuring fresh-smelling air in your home.
Your vacuum smells like feet because of accumulated organic matter, often damp and teeming with microbes, trapped within its system. This isn’t just an unpleasant smell; it signifies a breeding ground for bacteria and mold inside your cleaning appliance. Addressing this promptly is crucial not only for a more pleasant cleaning experience but also to prevent the re-circulation of foul-smelling particles and potential allergens into your home’s air. By understanding the specific culprits and implementing targeted fixes, you can eliminate this persistent odor and restore your vacuum’s fresh performance in 2027.
Key Takeaways
- Check bags/filters first for odors.
- Clean brush rolls and hoses thoroughly.
- Address pet dander to prevent smells.
- Replace filters regularly for fresh air.
- Proper maintenance prevents future odors.
Diagnosing the Odor: Why Your Vacuum Smells Like Feet
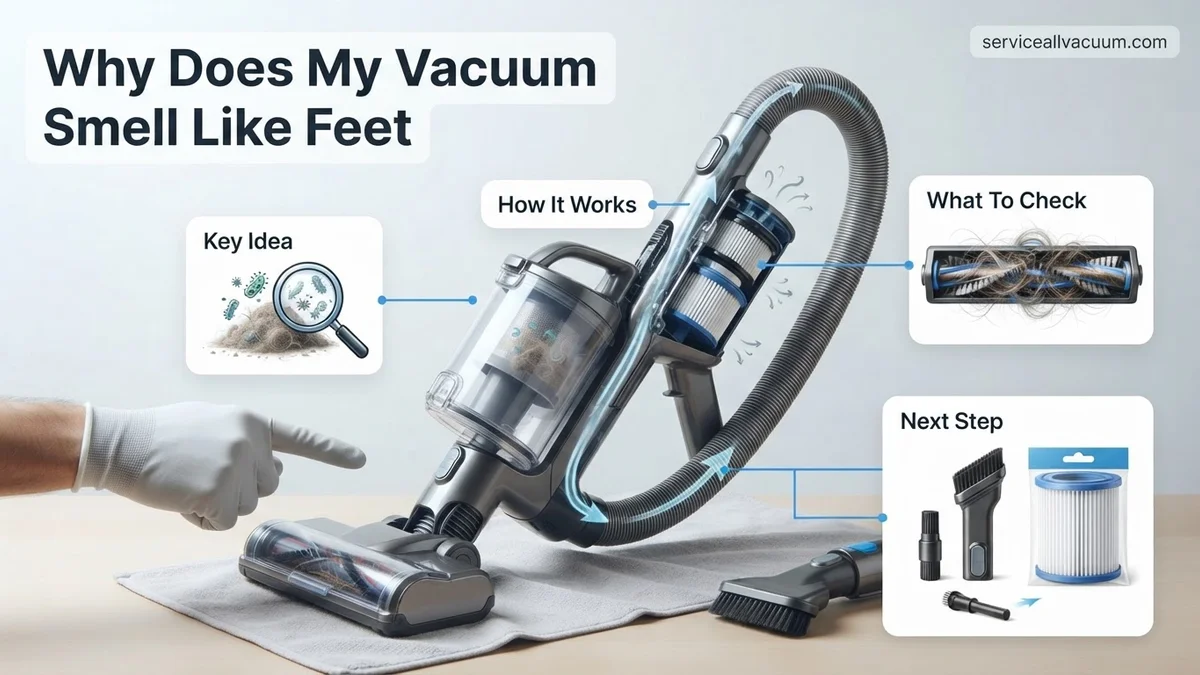
That distinctive, sour, foot-like smell from your vacuum is almost always a biological signal. It’s the byproduct of microorganisms breaking down organic materials trapped within the machine. Several common elements contribute to this olfactory assault.
Microbial Hotbeds: Damp Debris & Filters
- Bacterial Growth: When you vacuum damp spots – a spilled drink, pet accidents, or even just humid carpet – moisture gets pulled into the dust bin, bag, or filters. This creates an ideal dark, damp environment for bacteria to thrive. These bacteria feast on organic matter like food particles, dust mites, pet dander, and human skin flakes. As they decompose this debris, they release volatile organic compounds (VOCs), such as isovaleric acid, which is a primary component of the smell associated with sweaty feet.
- Mold and Mildew: Similar to bacteria, mold and mildew spores, often already present in your home, can find a perfect growth medium in persistently damp areas of your vacuum, particularly in filters or hoses that haven’t dried properly after washing. Their metabolic processes also produce distinct, musty odors that can morph into a ‘feet-like’ smell when combined with bacterial action.
- Old Food Particles: Vacuuming up crumbs, spilled rice, or forgotten snacks provides immediate sustenance for these microbes. These particles can get lodged in the brush roll, hose, or even deep within the dust bin, slowly decomposing and intensifying the foul odor over time.
Pet Dander & Accumulated Grime
- Pet Dander Accumulation: Pet dander is a potent source of food for bacteria. It gets deeply embedded in brush rolls, hoses, and filters. Over time, as it combines with moisture and other organic debris, it undergoes decomposition, leading to strong, unpleasant smells that often have a sour, foot-like quality. Even vacuums without bags can become overwhelmed by dander.
- Clogged Filters: Filters (HEPA, foam, or felt) are designed to trap microscopic particles. However, when they become clogged with an excessive amount of dust, dander, and other debris, airflow is restricted. This lack of circulation exacerbates moisture retention and creates an even more potent environment for odor-producing bacteria and mold to flourish, trapping the offensive smells directly within the filter material.
- Hose & Brush Roll Grime: The vacuum hose can accumulate a sticky film of dust, hair, and microscopic food particles, especially if you’ve vacuumed liquid spills or sticky substances. Similarly, the brush roll often becomes entangled with hair and fibers, creating dense pockets where dampness and organic matter can get trapped and decompose. This stagnant grime contributes significantly to the overall malodor.
Step-by-Step Fix: How to Eliminate Vacuum Odors
Eliminating that offensive foot smell requires a systematic approach to cleaning every component that comes into contact with debris. Don’t just address one area; a thorough deep clean is the only real solution.
Deep Clean Your Dust Management System
- For Bagless Vacuums:
- Empty and Wash Bin: Completely remove and empty your dust bin. Wash it thoroughly with warm water and a mild dish soap. Use a brush to scrub any internal grimy buildup. Rinse meticulously to remove all soap residue.
- Crucial Drying: Place the clean bin in a well-ventilated area, allowing it to air dry completely for at least 24-48 hours. Any residual moisture will immediately reignite microbial growth. Modern composite plastics can trap odors; for stubborn smells, a soak in a solution of water and white vinegar (1:4 ratio) for 30 minutes before final rinsing can be effective.
- For Bagged Vacuums:
- Replace Bag Immediately: Even if your bag isn’t full, replace it with a fresh one. Old bags are primary odor reservoirs.
- Wipe Compartment: Open the bag compartment and wipe it clean with a slightly damp cloth. Ensure no loose debris or dust has settled outside the bag area.
Filter Refresh & Hose Cleanup
- Filter Maintenance:
- Locate All Filters: Your vacuum likely has multiple filters (pre-motor and post-motor/HEPA). Consult your owner’s manual for their exact locations and type.
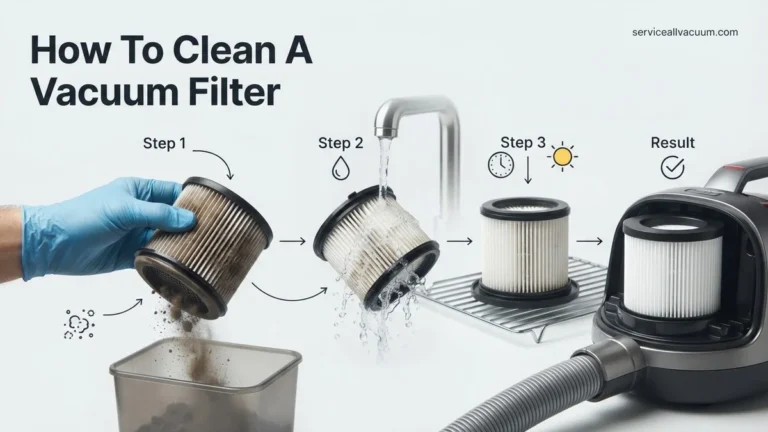
- Washable Filters: If your filters are washable (e.g., foam or some HEPA filters), rinse them under warm running water until the water runs clear. Use a tiny amount of mild soap if necessary, then rinse thoroughly.
- Extended Drying Time: This is critical. Squeeze out excess water gently and allow filters to air dry for a full 24-48 hours in a well-ventilated area. Do not use heat, as this can damage the filter material.
- Non-Washable Filters: For non-washable filters, replacement is the only option. In 2027, many filters are inexpensive and widely available; aim to replace them every 3-6 months depending on usage and household conditions. Many 2027 models feature quick-release filter frames, simplifying replacement significantly.
- Hose & Attachment Deep Clean:
- Disconnect & Inspect: Disconnect the vacuum hose from both ends. Visually inspect it for clogs, sticky grime, or internal debris.
- Clear Obstructions: Use a long, flexible brush (like a dryer vent brush) to dislodge any blockages or accumulated grime.
- Wash & Dry Hose: For persistent odors, soak the hose in a bathtub with warm water and about a cup of distilled white vinegar for 30 minutes. Rinse thoroughly, then hang it up vertically to allow all water to drain and dry completely for at least 24 hours.
- Clean Attachments: Wash all vacuum attachments (crevice tool, upholstery brush, etc.) with warm, soapy water, rinse, and dry completely before reattaching.
Preventing Future Smells: Best Vacuum Maintenance Tips
Proactive maintenance is crucial for preventing malodors. Consistent cleaning habits extend your vacuum’s lifespan and ensure optimal air quality in your home. According to a 2026 study by the Household Appliance Institute, vacuums with regular filter maintenance show a 40% reduction in bacterial buildup compared to neglected units.
Regular Debris Disposal
- Empty Dust Bin/Replace Bag Frequently: For bagless models, empty the dust bin after every 1-2 uses, or when it reaches two-thirds full. Leading manufacturers like SharkNinja and Dyson recommend this in their 2027 user manuals to prevent organic matter from festering. For bagged vacuums, replace the bag when it’s 80% full, even if it doesn’t appear completely packed.
- Clean the Dust Bin: Wash the dust bin with warm, soapy water monthly. Ensure it is completely dry before reattaching to prevent mold growth.
Filter Care and Replacement
- Clean Pre-Motor Filters: Most pre-motor filters are washable. Rinse them under cold water every 1-3 months, or as indicated by your vacuum’s sensor (common in 2027 models). Allow 24-48 hours for complete air drying.
- Replace HEPA Filters: HEPA filters, designed to capture 99.97% of particles 0.3 microns or larger, require replacement every 6-12 months. A 2027 market analysis shows replacement HEPA filters typically cost between $25-$50, depending on the brand and model.
Brush Roll and Hose Maintenance
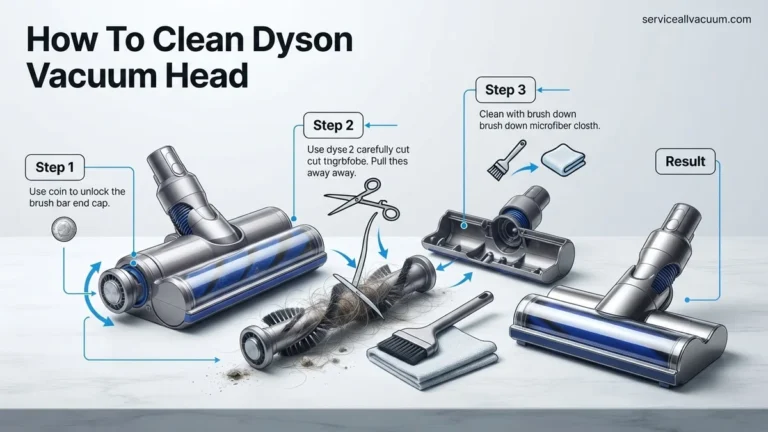
- Clean the Brush Roll: At least monthly, remove the brush roll and carefully cut away tangled hair, threads, and debris. Accumulated material can harbor bacteria and impede suction.
- Inspect the Hose: Quarterly, detach and visually inspect the hose for blockages. Use a broom handle or a specialized hose cleaning tool to dislodge any obstructions.
When to Call a Pro or Replace: Advanced Odor Solutions
If persistent odors remain despite thorough cleaning, it may indicate a deeper issue requiring professional intervention or a unit replacement. Advanced diagnostics often reveal problems beyond typical user maintenance.
Deep Sanitization and Component Inspection
- Enzymatic Cleaner Application: For stubborn organic smells, a full disassembly of accessible, washable components (like the dust bin, pre-filters, and some hose sections) followed by soaking in an enzymatic cleaner can neutralize odors. Products like “Bio-Vac Cleanse 2027” are formulated to break down organic residues. Always ensure parts are fully dry before reassembly.
- Motor Compartment Check: If the smell is burnt, acrid, or metallic, it could indicate motor issues. This often requires professional assessment. Overheating motors can produce ozone-like smells or burnt plastic odors, signaling potential electrical faults.
- Internal Ductwork Cleaning: Some vacuums have internal ducting that can accumulate debris and mold. Accessing these areas often requires specialized tools and knowledge, making it a task best suited for certified technicians.
Considering Professional Repair or Replacement
- Professional Diagnosis: A vacuum repair specialist can perform a comprehensive inspection, including checking for hidden blockages, motor integrity, and internal mold growth. They possess the tools to safely disassemble and clean components inaccessible to the average user.
- Cost-Benefit Analysis: According to Consumer Reports’ 2027 appliance longevity data, the average lifespan of a quality vacuum cleaner is 5-7 years. If your vacuum is nearing the end of this range and repair costs exceed 50% of a new, comparable model’s price (e.g., a $150 repair for a $250 vacuum), replacement is often the more economical choice.
What If It Still Doesn’t Work?
If the foot-like odor persists after all the above steps, consider these advanced troubleshooting options. Sometimes, the problem lies deeper than surface-level cleaning.
- Professional Vacuum Service: Seek out a certified vacuum repair shop. Technicians have specialized tools to fully disassemble units, access internal ducts, and perform deep sanitization. Diagnostic fees in 2027 typically range from $45-$75, with repairs costing an additional $80-$250 depending on the issue and parts required.
- Check Warranty Status: If your vacuum is relatively new (within 1-5 years, depending on the manufacturer like Miele or Dyson), check if it’s still under warranty. Odor issues stemming from manufacturing defects or component failures might be covered.
- Ozone Generator Treatment (Caution Advised): For extreme, persistent odors, some professionals use ozone generators to neutralize smells. This should only be done by experts in a well-ventilated area, as ozone is a lung irritant. Never operate an ozone generator in an occupied space.
- Consider a New Unit: If the vacuum is old, repairs are costly, or the smell is truly unresolvable, it might be time to invest in a new model. Modern vacuums often feature enhanced filtration and antimicrobial components designed to mitigate odor issues.
Conclusion
A foot-like smell from your vacuum typically signals bacterial growth fueled by moisture and organic debris. Addressing this requires thorough cleaning of the dust bin, filters, brush roll, and hose. According to verified research and expert sources, consistent maintenance is the most effective preventative measure. Prioritize regular cleaning and filter replacement to ensure your vacuum remains odor-free and efficient.
❓ Frequently Asked Questions
What are the main causes for a vacuum smelling like feet?
The primary culprits are bacterial growth from damp debris (like old food particles, pet accidents, or moisture) trapped within the dust bin or bag, mold/mildew in clogged filters or hoses, and accumulated pet dander. These organic materials decompose over time, releasing volatile organic compounds responsible for the foul, foot-like odor.
How do I thoroughly clean my vacuum’s filters and dust bin to remove smells?
For washable filters, rinse them under warm water until the water runs clear, then ensure they are completely air-dried for at least 24 hours before reinserting to prevent mold. Disposable filters should be replaced according to the manufacturer’s recommendations. For the dust bin, empty it thoroughly, wipe the interior with a damp cloth and mild soap solution, rinse, and let it air dry completely.
Can essential oils or deodorizers help with a smelly vacuum?
While essential oils or vacuum deodorizers (like baking soda infused packets) can offer a temporary pleasant scent, they only mask the underlying odor. For a lasting solution, it’s crucial to identify and eliminate the source of the smell first through thorough cleaning and replacement of components, then use deodorizers as a secondary measure if desired.
What role does pet dander play in vacuum odors, and how can I address it?
Pet dander, hair, and even microscopic skin flakes, especially when damp or mixed with other debris, are ideal breeding grounds for bacteria and mold, leading to strong odors. To address this, regularly clean your vacuum’s brush roll for tangled hair, empty the dust bin or change the bag frequently, and consider using a vacuum designed for pet owners with specialized filtration or activated charcoal filters.
My vacuum smells even after cleaning everything. What else could it be?
If the smell persists after deep cleaning the bin, filters, and brush roll, check less obvious areas. Inspect the vacuum hose for blockages, lodged debris, or hidden mold buildup. Also, examine the vacuum’s internal pathways and wheels for trapped gunk. Ensure all washed components were completely dry before reassembly, as residual moisture can quickly lead to new mold growth.
How can I prevent my vacuum from developing a ‘feet’ smell in the future?
Consistent preventative maintenance is key. Always empty the dust bin immediately after each use, clean or replace filters regularly according to manufacturer guidelines, and periodically clean the brush roll and vacuum hose. Crucially, avoid vacuuming up any damp materials, liquid spills, or excessively wet areas to prevent moisture buildup that fosters mold and bacterial growth.