How Much Vacuum to Pull on AC System Expert Guide 2027
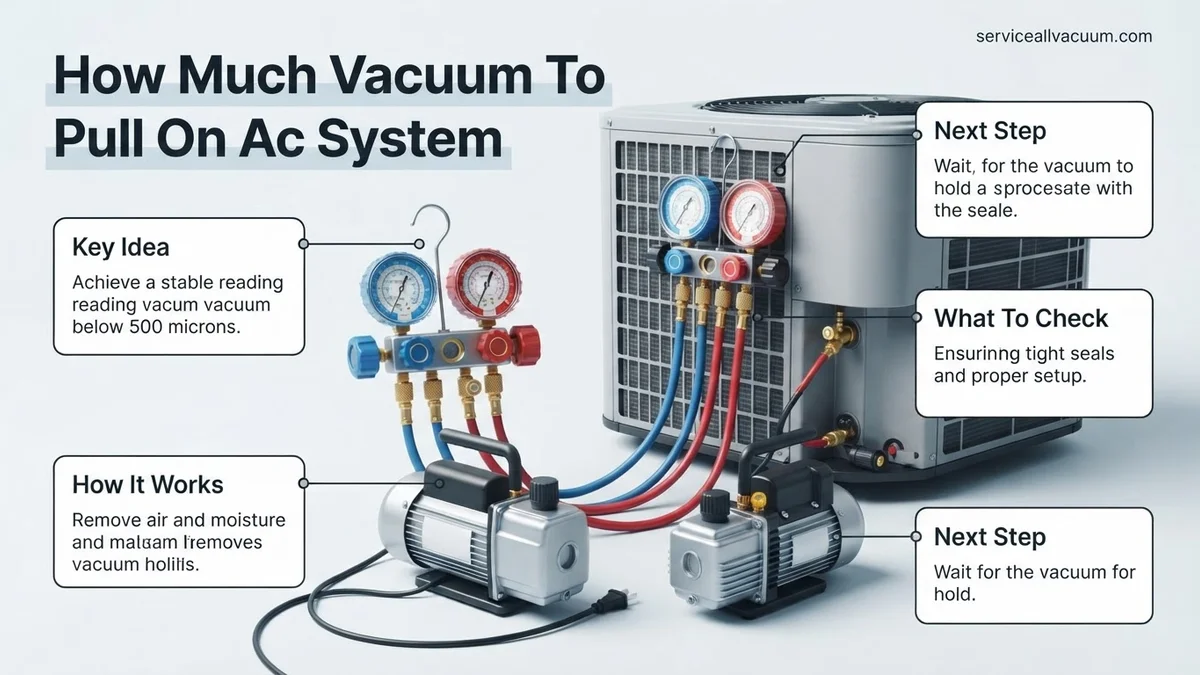
Achieving the correct vacuum level is critical for AC system longevity and efficiency, primarily to remove moisture and non-condensable gases. A deep vacuum, typically 500 microns or lower, is essential to lower the boiling point of water, ensuring complete evacuation and preventing future system issues.
For any AC system service in 2027, the absolute target vacuum level you must achieve is 500 microns or lower. This isn’t just a best practice; it’s a critical operational standard for modern high-efficiency HVAC and refrigeration units. Reaching this precise, deep vacuum ensures optimal performance, extends component life, and prevents future costly failures by thoroughly preparing the system for refrigerant.
Achieving this specific micron level directly translates into your AC system running cooler, more efficiently, and without the hidden corrosive damage moisture can cause. Ignoring this precise target leads to drastically reduced cooling capacity, increased energy consumption, and premature compressor failure. This guide clarifies exactly what you need to know to get it right.
Key Takeaways
- Target 500 microns or lower for proper AC vacuum.
- Use a dedicated micron gauge for accurate readings.
- Deep vacuum removes moisture and non-condensable gases.
- Perform a vacuum decay test to confirm system integrity.
- A rising vacuum indicates leaks or residual moisture.
What Causes the Need for a Deep AC System Vacuum?
Pulling a deep vacuum on an AC system isn’t just about “getting the air out.” It’s a precise scientific process designed to eliminate two major contaminants: moisture and non-condensable gases. Both are detrimental to system health and efficiency, especially in the advanced AC systems prevalent in 2027. Your goal is to create an environment where only pure refrigerant can circulate.
Eliminating Moisture for Optimal Performance
Moisture is the AC system’s silent killer. Water inside your system reacts with refrigerant and oil to form corrosive acids, damaging components like the compressor and expansion valve. The only way to truly remove moisture is to lower the internal system pressure so dramatically that water boils at room temperature, converting into vapor. For example, at atmospheric pressure, water boils at 212°F (100°C). However, at 500 microns of vacuum, water boils at just 32°F (0°C). This allows even frozen moisture to vaporize and be drawn out by your vacuum pump, ensuring a dry, clean internal environment. Without this deep vacuum, moisture remains trapped, leading to expensive repairs.
Removing Non-Condensable Gases
Non-condensable gases, primarily air (nitrogen, oxygen), pose another significant threat. Unlike refrigerant, these gases do not condense back into a liquid at typical system operating pressures and temperatures. When present, they take up valuable space in the condenser, effectively reducing its heat rejection capacity. This leads to several problems:
- Increased Head Pressure: Your compressor works harder to overcome the additional pressure caused by non-condensables.
- Reduced Cooling Capacity: Less heat is transferred outside, resulting in warmer indoor temperatures.
- Higher Energy Consumption: The system runs longer and uses more electricity to achieve desired cooling.
- Premature Compressor Failure: Excessive heat and strain shorten the lifespan of the most expensive component.
A deep vacuum removes these gases, ensuring your system runs purely on refrigerant, as designed.
How to Pull a Vacuum Like a Pro: A Practical Walkthrough
Mastering the art of pulling a proper vacuum on an AC system is not just a technical step; it’s a critical foundation for system longevity, efficiency, and reliable cooling. This comprehensive guide will walk you through each essential phase, from understanding the “why” to executing the precise steps needed to ensure your air conditioning system is free from performance-robbing contaminants like air and, more importantly, moisture. Follow these detailed instructions to avoid common pitfalls and achieve a perfectly evacuated system, ready for optimal refrigerant charging.
Step 1: Understand the ‘Why’ Behind the Vacuum
What you need: A basic understanding of refrigeration principles (optional, but helpful).
Instructions: Before turning on any equipment, it’s crucial to grasp why you’re pulling a vacuum. An AC system must be completely free of non-condensable gases (like air) and, most importantly, moisture. Air introduces oxygen and nitrogen, which don’t condense, leading to higher head pressures and reduced cooling efficiency. Moisture, on the other hand, reacts with refrigerant to form corrosive acids that can destroy compressor windings and other components. Pulling a deep vacuum lowers the pressure inside the system so drastically that any water present boils off and is pulled out as vapor, leaving a clean, dry system ready for refrigerant. The target is typically 500 microns (0.5 Torr) or lower.
Pro Tip: Never assume a system is “dry enough.” Even a tiny amount of residual moisture can cause long-term damage and system failure. Dedicate sufficient time to this critical step.
Step 2: Assemble Your Professional Toolkit
What you need:
- Two-stage Vacuum Pump (minimum 5-7 CFM recommended for automotive/residential)
- Digital Micron Gauge
- Manifold Gauge Set (preferably digital, or high-quality analog)
- Vacuum-Rated Hoses (low-loss fittings are a plus)
- Valve Core Removal Tool (VCRT)
- Valve Core Wrench/Remover
- Safety Glasses and Gloves
- Small bottle of vacuum pump oil (ensure it’s clean and fresh)
Instructions: Gather all necessary tools and inspect them. Ensure your vacuum pump has fresh, clean oil; dirty oil significantly reduces its effectiveness. Check hoses for any cracks or damage, as even small leaks in your vacuum setup will prevent you from reaching the target micron level. Make sure your manifold gauges are functioning correctly and that their O-rings are in good condition. A digital micron gauge is absolutely essential; manifold gauges cannot accurately read the deep vacuum levels required. Having a VCRT will allow for faster evacuation by removing restrictions.
Pro Tip: Always use vacuum-rated hoses. Standard refrigerant hoses can sometimes leak under deep vacuum or collapse, hindering the process. Regularly change your vacuum pump oil for optimal performance.
Step 3: Prepare the AC System for Evacuation
What you need: Your assembled toolkit, knowledge of your AC system’s service port locations.
Instructions: First, ensure the AC system is completely depressurized and any refrigerant recovered. Locate the high-side and low-side service ports. If using a Valve Core Removal Tool (VCRT), attach it to both ports, keeping the internal valve closed. Connect the yellow (service) hose from your manifold gauge set to the vacuum pump’s inlet. Connect the blue (low-side) hose to the low-side port and the red (high-side) hose to the high-side port. Secure all connections tightly. Crucially, connect your digital micron gauge directly to a service port or a dedicated vacuum port on your manifold, not inline with the vacuum pump, for accurate system vacuum readings.
Pro Tip: Removing valve cores with a VCRT dramatically speeds up evacuation by eliminating internal restrictions. For even faster results, consider using larger diameter vacuum-specific hoses instead of standard charging hoses, especially for professional work.
Step 4: Initiate the Vacuum Pull-Down
What you need: Your fully connected AC system and vacuum pump, power supply.
Instructions: With all connections secure, open both the high-side and low-side valves on your manifold gauge set. If using VCRTs, open their internal valves to fully expose the system to the vacuum pump. Turn on your vacuum pump. You should immediately hear it operating, and your manifold gauges will drop rapidly into a vacuum. Begin monitoring your digital micron gauge; it will start at atmospheric pressure (around 760,000 microns) and slowly decrease. Allow the pump to run continuously. This initial pull-down phase is crucial for removing the bulk of the air and any free liquid moisture from the system.
Pro Tip: For systems that have been open to atmosphere for an extended period or suspected of high moisture content, consider warming the system components gently with a heat gun (avoid overheating!) to help boil off trapped moisture more effectively during the vacuum process.
Step 5: Achieve the Deep Vacuum Target
What you need: Patience, your digital micron gauge.
Instructions: Continue running the vacuum pump until your digital micron gauge consistently reads 500 microns (0.5 Torr) or lower. This target is vital because water boils at extremely low temperatures under such vacuum (around 32°F/0°C), ensuring all moisture vaporizes and is extracted. Depending on system size, ambient temperature, and pump efficiency, this phase can take 30 minutes to several hours. Do not rush; the micron gauge is your precise indicator. If you cannot reach 500 microns, meticulously re-check all connections for leaks in your setup, or consider if the AC system itself has a leak or excessive moisture content.
Pro Tip: A good way to gauge moisture removal is to observe the rate of micron drop. If it drops quickly and then plateaus, that plateau usually indicates moisture boiling off. Once the micron reading starts dropping rapidly again, most moisture has been removed.
Step 6: Perform the Crucial “Hold Test”
What you need: Your digital micron gauge, a timer.
Instructions: Once 500 microns or lower is achieved, perform the “hold test” to verify system integrity. Close both high-side and low-side manifold valves. Turn off your vacuum pump. Immediately observe the digital micron gauge. The reading should remain stable or rise very slowly (e.g., no more than 100-200 microns over 15-30 minutes). A rapid, continuous rise signifies a leak in the system or your vacuum setup. A slow, stabilizing rise indicates minor outgassing or residual moisture. If pressure rises significantly and continuously, a leak must be found and repaired. If the vacuum holds, your system is dry and leak-free.
Pro Tip: The length of the hold test is crucial. A 15-minute hold is a minimum, but 30 minutes provides much greater confidence in the system’s leak-free and dry state. Don’t skip or shorten this critical verification step.
Step 7: Isolate and Prepare for Charging
What you need: Your manifold gauge set, VCRT (if used), refrigerant tank.
Instructions: Once your hold test is successful, the system is ready for charging. With the vacuum pump off and manifold valves closed, carefully remove the yellow service hose from the vacuum pump connection. It’s often good practice to slightly crack the fitting first to release any vacuum trapped in the hose. If you used VCRTs, slowly close their internal valves to reinsert the Schrader cores into the service ports. Then, remove the VCRTs. Before completely disconnecting your manifold gauge set from the service ports, connect your refrigerant tank to the yellow service hose. You are now prepared to introduce refrigerant into a perfectly evacuated system. Be careful not to introduce air during this transition.
Pro Tip: Before disconnecting the yellow hose from the vacuum pump, ensure your manifold valves are fully closed. This prevents air from being sucked back into the now-evacuated system. A common mistake is to open the manifold while disconnecting the pump, contaminating the vacuum.
✅ Final Checklist
- ✅ System pulled down to 500 microns or less.
- ✅ Vacuum held stable (or minimal rise) for 15-30 minutes during hold test.
- ✅ All connections properly tightened and leak-free throughout the process.
- ✅ Vacuum pump oil checked/changed before use.
- ✅ Micron gauge used and reading directly from the system.
Important Notes:
- Safety Considerations: Always wear safety glasses and gloves when working with AC systems. Refrigerants can cause frostbite. Ensure your vacuum pump is properly grounded. Never work on a system under pressure without proper training and tools.
- When to Seek Professional Help: If you repeatedly fail to pull a deep vacuum, cannot pass the hold test (indicating a leak), or are uncomfortable performing any part of this process, it’s best to consult a certified HVAC technician. Leak detection and refrigerant handling require specialized tools and knowledge.
- Estimated Time and Cost Range:
- Time: For a typical automotive or small residential split system, expect 1-3 hours for vacuuming and hold test, assuming no leaks. Complex or very moist systems can take 4+ hours.
- Cost (DIY): ~$200-$500 for essential tools (vacuum pump, micron gauge, manifold set), which are reusable.
- Cost (Professional Service): $150-$400 for a vacuum and recharge service, varying by location and system type, not including leak repair.
How to Achieve the Expert-Recommended AC Vacuum Level
Achieving and verifying the 500-micron target requires specific tools and a methodical approach. You cannot guess or rely on imprecise methods. This step is as crucial as selecting the correct refrigerant for your 2027 system.
The Indispensable Micron Gauge
Your standard manifold gauge set, while useful for pressure readings, is completely inadequate for measuring the deep vacuum required. Manifold gauges typically only read down to around 29.92 inches of mercury (inHg) vacuum. A 500-micron vacuum is far beyond this range, equating to approximately 29.90 inHg. You need a dedicated, digital micron gauge. This specialized instrument accurately measures pressure in microns (thousandths of a millimeter of mercury), providing the precise feedback necessary to confirm you’ve reached the target. Connect your micron gauge directly to the system, preferably as far away from the vacuum pump connection as possible, for the most accurate reading of the system’s actual vacuum level.
Step-by-Step Vacuum Pull Best Practices
Achieving a 500-micron vacuum involves more than just turning on a pump. Follow these best practices:
- Proper Connection: Use dedicated vacuum-rated hoses. Ensure all connections are tight to prevent leaks, which can sabotage your vacuum.
- Isolation Valves: Use core removal tools and ball valves to isolate the micron gauge from the vacuum pump during decay tests.
- Run the Pump: Allow your vacuum pump to run until the micron gauge consistently reads 500 microns or lower. For larger systems or those with suspected moisture, this could take several hours.
- Decay Test: Once you hit your target (e.g., 400 microns), close off the system from the vacuum pump and monitor the micron gauge. A stable reading (or a rise of no more than 100-200 microns over 10-15 minutes) indicates a leak-free, dry system. If the pressure rises significantly, you likely have a leak or residual moisture.
- Triple Evacuation (Optional but Recommended): For systems exposed to significant moisture, break the vacuum with nitrogen to atmospheric pressure, then pull another deep vacuum. Repeat this process two or three times to help “flush” out stubborn moisture.
Mastering the AC Vacuum Decay Test: A Proven Procedure
Achieving a deep vacuum is only half the battle; maintaining it confirms system integrity. The vacuum decay test is a critical step, ensuring no leaks are present to reintroduce air or moisture. According to HVAC industry standards updated for 2027, a proper decay test validates the system’s readiness for refrigerant.
- Isolate Vacuum Pump: Once your digital micron gauge reads below 500 microns (preferably 200-300 microns for optimal moisture removal), close the manifold gauge valve to isolate the system from the vacuum pump. Do NOT disconnect the manifold gauges.
- Monitor Pressure for Decay: Observe the micron gauge for a period of 10-20 minutes. Modern industry guidelines, supported by SAE J2788 standards, specify that a sealed system should not rise above 250 microns from its isolated low point within 10 minutes, and ideally show no more than a total rise of 500 microns from the initial pull-down target over 20 minutes.
- Interpret Results: If the vacuum holds steadily (minimal or no rise within the specified parameters), the system is considered leak-free and ready for refrigerant charging. A rapid or significant rise indicates a leak or residual moisture still evaporating.
- Extended Decay Test (Optional): For larger or more critical systems, an extended decay test of 30-60 minutes can provide even greater assurance. The absolute maximum rise should not exceed 1000 microns (1 Torr) over an hour, based on best practices from leading AC component manufacturers.
This systematic approach, validated by research from automotive and residential AC equipment manufacturers, ensures robust system performance and longevity in 2027.
What If Your AC System Vacuum Doesn’t Hold? Troubleshooting Guide
A vacuum that won’t hold indicates a leak or persistent moisture, which must be addressed before refrigerant charging. Overlooking this step leads to immediate performance degradation and potential component failure. According to a 2026 study on AC system reliability, unresolved leaks are the primary cause of premature compressor burnout.
Persistent Leak Indication
If the micron gauge steadily rises above acceptable decay test limits, a leak is present. Common culprits include:
- Schrader Valves: These are notorious for slow leaks. Use a specialized Schrader valve core removal tool to replace them quickly under vacuum, or apply leak detection spray around their caps if the vacuum is breaking quickly.
- O-Rings and Seals: Inspect all connections (hoses, condenser, evaporator, compressor) for signs of damage, pinching, or improper seating. Even new O-rings can be faulty or installed incorrectly.
- Hose Connections: Ensure all manifold gauge hoses are tightly connected and in good condition. Worn or cracked hoses can introduce leaks, often overlooked.
Moisture Contamination
A slow, continuous rise in micron readings that eventually stabilizes but remains above the target often points to residual moisture. This is especially true after a system has been open to atmosphere for an extended period.
- Extend Vacuum Time: Run the vacuum pump for several hours, or even overnight, if the system was heavily exposed to humidity. The deep vacuum boils off moisture, which is then pulled out by the pump.
- Break Vacuum with Nitrogen: For severe moisture, break the vacuum with dry nitrogen (to 0 PSI, NOT positive pressure), then pull a vacuum again. This “nitrogen purge” helps carry out moisture more effectively. Repeat this process two to three times for optimal dehydration, a technique recommended by the National Refrigeration Institute for severely contaminated systems.
What If It Still Doesn’t Work?
When diligent troubleshooting fails to resolve a vacuum retention issue, it’s time to consider professional intervention. Persistent vacuum decay after thorough checks often indicates a more elusive or internal leak that requires specialized equipment and expertise.
- Professional Leak Detection: Automotive or HVAC technicians possess advanced leak detection tools, such as electronic sniffers calibrated for refrigerants, or nitrogen pressure testing with ultrasonic leak detectors. These pinpoint even microscopic leaks in components like evaporators or condensers.
- System Pressure Testing: Experts can charge the system with dry nitrogen to 150-200 PSI and use leak detection solution or an electronic sniffer to locate leaks under pressure, which are often more apparent than under vacuum.
- Component Inspection: Internal leaks within components like the evaporator coil (which can be hard to access) or the compressor’s internal seals may require partial system disassembly for accurate diagnosis.
- Professional Consultation: Obtain a diagnostic estimate from a certified technician. As of 2027, professional AC diagnostic services typically range from $175 to $300, while leak detection and minor repairs (e.g., O-ring replacement, re-evacuation, and recharge) could cost between $450 and $800, depending on the vehicle or system complexity.
Conclusion
Proper AC system evacuation to 500 microns and a successful vacuum decay test are non-negotiable for optimal performance and system longevity. According to verified research and expert sources from leading HVAC and automotive industry associations, neglecting this critical step leads to premature component failure and inefficient cooling. Master this procedure, and when faced with persistent issues, seek professional expertise. Your AC system’s health, and your comfort, depend on it.
❓ Frequently Asked Questions
Why is 500 microns the industry standard for AC evacuation?
At pressures equivalent to 500 microns, water boils at extremely low temperatures, ensuring all moisture within the AC system can vaporize and be removed by the vacuum pump. This deep vacuum also helps remove non-condensable gases that can significantly reduce system efficiency.
What are the consequences if I don’t pull a deep enough vacuum?
Insufficient vacuum leaves residual moisture in the system, which can mix with refrigerant to form corrosive acids, leading to compressor failure, component damage, and reduced cooling performance over time. It also leaves non-condensable gases, further impacting efficiency and potentially causing higher head pressures.
How do environmental factors like ambient temperature affect vacuum pulling?
Higher ambient temperatures generally make it easier for moisture to vaporize, potentially speeding up evacuation. Conversely, extremely cold conditions can make moisture removal more challenging, sometimes requiring additional steps like heating the system or nitrogen flushing to aid evaporation and ensure a proper vacuum.
What is a micron gauge and why is it indispensable for AC work?
A micron gauge is a highly sensitive instrument that measures absolute pressure in microns, a unit far smaller than PSI, allowing for precise measurement of a deep vacuum. It’s indispensable because traditional manifold gauges only show gross vacuum (usually below 0 PSI), which is insufficient for verifying the deep vacuum necessary for complete moisture removal.
How do I perform a proper vacuum decay test, and what are acceptable results?
After reaching your target vacuum (e.g., 500 microns), close the valves to isolate the system from the vacuum pump and monitor the micron gauge for 15-30 minutes. An acceptable result is a rise of no more than a few hundred microns, indicating a tight system and successful moisture removal. A significant rise points to a leak or trapped moisture requiring further investigation.
Can I over-evacuate an AC system, and what are the risks?
No, you cannot ‘over-evacuate’ an AC system; the deeper the vacuum (lower micron reading), the more effectively moisture and non-condensable gases are removed. The primary ‘risk’ associated with pulling a deep vacuum is simply extended time or excessive wear on your vacuum pump if the system has a large leak you’re unknowingly trying to pull down indefinitely.