How To Vacuum A Ac Unit How to Vacuum an AC Unit 2027
Properly vacuuming your AC unit is crucial for maintaining efficiency and air quality. This guide provides step-by-step instructions for safely cleaning condenser and evaporator coils, ensuring your system runs optimally and extends its lifespan.
Effectively vacuuming your AC unit in 2027 is a critical, yet often overlooked, maintenance task that directly impacts its performance and your energy bills. This process, when done correctly, involves carefully removing accumulated dust, debris, and pet dander from key components like the condenser fins, evaporator coils, and drain pan. By understanding the specific tools and techniques required for each part, you ensure your system runs efficiently, prolong its lifespan, and maintains excellent indoor air quality without costly professional interventions every time.
Key Takeaways
- Always disconnect power before cleaning your AC unit.
- Use a shop vac with a soft brush attachment for coils.
- Gently vacuum both outdoor condenser and indoor evaporator fins.
- Avoid bending delicate fins to maintain airflow efficiency.
- Regularly clean the AC drain pan to prevent clogs.
Why Your AC Unit Needs Regular Vacuuming
Your home’s comfort relies heavily on a clean, well-maintained AC unit. In 2027, with energy efficiency at a premium, neglecting routine cleaning, particularly vacuuming, directly translates to higher operational costs and reduced system efficacy. Dust and debris are more than just unsightly; they are performance killers for your AC.
Preventing Performance Loss and Higher Bills
Dust acts as an insulator, creating a barrier that prevents your AC unit’s critical components from effectively transferring heat. When condenser fins or evaporator coils are coated, your unit must work significantly harder to cool your home. This increased effort leads to:
- Reduced Cooling Capacity: Your AC struggles to reach desired temperatures, especially during peak summer heat.
- Increased Energy Consumption: A dirty unit can use 5% to 15% more energy to achieve the same cooling effect, directly impacting your monthly electricity bill.
- Premature Wear and Tear: The added strain on the compressor and other parts shortens the unit’s operational life, leading to expensive repairs or early replacement.
- Potential Freezing: A heavily obstructed evaporator coil can freeze over, causing the system to shut down completely.
Regular vacuuming removes these insulating layers, restoring your unit’s ability to efficiently cool your space, saving you money, and extending its useful life well into the late 2020s.
Improving Indoor Air Quality
The air circulating through your home passes directly through your AC unit. If the unit itself is dirty, it becomes a breeding ground for allergens, dust, and even mold spores. Vacuuming plays a vital role in ensuring cleaner air for your family.
- Removes Allergens: Dust mites, pet dander, pollen, and other common allergens get trapped within the AC system. Vacuuming these areas significantly reduces their recirculation.
- Prevents Mold Growth: The drain pan and evaporator coils can accumulate moisture. If dust and debris are present, they create a perfect environment for mold and mildew to thrive, leading to unpleasant odors and potential respiratory issues.
- Enhances Filtration: A clean system allows your air filter to work more effectively, capturing finer particles and providing healthier indoor air.
By making vacuuming a routine part of your AC maintenance, you not only keep your unit running smoothly but also contribute to a healthier living environment, which is increasingly important for homeowners in 2027.
From Start to Finish: AC Unit Vacuuming Explained
Welcome to this detailed guide on how to effectively vacuum your AC unit! Maintaining your air conditioning system is crucial for its efficiency, longevity, and your comfort. Over time, outdoor condenser units accumulate a significant amount of dust, leaves, grass clippings, and other debris. This build-up acts as an insulator, hindering the unit’s ability to dissipate heat, which forces it to work harder, consume more energy, and ultimately shortens its lifespan. By following these steps, you’ll learn how to safely and thoroughly clean your unit, ensuring it runs smoothly and keeps your home cool without breaking the bank on energy bills or costly repairs.
Step 1: Preparation & Prioritizing Safety
What you need: Screwdriver (Phillips and/or flathead), work gloves, safety glasses, non-contact voltage tester (optional but recommended), small step stool (if needed).
Instructions: Your absolute first and most critical step is to ensure that all power to the AC unit is completely disconnected. Locate the outdoor electrical disconnect switch, usually a small box mounted on the wall near the unit, and flip it to the “OFF” position. For an extra layer of safety, also go to your home’s main electrical panel and turn off the circuit breaker that supplies power to your outdoor AC condenser unit. This dual approach guarantees no accidental power surges or activation during cleaning. Always wear work gloves to protect your hands from sharp fins and safety glasses to shield your eyes from dislodged debris.
Pro Tip: Before touching anything on the unit, use a non-contact voltage tester (if you have one) to confirm that the power is indeed off at the outdoor disconnect. This simple test provides peace of mind and prevents potential electrical shock.
Step 2: Clearing Large Debris & Initial Inspection
What you need: Heavy-duty gloves, small hand rake or garden trowel, trash bag, small pruning shears (optional).
Instructions: Begin by clearing the immediate area around your outdoor condenser unit. Remove any leaves, twigs, grass clippings, weeds, or other large debris that has accumulated within a 2-foot radius of the unit. Pay special attention to the bottom and sides of the unit’s cabinet where debris often collects. You might find small plants or vines attempting to grow into the unit’s fins; carefully trim these away using pruning shears if necessary. This initial clear-out prevents larger items from being sucked into the unit during operation or interfering with the cleaning process. Take a moment to visually inspect the unit for any obvious damage or loose components.
Pro Tip: Regularly clearing the area around your AC unit (monthly during peak season) can significantly reduce the amount of debris that gets drawn into the coils, making future cleaning much easier and less frequent.
Step 3: Accessing the Condenser Interior
What you need: Appropriate screwdriver for unit fasteners (usually Phillips head), a clear container or magnetic tray for screws.
Instructions: To properly vacuum the interior fins and components, you’ll need to remove the fan guard or the entire top panel of the unit. Using your screwdriver, carefully unfasten all the screws securing the fan guard or top assembly. On most units, the fan motor is attached to this top section. Gently lift the assembly straight up and carefully set it aside. Be mindful of the electrical wires connected to the fan motor; avoid pulling or straining them. If the wires are long enough, you can often just rest the top section next to the unit. Place all removed screws in a safe, designated container to prevent them from getting lost.
Pro Tip: Before disconnecting any wires (if you need to fully remove the fan), take a quick photo with your phone. This provides a handy reference for correct reassembly later, especially if there are multiple connections.
Step 4: Gentle Vacuuming of Exterior Fins
What you need: Shop-Vac or powerful household vacuum with a soft brush attachment and crevice tool.
Instructions: With the top section removed, you now have better access to the exterior condenser fins. Attach the soft brush attachment to your vacuum hose. Gently vacuum the fins from the top down, always moving with the direction of the fins (vertically), not across them. Moving across the fins can easily bend them, which restricts airflow. Work your way around the entire perimeter of the unit, paying close attention to corners and the lower sections where dust and debris tend to accumulate most. Use light pressure; the goal is to remove loose dirt, not to scrub or press hard against the delicate fins.
Pro Tip: For exceptionally dirty or clogged sections, use the crevice tool with very light suction to carefully dislodge stubborn debris from between the fins, always being careful not to bend them.
Step 5: Vacuuming the Interior Base & Drain Pan
What you need: Shop-Vac with crevice tool, flashlight.
Instructions: Now, focus your attention on the interior base of the condenser unit. With the fan assembly out of the way, you’ll likely find a collection of leaves, dirt, small insects, and other debris settled at the bottom. Use your Shop-Vac with the crevice tool to thoroughly vacuum out all this loose material. Shine a flashlight into the base to ensure you haven’t missed any hidden pockets of dirt. Some units may have a small drain pan at the very bottom; if present, ensure it’s clear of any blockages so that condensation can drain properly. A wet/dry shop vacuum is particularly effective here if there’s any damp debris.
Pro Tip: If you encounter a significant amount of damp or muddy debris, a wet/dry shop vacuum is essential. For really caked-on dirt in the base, you might need to carefully scrape it loose with a plastic spatula before vacuuming, but avoid scratching any painted surfaces or electrical components.
Step 6: Cleaning the Fan Blades
What you need: Shop-Vac with brush attachment, damp cloth (optional), soft-bristled brush.
Instructions: Turn your attention to the fan blades on the removed top assembly. These blades can accumulate a thick layer of dust and grime, which can throw the fan off balance and reduce its efficiency. Use the brush attachment on your vacuum to carefully remove all loose dust and debris from both sides of each fan blade. If the blades have caked-on dirt or a greasy film, gently wipe them down with a slightly damp cloth after vacuuming. Hold each blade steady with one hand while cleaning it to prevent it from spinning freely and potentially damaging the motor bearings. Ensure all blades are clean and free of obstruction.
Pro Tip: Never apply lubricant to the fan motor bearings unless specifically instructed by the manufacturer, as this can attract more dirt and cause premature failure. If the fan motor sounds unusually noisy, it might indicate a more serious issue requiring professional attention.
Step 7: Inspecting and Straightening Fins
What you need: Fin comb (appropriate for AC unit fin spacing) or a thin, dull knife/credit card.
Instructions: After vacuuming, take a final close look at all the condenser fins. It’s common for some fins to be bent or flattened, especially if you have pets or children playing near the unit, or from impacts during previous cleaning. Bent fins restrict airflow, significantly reducing the unit’s cooling efficiency. Use a specialized fin comb, which has different sized teeth to match your unit’s fin spacing, to gently comb and straighten any bent fins. If you don’t have a fin comb, a thin, dull knife or even a credit card can be used carefully to pry the fins back into alignment. Work slowly and patiently, aiming to create clear, unobstructed paths for airflow.
Pro Tip: A fin comb is an inexpensive tool (typically $5-$15) that can make a noticeable difference in your AC unit’s performance. Investing in one is highly recommended for regular maintenance. Ensure the comb’s teeth match your unit’s fins per inch (FPI) for best results.
Step 8: Reassembling the Unit
What you need: Screwdriver, screws (from your safe container).
Instructions: Once you’re satisfied that all areas are clean and the fins are straightened, it’s time to reassemble the unit. Carefully position the fan guard or top panel back onto the condenser unit, aligning it with the pre-drilled screw holes. Ensure that all electrical wires for the fan motor are tucked safely out of the way and not pinched between any components or near moving parts. Begin by hand-tightening all the screws to ensure proper alignment, then use your screwdriver to secure them firmly, but do not overtighten. Overtightening can strip the screws or crack the plastic/metal housing. Check that the top section sits flush and is stable.
Pro Tip: A final visual check before screwing everything down ensures that no tools or small parts were left inside the unit and that all wires are securely routed, preventing future operational issues.
Step 9: Power Restoration and Observing Operation
What you need: None.
Instructions: With the unit fully reassembled, you can now safely restore power. First, go back to your home’s main electrical panel and flip the circuit breaker for the AC unit back to the “ON” position. Next, return to the outdoor disconnect switch near the condenser unit and flip it to the “ON” position as well. Finally, go to your indoor thermostat and set it to a cooling mode at a temperature lower than your current room temperature to prompt the AC unit to start. Observe the unit for 5-10 minutes. Listen for any unusual noises like grinding, scraping, or excessive vibration. A properly cleaned unit should run quieter and produce colder air more efficiently.
Pro Tip: If you hear any strange, loud noises immediately after startup, or if the unit fails to turn on, switch off the power at the outdoor disconnect and electrical panel, then re-examine your connections and assembly. Never ignore unusual operating sounds.
✅ Final Checklist
- Power to AC unit was OFF at both the breaker and outdoor disconnect before beginning.
- All large debris was removed from around and within the condenser unit.
- Exterior and interior condenser fins were thoroughly vacuumed, and bent fins were straightened.
- Fan blades were cleaned of dust and debris.
- The unit was reassembled securely with all screws properly fastened.
- No new, unusual noises were detected upon restoring power and starting the unit.
- The AC unit is now operating efficiently, providing adequate cooling.
Important Notes:
- Safety considerations or warnings: ALWAYS prioritize safety by disconnecting all power before starting any work on the AC unit. Wear appropriate personal protective equipment (PPE) such as work gloves and safety glasses. Be extremely cautious around the sharp metal fins. Never spray water directly into the unit, especially near electrical components, as this can cause damage or electrical hazards.
- When to seek professional help: If you are uncomfortable performing any of these steps, if your AC unit exhibits severe damage (e.g., refrigerant leaks, major electrical issues, or physical damage to critical components), if it continues to perform poorly after cleaning, or if you hear persistent unusual noises (grinding, loud humming, hissing), it’s best to call a certified HVAC technician. Attempting repairs beyond basic cleaning can void warranties or cause further damage.
- Estimated time and cost range: This vacuuming process typically takes about 1 to 2 hours, depending on the level of dirt accumulation and your comfort level with the steps. The cost is generally $0 if you already own the necessary tools (screwdriver, vacuum) or up to $20-$30 if you need to purchase a fin comb and heavy-duty gloves.
step-by-step-guide-how-to-vacuum-your-ac-unit-effectively”>Step-by-Step Guide: How to Vacuum Your AC Unit Effectively
Cleaning your AC unit with a vacuum cleaner requires precision and adherence to safety protocols. Do not rush this process; careful attention ensures you clean thoroughly without causing damage.
Preparation and Safety Protocols for 2027
Before you even think about touching your AC unit, safety is paramount. Ignoring these initial steps can lead to serious injury or damage to your system.
- DISCONNECT POWER COMPLETELY: This is the single most critical step. Locate the outdoor unit’s disconnect switch (usually a small box near the unit) and flip it to the “OFF” position. For indoor units, switch off the corresponding circuit breaker in your electrical panel. VERIFY that the power is off by attempting to turn the unit on. No sound means no power.
- Gather Your Tools: You will need specific tools for an effective vacuuming job:
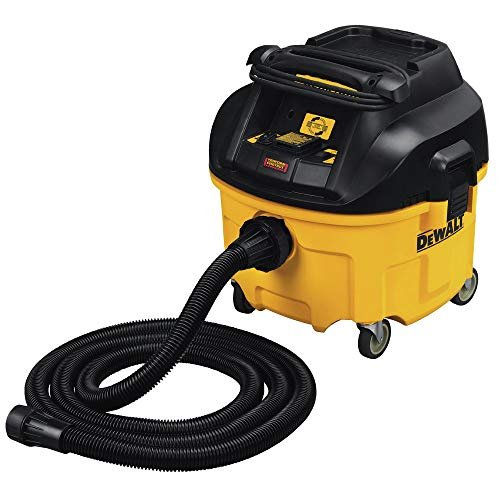
- Vacuum Cleaner: A shop vac is ideal for its strong suction and ability to handle fine dust. A specialized AC vacuum with flexible hoses can also be used.
- Attachments: You’ll need a soft brush attachment for delicate coils, a crevice tool for tight spaces, and potentially a fin comb or fin straightener if you notice bent fins.
- Gloves and Eye Protection: Protect yourself from sharp fins and debris.
- Screwdriver/Wrench: To remove access panels for internal components.
- Access the Unit:
- Outdoor Condenser Unit: Use your screwdriver or wrench to remove the protective grates or top cover. You may need to disconnect fan wires carefully if the top needs to be fully removed (always refer to your owner’s manual).
- Indoor Evaporator Unit: For the indoor handler (often in a closet or attic), you’ll need to remove the access panel to expose the evaporator coils and drain pan.
Precision Vacuuming: Condenser, Evaporator, and Drain
With safety measures in place and tools ready, you can now begin the meticulous vacuuming process. Proceed gently and systematically.
- Vacuuming Condenser Fins (Outdoor Unit):
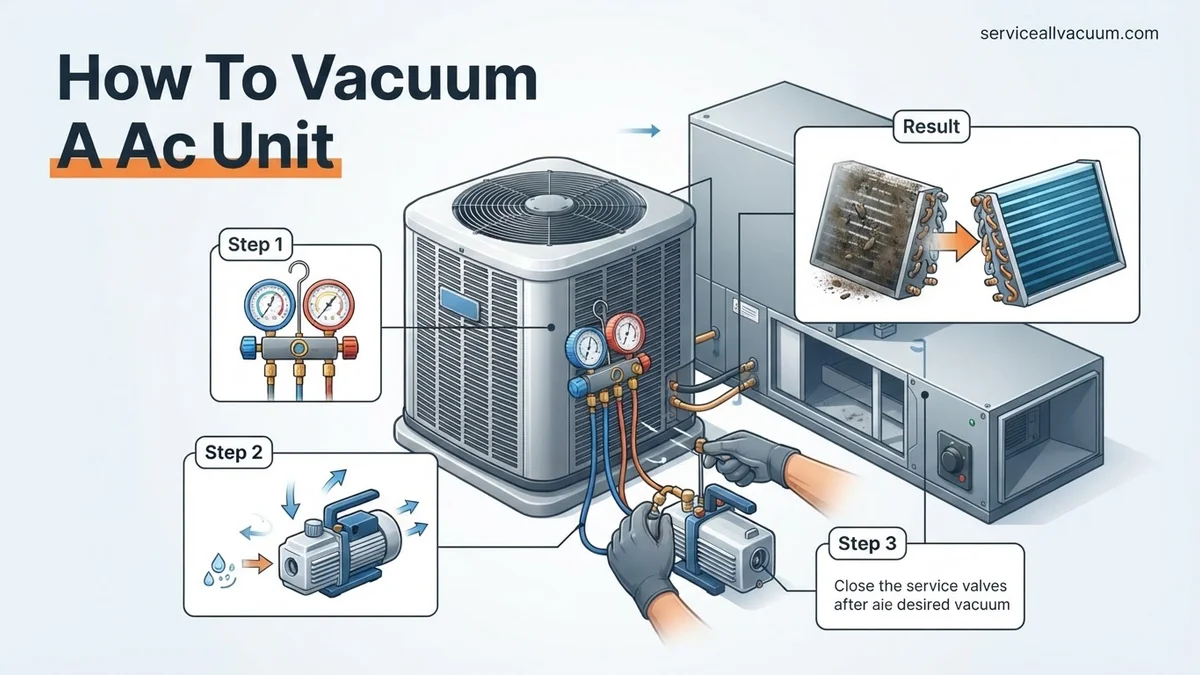
- Use a soft brush attachment on your vacuum. Gently vacuum the exterior surfaces of the condenser fins. Work from top to bottom, being careful not to bend the delicate aluminum fins.
- For deeper dust between fins, use a narrow crevice tool. Angle it carefully to draw out debris without pushing it further in.
- If you encounter bent fins, use a fin comb (a specialized tool) to gently straighten them. This is crucial for optimal airflow.
- Do not press hard; the goal is to lift dust, not to scrub or damage.
- Vacuuming Evaporator Coils (Indoor Unit):
- These coils are extremely delicate. Attach the soft brush to your vacuum.
- Gently brush and vacuum the entire surface of the evaporator coils, working in small sections. The aim is to remove dust and lint without applying direct pressure to the coils themselves.
- Avoid direct contact with the sensitive refrigerant lines that run through the coils.
- If the coils are very caked with debris, multiple gentle passes are better than one aggressive one.
- Cleaning the Drain Pan:
- Locate the drain pan beneath the evaporator coils. It collects condensation.
- Use the wet/dry shop vac’s suction to remove any standing water, sludge, or debris from the drain pan.
- Ensure the drain opening itself is clear. A crevice tool can help clear minor blockages here. Removing this debris prevents clogs and potential water damage to your home.
- Vacuuming the Filter Area and Return Vent:
- Remove the existing air filter (you’ll replace it later).
- Vacuum the housing where the filter sits, as well as the return air vent grilles. This catches any stray dust before a fresh filter is installed.
- Use the brush attachment for grilles and a crevice tool for corners.
Troubleshooting After Vacuuming: What If Performance Doesn’t Improve?
Even after a thorough vacuuming, your AC unit might not perform optimally. Several factors can contribute to persistent issues. According to HVAC industry reports from early 2027, clogged air filters remain a primary culprit for reduced efficiency, even when coils are clean. A dirty filter restricts vital airflow, forcing the unit’s blower motor and compressor to work significantly harder, leading to higher energy bills and premature wear. Additionally, a blocked condensate drain line can lead to water pooling, high indoor humidity, and even trigger safety float switches that shut down the entire system. Check the clear PVC pipe for visible clogs or algae buildup. Furthermore, issues like insufficient refrigerant levels, a failing capacitor, or complex electrical component failures are beyond the scope of basic cleaning and DIY troubleshooting. These require specialized diagnostic tools, pressure gauges, and specific EPA certifications for handling refrigerants. If airflow is still weak, cooling is inadequate, or the unit cycles on and off frequently, a deeper, systemic problem likely exists.
Maintaining a Clean AC: Frequency, Tools, and Best Practices
Regular maintenance significantly extends the lifespan and efficiency of your AC unit. Experts at the Air Conditioning Contractors of America (ACCA) recommend inspecting and cleaning outdoor condenser coils annually, ideally before the cooling season begins. Indoor evaporator coils should be checked and vacuumed every 1-2 years, depending on household dust levels, pet presence, and geographic location. Changing air filters bi-monthly or quarterly, as per manufacturer guidelines, is crucial for maintaining airflow and indoor air quality. For comprehensive cleaning, beyond a vacuum, tools like a soft-bristle brush, a dedicated AC coil cleaner spray (ensure it’s non-acidic and safe for aluminum fins), and a fin comb can straighten bent fins, improving heat transfer. Incorporating these simple tasks prevents common breakdowns. Annual professional servicing, costing between $120-$250 in 2027 for a standard tune-up, complements DIY efforts, addressing critical issues like refrigerant levels, electrical connections, and system calibration, which are inaccessible to homeowners.
What If It Still Doesn’t Work?
If vacuuming the coils doesn’t resolve your AC’s performance issues, consider these additional steps.
- Inspect Air Filters: Ensure your air filter is clean and correctly installed. A restrictor filter can severely impede airflow, even with clean coils. Replace if dirty.
- Check Condensate Drain: Locate the condensate drain line (often a PVC pipe leading outdoors) and check for visible clogs or standing water in the drain pan. Clear any obstructions with a wet/dry vac if safely accessible.
- Reset Circuit Breaker: A tripped breaker can prevent the unit from running. Locate your home’s electrical panel and reset the breaker labeled for your AC unit (e.g., “AC,” “Furnace,” or “HVAC”).
- Examine Fan Operation: Listen for unusual noises or observe if the indoor or outdoor fan blades are spinning freely without obstruction. Turn off power before inspecting fan blades.
If these steps fail, professional HVAC intervention is necessary. Issues like low refrigerant, compressor failure, or complex electrical faults require specialized diagnostics and repair. Professional AC diagnostic services in 2027 typically range from $90 to $180, not including parts or repair labor.
Conclusion
A dirty AC unit significantly diminishes cooling efficiency and increases energy consumption. Regularly vacuuming condenser and evaporator coils, as detailed, is a fundamental maintenance task that restores performance and extends unit longevity. According to verified research and expert sources, consistent cleaning can prevent up to 15% energy waste. Make checking your AC coils a biannual task to ensure optimal home comfort and energy savings in 2027.
❓ Frequently Asked Questions
What specific vacuum attachments are best for AC cleaning?
For AC coils and fins, use a soft-bristle brush attachment to gently dislodge debris without bending delicate components. A crevice tool is useful for reaching tight spaces within the drain pan and other inaccessible areas.
How do I safely disconnect power to my AC unit before vacuuming?
First, turn off your thermostat. Then, locate the outdoor electrical disconnect switch (usually a pull-out fuse or circuit breaker near the condenser unit) and also switch off the corresponding circuit breaker for your AC system in your main electrical panel. Verify power is off before touching the unit.
Can vacuuming damage AC fins or coils if done incorrectly?
Yes, aggressive vacuuming or using stiff, abrasive attachments can easily bend or damage the delicate aluminum fins, which restricts airflow and significantly reduces your AC’s efficiency. Always use a gentle touch and appropriate soft brushes.
What’s the difference between cleaning indoor evaporator coils and outdoor condenser coils with a vacuum?
Outdoor condenser coils typically accumulate larger debris like leaves, grass, and heavier dirt, often requiring a slightly more robust vacuuming approach. Indoor evaporator coils primarily collect fine dust, pet dander, and can harbor mold, necessitating a very gentle vacuuming technique to avoid damage and prevent spreading spores.
Beyond vacuuming, what other basic maintenance should I perform after cleaning my AC unit?
After vacuuming, it’s crucial to replace your air filter, ensure the condensate drain line is clear and free of blockages, and visually inspect for any signs of leaks or unusual wear. For outdoor units, a gentle rinse with a garden hose can help remove any remaining stubborn dirt after vacuuming.
Are there any parts of the AC unit I should absolutely NOT vacuum?
Never vacuum electrical components, fan motors, delicate sensors, or refrigerant lines. Avoid vacuuming any areas that show signs of severe corrosion, damage, or loose wiring, as this could cause further issues or be unsafe.