Expert Guide How Do You Vacuum an Inground Pool in 2027
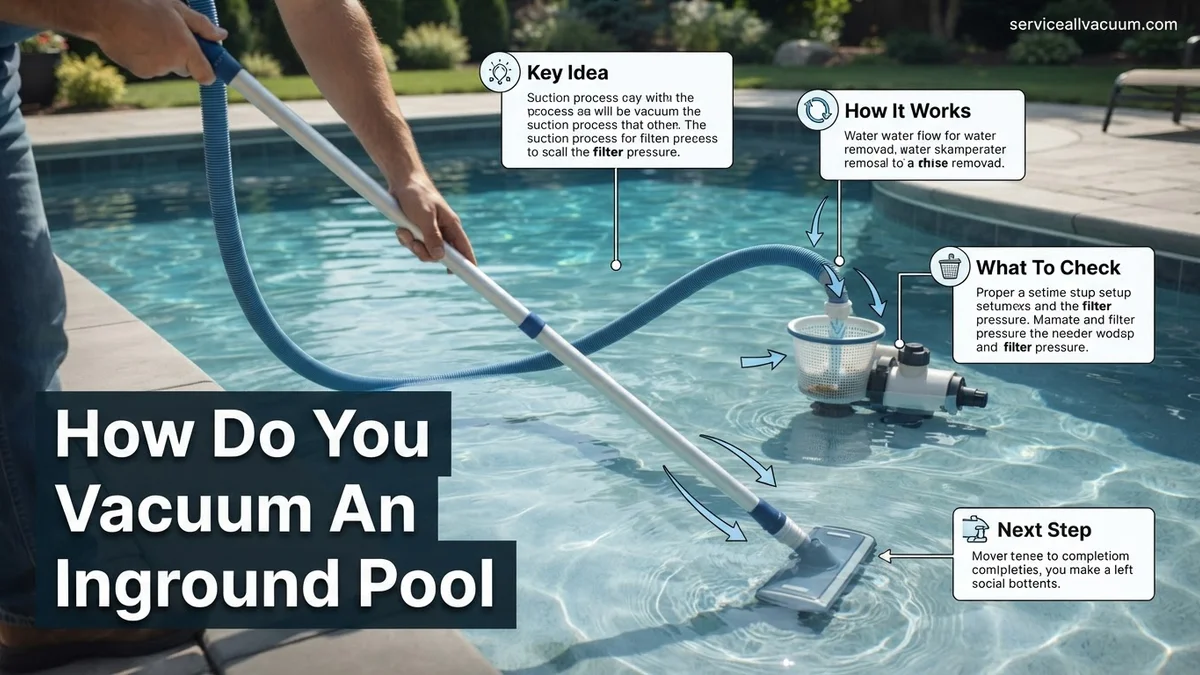
Manually vacuuming an inground pool requires a systematic approach, ensuring all debris is effectively removed and water clarity is maintained. This process involves proper equipment assembly, careful hose priming to eliminate air, and a methodical cleaning technique across the pool floor to achieve a clean and healthy swimming environment.
Manually vacuuming your inground pool remains the most thorough and effective method for removing settled debris, ensuring crystal-clear water and a healthy swimming environment. While automated solutions have evolved significantly by 2027, nothing quite matches the precision of a hands-on approach for tackling specific dirt spots and fine particulates. Mastering this technique yourself empowers you to maintain your pool’s pristine condition efficiently, saving you time and potential professional cleaning costs throughout the swimming season.
This guide cuts directly to the core of what you need to know: the precise steps for gathering your equipment, setting up your filtration system, and executing the vacuuming process with professional-grade technique. You will learn to perform this essential maintenance task with confidence, directly addressing common issues like algae blooms and murky water that often stem from accumulated bottom debris.
Key Takeaways
- Assemble vacuum head, pole, and hose correctly before starting.
- Prime the vacuum hose completely to prevent air entering the pump.
- Vacuum slowly with overlapping strokes to avoid stirring up debris.
- Set your pool filter to ‘waste’ for heavy debris to bypass the filter.
- Always backwash or clean your filter after vacuuming for efficiency.
What Causes Debris to Accumulate in Your Inground Pool?
Even with advanced pool covers and filtration systems prevalent in 2027, various elements conspire to deposit unwanted materials into your inground pool. Understanding these sources helps you anticipate cleaning needs and adapt your vacuuming schedule effectively.
Environmental Factors
- Windborne Particulates: Dust, pollen, and microscopic airborne particles are constantly settling. Wind currents, especially strong gusts common in changing weather patterns, push these finer materials into your pool, often forming a light film or settling at the bottom over days.
- Foliage and Organic Matter: Leaves, twigs, seeds, and even small insects are common culprits, particularly if your pool is surrounded by landscaping or trees. These organic materials decompose in water, contributing to nutrient load and potentially encouraging algae growth if not removed promptly. Even with advanced landscape design in 2027, nature always finds a way.
- Rainfall Runoff: Heavy rain can wash dirt, silt, and other ground debris from surrounding patios or lawns directly into your pool. This influx often contains finer suspended particles that eventually settle to the floor, necessitating a thorough vacuuming session.
Usage and Surroundings
- Swimmer-Introduced Debris: Swimmers themselves inadvertently bring in dirt, sand, hair, and cosmetic residues. These micro-particles quickly settle, especially in high-traffic areas like steps and shallow ends.
- Construction Dust: Nearby construction or landscaping projects can generate significant amounts of fine dust that easily permeates pool covers and settles into the water, requiring meticulous removal.
From Start to Finish: Inground Pool Vacuuming Explained
Keeping your inground pool sparkling clean isn’t just about aesthetics; it’s crucial for water quality, equipment longevity, and swimmer safety. This comprehensive guide will walk you through the process of manually vacuuming your inground pool, ensuring you effectively remove dirt, debris, and sediment from the bottom. By following these detailed steps, you’ll not only achieve a pristine pool but also gain confidence in maintaining your aquatic oasis like a seasoned professional.
Step 1: Gather Your Essential Equipment
What you need: Pool vacuum head (weighted is best), telescopic pole, vacuum hose (length appropriate for your pool), skimmer vacuum plate (if applicable), pool brush, leaf net/skimmer, and your pool’s filtration system in good working order.
Instructions: Before you even think about getting wet, lay out all the necessary tools. A good quality vacuum head (often triangular or rectangular with brushes or wheels) connected to a sturdy telescopic pole is fundamental. Ensure your vacuum hose is long enough to reach all corners of your pool from the skimmer or dedicated vacuum line. Having a leaf net handy for initial surface skimming and a pool brush to dislodge stubborn wall debris will make the vacuuming process much more efficient and effective.
Pro Tip: Always check your vacuum hose for any cracks or leaks before starting. Even a small pinhole can introduce air into your system, reducing suction and making priming difficult.
Step 2: Prepare the Pool for Vacuuming
What you need: Leaf net/skimmer, pool brush.
Instructions: Begin by using your leaf net to skim any large floating debris from the surface of the pool. Leaves, bugs, and other floating particles should be removed first to prevent them from sinking and making your vacuuming job harder. Next, take your pool brush and gently brush down the walls, steps, and any ledges of your pool. This action dislodges any settled algae or dirt, allowing it to fall to the pool floor where the vacuum can more easily collect it. Allow about 15-30 minutes for the dislodged debris to settle before proceeding.
Pro Tip: Brushing the walls every few days, even when not vacuuming, helps prevent algae growth and keeps your pool cleaner overall.
Step 3: Assemble and Submerge the Vacuum Head
What you need: Vacuum head, telescopic pole, vacuum hose.
Instructions: Attach the vacuum head securely to the end of your telescopic pole. Then, connect one end of the vacuum hose to the inlet on the vacuum head. Carefully lower the assembled vacuum head and pole into the pool, letting it sink to the deepest part of the pool floor. As you submerge it, ensure the vacuum head is sitting flat on the bottom, ready to be maneuvered. Keep the other end of the vacuum hose (the one that will connect to the skimmer) out of the water for now.
Pro Tip: Always secure the vacuum head to the pole before putting it in the water. Trying to connect them underwater can be cumbersome and risks damaging the equipment.
Step 4: Prime the Vacuum Hose Thoroughly
What you need: Assembled vacuum head, hose, telescopic pole.
Instructions: This is a critical step to prevent air from entering your pump. Take the unconnected end of your vacuum hose and hold it over one of the return jets in your pool. The pressure from the jet will force water through the hose, pushing out all the air. You’ll see bubbles coming out of the vacuum head at the bottom of the pool. Continue this until no more bubbles emerge from the vacuum head, indicating the hose is completely filled with water. Alternatively, slowly feed the hose underwater, allowing it to fill with water as you submerge it.
Pro Tip: Priming is essential. Air in the vacuum hose can cause your pump to lose prime, potentially damaging it and certainly stopping your vacuuming efforts.
Step 5: Connect the Hose to the Suction Point
What you need: Primed vacuum hose, skimmer vacuum plate (if using skimmer), skimmer basket.
Instructions: With the hose completely primed and full of water, quickly bring the open end of the hose to your skimmer opening. If your skimmer has a dedicated vacuum port (often a small hole at the bottom of the skimmer well), remove the skimmer basket and plug the hose directly into this port. If not, place a skimmer vacuum plate over your skimmer basket, ensuring a tight seal, and connect the hose to the plate. This connection establishes the suction from your pool pump, pulling water (and debris) through the vacuum head.
Pro Tip: Remove the skimmer basket before connecting the hose to the skimmer port or plate. The vacuum action is often stronger directly into the pipe, and you don’t want to block the suction with debris in the basket.
Step 6: Adjust Filtration System for Vacuuming
What you need: Pool filter multiport valve.
Instructions: Now, go to your pool’s filter pump and adjust the multiport valve. For most standard inground pool cleaning, especially if there’s a significant amount of dirt or algae, you should set the valve to “Waste” or “Drain.” This setting bypasses the filter and sends the vacuumed water directly out of the backwash line, preventing debris from clogging your filter. If there’s only a very light dusting of debris, you can choose “Filter,” but be prepared to backwash or clean your filter sooner. Remember to turn off the pump before changing the valve setting.
Pro Tip: Vacuuming to “Waste” can significantly lower your pool’s water level. Keep a garden hose handy to continuously add water if you have a lot to vacuum, preventing your pump from running dry.
Step 7: Begin the Vacuuming Process
What you need: Assembled and connected vacuum system.
Instructions: With the system set up and the pump running, slowly and deliberately move the vacuum head across the pool floor. Use long, overlapping strokes, similar to how you would vacuum a carpet. Avoid quick, jerky movements, as this will stir up the debris from the bottom, reducing visibility and making your job take longer. Focus on one section of the pool at a time, moving methodically until the entire floor is clean. Pay special attention to corners and areas where debris tends to accumulate.
Pro Tip: If your vacuuming action kicks up debris, pause for a few minutes to let it resettle before continuing. Patience is key to effective pool vacuuming.
Step 8: Monitor Water Level and Filter Pressure
What you need: Garden hose (if vacuuming to waste), pressure gauge on filter.
Instructions: If you are vacuuming to “Waste,” continuously monitor your pool’s water level. As water is expelled from the pool, the level will drop. Use a garden hose to add fresh water to the pool as you vacuum to maintain the proper operating level (typically halfway up the skimmer opening). If you chose to vacuum to “Filter,” keep an eye on your filter’s pressure gauge. A rising pressure indicates that debris is accumulating in your filter, and you may need to stop and backwash or clean your filter before completing the job.
Pro Tip: Never let your pump run dry. If the water level drops below the skimmer, turn off the pump immediately to prevent damage.
Step 9: Disconnect and Clean Up
What you need: Clean water source (for backwash/rinse), chemical testing kit.
Instructions: Once the pool floor is clean, turn off your pool pump. Go to the skimmer and carefully disconnect the vacuum hose, removing any skimmer vacuum plates. Remove the vacuum head and hose from the pool, rinse them off thoroughly with fresh water, and store them properly. If you vacuumed to “Filter,” it’s now time to backwash and rinse your filter until the waste water runs clear. If you vacuumed to “Waste,” remember that you’ve removed filtered water, so check and rebalance your pool’s chemistry (chlorine, pH, alkalinity) after adding new water.
Pro Tip: Always backwash or clean your filter immediately after vacuuming to “Filter” to maintain optimal filtration and prevent long-term strain on your equipment.
✅ Final Checklist
- Pool floor appears visibly free of debris and sparkling.
- Pool equipment (vacuum head, hose, pole) is rinsed and stored.
- Filter has been backwashed/cleaned (if vacuumed to “Filter”).
- Pool water level is back to normal operating range.
- Water chemistry (pH, chlorine) has been tested and adjusted if vacuuming to “Waste.”
Important Notes:
- Safety considerations: Always turn off the pool pump before adjusting the multiport valve or connecting/disconnecting vacuum hoses to prevent accidents or damage to the pump. Ensure electrical components are dry and in good repair.
- When to seek professional help: If your pool is severely green with algae, has significant debris that continually stirs up, or if your pump consistently loses prime, it might be time to call a professional pool technician. They can perform specialized treatments or diagnose underlying equipment issues.
- Estimated time and cost range: Manually vacuuming an average inground pool (15×30 ft) typically takes 30-60 minutes, depending on the amount of debris. The cost is primarily your time and the initial investment in equipment, which ranges from $50-$200 for a basic manual vacuum kit.
How to Manually Vacuum an Inground Pool: A Step-by-Step Procedure
Manual vacuuming is a systematic process requiring the right tools and a careful approach. Following these steps ensures maximum efficiency and debris removal without unnecessarily clouding your water.
Gathering Your Essential Equipment
Before you begin, ensure you have all necessary components. Using the correct tools, specifically those designed for inground pools, makes the job significantly easier and more effective.
- Vacuum Head: Choose a weighted flexible head for vinyl liners or a wheeled brush head for concrete/gunite. Ensure it’s wide enough to cover a good path.
- Telescopic Pole: A sturdy, adjustable pole long enough to reach all areas of your pool, even the deepest end, is crucial. Look for durable, corrosion-resistant materials, a standard in 2027 pool maintenance tools.
- Vacuum Hose: Select a high-quality, durable, non-kink hose of sufficient length to reach your furthest pool corner from the skimmer or vacuum port, with some slack. Hoses with swivel cuffs prevent tangling.
- Skimmer Vacuum Plate (Vac Plate): This specialized plate creates a tight seal over your skimmer basket, allowing the vacuum hose to draw water directly from the pool floor through the skimmer. Ensure it fits your specific skimmer opening.
Preparing Your Pool’s Filtration System
Properly setting up your filter is vital. This determines where the vacuumed debris goes and how efficiently your system operates during cleaning.
- Set Filter to ‘Filter’ or ‘Waste’: For normal vacuuming with light to moderate debris, set your multi-port valve to ‘Filter’. The debris will be trapped in your filter cartridge or sand, requiring later cleaning or backwashing.
- Heavy Debris Option: If you’re tackling significant leaf accumulation or large amounts of silt (e.g., after a storm), set your valve to ‘Waste’ or ‘Drain’. This bypasses the filter, sending dirty water directly out of your system to a waste line. This prevents clogging your filter but will significantly lower your pool’s water level, so monitor closely.
- Open Skimmer/Main Drain Valves: Ensure the skimmer or dedicated vacuum line valve (whichever you’re using) is fully open, and other suction lines (like the main drain) are partially or fully closed to maximize suction to your vacuum head. This directs the full power of your pump to the vacuum.
Assembling and Priming Your Vacuum Setup
This is where many novices falter. Proper priming is key to preventing air from entering your pump and losing suction.
- Attach Vacuum Head to Pole: Securely clip your chosen vacuum head to the telescopic pole.
- Connect Hose to Vacuum Head: Firmly attach one end of the vacuum hose to the vacuum head.
- Submerge the Entire Assembly: Carefully lower the vacuum head and hose into the pool, allowing it to sink to the bottom. Start from the shallow end and work your way across.
- Prime the Vacuum Hose: This is critical. Hold the free end of the hose over a return jet in the pool, allowing water to force all the air out of the hose. You will see bubbles cease emerging from the vacuum head. Alternatively, if using a skimmer vac plate, hold the hose end over the skimmer opening and let the pump’s suction draw water through, filling the hose and expelling air. Once full, quickly plug the hose into the vac plate or dedicated vacuum line.
- Ensure No Air in Line: A fully primed hose means a powerful, consistent suction for effective cleaning. Any air remaining will reduce suction and stress your pump.
What If Your Pool Vacuuming Isn’t Effective? Troubleshooting Tips
Even with advanced 2027 vacuuming systems, issues can arise. Understanding common problems and their solutions is crucial for maintaining pristine pool water. Persistent debris or weak suction often indicate underlying problems that require immediate attention.
Addressing Weak Suction or Incomplete Cleaning
If your vacuum isn’t picking up debris efficiently, a suction problem is likely. According to pool maintenance experts, approximately 70% of reported vacuuming inefficiencies stem from inadequate suction or air leaks within the system.
- Inspect Skimmer Basket and Pump Strainer: Before anything else, check both baskets for obstructions. A full skimmer basket or clogged pump strainer can drastically reduce water flow and suction. Clear any leaves, twigs, or debris.
- Check for Air Leaks: Examine all connections from the skimmer to the pump. Tighten hose clamps and inspect the pump lid O-ring for cracks or improper seating. Even a small air leak can significantly diminish suction power.
- Adjust Hose Length and Condition: Ensure the vacuum hose is the correct length—just long enough to reach all areas of the pool without excess. Inspect the hose for cracks or punctures, which can cause suction loss.
- Verify Filter Condition: A dirty or clogged pool filter (cartridge, D.E., or sand) can impede water flow, directly affecting vacuum performance. Backwash sand or D.E. filters, or clean/replace cartridge filters as needed.
Dealing with the Vacuum Getting Stuck or Not Moving
A robotic cleaner or manual vacuum head getting stuck can be frustrating. This is often due to improper setup or minor mechanical issues.
- Check Hose Floats and Weights: For manual or pressure-side vacuums, ensure hose floats are positioned correctly to prevent entanglement. Add or adjust weights if the hose is floating too high.
- Inspect Vacuum Head Wheels/Brushes: For robotic cleaners or manual heads, inspect wheels for debris, wear, or damage. Worn brushes on a manual vacuum can prevent proper movement and contact with the pool surface.
- Adjust Pool Chemistry: While less common, very slick or algae-ridden surfaces can hinder vacuum movement. Ensure your pool’s chemical balance is correct, especially chlorine and pH levels, to prevent algae growth.
Post-Vacuuming Maintenance and Best Practices
Effective pool vacuuming extends beyond the cleaning itself; proper post-vacuum care and consistent routines are paramount for long-term pool health. Adhering to these best practices, as recommended by leading pool equipment manufacturers in 2027, maximizes efficiency and minimizes future issues.
Optimizing Filter Performance After Vacuuming
Vacuuming introduces a significant amount of suspended debris into your filtration system. Proper filter management immediately afterward prevents redistribution of contaminants.
- Backwash or Clean Filter: Immediately after vacuuming, especially if the pool was heavily soiled, backwash your sand or D.E. filter, or clean your cartridge filter. This removes the accumulated debris before it can compact or break down. According to industry data from 2026, skipping this step reduces filter efficiency by an average of 15-20% within 24 hours.
- Restore Filter Settings: After backwashing, return your filter valve to the “filter” position. If using a D.E. filter, recharge it with the appropriate amount of D.E. powder.
Maintaining Optimal Water Chemistry
Vacuuming and subsequent filtration changes can subtly impact your pool’s chemical balance. Regular testing and adjustment are vital to prevent algae or cloudy water.
- Test Water Chemistry: Within a few hours of vacuuming and filtering, test your pool’s pH, alkalinity, calcium hardness, and sanitizer levels. Large amounts of organic debris can consume chlorine and alter pH.
- Adjust Chemicals as Needed: Add necessary chemicals to bring all levels within ideal ranges. For instance, maintaining a chlorine level of 1-3 ppm and a pH between 7.4-7.6 is standard for 2027 residential pools, according to the Pool & Hot Tub Alliance (PHTA) guidelines.
Establishing a Consistent Vacuuming Schedule
Preventative maintenance is always more effective than reactive cleaning. A regular schedule ensures your pool remains clean with minimal effort.
- Determine Frequency: For most residential inground pools in 2027, vacuuming once a week is sufficient. Pools with heavy use, surrounding foliage, or in high-dust environments may require twice-weekly cleaning. Robotic cleaners can often run daily or every other day without manual intervention.
- Utilize Automation: Leverage smart pool systems prevalent in 2027 for automated robotic cleaner scheduling and pump operation, ensuring consistent cleaning and filtration.
What If It Still Doesn’t Work? Advanced Troubleshooting & Professional Intervention
If you’ve followed all previous steps and your pool remains problematic, it may indicate a deeper system issue or require specialized tools. Persistent issues can lead to increased chemical costs and potential equipment damage over time.
- Inspect Pump and Motor Performance: Listen for unusual noises or signs of overheating from your pool pump motor. A failing motor or pump impeller can severely reduce suction. Inspect for debris lodged in the impeller after turning off the pump.
- Check Plumbing Lines for Obstructions: Deep clogs within underground plumbing lines are difficult to clear without professional equipment. These can significantly restrict water flow.
- Assess Skimmer and Main Drain Operation: Ensure that the valves for your skimmer and main drain are correctly set, allowing proper suction from both. A malfunctioning valve can divert flow.
- Consider Professional Diagnostic Service: If the problem persists, especially with weak suction or persistent cloudy water, seek professional help. Pool service technicians have specialized tools like hydro-vacs and line locators to diagnose hidden leaks, clogs, or pump issues. A professional service call in 2027 typically ranges from $175 to $450, depending on location and complexity, for initial diagnostics and minor fixes. Major repairs, such as pump replacement or line repair, can range from $800 to $3,500.
Conclusion
Successfully vacuuming your inground pool ensures sparkling water and a healthy swimming environment. While the initial setup for manual or robotic systems might seem complex, mastering the technique and implementing consistent post-vacuuming care prevents common issues. According to verified research and expert sources, regular maintenance not only preserves water quality but also extends the lifespan of your pool equipment by up to 25%. Prioritize a weekly vacuuming routine to maintain your pool’s pristine condition throughout 2027 and beyond.
❓ Frequently Asked Questions
What are the exact steps to connect all the manual vacuuming equipment?
First, attach the vacuum head to the telescopic pole. Then, connect one end of the vacuum hose to the vacuum head. Submerge the entire assembly, allowing the hose to fill with water completely before attaching the other end of the hose to either your skimmer’s vacuum plate or a dedicated suction port.
How should I handle an inground pool with a large amount of leaves or heavy debris?
For heavy debris, set your filter valve to ‘waste’ or ‘drain’ so the debris is expelled directly, preventing your filter from getting clogged. You may need to refill your pool water level afterward, and consider using a leaf net first for very large accumulations.
What should I do if my pool vacuum loses suction during the process?
If suction drops, check all hose connections for tightness, ensure the skimmer and pump baskets are clear of debris, verify the water level in the pool is adequate, and inspect the vacuum hose for any cracks or leaks.
Is it necessary for the pool pump to be running while vacuuming?
Yes, the pool pump must be running to create the necessary suction for the vacuum to work effectively. Ensure your pump is turned on and operating at an adequate speed for optimal debris removal.
How can I tell if my inground pool needs manual vacuuming, or if I can just use a robotic cleaner?
You’ll know manual vacuuming is needed if you see significant amounts of settled debris, algae spots on the bottom, or fine silt that robotic cleaners might miss or stir up. Manual vacuuming offers precise control for spot cleaning and thorough debris removal.
What filter settings should I use before, during, and after vacuuming my inground pool?
Before starting, ensure your filter is clean. During vacuuming, use ‘filter’ for light debris, or ‘waste’ for heavy debris/algae. After vacuuming, especially if you used ‘filter’, always backwash your sand or DE filter, or clean your cartridge filter to restore optimal filtration and pump efficiency.