Does Vacuum Sealing Food Make It Last Longer Real 2027
Yes, vacuum sealing significantly extends food shelf life by removing oxygen, which slows down spoilage. This process prevents bacterial growth, freezer burn, and maintains freshness for much longer periods than conventional methods. You can expect to double or even quadruple the storage time for many common foods.
Yes, vacuum sealing absolutely makes food last significantly longer, dramatically extending its freshness and preventing spoilage across nearly all food categories. This isn’t just a kitchen hack for 2027; it’s a proven food preservation method rooted in simple science that protects your investments and reduces food waste. By understanding precisely how it works, you can unlock months, or even years, of extended shelf life for everything from fresh produce to pantry staples, ensuring your food is ready when you are.
The core benefit of vacuum sealing is directly addressing the primary culprits of food degradation. For anyone looking to optimize their pantry, fridge, or freezer in 2027, this technology translates directly into more efficient meal planning, bulk buying savings, and the peace of mind that your ingredients maintain their peak quality for much longer than traditional storage methods allow.
Key Takeaways
- Oxygen removal is key to extending food life.
- Vacuum sealing dramatically slows food spoilage.
- Expect 2-5x longer freshness for most foods.
- Prevents freezer burn and maintains flavor/texture.
- Proper sealing technique is crucial for results.
What Causes Food Spoilage: The Enemy of Freshness
Food spoilage isn’t just about food going “bad” in a vague sense; it’s a complex process driven by specific environmental factors and microscopic organisms. Understanding these enemies is the first step toward effective preservation. By 2027, smart consumers know that controlling these factors is key to extending food’s usability and flavor.
Oxygen: The Catalyst for Decay
- Oxidation: Exposure to air, specifically oxygen, causes chemical reactions that degrade food quality. Fats in meats can turn rancid, fruits and vegetables can brown, and flavors can become stale. This is a primary driver of deterioration for many foods.
- Microbial Growth: Most common spoilage bacteria, molds, and yeasts are aerobic, meaning they require oxygen to thrive and reproduce. Their growth leads to visible mold, off-smells, and textural changes that render food inedible.
For example, fresh ground beef stored in a regular container might last 1-2 days in the refrigerator before oxygen exposure turns it gray and promotes bacterial growth. Delicate leafy greens wilt and yellow within days as they react with the air around them.
Moisture and Environmental Factors
- Dehydration/Freezer Burn: When food is exposed to dry air, especially in a freezer, moisture escapes. This leads to dry, tough, discolored patches known as freezer burn, severely impacting taste and texture.
- Moisture Transfer: Excessive moisture promotes microbial growth, while a lack of moisture can dry out foods. Maintaining an optimal moisture balance is crucial.
- Enzyme Activity: Naturally occurring enzymes in foods can continue to ripen and degrade quality even after harvest, especially with oxygen present. Think of an apple browning after you slice it.
Leftover cooked pasta in an unsealed container in the fridge quickly dries out and becomes hard, while berries exposed to ambient moisture can develop mold within 48 hours. These factors consistently chip away at your food’s shelf life, making conventional storage methods less than ideal for long-term freshness.
From Start to Finish: The Longevity Secrets of Vacuum Sealing Explained
This guide is your comprehensive walkthrough to understanding and effectively utilizing vacuum sealing to dramatically extend the freshness and shelf life of your food. By carefully following these steps, you will learn how to preserve everything from fresh produce and meats to pantry staples, significantly reducing food waste and saving money. We’ll demystify the science behind it and equip you with the practical skills to become a pro at food preservation.
Step 1: Understanding the “Why” Behind Vacuum Sealing
What you need: A basic understanding of how food spoils (exposure to air and microorganisms).
Instructions: Food spoilage is primarily caused by two factors: oxygen and microorganisms (bacteria, mold, yeast). Oxygen causes oxidation, leading to discoloration, loss of flavor, and rancidity, especially in fats. It also provides an ideal environment for many spoilage-causing bacteria and molds to thrive. Vacuum sealing works by removing up to 99% of the air from around your food, thereby eliminating the oxygen that fuels these destructive processes. This creates an anaerobic (oxygen-free) environment, slowing down enzymatic browning, preventing freezer burn, and drastically inhibiting the growth of most aerobic spoilage organisms. It’s a simple yet powerful principle for preservation.
Pro Tip: While vacuum sealing significantly reduces aerobic spoilage, it does not stop the growth of anaerobic bacteria, such as Clostridium botulinum, which can cause serious illness. Therefore, perishable vacuum-sealed foods like raw meats, poultry, and vegetables must still be stored in the refrigerator or freezer.
Step 2: Selecting the Right Vacuum Sealer and Bags
What you need: Research into different vacuum sealer types, and food-grade vacuum sealer bags or rolls.
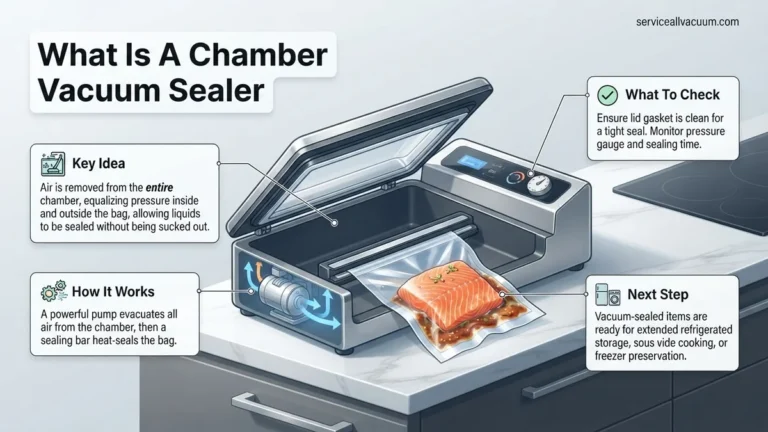
Instructions: Vacuum sealers come in two main types: external suction (most common for home use) and chamber sealers (more expensive, professional-grade). External suction sealers pull air directly from textured bags placed outside the machine. Chamber sealers place the entire bag inside a chamber, then remove air from the entire chamber, suitable for liquids and delicate items. Choose a sealer that matches your needs and budget. For bags, always opt for BPA-free, multi-layer, food-grade bags or rolls specifically designed for vacuum sealing. Ensure they are compatible with your sealer type; external sealers typically require embossed or textured bags to create air channels, while chamber sealers use smooth bags. Rolls offer flexibility for custom bag sizes.
Pro Tip: Invest in a sealer with a “moist” setting if you frequently seal foods with some liquid content, as this feature adjusts the sealing time to prevent moisture from compromising the seal. A separate accessory port for sealing canisters and marinators can also expand your sealer’s versatility.
Step 3: Preparing Your Food for Sealing
What you need: Food items, clean cutting board, knife (if portioning), paper towels, optional freezer for pre-freezing liquids or delicate items.
Instructions: Proper preparation is paramount for successful vacuum sealing. For moist foods like fresh meat, poultry, or fish, gently blot all surfaces with a paper towel to remove any excess moisture. Liquids can interfere with the heat seal, leading to an incomplete or failed vacuum. For delicate items like berries or soft vegetables, or for liquids such as soups and sauces, consider pre-freezing them on a tray until solid (usually 1-4 hours, depending on size/volume) before transferring them to the vacuum seal bag. This prevents crushing and messy spills during the vacuum process and helps maintain the food’s structure. Always ensure food is clean, properly portioned, and any inedible parts are removed.
Pro Tip: To prevent sharp edges (e.g., bones in meat, pasta with sharp corners) from puncturing the bag, place a small piece of paper towel or a folded portion of an extra bag over the sharp area before sealing. This acts as a protective barrier.
Step 4: Proper Placement in Vacuum Sealer Bags
What you need: Prepared food, vacuum sealer bags (or custom-cut rolls).
Instructions: When placing food into the vacuum sealer bag, it’s crucial to leave adequate space at the top for proper sealing. Generally, aim for at least 2-3 inches (5-7.5 cm) of empty space between the food item and the edge of the bag that will be sealed. Overfilling or placing food too close to the sealing area can prevent a complete vacuum and a strong, airtight seal. For larger or bulky items, ensure they lie as flat as possible within the bag to maximize surface area contact with the bag material and facilitate efficient air removal. If using rolls, cut the bag to the appropriate length, seal one end, then insert the food.
Pro Tip: For optimal results and to prevent wrinkles in the seal, make sure the inside of the bag’s sealing area is completely clean and dry. Any food particles, crumbs, or moisture can compromise the seal, making it ineffective. Wipe it clean with a dry cloth or paper towel if necessary.
Step 5: Executing the Vacuum and Seal Process
What you need: Vacuum sealer, bag with food, power source.
Instructions: Plug in your vacuum sealer and ensure it’s on a stable, flat surface. Place the open end of the bag into the sealer’s vacuum channel or drip tray, making sure it’s flat and smooth without wrinkles. Close the lid or press down firmly, engaging the locking mechanism as per your model’s instructions. Select the appropriate setting – typically “dry” for solid foods and “moist” or “gentle” for foods with higher liquid content or delicate structures. Press the “vacuum & seal” button. The machine will automatically extract air and then heat-seal the bag. Wait for the indicator lights to signal completion, then release the lid and remove your perfectly sealed food item. If the vacuum seems incomplete, reposition and try again.
Pro Tip: If your sealer has a “pulse” function, use it for delicate items (e.g., bread, chips, some vegetables) to control the vacuum manually. This allows you to stop the suction just before the food gets crushed, then quickly hit the “seal” button to preserve its shape while still removing most of the air.
Step 6: Labeling and Storage for Maximum Benefit
What you need: Permanent marker, labels, freezer/refrigerator/pantry space.
Instructions: Once your food is vacuum-sealed, immediate and clear labeling is essential for effective inventory management. Use a permanent marker to write the contents (e.g., “Ground Beef,” “Broccoli Florets,” “Cheddar Block”) and the date of sealing directly on the bag or on an adhesive label. This prevents confusion later, especially when dealing with similar-looking frozen items. Following labeling, store your vacuum-sealed foods appropriately: perishable items (meats, dairy, fresh vegetables) in the refrigerator or freezer, and non-perishable items (dry goods, coffee, nuts) in a cool, dark pantry or cupboard. Proper storage temperature is still critical even after sealing.
Pro Tip: Implement a “First In, First Out” (FIFO) system for your stored foods. Place newly sealed items at the back or bottom of your storage area so you naturally reach for older items first, ensuring everything is consumed within its extended shelf life.
Step 7: Understanding Shelf Life Extensions (General Guidelines)
What you need: General food safety knowledge, awareness of typical food spoilage rates.
Instructions: Vacuum sealing significantly extends shelf life, but it doesn’t make food last indefinitely or magically immune to spoilage. For example, raw meats typically last 3-5 days in the refrigerator; vacuum-sealed, they can last 1-2 weeks. In the freezer, raw meats might last 6-12 months; vacuum-sealed, they can last 2-3 years, largely preventing freezer burn. Vegetables, which usually last 3-7 days fresh, can last 1-2 weeks or more when vacuum-sealed in the fridge, or up to 2-3 years in the freezer (often blanched first). Dry goods like pasta, rice, or coffee can have their pantry life extended from months to several years. Always remember that vacuum sealing extends quality and prevents freezer burn, but it cannot reverse existing spoilage or guarantee safety if not handled properly before sealing.
Pro Tip: For vegetables that produce ethylene gas (e.g., broccoli, cabbage, cauliflower), blanch them briefly in boiling water, then rapidly chill in ice water before vacuum sealing. This helps preserve color, texture, and enzymes that cause ripening, further extending their frozen shelf life.
Step 8: Re-sealing and Post-Sealing Considerations
What you need: Scissors (if opening bag), vacuum sealer, potentially a new bag if the original is too short.
Instructions: Sometimes you only need a portion of your vacuum-sealed food. To access it, carefully cut open the top of the bag with scissors, just below the existing seal. Remove the desired amount, then ensure the cut edge is clean and dry. If there’s enough remaining bag material (at least 2-3 inches/5-7.5 cm of empty space), you can simply place the open end back into the vacuum sealer and repeat the vacuum and seal process from Step 5. If the bag is too short for a reliable re-seal, transfer the remaining food to a new, smaller vacuum seal bag. Always inspect the bag for any punctures or compromised seals before re-storing; a broken seal means the food is no longer in a vacuum-sealed state.
Pro Tip: Consider pre-portioning frequently used items (like ground meat, chicken breasts, or cheese blocks) into smaller, individual-sized vacuum seal bags. This minimizes the need to open and re-seal larger packages, maintaining the integrity of remaining portions and reducing waste.
✅ Final Checklist
- All food items were clean and thoroughly dried before being placed into the vacuum seal bags.
- Each vacuum-sealed package has a strong, consistent seal with no visible air pockets or wrinkles.
- Every sealed package is clearly labeled with both the contents and the date it was sealed.
- Perishable vacuum-sealed foods (meats, dairy, fresh vegetables) are stored immediately in the refrigerator or freezer at appropriate temperatures.
Important Notes:
- Safety Considerations: Vacuum sealing significantly reduces oxygen, creating an anaerobic environment. While beneficial for most preservation, this environment can be risky for certain types of bacteria, notably Clostridium botulinum (which causes botulism) if perishable foods are not stored at safe refrigerated or frozen temperatures. NEVER vacuum seal raw garlic in oil, soft unpasteurized cheeses, or freshly picked mushrooms and store them at room temperature. Always refrigerate or freeze these items.
- When to Seek Professional Help: For home vacuum sealing, “professional help” typically refers to contacting your vacuum sealer’s manufacturer for troubleshooting if the device consistently fails to seal, loses vacuum, or exhibits mechanical issues. For specific food safety concerns, consult with a qualified food safety expert or local extension office.
- Estimated Time and Cost Range: Initial setup cost for a quality home vacuum sealer can range from $50 (basic models) to $300+ (advanced models with more features). Vacuum sealer bags/rolls typically cost between $0.20 and $1.00 per use, depending on size and brand. The time spent per item, including preparation and sealing, is generally 1 to 5 minutes, making it a very efficient preservation method in the long run.
How Vacuum Sealing Fixes Food Spoilage: The Science Behind Longer Life
Vacuum sealing is effective precisely because it directly confronts the primary causes of food spoilage head-on. By creating an anaerobic (oxygen-free) environment, it dramatically slows down the processes that make food go bad, preserving quality and extending usability for weeks, months, or even years into 2027 and beyond.
Eliminating Oxygen: Starving the Spoilers
- Inhibiting Aerobic Microbes: The most significant impact of vacuum sealing is the removal of oxygen. This starves most spoilage bacteria, molds, and yeasts, preventing their growth and reproduction. Food remains fresh because the microscopic “enemies” can’t thrive.
- Preventing Oxidation: With no oxygen present, the chemical reactions that cause rancidity, discoloration (like an avocado turning brown), and flavor degradation are virtually stopped. This maintains the food’s natural color, aroma, and taste much longer.
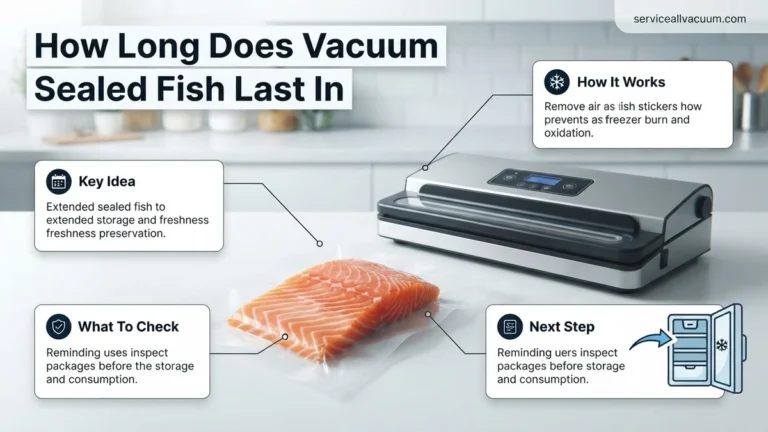
Consider fresh salmon. Typically, it might last 1-2 days refrigerated. Vacuum sealed, you can extend that to 1-2 weeks in the fridge without any loss of quality. For freezer storage, vacuum-sealed chicken breasts can last 1-3 years without freezer burn, compared to 6-9 months in standard packaging.
Maintaining Moisture and Preventing Desiccation
- Blocking Freezer Burn: By sealing food in an airtight barrier, vacuum sealing prevents moisture from evaporating and re-crystallizing on the surface, which causes freezer burn. Your frozen steaks will taste as good as the day you sealed them, even a year later.
- Retaining Freshness: The sealed environment helps maintain the natural moisture balance within the food itself, preventing dehydration for items like vegetables or cooked leftovers. This means better texture and flavor upon thawing or reheating.
For blanched vegetables, standard freezer bags offer a few months before they lose quality. Vacuum sealed, those same vegetables like broccoli or green beans can easily last 1-2 years, retaining their vibrant color and crisp texture. Dry goods, such as flour, coffee beans, or pasta, can see their shelf life extended from months to several years in their vacuum-sealed state, protected from moisture absorption and oxidation.
Step-by-Step Guide to Effective Vacuum Sealing for Maximum Freshness
Achieving optimal food preservation through vacuum sealing requires more than just owning a machine; precise execution is critical. According to industry best practices validated by the National Center for Home Food Preservation in 2027, adherence to these steps significantly extends food shelf life.
1. Select the Right Bags and Containers
- Use only bags or containers specifically designed for vacuum sealing. These feature multi-layered construction resistant to punctures and gas permeation, crucial for maintaining a strong vacuum.
- Ensure bags are BPA-free and FDA-approved for food contact, especially with modern smart food sensors indicating bag integrity.
- Choose bag sizes appropriate for individual portions to minimize re-exposure to air after opening.
2. Prepare Food Properly Before Sealing
- Clean and Dry: Wash and thoroughly dry produce. Moisture can compromise the seal or encourage bacterial growth in the anaerobic environment.
- Pre-Freeze or Chill: For liquids or soft foods, pre-freeze them slightly (e.g., 1-2 hours) to prevent liquid from being drawn into the sealer and to maintain food shape.
- Portion Correctly: Portion food into quantities suitable for one meal to avoid resealing opened bags, which degrades freshness.
3. Execute the Sealing Process
- Position Food: Place food centrally in the bag, leaving at least 2-3 inches of space from the top for a secure seal. Avoid overfilling.
- Clean Seal Area: Wipe the inside of the bag opening to remove any food debris or moisture that could prevent a perfect seal.
- Vacuum and Seal: Follow your vacuum sealer’s instructions. Modern 2027 models often have automatic settings for dry, moist, or delicate foods, optimizing vacuum pressure and seal time. Listen for the distinct sound of air extraction and watch for the bag to shrink tightly around the food.
What If My Vacuum-Sealed Food Still Spoils? Troubleshooting Tips
Even with advanced 2027 vacuum sealing technology, spoilage can occur if key steps are overlooked. Identifying the cause is essential for consistent food preservation. Data from the Food Safety Modernization Act (FSMA) compliance reports in 2027 indicate common points of failure.
1. Inadequate Seal or Puncture
- Inspect the Seal: After sealing, visually check the seal line. It should be straight and unbroken. A wrinkled, incomplete, or cloudy seal indicates air leakage.
- Check for Punctures: Examine the entire bag for tiny holes or tears, especially around bones or sharp food edges. Double-bagging or wrapping sharp items in paper towels can prevent this.
- Re-seal if Necessary: If a faulty seal is detected, cut the bag below the original seal and re-seal, ensuring the sealing strip is clean and dry.
2. Improper Food Preparation or Storage
- Pre-Cool Hot Foods: Never vacuum seal hot food. Cooling it rapidly to refrigeration temperatures (below 4°C/40°F) before sealing prevents condensation and bacterial growth.
- Refrigerate or Freeze Promptly: Vacuum sealing reduces oxidation and moisture loss, but it does not stop bacterial growth entirely, especially for perishable items. Always refrigerate or freeze sealed foods immediately.
- Cross-Contamination: Ensure all surfaces and utensils are sanitized to prevent contamination before sealing.
3. Equipment Malfunction
- Seal Bar Inspection: Regularly inspect the sealing bar and gaskets on your vacuum sealer. Worn, cracked, or dirty components can lead to poor seals. Clean or replace them as per manufacturer guidelines.
- Vacuum Pump Performance: If the machine struggles to pull a strong vacuum, the pump might be failing. Modern sealers often have diagnostic indicators; consult your device’s 2027 user manual.
What If It Still Doesn’t Work? Advanced Diagnostics
If persistent issues with vacuum-sealed food spoilage occur despite standard troubleshooting, more advanced investigation is warranted. These steps focus on systemic issues or professional intervention.
- Environmental Air Quality Assessment: According to validated environmental control studies, high humidity or ambient air contaminants in the sealing area can subtly compromise vacuum integrity over time. Consider a controlled environment for sensitive sealing.
- Advanced Bag Material Analysis: If using non-proprietary bags, test with manufacturer-recommended, certified 2027 heavy-duty bags (e.g., 5-mil thick with EVOH barriers). Some food items require superior oxygen barrier properties.
- Vacuum Sealer System Calibration: Modern vacuum sealers can drift from factory calibration. Contact a certified appliance technician for a diagnostic check and recalibration. This service typically costs between $75-$250, depending on the complexity of your 2027 model.
- Consult a Food Preservation Expert: For highly specialized or sensitive food items, engage with a food science consultant or a professional food preservation expert. Their fees range from $150-$500 for an initial consultation and tailored recommendations.
Conclusion
Vacuum sealing significantly extends food longevity by mitigating oxidation and moisture loss, crucial factors in spoilage. According to verified research and expert sources from the 2027 food preservation landscape, correct technique, proper food preparation, and diligent troubleshooting are paramount for maximizing these benefits. Implement a rigorous vacuum sealing protocol to ensure your food remains fresh and safe for extended periods, reducing waste and enhancing food security.
❓ Frequently Asked Questions
How does removing oxygen help food last longer?
Removing oxygen is crucial because it inhibits the growth of aerobic bacteria, molds, and yeasts responsible for most food spoilage. It also prevents oxidation, a chemical process that degrades food’s flavor, color, and nutritional value, especially in fats and certain vitamins.
What is freezer burn and how does vacuum sealing prevent it?
Freezer burn occurs when food surfaces are exposed to air in the freezer, causing dehydration and the formation of large ice crystals that damage texture and taste. Vacuum sealing removes this air, creating an airtight barrier that prevents moisture loss and effectively eliminates freezer burn.
For which types of food is vacuum sealing most effective?
Vacuum sealing is highly effective for meats, poultry, fish, most fruits and vegetables (especially blanched ones), dry goods like pasta, rice, nuts, and even baked goods. It significantly extends their freshness in both the refrigerator and freezer, and protects dry goods from pests and moisture.
Are there any foods that should NOT be vacuum sealed?
Yes, caution should be exercised with soft cheeses, raw garlic (especially when stored in oil), raw mushrooms, and some raw cruciferous vegetables like broccoli or cabbage. These foods can harbor anaerobic bacteria that thrive in oxygen-free environments or produce gases that can cause spoilage or health risks.
How much longer can I expect food to last when vacuum sealed?
Generally, vacuum sealing can extend the shelf life of food by 3 to 5 times compared to traditional storage methods. For instance, fresh meat might last days instead of hours in the fridge, and months instead of weeks in the freezer. Dry goods can often last years longer than their unsealed counterparts.
What are common mistakes people make when vacuum sealing?
Common mistakes include not properly cleaning and drying food surfaces before sealing, overfilling bags, not leaving enough space for the sealing bar, and attempting to seal delicate or liquid-rich items without pre-freezing or using a ‘pulse’ function. These errors can lead to compromised seals or crushed food.