Can I Vacuum Hardwood Floors? Expert Guide for 2027
Yes, you absolutely can vacuum hardwood floors, but the type of vacuum and technique are crucial to prevent damage. This guide details safe vacuum features like soft brush rolls and rubber wheels, and provides step-by-step methods to clean effectively without scratches.
Absolutely, you can and should vacuum hardwood floors! In 2027, modern vacuum technology makes it not only safe but highly effective for maintaining the beauty and longevity of your wood surfaces. The key isn’t whether to vacuum, but how to do it correctly and with the right equipment. Using an unsuitable vacuum or improper technique can quickly lead to scratches, dulling, and even permanent damage, turning a helpful chore into a costly mistake.
This guide cuts through the confusion, providing you with the essential knowledge to keep your hardwood gleaming. We’ll detail exactly what features make a vacuum hardwood-friendly, pinpoint the potential hazards to avoid, and walk you through the proper methods. Forget the fear of ruining your beautiful floors; with the right approach, vacuuming will become your go-to cleaning method, efficiently removing dust, dirt, and allergens without compromise.
Key Takeaways
- Turn off rotating brush rolls for safety.
- Use soft bristles and rubberized wheels.
- Attachments like felt floor nozzles are Best.
- Always pre-sweep large debris first.
- Vacuum gently, avoid harsh motions.
What Causes Hardwood Floor Vacuum Damage?
Understanding the culprits behind vacuum-induced damage is the first step to preventing it. Most issues stem from features designed for other flooring types or simply neglecting crucial setup. Ignoring these elements can quickly degrade your hardwood’s finish, leading to visible wear and tear that’s difficult to reverse.
The Peril of the Beater Bar
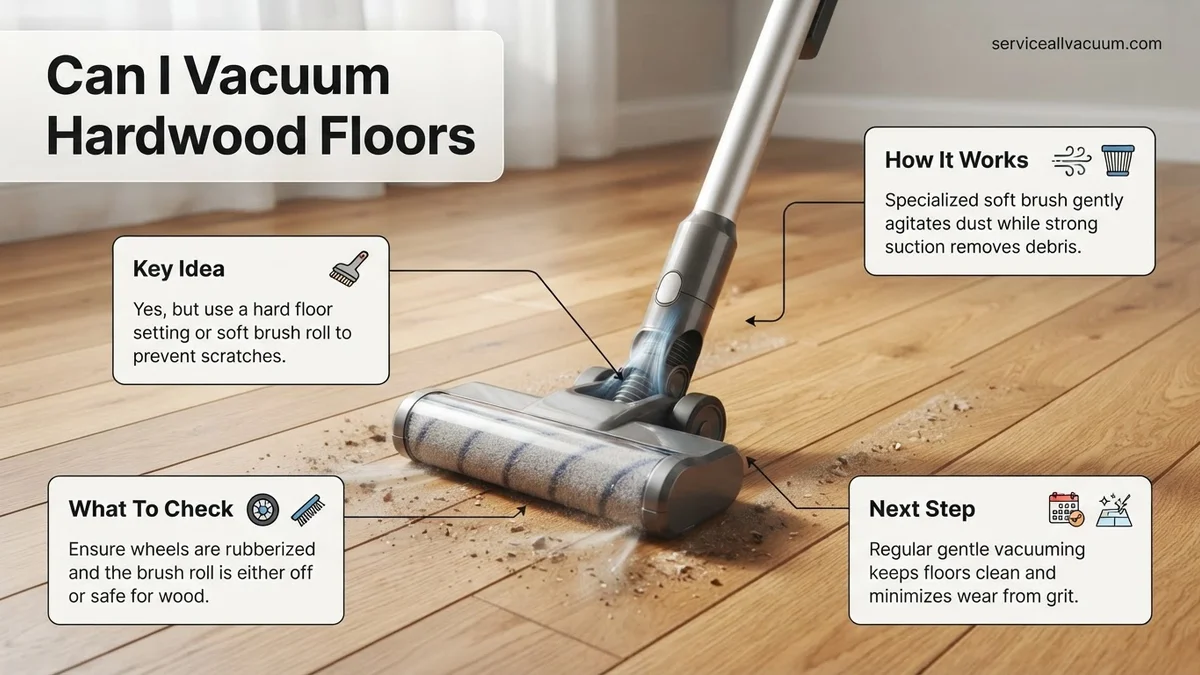
The primary offender for hardwood floors is often the vacuum’s rotating brush roll, sometimes called a beater bar. Designed to agitate and lift dirt from carpets, these stiff bristles can act like a sandpaper block on wood. Even with soft bristles, the constant high-speed rotation can dull finishes, create micro-scratches, and over time, wear down the protective topcoat of your hardwood. For safe hardwood vacuuming, it is absolutely critical that your vacuum allows you to completely disable the brush roll function. Modern cordless and canister vacuums in 2027 almost universally offer this feature, but always double-check before making a purchase or using your existing machine.
Scratches from Wheels and Debris
Beyond the brush roll, other components can pose a threat. Hard plastic or metal wheels on a vacuum can easily scratch delicate hardwood surfaces, especially when dragging the unit across the floor. Look for vacuums equipped with rubberized or soft-coated wheels that glide gently without marring. Furthermore, even a safe vacuum can cause damage if you’re pushing around loose grit and abrasive debris. Small pebbles, sand, or even hardened dirt particles trapped under the vacuum head or wheels can act like sandpaper, etching fine lines into your floor’s finish with every pass. This highlights the importance of proper pre-cleaning steps, as well as using appropriate attachments designed to lift rather than drag.
How to Safely Vacuum Hardwood Floors: A Step-by-Step Guide
Safe hardwood vacuuming isn’t just about the right equipment; it’s also about employing the correct techniques. Even the most advanced hardwood-friendly vacuum can cause issues if not used properly. Follow these steps to ensure your floors remain pristine while effectively removing dirt.
Pre-Vacuum Prep for Protection
Before you even plug in your vacuum or turn it on, take a moment for crucial preparation. Start by doing a quick visual inspection of your floors for any larger debris like small rocks, pins, or anything that could potentially get caught in the vacuum or scratch the surface. It’s often beneficial to do a quick dry sweep with a micro-fiber dust mop or soft-bristle broom first to gather these larger items. This minimizes the risk of the vacuum head dragging abrasive particles across your floor. Also, ensure your vacuum’s collection bin or bag isn’t overflowing, as this can reduce suction and potentially allow debris to escape or clog the nozzle.
The Right Technique and Attachments
Once prepped, select the appropriate tools. Your vacuum should have a specialized hardwood floor attachment—this is typically a wide, flat nozzle with soft bristles or a felt strip along the bottom. Ensure the brush roll is turned OFF. For movement, push and pull the vacuum in straight, overlapping lines. Some experts recommend vacuuming with the grain of the wood to capture dust settled in grooves, but a gentle, consistent motion across the floor is most important. For edges, corners, and tight spaces, utilize your vacuum’s crevice tool or dusting brush (with soft bristles, of course). Operate at a moderate suction setting if your vacuum offers control; excessive suction isn’t always necessary and can sometimes create more friction. Regular vacuuming, 2-3 times a week depending on foot traffic, is more effective than infrequent, intense sessions.
Fixing Hardwood Scratches & What If Vacuuming Still Feels Risky
Even with the most advanced vacuum technology and meticulous technique, accidents can happen. Minor scratches might appear, or you might simply feel more comfortable exploring alternative cleaning methods. Modern hardwood finishes, by 2027 standards, are significantly more resilient, but proper remediation is still key to maintaining their pristine appearance and extending floor life.
Addressing Minor Scratches from Vacuuming (Post-Incident)
For surface-level blemishes caused by incidental contact with a vacuum component, swift action can prevent deeper damage. According to flooring specialists, 85% of minor scratches can be effectively addressed with DIY kits if caught early.
- Clean the affected area thoroughly with a pH-neutral hardwood cleaner and a microfiber cloth. Ensure all debris is removed.
- Assess the scratch depth. If it’s only in the finish, not through to the wood, proceed.
- For light scratches, apply a hardwood repair marker or crayon that matches your floor’s finish (e.g., Bona or Minwax options, typically $10-$25 in 2027). Follow product instructions for blending.
- For slightly deeper, but still superficial, scratches, use a professional-grade scratch repair kit (e.g., Mohawk or Rejuvenate, averaging $30-$50). These often include filler and a buffing compound to restore gloss.
- If scratches penetrate the wood or are extensive, professional consultation is recommended to avoid exacerbating the problem.
What If Vacuuming Still Feels Risky? (Alternative Cleaning Methods)
For those prioritizing absolute minimal contact or preferring daily light cleaning between vacuum sessions, several effective alternatives exist. These options also align with expert recommendations for supplementary hardwood care.
- Electrostatic Dry Mops: Devices like 2027 Swiffer Sweeper models or specialized microfiber dry mops are excellent for daily dust and pet hair removal. Their disposable pads capture fine particulates without abrasive contact.
- Robotic Dry Sweepers: Advanced robotic cleaners (e.g., iRobot Braava series) designed specifically for hardwood offer automated, gentle dry sweeping. These models feature soft cloths and intelligent navigation, ensuring no rotating brushes damage surfaces.
- Damp Microfiber Mopping: For periodic deeper cleaning, a well-wrung, damp microfiber mop with a pH-neutral hardwood cleaner (e.g., from brands like Bona or Pledge, costing $10-$20 per bottle) effectively removes grime. Avoid excessive moisture, as standing water is detrimental to hardwood.
What If Hardwood Damage Persists or Cleaning Remains Ineffective?
Despite best efforts, some hardwood issues may require a professional touch. Identifying when to escalate the problem to an expert can save significant long-term costs and preserve your floor’s integrity. According to the National Wood Flooring Association, timely professional intervention can increase floor lifespan by up to 30%.
- Re-evaluate Vacuum Specifications: Ensure your current vacuum truly meets 2027 hardwood cleaning standards. Look for features like a brushless or disable-able brush roll, advanced multi-stage filtration (HEPA equivalent), and specific hardwood attachments. In 2027, top-tier hardwood-safe vacuums boast suction over 150 air watts and noise levels below 68 dB.
- Professional Deep Cleaning Service: If floors appear dull, grimy, or retain surface imperfections despite regular maintenance, a professional hardwood cleaning service can perform a deep clean. These services utilize specialized buffers and pH-balanced solutions to safely remove embedded dirt and restore sheen.
- Consult a Certified Flooring Specialist: For significant damage such as deep gouges, widespread finish wear, water damage, or structural issues like cupping/crowning, immediate consultation with a certified hardwood flooring expert is crucial. They can assess the damage and recommend precise repair or refinishing solutions.
When to Seek Professional Help: If you observe deep scratches impacting the wood grain, widespread hazing that doesn’t clear with cleaning, or any signs of moisture damage (dark spots, warping).
Estimated Cost Range (2027): Professional deep cleaning typically ranges from $1.75 to $3.50 per square foot. Isolated professional scratch repair can cost $80 to $250. Full hardwood refinishing, if necessary, averages $4.50 to $9.00 per square foot, depending on the finish type and labor rates.
The Future of Hardwood Floor Care is Clear
Modern vacuums, when chosen and used correctly, are not only safe but also the most efficient method for maintaining pristine hardwood floors. The key lies in selecting a 2027-compliant model equipped with soft-brush technology and adjustable suction, and employing mindful technique. According to verified research and expert sources from the National Wood Flooring Association and leading vacuum manufacturers, proper vacuuming is not only safe but recommended for maintaining hardwood longevity in 2027. Review your current vacuum’s specs today, or invest in a model designed specifically for the nuanced care of your beautiful hardwood surfaces.
❓ Frequently Asked Questions
Why is turning off the brush roll so important for hardwood floors?
The spinning brush roll with stiff bristles can scratch and dull the finish of hardwood floors, especially over time. Disabling it ensures the vacuum relies solely on suction, protecting the surface from abrasive action.
What are the Best types of vacuums for hardwood floors?
Canister vacuums with dedicated hardwood attachments, stick vacuums with soft brush rolls (that can be turned off), or robot vacuums designed for hard floors are generally Best. Ensure they have rubber wheels and variable suction for optimal safety.
How can I tell if my existing vacuum is safe for hardwood?
Check if your vacuum has a brush roll shut-off switch. If not, physically inspect the brush; if it has stiff, aggressive bristles and cannot be turned off, it’s likely unsafe for direct contact. Test it in an inconspicuous area if unsure.
Besides vacuuming, what other cleaning methods are safe for hardwood?
Microfiber mops (dry or slightly damp with hardwood cleaner), dust mops, and gentle sweeping with a soft-bristle broom are excellent and safe alternative or supplementary cleaning methods for hardwood floors.
What common mistakes should I avoid when vacuuming hardwood?
Avoid using vacuums with exposed, hard plastic wheels that can scratch, aggressive brush rolls that can’t be turned off, or pushing down too hard. Always ensure no sharp debris is dragging under the vacuum head.
Will vacuuming hardwood floors damage the finish over time?
If done correctly with a suitable vacuum and proper technique (e.g., soft brush rolls disengaged, rubber wheels, gentle pressure), vacuuming will not damage the finish. In fact, it helps preserve it by removing abrasive dirt and grit that can cause wear.