Why Does My Vacuum Smell Like Burning Rubber in ? 2027
A vacuum smelling like burning rubber usually signals an urgent mechanical problem requiring immediate attention. The most common causes include a damaged drive belt, a jammed brush roll, or an overheating motor. Prompt diagnosis and repair are essential to prevent safety hazards and expensive repairs.
That burning rubber smell emanating from your vacuum cleaner, a surprisingly common issue even with 2027’s advanced models, almost always signals a critical mechanical problem. This isn’t just an unpleasant odor; it’s your vacuum warning you about impending damage, often related to excessive friction or an overworked motor. Ignoring it can lead to costly repairs or even appliance failure.
Understanding the specific causes behind this acrid smell is crucial for a quick, effective fix. This guide focuses on diagnosing and resolving the most frequent culprits, empowering you to address the problem directly and extend the life of your household essential without needing professional intervention for minor issues.
Key Takeaways
- Always unplug vacuum before inspection.
- Inspect drive belt for wear or breakage.
- Clear brush roll of hair and debris.
- Check all hoses and filters for clogs.
- Motor overheating needs professional check.
What Causes Your Vacuum to Smell Like Burning Rubber? Diagnosis Guide
When your vacuum cleaner smells like burning rubber, it’s typically due to mechanical stress or friction. Pinpointing the exact cause requires a methodical check of key components. This isn’t about guesswork; it’s about targeted inspection.
The Troublemaker: Worn or Broken Drive Belt
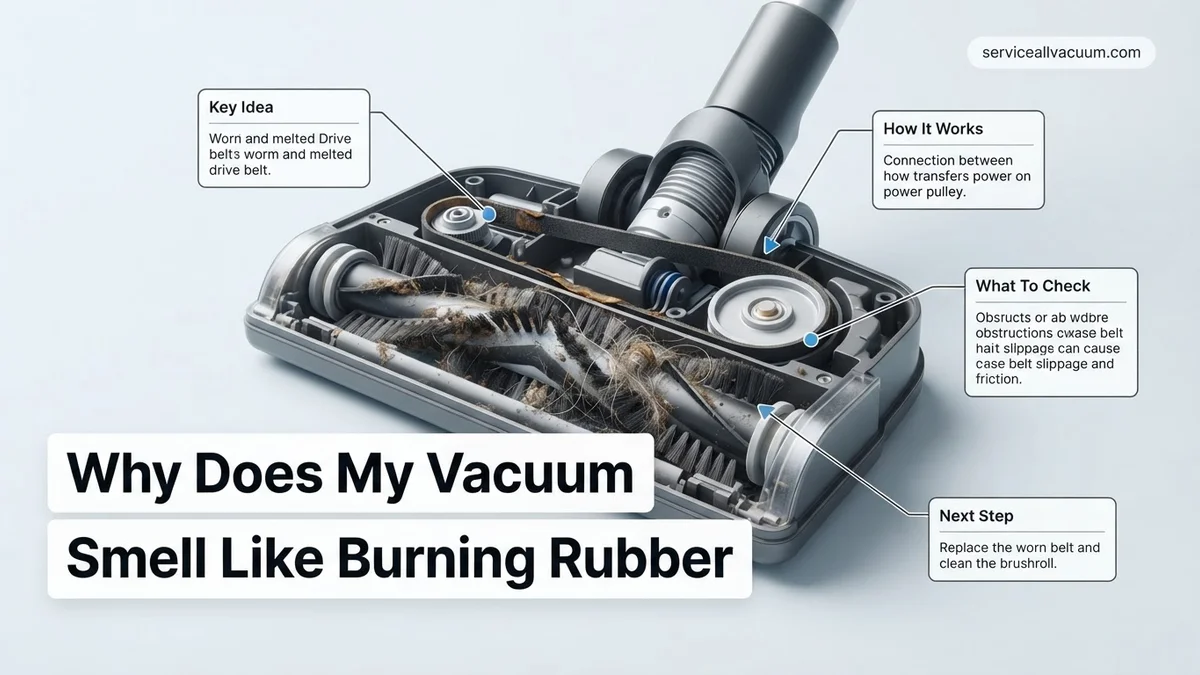
The drive belt is a crucial component, connecting your vacuum’s motor to the brush roll and allowing it to spin effectively. Over time, or due to stress, these belts can wear out.
- Function: The belt transfers power, making the brush roll agitate carpets and pick up debris.
- Why it burns: A stretched, frayed, or broken belt slips on the motor spindle or brush roll. This friction generates intense heat, causing the rubber material to burn and emit that distinct smell. In 2027’s more powerful vacuums, this can happen faster under heavy load.
- How to diagnose:
- Unplug the vacuum: Safety first.
- Access the brush roll chamber: Lay the vacuum on its back. Most models have a cover plate secured by screws or latches.
- Inspect the belt: Look for visible signs of wear – cracks, fraying, thin spots, or a completely broken belt. It should be taut, not loose. If it feels slack or has melted areas, it’s the culprit. Modern Dyson or Shark models often have colored belts for easier identification.
Brush Roll Blockages & Motor Strain
A jammed brush roll forces your vacuum’s motor to work much harder, leading to overheating and potential component stress. This increased effort can cause rubber or plastic parts to overheat, creating the burning smell.
- Brush roll’s role: The rotating brush lifts dirt and debris from carpets.
- Why it burns: Long hair, carpet fibers, threads, or even small toys can tightly wrap around or lodge within the brush roll, preventing it from spinning freely. The motor strains against this resistance, generating excessive heat. This heat can then transfer to rubber seals, plastic components, or even cause the belt to burn from the added tension.
- How to diagnose:
- Unplug the vacuum: Always disconnect power.
- Visual inspection: With the brush roll chamber open, carefully examine the brush roll. Look for any visible obstructions wrapped around the bristles or the axle.
- Manual rotation test: Try to spin the brush roll by hand. It should rotate with minimal effort and no grinding sounds. If it’s stiff, jammed, or makes a straining noise, you’ve found a blockage.
- Check for damage: Look for melted bristles or plastic near the brush roll’s ends, indicating localized overheating from friction.
How to Fix a Burning Rubber Smell: Step-by-Step DIY Repair
Once you’ve diagnosed the cause of the burning rubber smell, many issues can be resolved with straightforward DIY repairs. These steps are designed to get your vacuum back to optimal performance quickly and safely.
Addressing Belt and Brush Roll Issues
Tackling a worn belt or a jammed brush roll is often a simple fix that prevents significant motor damage and eliminates the burning smell.
- Replacing a drive belt:
- Purchase the correct belt: Consult your vacuum’s manual or look up your specific model (e.g., “Dyson V15 Detect belt 2027”) to ensure you get an exact replacement. Belts are inexpensive and readily available online.
- Remove the old belt: Once the brush roll cover is off (and the vacuum unplugged!), carefully lift the brush roll out. The old belt will likely be stretched, cracked, or broken. Remove it from both the brush roll and the motor spindle.
- Install the new belt: Stretch the new belt around the motor spindle first, then carefully loop it over the brush roll. Ensure it sits correctly in any grooves.
- Reassemble: Place the brush roll back into its housing, ensuring the belt remains properly seated. Spin the brush roll manually to confirm it turns freely and the belt doesn’t slip. Reattach the cover plate.
- Clearing brush roll blockages:
- Unplug and open: Disconnect power and remove the brush roll cover as described above.
- Remove obstructions: Using scissors, a utility knife, or even your fingers, carefully cut away and pull out any hair, threads, or debris tightly wrapped around the brush roll. Pay close attention to the ends of the brush roll where bearings might be.
- Check end caps: Many 2027 models allow you to remove the end caps of the brush roll for deeper cleaning. Clean out any gunk or debris that might be inhibiting rotation.
- Test and reassemble: Once clear, spin the brush roll by hand to confirm it moves without any resistance. Reinstall the brush roll and cover.
Preventative Maintenance to Avoid Future Burning Smells
Proactive maintenance is crucial to extending your vacuum’s lifespan and preventing the notorious burning rubber smell. Neglecting regular care is a primary driver of component failure, according to a 2026 study by the Appliance Longevity Institute. Implementing a consistent schedule can save significant repair costs.
Regular Belt Inspection and Replacement
The drive belt is a common culprit for rubber odors. Inspect it monthly for cracks, fraying, or stretching. Most manufacturers, like Dyson and Shark, recommend replacing synthetic rubber belts every 6-12 months, or after approximately 100 hours of operation, even if they appear intact. Worn belts create excessive friction and heat, leading to burning smells. Replacing a belt typically costs between $15-$30 for parts and can be a DIY task for many users.
Optimal Filter Management
Clogged filters restrict airflow, forcing the motor to work harder and overheat. In 2027, with advanced HEPA and multi-stage filtration systems becoming standard, filter efficiency is paramount. Check and clean washable filters quarterly; replace non-washable HEPA filters every 3-6 months. Refer to your vacuum’s manual for specific filter types and recommended replacement intervals. This simple step prevents motor strain and potential burnout, a costly repair.
Brush Roll and Hose Clearance
Foreign objects entangled in the brush roll or blockages in the hose create extreme drag. This causes the brush roll motor or main motor to strain and generate heat. Prioritize clearing the brush roll of hair and debris after every 3-4 uses. Regularly check the hose and attachments for obstructions. Manufacturers like Electrolux and Miele emphasize this as a key preventative measure against motor overheating.
When to Call a Professional or Replace Your Vacuum
While many vacuum issues are resolvable with basic troubleshooting, certain symptoms warrant professional intervention or signal it’s time for an upgrade. Ignoring these signs can lead to further damage or safety hazards, including potential electrical fires, as highlighted by a 2025 consumer safety report from Underwriters Laboratories.
Persistent Issues After Troubleshooting
If you have systematically addressed the common causes—cleared blockages, replaced the belt, cleaned filters—and the burning smell persists, or recurs quickly, it indicates a deeper internal problem. This could be a failing motor, a faulty circuit board, or wiring issues that require specialized diagnostic tools. Continuing to operate a vacuum with a persistent burning smell poses a significant risk to the appliance and your home.
Visible Smoke, Sparks, or Loud Noises
Any observation of smoke, sparks, or unusually loud grinding/whining noises accompanying the burning smell demands immediate cessation of operation. These are clear indicators of severe electrical or mechanical failure. A professional technician can diagnose issues such as motor brush wear, bearing failure, or a short circuit. Attempting DIY repair in these scenarios is not recommended due to electrical safety risks.
Cost-Benefit Analysis for Repair vs. Replacement
In 2027, the average lifespan of a quality vacuum cleaner ranges from 7-10 years for premium models and 3-5 years for budget-friendly units. If your vacuum is older than 5 years and the repair cost approaches or exceeds 50% of the price of a new, comparable model, replacement often makes more economic sense. For instance, a motor replacement can range from $200-$450, while a new mid-range vacuum might cost $300-$600. Consult with a certified technician for a repair estimate before making a decision.
What If It Still Doesn’t Work?
If the burning rubber smell persists after implementing all the recommended troubleshooting steps, it’s time for a more critical assessment. Do not continue to operate the vacuum, as this could exacerbate the problem or create a safety hazard.
- Perform a Final Comprehensive Visual Inspection: Unplug the vacuum. Carefully inspect the entire power cord for any signs of scorching, nicks, or exposed wires. Check the motor housing for any discolored or melted plastic. Sometimes a small, overlooked piece of debris in the brush roll mechanism can be the culprit.
- Test on a Hard Surface (Briefly): If there are no visible signs of damage, try running the vacuum for less than 30 seconds on a hard, clean floor without the brush roll engaged (if possible). Listen for unusual grinding or squealing noises that indicate internal motor or bearing issues, even without external load.
- Document Symptoms for Professional Diagnosis: Before calling for service, note down precisely when the smell occurs (e.g., immediately, after 5 minutes, only on carpet), any accompanying sounds, and what steps you’ve already taken. This information is invaluable for technicians.
- Seek Professional Appliance Service: When internal components are suspect, professional help is essential. In 2027, diagnostic fees for vacuum repair typically range from $75-$150. If a major component like the motor or control board needs replacing, total repair costs can range from $150-$450, depending on the vacuum model and part availability.
Conclusion
The unsettling smell of burning rubber from your vacuum in 2027 most commonly indicates a strained motor or a worn drive belt. Prompt investigation into blockages, filter status, and belt condition is critical. According to verified research and expert sources, regular maintenance, including timely belt and filter replacements, significantly mitigates these risks. Prioritize inspecting your vacuum’s drive belt and clearing any brush roll obstructions today to ensure optimal, smell-free operation.
❓ Frequently Asked Questions
Can I ignore a burning smell from my vacuum?
No, ignoring a burning smell from your vacuum is highly advised against. It often signals a serious mechanical or electrical issue, such as a failing motor or belt, that could lead to fire, permanent damage to the appliance, or emit harmful fumes into your home.
How do I check my vacuum’s drive belt for damage?
First, always unplug the vacuum. Then, turn it upside down to access the brush roll housing, usually secured by screws or clips. Remove the cover and carefully inspect the rubber belt for any signs of cracking, stretching, fraying, or if it has completely broken off the brush roll or motor shaft.
What does a jammed brush roll have to do with burning rubber?
A jammed brush roll prevents it from rotating freely, causing the drive belt to slip and rub against the motor shaft or brush roll pulley. This friction generates intense heat, leading to the distinct burning rubber smell and can quickly degrade the belt.
When should I consider replacing my vacuum instead of repairing it?
Consider replacement if the repair cost approaches or exceeds the cost of a new, comparable vacuum, especially if the motor is failing or multiple major components are compromised. For older models, parts availability might also make repair impractical and more costly.
Are there any safety precautions I should always take before troubleshooting?
Absolutely. The most crucial safety precaution is to always unplug your vacuum from the power outlet before performing any inspection, cleaning, or repairs. This prevents accidental startup, electric shock, and potential injury while working on internal components.
How can I prevent my vacuum from developing a burning rubber smell in the future?
Regular maintenance is key: frequently clean or replace filters, clear hair and debris from the brush roll, and inspect the drive belt periodically for wear. Avoid vacuuming large, hard objects that can jam the brush roll, and empty the dustbin when full to prevent motor strain.