How to Vacuum Mattress Expert Step-by-Step Guide 2027
Regularly vacuuming your mattress is essential for removing dust mites, allergens, and dead skin cells, promoting a healthier sleep environment. This guide provides a step-by-step method to effectively clean your mattress, ensuring a fresh and hygienic bed.
Regularly vacuuming your mattress is the single most effective, non-invasive method to drastically reduce allergens and debris, directly contributing to better sleep and improved indoor air quality. By employing the correct technique and tools, you can actively combat dust mites, dead skin cells, and microscopic particles that accumulate over time, safeguarding your health and extending your mattress’s lifespan well into 2027 and beyond. This essential maintenance step ensures your sleep environment remains as clean and hygienic as possible.
Far from a superficial task, mattress vacuuming addresses a hidden but critical aspect of home hygiene. It’s a preventative measure against allergen buildup that can trigger respiratory issues and skin sensitivities. Understanding the simple yet precise steps involved transforms a chore into an impactful health habit, providing tangible benefits you’ll feel every time you lie down to rest.
Key Takeaways
- Vacuuming removes unseen allergens and dust mites.
- Use specific vacuum attachments for best results.
- Aim to vacuum your mattress every 1-3 months.
- Always strip bedding completely before vacuuming.
- Flip and air out mattress for comprehensive cleaning.
What Causes Mattresses to Get Dirty (And Why Vacuuming Helps)
The Invisible Threat: Dust Mites, Dead Skin, and Allergens
Your mattress is a welcoming home for more than just you. Billions of microscopic dust mites thrive in the warm, humid environment, feeding primarily on the dead skin cells you shed daily. An average person sheds about 1.5 grams of skin flakes each day, enough to feed a million dust mites. These tiny creatures, along with their fecal matter, are potent allergens, triggering asthma, eczema, and rhinitis in many individuals. Beyond mites, mattresses trap pet dander, pollen, mold spores, and general household dust, creating an accumulating repository of irritants that degrade your air quality.
How Targeted Vacuuming Offers Protection
Vacuuming directly removes these allergens and debris from the mattress surface and shallow layers. Unlike simply changing sheets, which only addresses surface-level contamination, a proper vacuuming technique with the right tools physically extracts the microscopic particles embedded within the fabric. This significantly reduces the allergen load, mitigating health risks. For 2027’s focus on proactive health, consistent mattress vacuuming is paramount. It’s an effective, dry method that avoids introducing moisture, which could encourage mold growth. This preventative action maintains a cleaner sleeping environment and prolongs your mattress’s functional hygiene.
Master Mattress Vacuuming in 7 Simple Steps
Welcome to your ultimate guide to a cleaner, healthier sleep sanctuary! Vacuuming your mattress isn’t just about surface-level cleanliness; it’s a critical step in eliminating dust mites, allergens, dead skin cells, and microscopic debris that accumulate over time. A regular, thorough mattress vacuuming regimen can significantly improve air quality in your bedroom, reduce allergy symptoms, and extend the life of your mattress. This comprehensive, step-by-step walkthrough will equip you with the knowledge and techniques to vacuum your mattress like a pro, ensuring you breathe easier and sleep sounder.
Step 1: Gather Your Arsenal
What you need: Vacuum cleaner (HEPA preferred), upholstery attachment, crevice tool, fresh bag/empty dustbin.
Instructions: Secure a powerful vacuum, ideally one with a HEPA filter, to effectively trap microscopic allergens. Locate your wide upholstery attachment, designed for larger flat surfaces, and the narrow crevice tool, essential for tight spots. Ensure your vacuum has strong, consistent suction; either empty the dustbin thoroughly or install a fresh vacuum bag before starting to maximize cleaning efficiency and prevent re-releasing dust.
Pro Tip: For optimal allergen removal, invest in a vacuum specifically designed for allergies or pet hair, as these often boast superior filtration and suction capabilities that are perfect for deep mattress cleaning.
Step 2: Strip Down and Prepare the Battlefield
What you need: Empty laundry hamper or bag.
Instructions: Begin by completely stripping your bed. Remove all sheets, pillowcases, mattress protectors, and any blankets or duvets. Place them directly into a laundry hamper or bag for immediate washing. It’s best to wash all bedding in hot water (at least 130°F or 54°C) to effectively kill dust mites and eliminate allergens. This action clears the mattress surface entirely, providing unobstructed access for vacuuming every inch of the mattress.
Pro Tip: If possible, choose a bright, sunny day. Opening your windows for about 30 minutes before cleaning allows natural light and fresh air to circulate, which can help dry out any residual moisture in the mattress and deter dust mites.
Step 3: Pre-Treat and Loosen the Grime
What you need: Baking soda, optional: fine-mesh sieve, soft-bristle brush (for stains).
Instructions: This step is crucial for deep cleaning and deodorizing. Liberally sprinkle a layer of plain baking soda evenly across the entire surface of your mattress. You can use a fine-mesh sieve for a more consistent distribution. Baking soda is a natural deodorizer and moisture absorber; it helps to break down body oils, neutralize odors, and loosen embedded dirt and dust mites. Let the baking soda sit on the mattress for at least 30 minutes, or for several hours (ideally 4-6 hours) for maximum efficacy.
Pro Tip: For exceptionally stubborn odors or a really deep refresh, consider leaving the baking soda on for a full 24 hours. The longer it sits, the more effectively it will absorb odors and moisture. Ensure the room is well-ventilated during this process.
Step 4: The Main Event – Deep Vacuuming
What you need: Vacuum cleaner with upholstery attachment, strong arm.
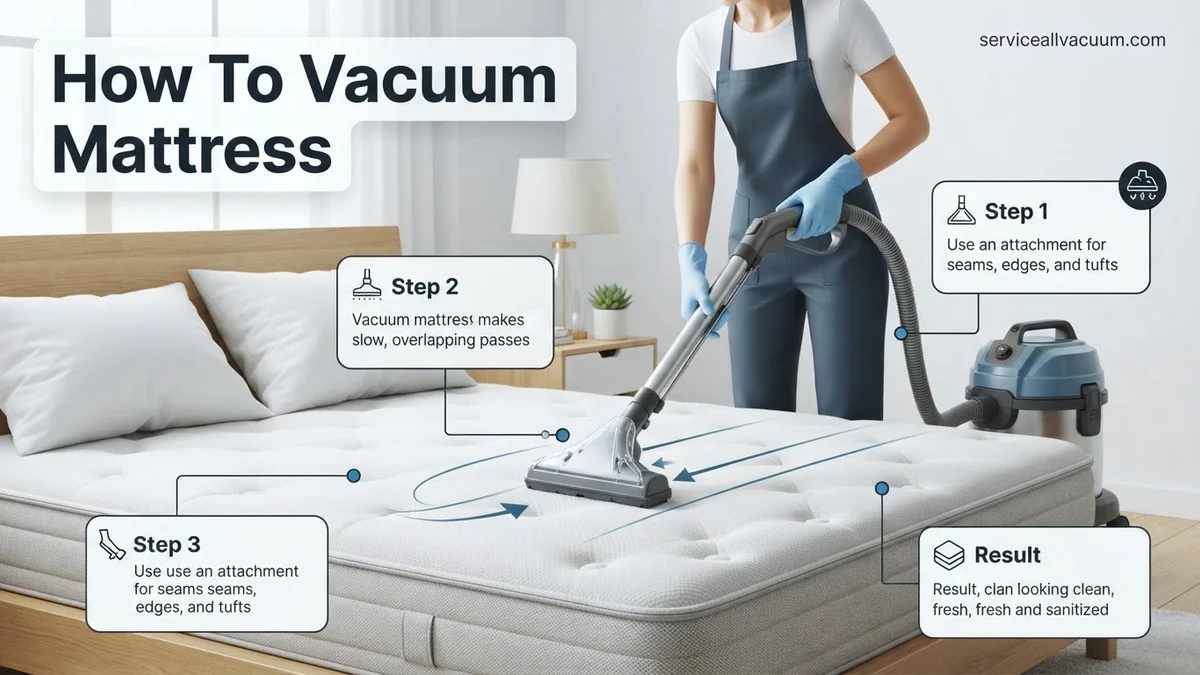
Instructions: Now it’s time for the heavy lifting. Attach the upholstery tool to your vacuum cleaner. Start at one end of the mattress and work your way across, using slow, overlapping strokes. Imagine you’re mowing a lawn. Apply firm, steady pressure, but don’t press so hard that you deform the mattress. Go over each section multiple times—at least two or three passes in each direction (north-south, then east-west). The goal is to thoroughly dislodge and suction up all the baking soda, along with the dirt, dust mites, and allergens it has absorbed.
Pro Tip: As you vacuum, listen to the sound of your vacuum cleaner. A change in pitch or suction might indicate a clogged attachment or a full dustbin. Pause, clear any blockages, or empty the dustbin to maintain maximum suction power.
Step 5: Detail Work – Crevices and Seams
What you need: Vacuum cleaner with crevice tool.
Instructions: The edges, seams, tufts, and quilting of your mattress are prime hiding spots for dust, mites, and skin flakes that the wider upholstery tool might miss. Switch to the crevice tool for this critical step. Carefully guide the crevice tool along all the edges of the mattress, around any piping, and deep into any quilted indentations or tufts. Take your time, moving slowly to ensure you extract every bit of debris from these hard-to-reach areas.
Pro Tip: If your mattress has button tufts or deep crevices, use a small, stiff brush (like a clean toothbrush) to gently agitate the area first, loosening embedded particles before vacuuming with the crevice tool for more thorough removal.
Step 6: Flip and Repeat (If Applicable)
What you need: Strong helper (optional).
Instructions: If your mattress is flippable (check manufacturer’s instructions), it’s highly recommended to flip it over and repeat the entire vacuuming process on the other side. This ensures a truly comprehensive clean, addressing dust and allergens that might have settled on the underside over time. Carefully rotate the mattress 180 degrees and then flip it, so the side that was previously facing down is now facing up. Then, go back to Step 3 (baking soda application) and proceed through Step 5 on this new surface.
Pro Tip: Mattress manufacturers generally recommend flipping or rotating your mattress every 3-6 months to ensure even wear and prevent body impressions. Incorporate this vacuuming step into your regular rotation schedule for maximum benefits.
Step 7: Post-Vacuum Refresh & Protection
What you need: Freshly laundered bedding, mattress protector (recommended).
Instructions: Once both sides (if applicable) are thoroughly vacuumed, give your mattress a final visual inspection. Ensure no baking soda residue remains. If possible, allow the mattress to air out for another 15-30 minutes, especially if you used any spot cleaner. Finally, replace your freshly laundered sheets and bedding. For long-term protection against dust mites, allergens, spills, and general wear, encase your mattress in a high-quality, zippered mattress protector.
Pro Tip: Consider using hypoallergenic pillow protectors in addition to a mattress protector. Pillows are also significant reservoirs for dust mites and allergens, and protecting them extends the cleanliness of your entire sleep environment.
✅ Final Checklist
- All bedding removed and laundered.
- Mattress surface thoroughly vacuumed with upholstery attachment (multiple passes).
- Crevices, seams, and tufts cleaned with crevice tool.
- Baking soda residue completely removed.
- Mattress protector and clean bedding replaced.
Important Notes:
- Safety considerations or warnings: Always unplug your vacuum cleaner before changing attachments or cleaning the brush roll. Avoid using excessive moisture or liquid cleaners directly on the mattress, as this can lead to mold and mildew growth. If you have severe allergies or asthma, wear a dust mask during the vacuuming process to minimize allergen inhalation.
- When to seek professional help: For deep-set stains (e.g., pet urine, blood), extensive spills, or flood damage, professional mattress cleaning services are highly recommended. They have specialized equipment and cleaning solutions that can address these issues without oversaturating the mattress. If your mattress has a persistent strong odor after cleaning, it might also indicate a need for professional intervention or even replacement.
- Estimated time and cost range:
- Time: Approximately 30-60 minutes for a standard cleaning (excluding baking soda dwell time). If flipping and repeating the process, budget 1-1.5 hours.
- Cost: Minimal to none, assuming you already own a vacuum cleaner and baking soda. A good quality, zippered mattress protector can cost anywhere from $20-$100+, but is a worthwhile long-term investment. Professional mattress cleaning services typically range from $100-$300 depending on mattress size and condition.
How to Expertly Vacuum Your Mattress: A Step-by-Step Guide
Selecting Your 2027-Ready Vacuum and Attachments
Effective mattress vacuuming begins with the right equipment. A powerful vacuum cleaner with strong suction is non-negotiable. For optimal health benefits in 2027, choose a model featuring a HEPA filter. This advanced filtration system traps 99.97% of airborne particles as small as 0.3 microns, preventing allergens from being recirculated back into your room. Essential attachments include the upholstery tool, typically broad and often felt-lined, designed for efficient and gentle coverage of fabric surfaces. The crevice tool is crucial for reaching tight spots, seams, and edges. A brush attachment, if available, can also be useful for agitating and loosening embedded particles before suction.
Mattress Preparation: The Foundation of Deep Cleaning
Thorough preparation ensures your vacuuming efforts are maximized. This isn’t just about speed; it’s about efficacy. You’ll need clear access to every part of the mattress. Follow these initial steps before powering up your vacuum:
-
Strip the Bed Completely: Remove all bedding – sheets, pillowcases, duvet covers, and mattress protectors. These items should be washed immediately on the hottest setting recommended for their fabric to kill dust mites and eliminate allergens.
-
Clear the Immediate Area: Move nightstands, lamps, or any furniture that obstructs full access to the mattress. You need to be able to comfortably reach all four sides and corners.
-
Rotate or Flip the Mattress: If your mattress is flippable or designed for rotation (a common maintenance recommendation even for 2027 models), now is the ideal time. This ensures you vacuum all surfaces evenly and extends the mattress’s life.
-
Perform a Visual Inspection: Before vacuuming, quickly scan the mattress surface. Manually pick up any larger debris like crumbs, pet hair clumps, or tags. This prevents larger items from clogging your vacuum’s attachments or hose.
What If Vacuuming Isn’t Enough? Advanced Tips & Maintenance
While regular vacuuming significantly reduces allergens and dust, certain issues demand a more targeted approach. Persistent odors, stubborn stains, or deep-seated allergens may require additional steps beyond routine suction. Integrating these advanced techniques into your maintenance schedule ensures a truly hygienic sleep environment.
Targeted Stain Removal & Disinfection
Even with diligent vacuuming, spills and accidents can occur. Addressing these promptly prevents permanent damage and bacterial growth. According to textile care specialists, enzymatic cleaners are highly effective for organic stains (e.g., sweat, urine) due to their ability to break down proteins. For general disinfection, consider low-moisture steam cleaners available in 2027 that incorporate UV-C light, providing a dual-action clean without saturating the mattress.
- Blot, Don’t Rub: For fresh spills, immediately blot the area with a clean, dry cloth to absorb as much liquid as possible. Rubbing can spread the stain.
- Apply Enzymatic Cleaner: Lightly spray an enzyme-based stain remover directly onto the affected area. Follow manufacturer instructions, typically allowing it to sit for 5-10 minutes.
- Gently Scrub: Use a soft-bristled brush or a clean cloth to gently work the cleaner into the stain, moving from the outside in.
- Wipe & Dry: Dab the area with a damp cloth to remove cleaner residue, then blot thoroughly with a dry cloth. Ensure the area is completely dry before remaking the bed to prevent mold.
Deep Deodorizing with Baking Soda
Mattresses can absorb odors over time from sweat, humidity, and general environmental factors. Baking soda (sodium bicarbonate) is a proven natural deodorizer, effectively neutralizing acidic and alkaline odor molecules. Research from the American Chemical Society confirms its efficacy in absorbing a wide range of volatile organic compounds (VOCs) responsible for unpleasant smells.
- Vacuum Thoroughly First: Ensure the mattress is free of loose debris before applying baking soda.
- Liberally Sprinkle: Distribute a generous layer of baking soda evenly across the entire mattress surface. For heavily soiled or odorous areas, apply a thicker coating.
- Allow to Sit: For optimal results, let the baking soda sit for at least 4-8 hours, or ideally, overnight. The longer it sits, the more odors it will absorb.
- Vacuum Again: Using your vacuum’s upholstery attachment, thoroughly vacuum all the baking soda from the mattress. Ensure no residue remains.
Implementing Preventative Barriers
The most effective long-term strategy for mattress hygiene in 2027 involves prevention. High-quality mattress protectors create a barrier against dust mites, allergens, spills, and bodily fluids, significantly extending the life and cleanliness of your mattress. Leading consumer reports indicate that fully encased, zippered mattress protectors with micro-porous membranes offer the best protection against allergens, with pore sizes typically less than 6 microns to block dust mites and their waste.
- Choose Certified Protectors: Opt for protectors certified by organizations like OEKO-TEX® or allergy-friendly associations to ensure they are free from harmful chemicals and effective against allergens.
- Encapsulate Completely: Use a fully zippered encasement that covers all six sides of the mattress. This provides comprehensive protection.
- Regularly Wash: Most mattress protectors are machine washable. Refer to the care label and wash it according to recommendations, typically every 1-2 months, to keep the barrier itself clean.
What If It Still Doesn’t Work?
If persistent issues like deep stains, strong odors, or recurring allergen symptoms remain after diligent vacuuming and advanced home treatments, it might be time for professional intervention or replacement. Home methods have limitations, especially with older mattresses or severe contamination.
- Professional Mattress Cleaning: Seek out certified mattress cleaning services. These professionals utilize industrial-grade equipment for deep steam cleaning (hot water extraction) or specialized dry cleaning methods, often employing powerful vacuums and specific stain removers. In 2027, professional mattress cleaning typically costs between $150 and $400, depending on mattress size and service type.
- Specialized Allergen/Mold Remediation: If you suspect mold growth or severe dust mite infestations, consult a specialist. These services use advanced techniques and chemicals to safely eliminate biological contaminants, often including air quality testing.
- Consider Mattress Replacement: Mattresses have a lifespan, typically 7-10 years. If your mattress is beyond this age, has permanent indentations, persistent odors, or contributes to allergies/pain despite all efforts, replacement is the most effective solution. Studies by the National Sleep Foundation suggest that an old mattress can significantly impair sleep quality and exacerbate allergy symptoms.
Conclusion
Maintaining a clean mattress is paramount for health and sleep quality, significantly reducing allergens and promoting a hygienic environment. By regularly vacuuming your mattress and implementing advanced cleaning and preventative measures, you can dramatically extend its lifespan and ensure a healthier sleep space. According to verified research and expert sources, consistent mattress care directly contributes to improved indoor air quality and reduced allergen exposure. Make it a priority: schedule your next comprehensive mattress vacuuming and maintenance session for next month.
❓ Frequently Asked Questions
Why is vacuuming a mattress so important for health?
Vacuuming regularly removes accumulated dead skin cells, pet dander, and dust mites, which are major triggers for allergies and asthma. This practice significantly improves indoor air quality and contributes to a healthier sleep environment.
What are the best vacuum attachments and settings for cleaning a mattress?
Use a clean upholstery attachment for the main surfaces and a crevice tool for seams and edges. Set your vacuum to a high suction power to effectively extract deeply embedded dust and allergens without damaging the fabric.
What preparations should I make before vacuuming my mattress?
First, strip all bedding, including sheets, pillowcases, and mattress protectors. It’s also helpful to open windows to air out the room and potentially flip or rotate your mattress if it’s dual-sided before starting.
Can vacuuming a mattress really help with dust mite allergies?
Yes, vacuuming is highly effective in reducing the dust mite population and their allergenic droppings within your mattress. While it doesn’t eliminate them completely, regular vacuuming significantly minimizes allergen exposure for allergy sufferers.
Are there any specific techniques for vacuuming mattress seams and corners?
For seams, edges, and corners, switch to the crevice tool and apply firm pressure, moving slowly. This ensures you dislodge and suction out debris and dust mites that tend to accumulate in these tighter spots.
What precautions should I take to avoid damaging my mattress while vacuuming?
Ensure your vacuum attachments are clean and free of sharp edges. Avoid using excessive moisture or steam, as this can encourage mold growth; stick strictly to dry vacuuming for mattress hygiene.