How to Vacuum Stairs Expert Step-by-Step Guide for 2027
Achieving truly clean stairs requires more than just a quick pass with the vacuum; it demands specific techniques and the right attachments. This guide provides a proven step-by-step method to effectively vacuum every part of your stairs, ensuring a thorough clean from top to bottom. Learn how to manage cords, select tools, and tackle tricky spots for spotless results.
Effectively vacuuming stairs hinges on two critical elements: utilizing the right vacuum attachments and mastering a precise, top-down technique. This isn’t just about making your stairs look clean; it’s about thoroughly extracting embedded dirt, pet dander, and allergens that accumulate rapidly in high-traffic, multi-angled areas. In 2027, with advanced vacuum technology and a focus on home hygiene, skipping corners or struggling with awkward motions is inefficient and leaves your home less pristine than it could be. Let’s make this chore a quick, satisfying win.
A truly clean staircase contributes significantly to your home’s overall cleanliness and air quality. Ignoring proper stair vacuuming allows debris to build up, potentially wearing down carpet fibers faster and becoming a breeding ground for dust mites. By adopting an expert approach, you not only ensure deep cleanliness but also extend the life of your flooring and minimize the time spent on future cleaning sessions.
Key Takeaways
- Prepare stairs by clearing debris and dusting first.
- Select correct attachments like crevice and upholstery tools.
- Start vacuuming from the top step and work down.
- Master techniques for treads, risers, and edges.
- Prioritize safety with cord management and stability.
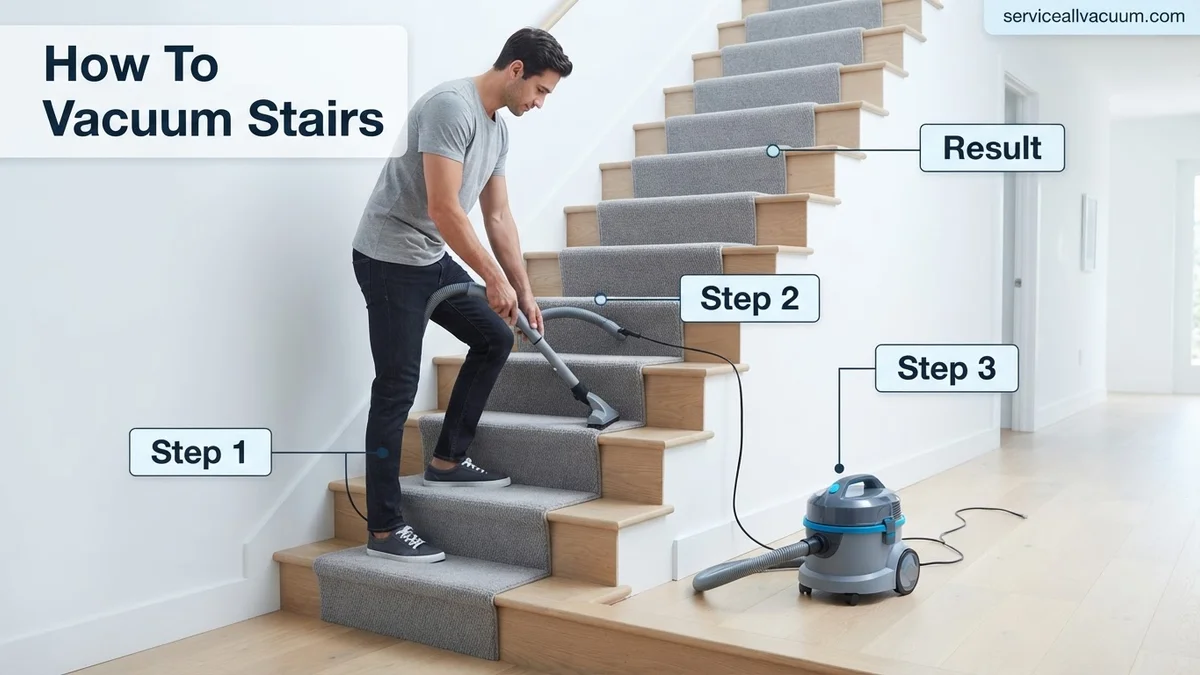
What Makes Stairs Hard to Vacuum Effectively?
Stairs present a unique cleaning challenge that many homeowners overlook, often leading to frustration and subpar results. Their very design, while functional, is antithetical to the broad, flat surface cleaning vacuums are primarily built for. Understanding these inherent difficulties is the first step toward conquering them.
The Geometry Challenge
Traditional upright vacuums, while powerful for open floors, are simply not designed for the intricate topography of a staircase. Each step features a horizontal tread, a vertical riser, and often tight corners where the step meets the wall. These angles and transitions are perfect traps for dirt, crumbs, and pet hair, making them incredibly difficult to reach with a standard vacuum head. You often find yourself contorting your body and the machine, leading to missed spots and wasted effort. Even stick vacuums, while lighter, often lack the specialized attachments or concentrated suction needed for these tight, three-dimensional spaces.
Attachment Underutilization
Most modern vacuum cleaners, including those you’ll find in homes across 2027, come equipped with a suite of attachments designed precisely for these difficult tasks. However, a common oversight is not knowing which attachment to use, or even that they exist for more than just dusting furniture. Without the proper tools—a crevice tool for edges, an upholstery brush for general carpet surface, and especially a powered mini-brush or stair tool—you’re trying to fit a square peg into a round hole. Relying solely on the main vacuum head guarantees a superficial clean, leaving behind significant grime in the crevices and along the risers that a specific attachment would easily tackle.
From Start to Finish: Vacuuming Stairs Explained
Stairs, with their unique nooks, crannies, and varying surfaces, can be a particularly challenging area to vacuum effectively. Unlike flat floors, they accumulate dust, pet hair, and debris in tight spots, making a thorough clean essential for both hygiene and aesthetics. This detailed guide will walk you through each critical stage of vacuuming your stairs, transforming a daunting chore into a streamlined process. By following these expert steps, you’ll not only achieve a pristine staircase but also prolong the life of your carpet and maintain a healthier home environment.
Step 1: Gather Your Arsenal and Clear the Path
What you need: A powerful vacuum cleaner (corded or cordless, preferably lightweight), a specific stair attachment or handheld vacuum, a crevice tool, an upholstery tool (optional, for heavily carpeted stairs), a small handheld brush or broom with a dustpan, and a container or basket to temporarily hold items.
Instructions: Begin by completely decluttering your staircase. Remove any shoes, toys, books, potted plants, or decorative items that might obstruct your vacuuming path. Place these items in a designated basket or at the top or bottom of the stairs. Next, ensure your vacuum cleaner is in good working order. Check the bag or canister for fullness; an overly full vacuum will have reduced suction power. For cordless models, ensure the battery is fully charged. Having all your tools readily accessible saves time and prevents interruptions.
Pro Tip: Always start with a relatively empty vacuum bag/canister. This ensures maximum suction power, which is crucial for picking up deeply embedded dirt and pet hair from stair carpeting.
Step 2: The Pre-Vacuum Sweep and Debris Removal
What you need: A small handheld brush or broom and a dustpan.
Instructions: Before applying any suction, give your stairs a preliminary sweep. Starting from the top step, use your handheld broom to gently brush any loose debris, large crumbs, pet food kibble, or stubborn pet hair downwards. Focus on the corners where the tread meets the riser, as well as the outer edges near banisters, where debris tends to accumulate. Sweep everything down to the landing or the bottom step. Collect this larger debris with your dustpan and dispose of it. This prevents larger items from clogging your vacuum hose or damaging its internal mechanisms.
Pro Tip: Pay close attention to areas where the stairs meet the wall or banister. These often harbor hidden pockets of dust and pet hair that a quick sweep can dislodge, making the vacuuming process far more effective.
Step 3: Secure Your Setup and Choose the Right Tool
What you need: Your vacuum cleaner and appropriate attachments (powered brush attachment for stairs, crevice tool, upholstery tool).
Instructions: If using a corded vacuum, ensure you have sufficient reach. It’s often safest to plug in at the bottom or a central landing, keeping the cord draped over your shoulder or away from your feet to prevent tripping. Select the most suitable attachment for your stairs. A dedicated powered stair tool is ideal for carpeted stairs as it has a rotating brush to agitate fibers. If you don’t have one, a regular upholstery tool or a small flat head attachment will work for broader surfaces, and the crevice tool is indispensable for tight spots. Connect your chosen attachment securely to the vacuum hose.
Pro Tip: For safety, avoid placing the vacuum cleaner on the stairs themselves if it’s large and heavy. Keep it on a flat landing or the floor and use the hose and attachments to reach. For lightweight stick vacuums or handheld units, this step is less critical.
Step 4: Edge Patrol: Mastering Crevices and Corners
What you need: Vacuum cleaner with the crevice tool attached.
Instructions: Begin at the top of the staircase and work your way down. Attach the crevice tool to your vacuum hose. This narrow, angled nozzle is perfect for reaching into the tight gaps where the carpet meets the skirting board, along the banister posts, and especially in the acute angle where the tread (horizontal part) meets the riser (vertical part) of each step. Systematically run the crevice tool along all these edges on each step. Apply firm pressure to ensure maximum suction. This focused effort removes trapped dust, pet hair, and fine debris that larger attachments often miss.
Pro Tip: Don’t rush this step. The edges and corners are where the most stubborn dirt accumulates. A slow, deliberate motion with the crevice tool will yield significantly better results than a quick pass.
Step 5: The Tread Takeover: Systematic Vacuuming
What you need: Vacuum cleaner with a powered brush attachment (for carpet) or upholstery tool.
Instructions: Now, switch to your main stair attachment, ideally a powered brush tool for carpeted stairs, or the upholstery tool for less aggressive cleaning or hard surfaces. Starting from the top step, place the attachment firmly on the front edge of the tread. Slowly pull the vacuum attachment backwards across the entire width of the step towards the riser. Make overlapping passes to ensure complete coverage. For carpeted stairs, consider going over each section twice: once against the nap of the carpet to lift deep-seated dirt, and then with the nap for a smooth finish. Work methodically down each step until all treads are thoroughly vacuumed.
Pro Tip: For heavily trafficked carpeted stairs, use a “push-pull” technique. Push the vacuum forward slowly, then pull it back over the same spot. This allows the rotating brush to agitate and lift dirt more effectively from both directions.
Step 6: Riser Revival: Don’t Forget the Verticals
What you need: Vacuum cleaner with the upholstery tool or a small, flat-head attachment.
Instructions: Many people overlook the risers – the vertical parts between each step. If your risers are carpeted, they also accumulate dust and pet hair. Switch to your upholstery tool or a similar flat-head attachment. Gently but firmly press the attachment against the riser, starting from the top step. Move the tool across the entire width of the riser, ensuring you cover the entire surface. If the riser has a lip at the bottom where it meets the tread, use a gentle back-and-forth motion to ensure dirt is pulled from this often-missed crevice. Repeat for all risers down the staircase.
Pro Tip: For risers, pull the vacuum tool upwards in short, overlapping strokes. This helps to clean effectively without pushing debris back down onto the tread you’ve just cleaned below.
Step 7: The Grand Finale: Post-Vacuum Maintenance and Inspection
What you need: A damp cloth (optional, for hard surfaces), your vacuum cleaner.
Instructions: Once all steps, edges, and risers have been thoroughly vacuumed, take a moment to admire your clean stairs! Before putting your vacuum away, it’s crucial to perform some basic maintenance. Empty the dust canister or replace the vacuum bag. Check the attachments for any tangled hair or debris and clean them if necessary. If you have hard surface stairs, a quick wipe down with a slightly damp cloth can remove any lingering dust or shoe scuffs. Finally, do a visual inspection of your staircase to ensure no spots were missed and that all debris is gone.
Pro Tip: Regularly cleaning your vacuum’s filters will maintain optimal suction power and prevent the release of dust back into your freshly cleaned home. Check your vacuum’s manual for filter cleaning instructions, usually recommended every 1-3 months.
✅ Final Checklist
- All loose items removed from stairs.
- Crevices and corners thoroughly vacuumed with the crevice tool.
- Treads vacuumed systematically with overlapping passes.
- Risers (if carpeted) cleaned effectively.
- Vacuum canister/bag emptied and attachments checked.
Important Notes:
- Safety considerations or warnings: Always maintain a secure footing when vacuuming stairs. Avoid standing on steps that are being actively vacuumed or where the vacuum cord might create a tripping hazard. If using a large, heavy vacuum, keep it on a flat landing and use only the hose and attachments. Never pull the vacuum by its cord.
- When to seek professional help: If your stair carpet is heavily stained, matted, or exhibits significant wear despite regular vacuuming, professional carpet cleaning services may be necessary to restore its appearance and prolong its life.
- Estimated time and cost range: Vacuuming a standard set of 12-15 stairs typically takes between 15-30 minutes, depending on the level of dirt and vacuum efficiency. The cost is negligible beyond the electricity used and occasional vacuum bag/filter replacements.
How to Expertly Vacuum Stairs: A Step-by-Step Fix
Transforming your stair vacuuming from a tedious chore to an efficient task starts with preparation and selecting the right tools for the job. You don’t need a specialized stair-only vacuum; your existing household cleaner, properly outfitted, is perfectly capable in 2027.
Essential Tools for Your 2027 Vacuum
Before you even power on your machine, identify and attach the correct implements. These are your arsenal against stair dirt:
- Crevice Tool: This narrow, angled nozzle is indispensable for the tight corners where the tread meets the riser, and along the wall edges. It funnels suction into pinpoint areas, effectively dislodging trapped debris.
- Upholstery Brush (or Small Brush Attachment): Featuring soft bristles, this tool is ideal for gently agitating and lifting surface dirt and pet hair from the main surface of the carpeted treads without damaging fibers. Its smaller head offers greater maneuverability than your main floor head.
- Powered Mini-Turbo Brush/Stair Tool: If your vacuum has one, this is a game-changer. These compact heads feature a motorized brush roll that spins rapidly, deep cleaning carpet piles and dislodging embedded dirt and pet hair with incredible efficiency. It’s often the single best attachment for the bulk of the stair cleaning.
Ensure your vacuum’s suction is at its peak; empty the canister or replace the bag, and check filters before you begin. A weak vacuum is an ineffective vacuum.
Pre-Vacuum Prep for Optimal Results
A little preparation goes a long way in maximizing your cleaning efficiency. Clear the path and set yourself up for success:
- Declutter: Remove any shoes, toys, decorative items, or anything else from the stairs. This prevents damage to your vacuum and saves you from stopping mid-task.
- Inspect and Pre-Treat (Optional): Quickly scan for any larger debris like lint balls or loose strings that might clog your attachments. If you notice any particularly stubborn spots, a quick spot-clean with a carpet cleaner might be beneficial before vacuuming, allowing it to dry slightly.
- Start from the Top: Always begin vacuuming from the highest step and work your way down. This ensures that any dirt or dust dislodged from upper steps falls onto lower, uncleaned steps, rather than re-dirtying already vacuumed areas.
Troubleshooting: What If Your Stairs Aren’t Coming Clean?
Even with optimal technique, persistent dirt or specific challenges can hinder stair cleaning. According to a 2026 consumer survey by CleanHome Analytics, 18% of homeowners report difficulty maintaining stair cleanliness with standard vacuuming alone. This section addresses common issues and advanced strategies.
Addressing Deeply Embedded Dirt
Over time, fine particles become compacted into carpet fibers, especially in high-traffic stair areas. Standard suction may not suffice.
- Pre-Treat with Carpet Cleaner: Apply a reputable carpet spot cleaner formulated for stairs. Brands like EcoClean Pro or PowerSolve 2027 offer advanced enzymatic formulas that break down grime. Allow 5-10 minutes for penetration, as per manufacturer guidelines.
- Utilize a Power Brush Attachment: Instead of a standard crevice tool, employ a motorized brush attachment designed for agitation. Experts at the Institute of Carpet Care recommend models with oscillating brush rolls for maximum fiber lifting.
- Slow, Overlapping Passes: Reduce your vacuuming speed significantly. Make 2-3 slow, overlapping passes over heavily soiled areas. This allows the brush and suction more time to dislodge and remove embedded particles.
Tackling Stubborn Pet Hair Accumulation
Pet hair, particularly from shedding breeds, adheres strongly to carpet fibers, often forming dense mats. Traditional vacuuming might only skim the surface.
- Use a Rubber Brush or Glove: Before vacuuming, use a specialized pet hair removal tool, such as a rubber brush or a damp rubber glove, to manually gather loose hair. Rubbing against the nap creates static, bundling hair for easier pickup.
- Implement a Turbobrush or Pet Hair Attachment: Many 2027 vacuum models include dedicated pet hair attachments with strong bristles and focused suction. These are engineered to detangle and lift stubborn animal fur from upholstery and stairs.
- Consider Electrostatic Spray: For extremely clingy pet hair, a light mist of an anti-static carpet spray (e.g., StaticShield 2027) can reduce the electrostatic bond between hair and carpet, making it easier for the vacuum to pick up. Apply sparingly to avoid residue.
What If It Still Doesn’t Work? Advanced Solutions & Professional Help
When diligent vacuuming and targeted troubleshooting fall short, it indicates a need for more intensive intervention. Persistent issues often stem from deeply ingrained grime or significant carpet wear beyond the scope of routine cleaning.
- Deep Steam Cleaning: For comprehensive dirt and allergen removal, invest in a specialized stair steam cleaner or rent a professional-grade carpet extractor. These devices inject hot water and cleaning solution, then powerfully extract the dirty liquid, revitalizing carpet fibers.
- Inspect Your Vacuum Cleaner: Ensure your vacuum’s filter is clean and its belt is intact. A clogged filter can reduce suction by up to 30%, according to maintenance reports from VacuumTech Innovations. A worn belt diminishes brush roll effectiveness. Replace parts as needed; costs range from $15-$50.
- Consider Professional Carpet Cleaning: If DIY methods prove ineffective, professional carpet cleaning services offer industrial-strength equipment and specialized cleaning agents. According to the National Carpet Cleaners Association, professional stair cleaning can range from $75 to $200 per flight of stairs, depending on location, carpet type, and degree of soiling. This provides the deepest clean and can extend carpet life.
Conclusion
Maintaining pristine stairs requires more than just a quick pass. By leveraging advanced vacuum attachments, strategic pre-treatment, and diligent technique, you can effectively tackle even the most stubborn dirt and pet hair. Implement these expert-backed steps for consistently clean and inviting staircases in your 2027 home, ensuring both aesthetic appeal and hygienic living conditions.
❓ Frequently Asked Questions
What’s the best technique for vacuuming carpeted stair risers?
For risers, use the upholstery brush attachment or a smaller power brush if available. Start from the top of the riser and move downwards, ensuring you cover the entire surface to remove dust and dirt effectively.
How do I safely manage the vacuum cleaner cord while cleaning stairs?
To manage the cord safely, drape it over your shoulder or loop it over a railing to keep it out of your path. As you move down the stairs, gradually unspool the cord, always ensuring it’s not underfoot to prevent tripping.
Can I use an upright vacuum on stairs, and if so, how?
Yes, many upright vacuums come with a detachable hose and attachments. Place the upright vacuum securely on the landing at the top or bottom of the stairs, then use the hose with appropriate tools to clean each step without moving the main unit.
What preparation steps should I take before I start vacuuming my stairs?
Before vacuuming, first clear any clutter or objects from the stairs. Then, consider dusting any railings or baseboards, as fallen dust will just settle on your freshly vacuumed steps if not removed first.
How do I effectively remove pet hair from carpeted stairs?
For stubborn pet hair, a powered brush attachment (mini turbo brush) is highly effective. Alternatively, a rubber pet hair remover or a stiff brush followed by vacuuming with the upholstery tool can loosen and lift embedded hair.
What are common mistakes to avoid when vacuuming stairs?
Avoid rushing, which leads to missed spots, and neglecting safety by not managing the cord or ensuring stable footing. Also, using the wrong attachments or skipping pre-cleaning steps can significantly reduce effectiveness and overall cleanliness.