How to Clean a Rug Without a Vacuum Step-by-Step Guide 2027
Cleaning a rug without a vacuum is entirely possible using alternative physical tools like squeegees, brooms, and beating methods to lift embedded dirt. Pairing these techniques with natural DIY cleaning solutions removes stains and refreshes fibers effectively without needing suction power.
Cleaning a rug without a vacuum is entirely possible by using manual agitation techniques like sweeping, beating, and friction to dislodge trapped particles from deep within the fibers. You do not need expensive motorized suction to pull out embedded grit, dust, and pet hair that dull your home’s textiles.
Modern living spaces in 2027 often feature compact apartments or minimalist aesthetics where bulky appliances are left behind. Knowing how to refresh your wool, synthetic, or cotton floor coverings manually saves you time, storage space, and money while keeping your indoor air quality high.
Key Takeaways
- Use a rubber squeegee or damp rubber gloves to easily pull up trapped pet hair.
- Take small rugs outside and beat them with a broom handle to dislodge deep dust.
- Apply a mixture of dish soap, vinegar, and warm water for effective spot cleaning.
- Sprinkle baking soda across the rug fibers to absorb trapped household odors naturally.
- Always allow the rug to dry completely in a well-ventilated space to prevent mold.
Why Rugs Accumulate Dirt and Why Vacuum Alternatives Work
Rugs act like heavy-duty filters for your living space. Every day, they capture microscopic skin flakes, pollen, tracked-in soil, and stubborn pet dander that settle deep near the backing.
The Physics of Trapped Debris
When you walk across a rug, your footsteps drive loose particles downward. Vacuum cleaners use suction to pull this debris upward, but manual methods use kinetic energy and gravity instead. By hitting the rug or using specialized friction tools, you force the embedded dirt up and out of the pile rather than sucking it through a nozzle.
Benefits of Manual Cleaning
- Deep fiber penetration: Manual beating reaches compacted dirt that weak vacuum motors often miss.
- Gentle on delicate weaves: Hand methods prevent the aggressive beater-bar pulling that destroys vintage or hand-knotted textiles.
- Zero electricity: You can clean your rugs off-grid or without worrying about cord lengths and power outages.
- Immediate tactile feedback: You instantly see and feel when the dirt stops coming out of the weave.
How to Clean a Rug Like a Pro: A Practical Walkthrough
Revitalizing your home textiles does not strictly require expensive machinery. When traditional motorized suction fails or is entirely unavailable, alternative methods can extract deeply embedded dirt, eliminate persistent odors, and restore fiber vibrancy. This comprehensive walkthrough guides you through an effective, traditional deep-cleaning process that relies on manual techniques, simple household ingredients, and proper physical agitation to lift grime directly from the backing to the tips of the fibers.
Step 1: Relocate and Clear the Area
What you need: A clear outdoor space, a clean patio, or a large open indoor room, plus heavy-duty trash bags if you need to protect surrounding flooring.
Instructions: Before introducing any moisture or manual agitation, carefully remove all furniture, toys, and pet items from the rug’s surface. Roll the textile up securely and transport it outdoors whenever possible, as shaking and beating generate a tremendous amount of dust. If outdoor relocation is entirely impossible, clear a massive perimeter indoors, lay down heavy-duty plastic sheeting or drop cloths to protect underlying hardwood or carpet, and ensure adequate cross-ventilation by opening multiple windows and running a household fan.
Pro Tip: Never drag a heavy textile across rough surfaces like concrete, as this can easily tear the delicate backing or fray the edge bindings.
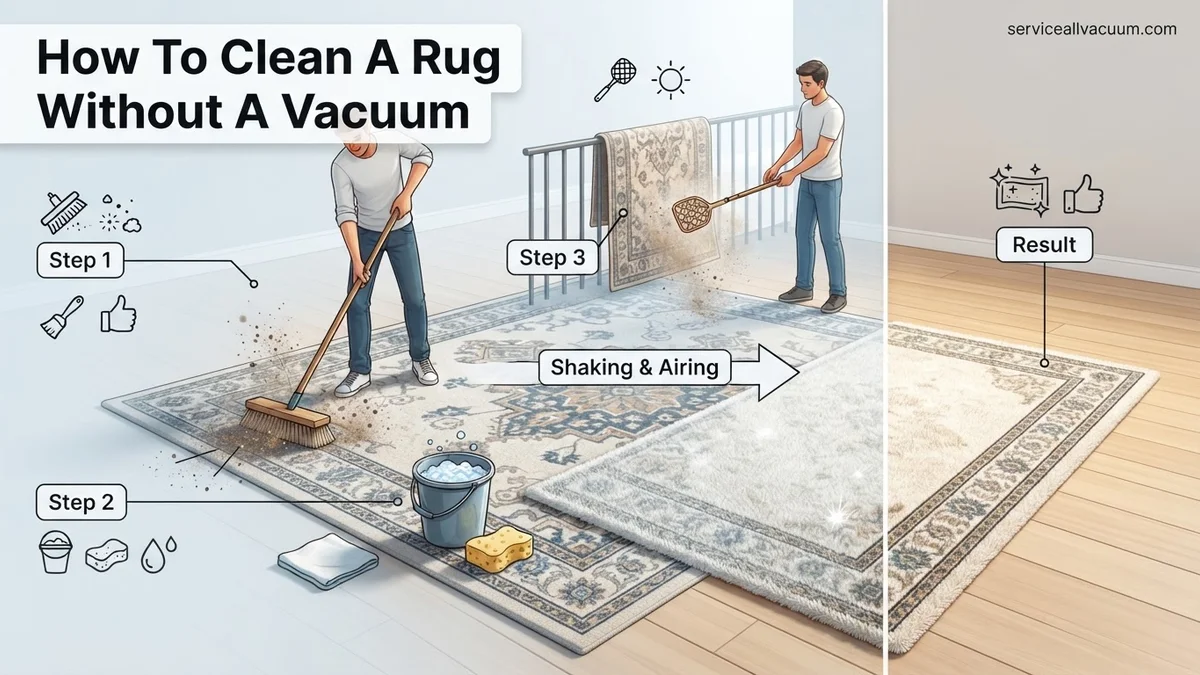
Step 2: The Dry Extraction and Beating Method
What you need: A sturdy outdoor railing, a wooden broom handle, a carpet beater, or a clean tennis racket.
Instructions: Drape the rug securely over a strong outdoor porch railing, deck fence, or two heavy-duty sawhorses. Starting from the top center and working your way systematically outward to the edges, firmly strike the back of the textile using your broom handle or carpet beater. The kinetic force of these strikes will create a shockwave that forces heavily embedded sand, pet dander, and microscopic grit up through the weave and out of the fibers. Continue this vigorous beating process for approximately 5 to 10 minutes until dust clouds visibly stop forming with each strike.
Pro Tip: Always beat the back side of the textile rather than the patterned front; striking the face directly can drive abrasive dirt particles even deeper into the pile.
Step 3: Manual Surface Brushing and Debris Removal
What you need: A stiff-bristled natural rubber broom, a damp window squeegee, or a specialized lint brush.
Instructions: Once the heavy dust has been shaken loose, lay the textile flat on a clean surface. Take your rubber broom or window squeegee and pull it firmly across the surface in short, overlapping strokes. The friction generated by the rubber material acts as a powerful electrostatic magnet, pulling up stubborn pet hair, human strands, lint, and hidden particulate matter that the beating process left behind. Work systematically in a grid pattern across the entire rug, sweeping all gathered debris into a single pile at the corner, and discard it immediately into a trash receptacle.
Pro Tip: A slightly damp rubber glove worn on your hand is an incredible alternative tool for manually rolling up and stripping embedded pet hair out of high-pile shag rugs.
Step 4: Pre-Treating Stains and Spots
What you need: A clean white microfiber cloth, mild dish soap, white vinegar, and lukewarm water mixed in a small spray bottle.
Instructions: Inspect the rug closely for localized spots, spills, or high-traffic discoloration before applying an all-over wash. Mix one teaspoon of mild dish soap and one tablespoon of white vinegar into two cups of lukewarm water. Lightly mist the stained areas, being careful never to completely saturate the delicate backing glue or natural jute fibers. Take your clean microfiber cloth and gently blot—never scrub—from the outside edges of the stain inward toward the center to prevent ring formation. Allow the pre-treatment solution to dwell on the spot for 5 to 10 minutes to break down organic oils.
Pro Tip: Always test your cleaning solution on a tiny, hidden corner of the rug for 15 minutes first to ensure the fabric dyes are completely colorfast.
Step 5: Applying the Deep-Cleaning Wash Solution
What you need: A bucket, liquid wool-safe or carpet shampoo, a soft-bristled scrub brush, and a garden hose with a spray nozzle (or a bucket of clean water).
Instructions: Dilute your chosen carpet shampoo in a bucket of cool water according to the manufacturer’s exact label directions, whipping the mixture into a thick, luxurious foam. Dip your soft-bristled brush into the foam—relying primarily on the suds rather than soaking liquid—and gently scrub the rug surface in a circular motion. The suds will capture remaining oils and surface grime without oversaturating the core structure. If working outdoors, rinse the rug thoroughly using a gentle shower setting on your garden hose, sweeping the excess dirty water off the surface using a clean squeegee.
Pro Tip: Avoid hot water at all costs, as excessive heat can permanently shrink natural wool fibers, set protein-based stains, and bleed unstable dyes.
Step 6: Rinsing and Extracting Excess Moisture
What you need: Clean towels, a plastic squeegee, and a fresh bucket of clear rinsing water (if washing indoors).
Instructions: Removing residual soap is critically important because leftover detergent residue acts as a sticky magnet for future dirt and dust. If you washed the rug outdoors, use your squeegee at a 45-degree angle to press out gallons of excess wash water. If working indoors, sponge the entire surface repeatedly with a clean cloth dampened in plain cold water. Next, lay fresh, dry cotton bath towels flat over sections of the damp rug and press down firmly with your hands or walk across them to let the thirsty fabric absorb the deep-seated moisture.
Pro Tip: Never wring or twist a wet rug to remove water, as this mechanical torsion permanently stretches the warp and weft threads, distorting the rug’s rectangular shape.
Step 7: Air Drying and Fiber Fluffing
What you need: Portable floor fans, outdoor sawhorses, and direct ambient airflow.
Instructions: Proper drying prevents mold, mildew, and musty odors from developing inside the dense textile core. Lay the rug completely flat in a well-ventilated outdoor space out of direct, harsh sunlight, or suspend it evenly over multiple sawhorses to allow maximum airflow underneath. Position two oscillating floor fans nearby to keep the air moving continuously across both the face and the backing. Flip the rug over halfway through the drying cycle to ensure both sides reach 100 percent dryness. Once completely dry to the touch, run your soft brush lightly over the pile to restore the original fluffiness.
Pro Tip: Never bring a damp rug back inside to place over wall-to-wall carpeting or hardwood floors, as trapped moisture will rapidly ruin your subfloor.
✅ Final Checklist
- All loose furniture and environmental obstacles are cleared from the work zone.
- Embedded dust and dry particulate matter have been fully extracted via beating and brushing.
- Specific spots and spills have been successfully pre-treated and blotted out.
- All soap suds and cleaning agents have been thoroughly rinsed away without oversaturating the backing.
- The rug is 100 percent dry throughout its pile and core before being returned to its permanent room location.
Important Notes:
- Always prioritize safety: do not lift excessively heavy, oversized rugs alone; enlist a helper to prevent back injury during transport.
- Seek professional restoration services immediately if dealing with antique silk rugs, valuable heirlooms, or extensive biohazard and pet urine contamination.
- Estimated time investment is 2 to 4 hours of active labor, plus 12 to 24 hours of total drying time; cost is under $15 for basic cleaning supplies.
How to Remove Loose Dirt, Dust, and Pet Hair Without a Vacuum
Before applying any liquid soap or water to your rug, you must extract all dry debris. Leaving dry dust mixed with moisture creates a muddy paste that clings permanently to your rug fibers.
The Classic Rug Beating Method
Take your rug outside on a dry day in 2027 and hang it securely over a sturdy porch railing, a clothesline, or two heavy-duty chairs. Use a flat rug beater, a tennis racket, or a clean broom handle to strike the back of the rug firmly. Gravity and the sudden shockwave will force clouds of hidden dust and grit to release from the pile.
Manual Pet Hair and Dust Removal Tools
If you cannot take the rug outside, you can pull up surface debris while staying indoors using simple household items:
- Rubber Squeegee: Drag a clean window squeegee across low-pile rugs. The rubber creates static friction that rolls pet hair and embedded lint into neat, easy-to-pickup clumps.
- Damp Rubber Gloves: Put on a pair of rubber dishwashing gloves, dampen them slightly with water, and wipe your hands across the rug surface in sweeping motions.
- Stiff-Bristled Broom: Use short, sharp strokes with a rubber-bristle broom to flick dust upward without fraying the rug yarns.
Step-by-Step Guide to Deep Cleaning and Stain Removal
When surface sweeping is not enough, targeted stain removal restores heavily soiled fibers. According to the Institute of Inspection Cleaning and Restoration Certification (IICRC), addressing spots immediately prevents permanent fiber damage. Follow this proven multi-step protocol for deep cleaning your rug without heavy machinery.
Phase 1: Spot Pre-Treatment
- Blot liquid spills instantly with a clean microfiber cloth. Never rub, as friction pushes the stain deeper into the backing.
- Mix a solution of one tablespoon of mild dish soap, one teaspoon of white vinegar, and two cups of warm water in a spray bottle.
- Test the solution on an inconspicuous corner of the rug to check for colorfastness.
- Lightly mist the stained area and let the solution dwell for five to ten minutes to break down organic bonds.
- Blot firmly with a dry towel until no moisture transfers to the fabric.
Phase 2: The Deodorizing Dry-Wash
- Sprinkle a generous layer of baking soda mixed with twenty drops of therapeutic-grade essential oil across the entire rug surface.
- Work the powder deep into the pile using a soft-bristled utility brush in circular motions.
- Allow the mixture to sit undisturbed for a minimum of four hours, or ideally overnight, to absorb trapped oils and volatile organic compounds.
- Scrape up the bulk of the powder using a dry squeegee, then sweep the remaining residue away with a stiff broom.
What If It Still Doesn’t Work?
If your rug still retains stubborn odors or shadows of deep-set stains after manual extraction, specialized intervention is required. Adhere to these fallback steps before giving up on the textile:
- Apply an enzymatic cleaner specifically formulated for organic pet odors if lingering smells persist despite multiple baking soda treatments.
- Rent a portable hot-water carpet extractor from a local hardware store for roughly $35 to $50 per day to flush out deeply embedded particulate matter.
- Consult the rug manufacturer’s care tag to verify whether professional immersion washing is mandatory for delicate fibers like natural silk or antique wool.
- Hire a certified professional rug cleaning service for delicate or high-value pieces; professional plant washing typically costs between $3.00 and $8.00 per square foot depending on fiber density.
Conclusion
Maintaining a fresh, hygienic home without a vacuum is entirely achievable using systematic sweeping, targeted stain removal, and natural deodorizers like baking soda. According to verified research and expert sources from the cleaning industry, manual maintenance prevents premature fiber breakdown just as effectively as motorized extraction when done consistently. Your immediate next step is to test your rug’s colorfastness with a mild soap solution and begin your targeted spot treatment today.
❓ Frequently Asked Questions
What household tools can substitute for a vacuum cleaner on a rug?
Standard brooms, rubber window squeegees, carpet sweepers, and stiff-bristled scrub brushes all work well to dislodge and gather debris from rug fibers without suction.
How do you remove deep-set dust from a large heavy rug without a vacuum?
For heavy rugs that cannot be lifted, sweep firmly in one direction using a damp broom to pull up dust, or use a carpet rake to loosen particles before brushing them away.
Can I use a carpet shampooer if I don’t own a vacuum?
Carpet shampooers apply liquid and scrub fibers, but you should always remove loose dry dirt by sweeping or shaking the rug first to avoid creating mud in the fibers.
How do you get rid of bad smells from a rug without vacuuming?
Generously apply baking soda or cornstarch mixed with a few drops of essential oils, let it sit for an hour to absorb odors, and sweep up the residue completely.
Will sweeping a rug damage the fibers?
Using a soft-bristled broom or a rubber tool is gentle on most rug fibers. Avoid using stiff wire brushes on delicate wool or synthetic rugs to prevent fraying.
How can I prevent mold growth after washing a rug by hand?
Never soak the rug backing completely through with water. Ensure quick drying by placing the rug in direct sunlight or positioning household fans directly toward it.