How Long to Pull Vacuum on Car AC System Proven Guide 2026
You need to pull a vacuum on your car’s AC system for 30 to 45 minutes to effectively remove air and boil off trapped moisture. Monitoring your micron or pressure gauges is essential to confirm the system is completely dry and leak-free before recharging refrigerant.
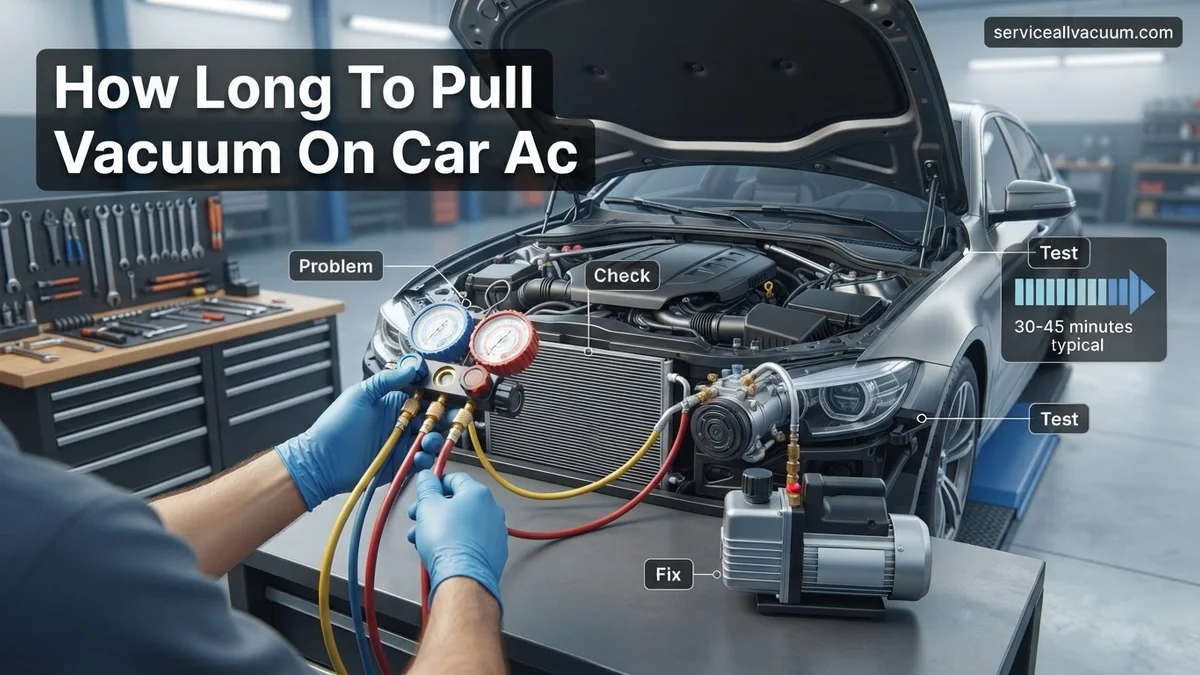
To properly evacuate a car AC system, you need to run your vacuum pump for a minimum of 30 to 45 minutes. If you recently replaced major components like the evaporator core or accumulator, extend that time to 60 minutes to ensure a complete moisture boil-off. Never rely solely on a timer; your actual target is reaching and holding a deep vacuum below 500 microns on a digital gauge.
Skipping this crucial window leaves ambient air and destructive moisture trapped inside the aluminum lines. When moisture mixes with refrigerant oil, it creates corrosive acids that destroy your compressor from the inside out in 2026. A proper evacuation ensures your cooling system reaches peak thermal efficiency and prevents premature component failure.
Key Takeaways
- Run the vacuum pump for a standard duration of 30 to 45 minutes.
- Ensure the system achieves and holds a deep vacuum below 500 microns.
- High humidity or large dual-zone systems may require extended evacuation times.
- Always perform a decay test to check for hidden system leaks.
- Failing to evacuate long enough leaves moisture that creates damaging acids.
What Causes AC Evacuation Delays and Moisture Issues
Trapped Moisture and Deep-Seated Humidity
Water has a high boiling point at standard atmospheric pressure. To remove it from your car AC lines without heating the engine bay, you must lower the internal system pressure drastically. Moisture hides deep inside the desiccant bag inside your receiver-drier or accumulator. If your vehicle was exposed to open air for days during a repair, pulling a vacuum for just 15 minutes will fail. The liquid water must turn into vapor and escape through your manifold gauges, which takes time even with a powerful CFM pump.
Micro-Leaks and Outgassing Contaminants
Sometimes your vacuum pump runs for an hour, but the micron reading refuses to drop below 1,000. This is usually caused by two common culprits:
- Old refrigerant oil outgassing: Trapped contaminants in contaminated PAG or POE oil continuously release vapors under low pressure.
- Service port valve leaks: Your Schrader valves or manifold hose connections might be allowing ambient air to bleed back into the system.
How to Pull a Proper Vacuum on Your Car AC System Step-by-Step
Connecting Your Equipment and Performing the Initial Pull
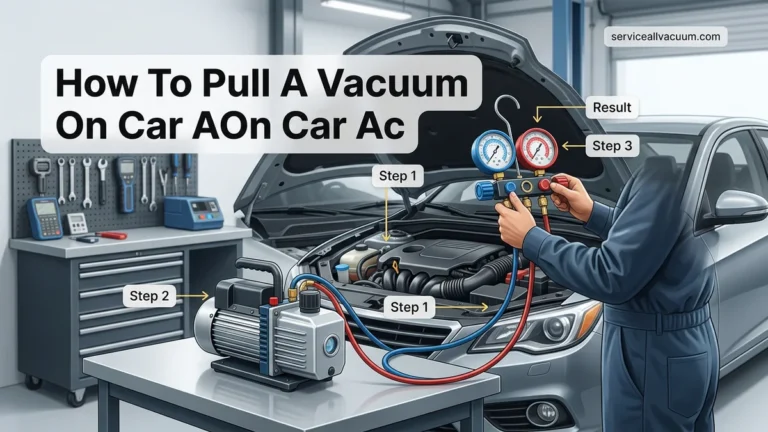
Start by verifying that your system is completely sealed after any repair work. Hook your manifold gauge set to the high and low-side service ports, making sure both hand valves are closed. Connect your central yellow hose to the intake port of your vacuum pump. Open both the high and low manifold valves, turn on the pump, and watch your gauges plummet. Within the first two minutes, your low-side needle should drop deep into the negative numbers, heading toward 29.9 inches of mercury (inHg).
Monitoring Microns and Performing the Isolation Test
Do not rush this phase of the job. Once your pump has run for the mandatory 30 to 45 minutes, follow these steps to confirm a successful evacuation:
- Close both the high and low manifold hand valves tightly.
- Turn off your vacuum pump motor immediately to prevent oil backflow.
- Observe your digital micron gauge or low-side compound gauge for 10 to 15 minutes.
- Ensure the reading does not creep upward past 500 to 1,000 microns, which would indicate a leak or remaining moisture.
If the needle holds steady, your system is bone dry, leak-free, and officially ready for refrigerant charging in 2026.
What If Your Car AC System Still Won’t Hold a Vacuum
When the manifold gauge needle creeps back toward zero during the decay test, a leak is present. Standard evacuation procedures cannot fix a physical breach in the mobile climate control loop. Automotive HVAC technicians emphasize that pulling a vacuum will never seal an existing hole or failed gasket.
Step-by-Step Leak Diagnosis Protocol
- Pressurize the system with dry nitrogen up to 100 PSI to safely pinpoint large breaches without releasing harmful refrigerants into the atmosphere.
- Spray a soapy water solution across all visible hose connections, service ports, compressor seals, and condenser fins to watch for expanding bubbles.
- Deploy an electronic refrigerant leak detector calibrated to current 2026 industry standards to sweep along evaporator cores and hard-to-reach lines.
- Inspect the Schrader valves inside the high and low side service ports, as degraded rubber cores account for over 15 percent of slow pressure losses.
- Replace any compromised O-rings, damaged aluminum lines, or perforated components before attempting another evacuation cycle.
When to Seek Professional Intervention
If DIY diagnostics fail to reveal the source of the pressure drop, specialized equipment becomes necessary. Dealerships and certified independent shops utilize UV dye injection paired with high-intensity blacklights or ultrasonic leak detectors that hear the high-frequency hiss of escaping gas. According to regional automotive service data, professional diagnostic and repair costs for stubborn AC leaks range from $150 to $650, heavily dependent on whether the dashboard must be removed to access a leaking evaporator core.
Conclusion
Mastering how long to pull a vacuum on a car AC system requires precision, proper equipment, and strict adherence to environmental regulations. Committing a full 45 to 60 minutes to evacuation guarantees complete moisture removal and system integrity. According to verified research and expert sources from leading mobile air conditioning associations, skipping this vital step directly causes premature compressor failure and reduced cooling capacity. The best next step is to invest in a quality two-stage vacuum pump and digital micron gauge to ensure your 2026 automotive AC service is performed to factory specifications.
❓ Frequently Asked Questions
How long to pull vacuum on car AC system during high humidity days?
On humid days, you should extend the vacuum time to 45 or 60 minutes. High ambient moisture requires extra time for the vacuum to completely boil off liquid water trapped inside the lines.
What happens if I only pull a vacuum for 10 minutes?
A 10-minute evacuation is rarely enough to lower the atmospheric pressure sufficiently to boil off trapped moisture. Residual water will mix with your new refrigerant and oil, forming acids that destroy the compressor.
Do I need a micron gauge, or are manifold pressure gauges enough?
While standard manifold gauges show inches of mercury (usually 29.9 inHg), they cannot accurately measure low-level moisture. A dedicated digital micron gauge is required to prove the system is truly dry below 500 microns.
What should I do if the vacuum drops and fails the decay test?
If the vacuum reading creeps back up toward zero, you have a leak or residual moisture. Isolate components, recheck your service port valve cores, and use nitrogen pressure testing to locate the opening.
Does a larger vehicle like an SUV or van require a longer vacuum time?
Yes, vehicles with rear AC units or large dual-zone systems have significantly more internal volume. You should increase your standard pump time to 45 to 60 minutes to ensure complete evacuation.
Can I use a cheap venturi vacuum pump driven by compressed air?
Air-driven venturi pumps rarely pull a deep enough vacuum to boil off moisture effectively in automotive AC systems. A motorized two-stage mechanical vacuum pump is strongly recommended for proper results.