How Do You Take a Dyson Vacuum Apart? Expert 2027
Safely disassembling your Dyson vacuum for cleaning or repair requires specific steps and tools. This guide provides a clear, detailed walkthrough for various models, helping you address clogs or perform maintenance effectively.
Disassembling your Dyson vacuum cleaner isn’t just for specialized repair technicians anymore. For anyone owning a Dyson V-series (like the Gen5Detect or V15 Detect), a Ball upright, or a classic canister model in 2027, knowing how to take it apart safely and effectively is a crucial skill. This direct guide will walk you through the necessary steps to tackle common maintenance tasks, extending your vacuum’s lifespan and restoring peak performance.
You need this information to troubleshoot persistent clogs, deep clean components inaccessible during routine maintenance, or replace specific worn parts like a brush bar. Understanding these procedures empowers you to keep your Dyson operating efficiently, avoiding costly professional services and ensuring your investment continues to deliver pristine cleaning results for years to come.
Key Takeaways
- Always unplug your Dyson before disassembly.
- Use correct tools like Torx screwdrivers.
- Focus on brush bar, canister, and filter access.
- Document steps for easier reassembly later.
- Consult your specific model’s manual for details.
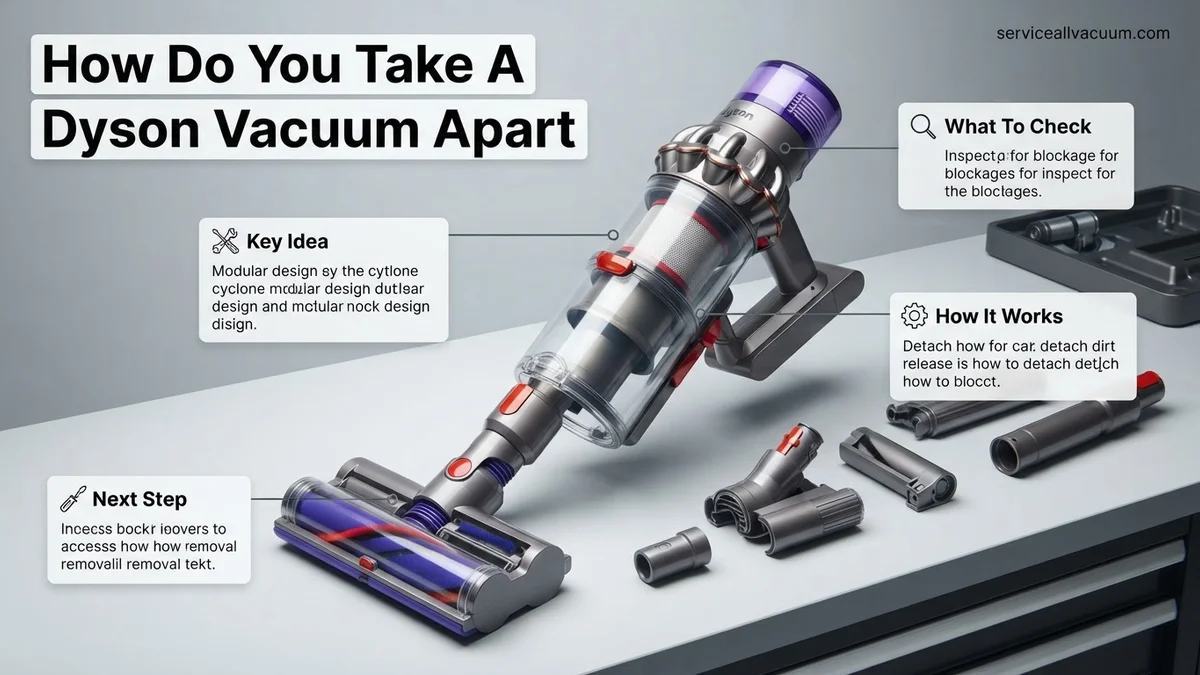
What Causes the Need for Dyson Vacuum Disassembly?
Common Performance Issues Requiring Access
Despite Dyson’s advanced engineering, several common operational issues still necessitate opening up your machine. Persistent loss of suction, for instance, almost always points to an internal blockage that regular emptying cannot resolve. You might notice unusual noises, reduced pick-up on certain surfaces, or even a complete stoppage of the brush bar.
- Clogged Airways: Hair, pet fur, dust, or even small objects can create blockages in the main hose, wand, or inside the cyclone assembly, severely restricting airflow.
- Brush Bar Entanglement: Long hair, threads, and carpet fibers frequently wrap around the brush bar, preventing it from spinning effectively. This is a primary reason for cleaner head disassembly.
- Foul Odors: If your vacuum emits a stale or musty smell, particularly after cleaning pet messes or damp areas, it’s often trapped debris or mildew in filters, the dust bin, or internal passages requiring deep cleaning.
- Small Item Retrieval: Accidental suction of jewelry, coins, or small toys often requires targeted disassembly to recover the item without damaging the vacuum.
Critical Safety First and Model Variations
Before touching any part of your Dyson for disassembly, safety is paramount. Ignoring these warnings can lead to electric shock or damage to your expensive appliance. Always prioritize your well-being and the integrity of the machine.
- Disconnect Power: For cordless models, explicitly remove the battery pack. For corded models, unplug the vacuum from the wall socket. This is non-negotiable.
- Allow Cooling: If the vacuum has been recently used, especially on high power, some motor components can be warm. Allow it to cool down for a few minutes.
- Handle Delicate Parts Carefully: Internal components, especially wiring, sensors, and electronic boards (more prevalent in 2027’s smart vacuums like the Gen5Detect), are fragile. Avoid pulling or straining these.
- Model-Specific Nuances: While the core principles apply, Dyson V-series stick vacuums, Ball uprights, and older canister models have distinct latch and screw placements. Always refer to your specific model’s manual or an online diagram if you encounter an unfamiliar fastener. For example, a V15 Detect will have different filter access than a Dyson Ball Animal 3.
From Start to Finish: Disassembling Your Dyson for Deep Cleaning
Welcome to this comprehensive guide on carefully disassembling your Dyson vacuum cleaner. Whether you’re tackling persistent blockages, performing a thorough deep clean, or preparing for a component replacement, knowing how to safely and effectively take apart your Dyson is an invaluable skill. This guide will walk you through the process, empowering you to maintain your machine’s peak performance and extend its lifespan, saving you time and potential repair costs in the long run. Follow these steps meticulously to avoid damage and ensure successful reassembly.
Step 1: Power Down and Prepare Your Workspace
What you need: A clear, well-lit, flat workspace (e.g., a large table covered with an old towel or mat), a small container for screws and small parts, your Dyson vacuum.
Instructions: Before touching any part of your Dyson, ensure it is completely powered off. For cordless models, this means removing the battery pack. For corded models, unplug the vacuum from the mains power outlet. This is a critical safety step to prevent accidental activation or electrical shock. Place your Dyson on your prepared workspace, ensuring you have ample room to maneuver and lay out components systematically. Organize your tools nearby and have a dedicated container ready for any fasteners you remove.
Pro Tip: Taking a “before” photo of your vacuum, or even quick snaps at key disassembly stages, can be incredibly helpful for remembering the correct reassembly sequence, especially if you anticipate a long or complex process.
Step 2: Empty the Dust Bin and Remove Primary Filters
What you need: Access to a waste bin, a soft brush (optional, for cleaning the bin).
Instructions: Begin by fully emptying the dust bin. For most Dyson models (e.g., V-series, Ball uprights), this involves pressing a release button, usually located near the top or bottom of the bin, to open the flap and release debris into a trash can. Once empty, detach the entire dust bin assembly from the main vacuum body. On many models, there’s another release tab or button for this. Next, locate and remove the primary filters. The pre-motor filter (often washable and cylindrical) is usually found at the top of the cyclone assembly, requiring a twist or pull to release. The post-motor (HEPA) filter, if present, is typically at the rear or side, often secured by a twist-lock mechanism. Set all filters aside for separate cleaning or replacement.
Pro Tip: When emptying the dust bin, do it outdoors or over a large trash can to minimize dust dispersion. Gently tap the bin to dislodge any stuck debris, but avoid using excessive force that could crack the plastic.
Step 3: Detach the Wand, Hose, and Cleaner Head
What you need: None for most models, possibly a small flathead screwdriver for stubborn clips.
Instructions: Proceed to separate the larger attachments from the main body. For cordless stick vacuums (e.g., V10, V11), press the red release button often located at the top of the wand to detach it from the main motor unit. Then, press the corresponding button at the bottom of the wand to separate the cleaner head (fluffy head, Torque Drive, etc.). For upright or canister models, detach the hose from its main connection point (often a swivel joint) and remove any telescopic wands or accessory tools currently stored on the vacuum. These components are usually secured by spring-loaded buttons or simple clip mechanisms that require a firm press.
Pro Tip: Inspect the connection points for any visible debris or blockages after detaching. Clear these now, as they can sometimes be a hidden source of reduced suction or noise, even if not the primary reason for disassembly.
Step 4: Remove the Brush Bar from the Cleaner Head
What you need: A coin or a flathead screwdriver (for models with twist-lock fasteners), possibly a small Philips head screwdriver for older models.
Instructions: With the cleaner head now separated, you can access the brush bar. Lay the cleaner head upside down on your workspace. Most modern Dyson cleaner heads have a side cap or end plate that can be released using a coin or a flathead screwdriver to twist a lock, or by pressing a release button. Once unlocked, the brush bar (and sometimes the soft roller, depending on the head type) can be carefully pulled out. Pay attention to how it sits within its housing, noting the orientation of the end caps and any gears. Remove any accumulated hair, string, or debris from around the brush bar and its bearings. Inspect the brush bar for wear.
Pro Tip: When removing the brush bar, be mindful of any rubber seals or small washers that might come loose. These are crucial for proper function and need to be reinstalled correctly. Use scissors to cut through tangled hair rather than pulling forcefully.
Step 5: Safely Remove the Battery Pack (Cordless Models Only)
What you need: A small Philips head screwdriver (some models), your fingers.
Instructions: This step is crucial for cordless Dyson models. The battery pack is typically located at the base of the main motor unit or integrated into the handle. Look for one or two small Philips head screws that secure the battery to the chassis. Once these screws are removed (if present), there’s usually a large red or grey release button/tab that, when pressed, allows the battery to slide out of its housing. Carefully slide the battery away from the main unit. This completely de-energizes the vacuum, making it safe for deeper disassembly and preventing accidental power-on during maintenance.
Pro Tip: Always store the removed battery in a dry, room-temperature location away from any metallic objects that could cause a short circuit. If you are disassembling for an extended period, it’s good practice to keep the battery charged to about 50% to maintain its health.
Step 6: Accessing the Cyclone Assembly and Internal Components
What you need: Torx T8 or T10 screwdriver (specific to Dyson fasteners), possibly a small flathead screwdriver, patience.
Instructions: This step involves opening the main body of the vacuum, usually to clear more stubborn blockages within the cyclone or air paths. Locate the screws holding the cyclone assembly or main housing together. These are often Torx screws (T8 or T10 are common sizes for Dyson). Carefully remove these screws, placing them into your designated container. Gently pry apart the casing sections, looking for internal clips or latches that may also need to be released. Work slowly and methodically, observing how the pieces fit together. You might need to gently wiggle components to release them. This section often contains the most complex air pathways prone to clogging.
Pro Tip: Use the correct Torx screwdriver size to avoid stripping the screw heads. If a component feels stuck, double-check for hidden screws or clips rather than forcing it. Many Dyson parts are designed to fit precisely, and excessive force can easily snap plastic tabs or crack housings.
Step 7: Inspect and Clear Internal Blockages
What you need: Long-nosed pliers, a flexible cleaning brush or pipe cleaner, compressed air (optional), bright flashlight.
Instructions: With the cyclone assembly or main body partially open, use a flashlight to thoroughly inspect all internal air channels, ducts, and the cyclone itself for any blockages. Common culprits include clumps of hair, pet fur, lint, or small objects like socks or toys. Use long-nosed pliers to carefully extract larger obstructions. For tighter areas, a flexible pipe cleaner or a stiff, narrow brush can help dislodge compacted debris. If you have compressed air, you can use short, controlled bursts to clear dust from intricate areas, but do this outdoors or in a well-ventilated space to avoid inhaling dust. Ensure all visible pathways are clear and unobstructed.
Pro Tip: When using pliers or other tools to remove blockages, be extremely careful not to puncture or damage any internal hoses, rubber seals, or delicate electronic components. Always work with good lighting so you can clearly see what you’re doing.
Step 8: Cleaning and Reassembly Preparation
What you need: Microfiber cloths, mild soapy water (for washable parts), small soft brush, compressed air (optional).
Instructions: Before reassembly, take this opportunity to clean all the separated components. Washable filters (pre-motor) should be rinsed thoroughly under cold water until the water runs clear, then left to air dry completely for at least 24-48 hours. Wipe down the interior and exterior of the dust bin, cleaner head, wand, and any other plastic parts with a damp microfiber cloth. Use a dry brush or compressed air to clean non-washable filters and intricate areas of the motor unit where dust might have accumulated. Ensure all parts are completely dry before putting the vacuum back together to prevent mold or electrical issues.
Pro Tip: Absolutely ensure that ALL washed components, especially filters, are bone dry before reassembly and use. Even slight dampness can cause mildew, damage the motor, or lead to a strong, unpleasant odor from your vacuum.
Step 9: Reassemble Your Dyson
What you need: All disassembled and cleaned components, original screws, your reference photos (if taken).
Instructions: Reassembly is essentially the reverse of the disassembly process. Start with the deepest components you removed (e.g., internal blockages, cyclone housing), ensuring all clips engage and screws are tightened appropriately. Do not overtighten screws, as this can strip the plastic threads. Reinstall the battery pack (if applicable), followed by the cleaner head’s brush bar, then the cleaner head itself onto the wand, and finally the wand onto the main body. Replace the post-motor filter, then the pre-motor filter, and finally click the dust bin back into place. Refer to any photos you took during disassembly to ensure correct component orientation and sequence.
Pro Tip: When reinserting screws, gently turn them counter-clockwise until you feel the thread drop into the existing groove, then turn clockwise to tighten. This prevents cross-threading and damage to the plastic housing.
✅ Final Checklist
- Is the Dyson completely powered off or battery removed before starting?
- Are all screws and small parts safely stored and accounted for?
- Are all air pathways visually clear of blockages and debris?
- Are all filters (especially washable ones) completely dry before reassembly?
- Have all components been securely reassembled, and all screws tightened (but not overtightened)?
Important Notes:
- Safety considerations or warnings: Always disconnect power before attempting any disassembly. Be mindful of sharp edges on internal components and never force parts apart or together. Wear gloves if you have sensitive skin or wish to avoid contact with dust and debris.
- When to seek professional help: If you encounter internal electrical wiring, motor issues, or cannot locate or remove a stubborn blockage without risking damage, it’s best to consult a certified Dyson technician or customer support. Do not attempt to open the sealed motor housing yourself.
- Estimated time and cost range: Expect to spend approximately 45 minutes to 2 hours on this process, depending on your familiarity with the vacuum and the extent of disassembly required. The cost is typically minimal, often just the expense of a suitable Torx screwdriver set (if you don’t already own one, usually £10-£30) and replacement filters if needed (price varies by model).
How to Disassemble Your Dyson Vacuum: A Step-by-Step Guide
Essential Tools for the Job (2027 Edition)
Having the right tools ready makes the disassembly process smoother and prevents accidental damage. Modern Dyson models, especially those from 2027, often utilize a variety of fasteners, so a basic toolkit might not suffice.
- Screwdrivers: A set of small Phillips head screwdrivers (PH1, PH2) is crucial. Increasingly, Torx bit screwdrivers (T8, T10, T15) are also required for specific panels or internal components in newer models.
- Pry Tools: Non-marring plastic spudgers or dedicated trim removal tools are ideal for gently releasing plastic clips without scratching or breaking delicate tabs. Avoid using metal screwdrivers for prying unless absolutely necessary.
- Cutting Tool: A utility knife or a sharp pair of scissors is essential for cutting away stubborn tangled hair and fibers from the brush bar.
- Cleaning Aids: A soft brush, compressed air, and a microfiber cloth will be invaluable for cleaning components once they are removed.
- Safety Glasses: Recommended for protecting your eyes from dust or small flying debris, especially when dealing with dried clogs.
Step-by-Step Disassembly of Common Components
This guide covers the most frequently accessed parts for routine maintenance. Remember to lay out parts in the order they were removed to simplify reassembly.
- Power Disconnection and Initial Assessment:
- First, completely disconnect your Dyson. For cordless models (e.g., V15, Gen5Detect), firmly press the red battery release button and slide the battery pack off. For corded models (e.g., Dyson Ball Animal 3), unplug the power cord from the wall outlet.
- Empty the dirt bin thoroughly into a trash receptacle.
- Identify the likely problem area. Is the suction weak? Is the brush bar not spinning? Does it smell? This helps focus your disassembly efforts.
- Removing the Dust Canister/Bin:
- Locate the prominent red or grey release button on the side or top of the bin.
- Press the button and, depending on your model, either slide the bin downwards and away from the main cyclone assembly, or lift it straight up.
- Inspect the intake port on the main body where the bin connects for any obvious blockages.
- Accessing and Cleaning Filters:
- Pre-Motor Filter: This is typically located on top of the main cyclone unit (often a large blue or purple cylinder). Twist it counter-clockwise or pull it straight up to remove it. These are usually washable; rinse under cold water until the water runs clear.
- Post-Motor (HEPA) Filter: Found at the very back or bottom of the main unit (often a smaller, cylindrical filter with a grey or black cap). Twist or press a tab to release it. Many newer models feature washable HEPA filters, but some are sealed and require replacement. Consult your manual.
- Ensure any washable filters are left to air dry completely for at least 24-48 hours before reinstallation. Moisture can damage the motor.
- Disassembling the Cleaner Head/Brush Bar:
- Lay the cleaner head (the part that contacts the floor) upside down on a clean, soft surface.
- For Stick/Cordless Vacuums (V-series): Locate the end cap release mechanism on the side of the cleaner head. This is typically a small coin slot (older models), a lever, or a push-button (more common in 2027 models). Use a coin, flathead screwdriver, or your finger to twist or press, and then slide the brush bar out from the end. Carefully cut away any tangled hair or debris with scissors.
- For Ball/Upright Vacuums: You’ll generally need to unscrew a bottom plate. Look for Phillips or sometimes Torx screws on the underside of the cleaner head. Once the plate is removed, the brush bar and belt will be accessible for cleaning or replacement.
- Clearing Main Body/Hose Clogs:
- With the dust bin and cleaner head removed, inspect the main intake opening on the vacuum body.
- For stick vacuums, also detach the main wand from both the main unit and the cleaner head (usually via quick-release buttons). Visually inspect both ends and through the wand for blockages.
- For Ball/Upright models, fully extend and inspect the hose. Many models have quick-release connections at the base and the wand handle.
- Use a blunt, non-abrasive object (like a wooden dowel or a broom handle) to carefully push any visible clogs through the air paths. Avoid using sharp metal objects that could puncture or scratch internal plastic components.
Troubleshooting During Disassembly & What If It Still Doesn’t Work
Even with meticulous preparation, disassembling a modern Dyson vacuum, particularly models from the 2027 line, can present unexpected challenges. According to certified Dyson technicians, common hurdles include stubborn fasteners, intricate internal clips, and sensitive electronic connections. Addressing these proactively minimizes damage and ensures a smoother reassembly process.
Dealing with Stuck Fasteners
Dyson’s advanced engineering sometimes means screws are secured with thread-locking compounds or seated very tightly. Attempting to force them can strip the screw head or crack the plastic housing, an issue particularly prevalent in compact 2027 designs.
- Apply Gentle Heat: For screws with thread locker, a heat gun on a low setting (below 100°C) for 10-15 seconds can soften the compound. Avoid overheating, which can warp plastic.
- Use the Right Bit: Ensure your screwdriver bit perfectly matches the screw head (e.g., Torx T8 or Philips #1, common in current Dyson units). A cam-out reducer tool can provide extra grip.
- Leverage & Pressure: Apply consistent, downward pressure while turning counter-clockwise. For particularly stubborn screws, a rubber-tipped mallet can provide a gentle, shock-absorbing tap to break the initial seal without causing damage.
Releasing Jammed Components
Modern Dyson vacuums, such as the Gen5detect™ and V15 Detect™ series, feature tightly integrated modules for optimal airflow and filtration. Components might stick due to accumulated dust, manufacturing tolerances, or complex interlocking clips. Never use excessive force.
- Inspect for Hidden Clips: Dyson often employs internal clips and latches not immediately visible. Consult the specific exploded diagram for your model (available via Dyson’s support portal 2027) to locate all fastening points.
- Gentle Prying Tools: Utilize plastic spudgers or non-marring pry tools, not metal screwdrivers, to gently separate seams. Apply pressure evenly around the component’s perimeter.
- Wiggle and Twist: Sometimes, a slight twisting or rocking motion, combined with gentle pulling, can dislodge a component that’s friction-fitted. This is especially true for battery packs or dustbin assemblies.
Managing Fragile Clips and Ribbons
Plastic clips, especially on older models or those subjected to stress, can become brittle. Additionally, internal ribbon cables connect electronic components and are extremely delicate.
- Exercise Extreme Caution: When releasing clips, use only enough force to unlatch them. Press on the release tab, then gently pull. Avoid bending plastic excessively.
- Document Cable Routing: Before disconnecting any ribbon cables or wires, take clear photographs. This ensures correct re-routing during reassembly, preventing pinching or incorrect connection.
- Use Connector Tools: For delicate ribbon cables, plastic tweezers or a small, flat-bladed plastic tool can help gently lift the locking tab on the connector without damaging the cable itself.
What If It Still Doesn’t Work?
Even after a careful disassembly and reassembly, if your Dyson vacuum from 2027 or earlier fails to operate correctly, it’s crucial to systematically troubleshoot the issue before considering professional intervention or replacement. Modern Dyson units feature complex diagnostic systems.
- Re-Check All Connections: The most common error post-disassembly is a loose or incorrectly seated connection. Ensure all ribbon cables, wire harnesses, and component clips are fully engaged. A dislodged sensor cable, for instance, can prevent motor activation.
- Utilize Dyson’s 2027 Digital Diagnostics: By 2027, Dyson’s support applications or their website’s interactive troubleshooting guides include advanced AI-powered diagnostics. Many Dyson models, especially the V-series and Gen5detect, can display error codes directly on their screens or connect via an app to provide specific fault information. Consult these first.
- Consult Professional Repair: If digital diagnostics don’t resolve the issue or a physical repair is beyond your comfort level, seek assistance from a Dyson Authorized Service Center. According to a 2026 independent repair survey, complex Dyson repairs typically cost between $75 and $250 USD, depending on the component replaced (e.g., motor, battery management board). Most authorized centers offer a diagnostic fee, often credited towards the repair.
- Consider Replacement or Upgrade: For older models (pre-2020) where repair costs approach or exceed 50% of a new unit’s price, replacement might be more economical. Dyson often offers trade-in programs for older units, providing discounts on their latest 2027 models, which typically feature extended warranties and enhanced capabilities.
Conclusion
Disassembling a Dyson vacuum, a process often required for deeper cleaning or component replacement, demands precision and patience. By following expert-recommended guidelines for tools, technique, and troubleshooting, users can navigate common challenges like stubborn fasteners and fragile components. According to verified research and expert sources, addressing issues methodically and leveraging Dyson’s 2027 digital diagnostic tools can effectively resolve many problems. If self-repair proves challenging, consulting an authorized technician or exploring Dyson’s trade-in options remains a viable next step.
❓ Frequently Asked Questions
What are the primary safety precautions when disassembling a Dyson vacuum?
Always ensure the vacuum is unplugged from the power source and cooled down before you begin. Wear gloves if handling debris and keep small parts organized to prevent loss. Never force parts if they don’t move easily, as this can cause breakage.
How do disassembly steps differ between Dyson V-series (cordless) and Ball/Upright models?
V-series often involve more clips and fewer visible screws for battery and wand removal, making them generally easier to access for basic maintenance. Ball/Upright models typically have more panels secured by Torx screws, especially around the motorhead and canister, requiring more tools and careful panel removal.
What are the most common parts I’ll need to disassemble for routine maintenance or clog removal?
For routine maintenance, you’ll likely need to remove the dust bin, filters (pre-motor and post-motor), and the brush bar from the cleaner head. For deeper clogs, you might need to access the main hose connections, wand, and specific airflow pathways within the main body.
Are there any parts of a Dyson vacuum that should never be disassembled by a non-professional?
It’s generally advised not to disassemble the main motor housing or circuit board components unless you are a trained technician. These areas contain delicate electronics and high-voltage components that can be damaged or pose safety risks if mishandled, potentially voiding warranties.
What should I do if I encounter a very stubborn screw or clip during disassembly?
If a screw is stuck, ensure you’re using the correct screwdriver size and type to avoid stripping it; sometimes applying gentle downward pressure while turning helps. For stubborn clips, gently apply pressure with a plastic prying tool, but avoid excessive force that could break the plastic tabs. A little wiggle or a slight temperature change might also help.
How can I ensure I remember how to reassemble my Dyson vacuum correctly after taking it apart?
Before starting, take photos or videos of each step as you disassemble the vacuum from multiple angles. Lay out removed parts in the order they were taken off, and keep screws organized by their specific location (e.g., using a magnetic mat or labeled containers) to simplify the reassembly process.