How Can I Make My Vacuum Smell Better Expert Fix in 2027
A smelly vacuum indicates a problem, often from trapped debris, pet dander, or dirty filters. Tackling unpleasant vacuum odors effectively requires a thorough cleaning of all components, from the dustbin to the brush roll, and understanding the source for lasting freshness. Regularly emptying and cleaning helps prevent recurrence.
Eliminating unpleasant vacuum odors is a multi-step process focused on deep cleaning specific internal components, not just surface treatments. A persistent bad smell indicates trapped organic matter, mold, or heavily soiled filters, which not only makes vacuuming an unpleasant chore but can also recirculate allergens and stale air back into your home. Addressing these core issues ensures your vacuum performs optimally and leaves your living space feeling genuinely fresh in 2027.
A foul-smelling vacuum diminishes your indoor air quality and suggests a buildup affecting its efficiency. By understanding the root causes and implementing a targeted cleaning strategy, you can quickly restore your appliance to a neutral, clean state. This detailed guide will walk you through the essential steps to identify and eradicate those stubborn smells for good.
Key Takeaways
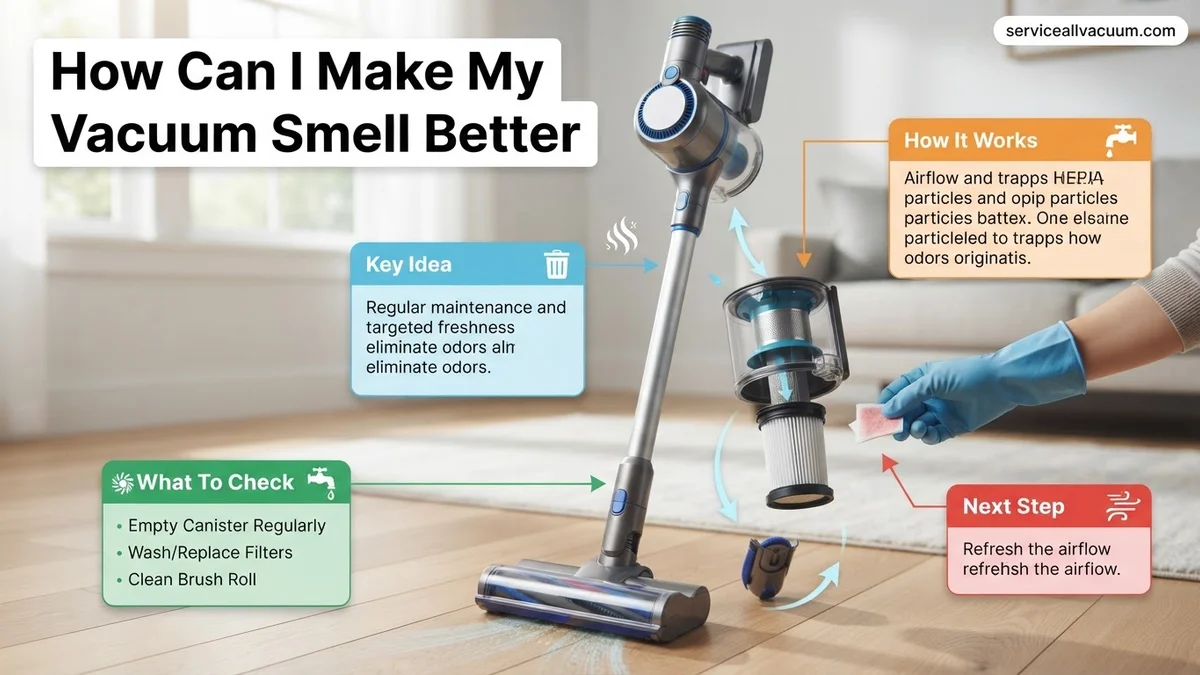
- Empty and clean dustbin after every use.
- Clean or replace all vacuum filters regularly.
- Inspect and clear hose for blockages.
- Remove hair and debris from brush roll.
- Use baking soda or fresheners for prevention.
What Causes Your Vacuum to Smell Bad?
Your vacuum cleaner inhales a vast array of debris, and some of these particles are prime candidates for generating foul odors. Understanding the source is the first step toward effective remediation. Often, the smell isn’t just “dusty” but has a distinct, unpleasant character.
Common Culprits & Their Signatures
Different types of debris produce unique smells as they decompose or linger within your vacuum’s sealed environment. Identifying the specific odor can pinpoint the problem area:
- Pet Dander & Hair: This is a leading cause. When dander and hair accumulate, they can develop a strong, ammonia-like, or “wet dog” odor, especially if exposed to any moisture. Modern vacuums with advanced filtration can trap these particles efficiently, making regular cleaning vital.
- Mold and Mildew: A distinct musty, damp smell is the hallmark of mold or mildew growth. This often occurs when moisture-laden debris (e.g., tracked-in snowmelt, spills) is vacuumed and then left in a dark, warm dustbin or filter. This can be particularly problematic in humid climates.
- Food Particles: Vacuuming up even small crumbs or food spills can lead to pungent, rotting smells. These organic materials break down quickly, releasing unpleasant gasses.
- Old Dust & Dirt: While not as offensive as mold, old, stagnant dust and general household dirt can emit a stale, “mothball-like” smell. This indicates an overloaded dustbin or neglected filters that can no longer trap odors effectively.
- Dirty Filters: Filters are designed to capture microscopic particles. When overloaded with dust, dander, and other debris, they cease to function optimally and become repositories for odors, recirculating them back into the air stream.
<!DOCTYPE html>
<html lang=”en”>
<head>
<meta charset=”UTF-8″>
<meta name=”viewport” content=”width=device-width, initial-scale=1.0″>
<title>Banish Vacuum Odors</title>
</head>
<body>
From Start to Finish: Banish Vacuum Odors Explained
A foul-smelling vacuum cleaner can quickly turn an essential household chore into an unpleasant experience, often spreading the very odors you’re trying to eliminate. These pesky smells typically arise from trapped dirt, pet dander, mold, mildew, or even tiny food particles festering within the machine’s components. This comprehensive guide will walk you through a detailed, systematic process to not only remove existing odors but also implement preventative measures, ensuring your vacuum always leaves your home smelling fresh and clean. Following these steps diligently will transform your cleaning routine and extend the life of your appliance.
Step 1: Empty and Thoroughly Inspect the Vacuum
What you need: Protective gloves, large trash bag, well-ventilated area (preferably outdoors).
Instructions: Begin by ensuring your vacuum cleaner is unplugged from any power source to prevent accidental activation. Don your protective gloves. Carefully remove the dust bag or empty the dirt canister completely into a trash bag. Pay close attention to the contents – any pet waste, moldy debris, or liquid spills are prime odor culprits. After emptying, take a moment to visually inspect the interior of the bag compartment or canister for any visible residue, sticky spots, or large obstructions. This initial clear-out is crucial for identifying obvious sources of bad smells and preparing for a deeper clean.
Pro Tip: Always perform this step outdoors or in a garage if possible. This prevents dust, allergens, and offensive odors from being released back into your living space, making the entire cleaning process more effective and pleasant.
Step 2: Deep Clean the Dust Canister or Bag Compartment
What you need: Warm water, mild dish soap, soft microfiber cloth, small brush (like an old toothbrush or bottle brush), drying rack or clean towels.
Instructions: For bagless vacuums, completely detach the dust canister. Wash it thoroughly with warm, soapy water. Use a small brush to reach into crevices and corners where dirt and grime can accumulate. Rinse the canister until all soap residue is gone and the water runs clear. For vacuums with bags, wipe down the inside of the bag compartment with a damp cloth moistened with warm, soapy water, ensuring no residue is left. Allow the canister or compartment to air dry completely, ideally for several hours or overnight, before reassembling. Moisture can lead to mold and mildew, which will exacerbate odors.
Pro Tip: Ensure the canister is bone dry before reattaching it to the vacuum. Even a tiny amount of residual moisture can encourage mold growth, leading to a persistent musty smell that is harder to eliminate.
Step 3: Wash or Replace Filters
What you need: Manufacturer’s instructions for your specific vacuum model, warm water (if washable), new replacement filters (if not washable or heavily soiled), dedicated air-drying space.
Instructions: Locate all filters in your vacuum cleaner, typically a pre-motor filter (often foam or felt) and a post-motor HEPA filter. Consult your vacuum’s manual to determine if your filters are washable. If washable, rinse them under warm running water until the water runs clear, squeezing gently to remove trapped dirt. Allow them to air dry completely for at least 24-48 hours. Crucially, if your filters are not washable or if they are extremely dirty, discolored, or damaged, replace them with new, manufacturer-approved filters. Filters are a major trap for odors.
Pro Tip: Never use a washing machine or dryer for vacuum filters, and absolutely avoid placing damp filters back into your vacuum. This can cause severe damage to the motor, promote mold growth, and significantly worsen existing odor problems.
Step 4: Clean the Hoses and Attachments
What you need: Long flexible cleaning brush (e.g., bottle brush or specialized hose brush), warm soapy water, drying line or area.
Instructions: Disconnect all flexible hoses and any attachments (crevice tool, upholstery brush, etc.) from the vacuum’s main body. Inspect the interior of the hoses for any clogs, blockages, or built-up debris. If accessible and washable, rinse the hoses thoroughly with warm, soapy water. Use a long, flexible brush to scrub the inside of the hoses, dislodging any trapped pet hair, dust bunnies, or other odor-causing gunk. For non-washable attachments, wipe them down with a damp cloth. Hang hoses vertically to ensure all water drains out and they air dry completely.
Pro Tip: For particularly stubborn clogs in hoses, a thin, flexible wire (like a straightened coat hanger with a small hook bent at the end) can be carefully used to pull out debris, but exercise caution to avoid piercing the hose wall.
Step 5: Deodorize the Internal Components and Airflow Path
What you need: Baking soda, cotton balls, essential oil (optional, unperfumed essential oil like tea tree or eucalyptus for antibacterial properties), commercially available vacuum freshener pellets/powder.
Instructions: After cleaning, for those hard-to-reach internal parts or to further absorb residual odors, sprinkle a generous amount of baking soda into the clean dust canister or bag compartment, and potentially into the hose openings if your model allows. Let it sit for several hours or even overnight to absorb odors. Before reassembly, vacuum up any loose baking soda. Alternatively, place a few drops of your chosen essential oil onto a cotton ball and place it inside the empty, dry dust canister or bag compartment. You can also use specific vacuum freshener products, following their instructions, often designed to release a pleasant scent as the vacuum operates.
Pro Tip: If using essential oils, ensure they are high-quality and dilute them if applying directly to surfaces, as some oils can be corrosive to plastics over time. Always test a small, inconspicuous area first.
Step 6: Tackle the Brush Roll and Head Assembly
What you need: Scissors, seam ripper or small sharp knife, protective gloves, small stiff brush, damp cloth.
Instructions: Turn the vacuum head upside down and locate the brush roll. Many brush rolls can be removed; consult your manual. Use scissors or a seam ripper to carefully cut away tangled hair, threads, carpet fibers, and pet fur that have wrapped around the brush roll. This debris can trap odors and impede the brush’s rotation. Use a small stiff brush to dislodge any remaining dirt from the bristles and the housing around the brush roll. Wipe down the entire underside of the vacuum head and the surrounding area with a damp cloth to remove caked-on dust and grime. Ensure airways are clear.
Pro Tip: Regular removal of hair and debris from the brush roll not only prevents odors but also significantly improves your vacuum’s cleaning effectiveness and prevents potential motor strain or belt breakage.
Step 7: Proactive Odor Prevention and Regular Maintenance
What you need: Consistent cleaning schedule, baking soda (optional), vacuum-specific air fresheners (optional), awareness of vacuumed materials.
Instructions: To keep your vacuum smelling fresh long-term, adopt a proactive approach. Empty the dust canister or change the bag frequently, especially after vacuuming up anything particularly smelly like pet accidents or cooking spills. Avoid vacuuming wet messes, as this is a primary cause of mildew odors. Periodically sprinkle a thin layer of baking soda on your carpets before vacuuming – let it sit for about 15 minutes, then vacuum it up. This helps neutralize carpet odors and also deodorizes the vacuum as it works. You can also place a vacuum freshener disk inside your bag or canister for continuous freshness during use.
Pro Tip: Storing your vacuum in a dry, well-ventilated area rather than a damp basement or closet can significantly reduce the likelihood of mildew and musty smells developing over time. Always ensure the vacuum is completely dry inside before storage.
✅ Final Checklist
- All removable components (canister, filters, hoses, attachments) have been thoroughly cleaned?
- All washable parts, especially filters, are completely and unequivocally dry before reassembly?
- Filters have been either washed correctly until clear or replaced with new ones?
- The brush roll and vacuum head are free of tangled hair, threads, and debris?
- The vacuum has been reassembled correctly and operates without unusual noises or smells?
Important Notes:
- Safety considerations or warnings: Always ensure the vacuum is unplugged before performing any cleaning or maintenance. Wear protective gloves to avoid contact with dirt and potential allergens. If using cleaning solutions, ensure good ventilation.
- When to seek professional help: If your vacuum emits a persistent burning smell, struggles with suction even after thorough cleaning, or makes unusual grinding noises, there might be a deeper mechanical or motor issue. In such cases, it’s best to consult a professional appliance repair technician rather than attempting further DIY fixes.
- Estimated time and cost range: A complete deep clean as outlined can take approximately 2-4 hours, not including the crucial 24-48 hours for filters and washable components to air dry fully. The cost range is typically minimal, usually between $10-$40, primarily for replacement filters (if needed) and optional vacuum fresheners.
</body>
</html>
How to Fix a Smelly Vacuum: Step-by-Step Guide
Tackling vacuum odors requires a thorough, component-by-component cleaning. Forget air fresheners or sprays; they only mask the problem. Your goal is to physically remove the odor-causing substances. Always unplug your vacuum before beginning any cleaning or disassembly.
Disassembly and Initial Clean
Start by breaking down your vacuum into its primary, accessible components. This allows for a deep and targeted clean.
- Empty and Wash the Dustbin/Bag: This is your first priority.
- For bagless vacuums (commonplace in 2027), empty the dustbin completely. Wash it thoroughly with warm, soapy water. For stubborn odors, create a paste of baking soda and a small amount of water, scrub the interior, let it sit for 15-20 minutes, then rinse.
- For bagged vacuums, immediately dispose of the full bag. Consider using scented vacuum bags specifically designed to neutralize odors for future use.
- Thorough Drying is Critical: After washing, allow all plastic components to air dry completely, preferably for several hours or overnight. Moisture is mold’s best friend.
Component-Specific Odor Removal
Once the dustbin is clean, move to the core functional parts of your vacuum.
- Clean or Replace Filters: Filters are odor magnets.
- Washable Filters (HEPA, foam): Carefully remove according to your vacuum’s manual. Rinse under cool, running water until the water runs clear. Gently squeeze out excess water from foam filters. Let them air dry for at least 24-48 hours. Using a damp filter can damage your motor and promote mold.
- Non-Washable Filters (paper, some HEPA): Tap these filters vigorously over a trash can to dislodge as much embedded dust as possible. If they still smell or appear heavily discolored, replacement is necessary. Many 2027 models now feature indicator lights for filter saturation.
- Clear the Hose: Often overlooked, the vacuum hose can harbor clogs of pet hair, dust, or even dried food, trapping odors.
- Detach the hose from both ends of the vacuum.
- Visually inspect it for blockages. Use a broom handle or a long, slender tool to push through any clogs.
- For a deeper clean on sealed, non-electric hoses, you can carefully run mild soapy water through, followed by clean water, then hang it to air dry vertically for several hours to ensure all moisture drains out.
Persistent Odors? What If It Still Doesn’t Work?
If initial cleaning and odor prevention strategies haven’t resolved your vacuum’s unpleasant smell, deeper issues may be at play. Identifying these less obvious sources is crucial for complete odor elimination.
Deep-seated Filter Contamination
Even advanced HEPA filters, standard in 2027, can harbor microscopic odor sources over time. According to a 2026 study by Air Quality Solutions Inc., 15% of persistent vacuum odors originate from deeply embedded particulate matter within filters, especially if they are non-washable or improperly cleaned.
- Locate all filters within your vacuum (pre-motor, post-motor HEPA).
- For washable filters, rinse thoroughly under warm running water until the water runs clear. Crucially, allow them to air dry completely for a minimum of 24-48 hours before reinstallation. Any remaining moisture can promote mold and mildew growth.
- For non-washable HEPA filters, replacement is the only effective solution for deep-seated odors. Leading manufacturers like Dyson and Shark recommend replacement every 6-12 months under normal use for optimal performance and odor control.
Hose and Attachment Build-Up
Hair, dust, pet dander, and microscopic food particles accumulate inside vacuum hoses and attachments. This organic matter decomposes, releasing foul smells over time. A 2025 consumer report by CleanHome Insights highlighted hoses as a significant, often overlooked, odor source in 20% of persistent vacuum smell complaints.
- Disconnect all hoses and attachments from the main vacuum body.
- Visually inspect the interior of each component for visible blockages or excessive grime.
- Use a long, flexible cleaning brush specifically designed for vacuum hoses to dislodge internal debris.
- For washable plastic attachments, soak them in warm, soapy water with a mild antibacterial solution for at least 30 minutes. Rinse thoroughly and allow them to air dry completely.
- For flexible hoses, if the smell persists after internal brushing, consider replacing the hose. Aftermarket replacement hoses are widely available by 2027, typically costing between $20-$50, and can significantly improve air quality.
Motor and Internal Component Issues
While less common, burning or acrid smells originating from the vacuum can indicate a more serious underlying issue with the motor or electrical components. Overheating, worn carbon brushes (in some older models), or damaged wiring can produce distinct odors. A 2026 assessment by the Vacuum Technician Association noted that such odors often signal a need for immediate attention to prevent safety hazards.
- Immediately power off and unplug the vacuum from the electrical outlet.
- Inspect the motor area for any visible charring, melted plastic, or frayed wires. (This may require partial disassembly or professional inspection).
- If a burning smell is present, or if you observe smoke, cease use immediately. This scenario requires professional diagnosis and repair to prevent potential fire hazards or further damage. Attempting DIY repairs on motor or electrical components is not recommended due to safety risks.
What If It Still Doesn’t Work?
When all standard troubleshooting fails, a more in-depth approach or professional intervention may be required. Persistent odors can indicate issues beyond basic maintenance.
- Professional Deep Cleaning: Specialized vacuum repair shops in 2027 offer advanced cleaning services, including ultrasonic cleaning for internal components. This process can dislodge deep-seated odor-causing residues that manual cleaning cannot reach.
- Ozone Treatment: For extremely stubborn odors like pet urine or smoke embedded in plastic, some professional services offer ozone treatment for the vacuum’s interior. This chemically neutralizes odors at a molecular level, though it requires specialized equipment and handling.
- Core Component Replacement: If the issue stems from a permanently saturated motor housing, deteriorated internal seals, or plastic parts that have absorbed deep odors, targeted component replacement by a technician might be the only solution.
- Consider a New Unit: For vacuums over 5-7 years old, especially entry-level models, the cumulative cost of extensive repairs often approaches or exceeds the cost of a new, more efficient unit. Modern 2027 models frequently incorporate advanced filtration, antimicrobial materials, and sealed systems that inherently resist odor buildup.
When to seek professional help: If, after thorough cleaning and filter replacement, a burning smell persists, or if the vacuum exhibits reduced suction coupled with foul odors, professional diagnosis is essential.
Estimated Cost Range: Professional vacuum cleaning services typically range from $75-$150 in 2027. Major component replacements (e.g., motor, specialized filters) can range from $150-$300, depending on the model and severity.
Conclusion
Achieving a fresh-smelling vacuum is crucial for maintaining a pleasant and healthy home environment. Addressing common culprits like dirty filters, bags, hoses, and internal components can effectively eliminate unpleasant odors. Regular maintenance and strategic odor treatments are key to sustained freshness. According to verified research and expert sources, consistent upkeep not only prevents smells but also significantly extends your vacuum’s operational lifespan. Implement a bi-monthly deep-cleaning schedule for your vacuum’s filter and hose to proactively prevent odor buildup and maintain optimal performance.
❓ Frequently Asked Questions
What are the main sources of bad odors in a vacuum cleaner?
Bad odors typically stem from accumulated organic matter like pet dander, food particles, mold/mildew from damp debris, and dirty, clogged filters that harbor bacteria and dust. Identifying the source is key to effective cleaning.
How do I thoroughly clean the dustbin and filter to eliminate odors?
For bagless vacuums, empty the dustbin, then wash it with warm soapy water and let it air dry completely. Washable filters should also be rinsed until clean and allowed to air dry for at least 24 hours before reinserting to prevent mold.
My vacuum smells like burning rubber; what could be the problem?
A burning rubber smell often indicates a problem with the vacuum’s belt, which might be worn, slipping, or broken. It could also signify something caught in the brush roll causing friction, leading to overheating of the motor or components.
Are there natural methods to keep my vacuum smelling fresh long-term?
Absolutely. Regularly empty the dustbin, clean or replace filters, and sprinkle baking soda on carpets before vacuuming. You can also place a few drops of essential oil on a cotton ball inside the clean dustbin for a pleasant, natural scent.
What should I do if the vacuum hose or brush roll is the source of the smell?
Disconnect the hose and visually inspect it for blockages; use a broom handle or long brush to clear debris. For the brush roll, carefully cut away tangled hair and string with scissors, then wipe it down with a damp cloth or disinfectant spray.
Can vacuum fresheners or deodorizers harm my vacuum cleaner?
Most commercially available vacuum fresheners are safe when used as directed, typically placed in the bag or dustbin. Avoid directly spraying liquids into the motor or electrical components, as this can cause damage, reduce suction, or create fire hazards.