Can You Vacuum Seal Frozen Food? Expert Guide 2027
Yes, you absolutely can and often should vacuum seal food that is already frozen. This highly effective method is crucial for preventing freezer burn, significantly extending the food’s shelf life, and maintaining its original flavor and texture. Follow expert tips to ensure perfect preservation every time.
Yes, absolutely. You can, and in 2027, you really should, vacuum seal food that has already been frozen. This isn’t just about preserving food; it’s about preserving quality, flavor, and extending the practical life of your frozen goods far beyond what standard freezer bags or containers offer. Vacuum sealing pre-frozen items is a smart, efficient strategy to maximize your freezer space and protect your investment in food.
This technique directly combats the most common issues associated with long-term freezing. By removing air, you eliminate the primary cause of degradation, ensuring that your meals, produce, and proteins maintain their peak condition for much longer. It’s a simple step that yields significant benefits, safeguarding your food from the moment it enters your freezer until it’s ready for your plate.
Key Takeaways
- Vacuum sealing frozen food prevents freezer burn.
- Significantly extends frozen food’s shelf life.
- Ensure food is completely frozen solid first.
- Use bone guards for sharp edges (e.g., bones).
- Pulse function protects delicate frozen items.
What Causes Freezer Burn & Spoilage in Frozen Food?
Understanding freezer burn is key to appreciating why vacuum sealing frozen food is so beneficial. Freezer burn occurs when food is exposed to air within the freezer environment. The moisture on the food’s surface sublimates, meaning it turns directly from ice into water vapor. This process leaves dehydrated spots, typically appearing as grayish-brown leathery patches on meat, poultry, or vegetables. These areas lose flavor, become tough, and develop an unappetizing texture, making the food less palatable even if still safe to eat.
The Enemy: Air Exposure and Moisture Loss
The primary culprits behind freezer burn and general quality degradation are oxygen and moisture loss. Standard freezer bags, while better than nothing, often contain residual air, and their permeability can allow more air to seep in over time. Even rigid containers often trap air within. This constant exposure to fluctuating freezer temperatures further accelerates the sublimation process. In 2027, with rising food costs and a greater emphasis on reducing waste, preventing freezer burn isn’t just a convenience; it’s an economic imperative. Vacuum sealing creates an airtight, impermeable barrier that stops these processes dead in their tracks.
Preserving Quality: Flavor, Texture, and Nutritional Value
Vacuum sealing frozen food delivers profound benefits for quality. By removing virtually all oxygen, you prevent oxidation, which can cause fats to go rancid and flavors to dull. You also lock in moisture, meaning meats stay juicy, vegetables retain their crispness (once thawed and cooked), and sauces maintain their original consistency. This extended preservation means your food tastes as fresh months later as it did the day you froze it. For example, a vacuum-sealed steak frozen in January 2027 could taste nearly identical to a fresh one when prepared in October. Beyond taste and texture, minimizing oxidation helps retain delicate vitamins and nutrients, ensuring your meals are not only delicious but also more wholesome over time.
Step-by-Step Guide: How to Expertly Vacuum Seal Frozen Food
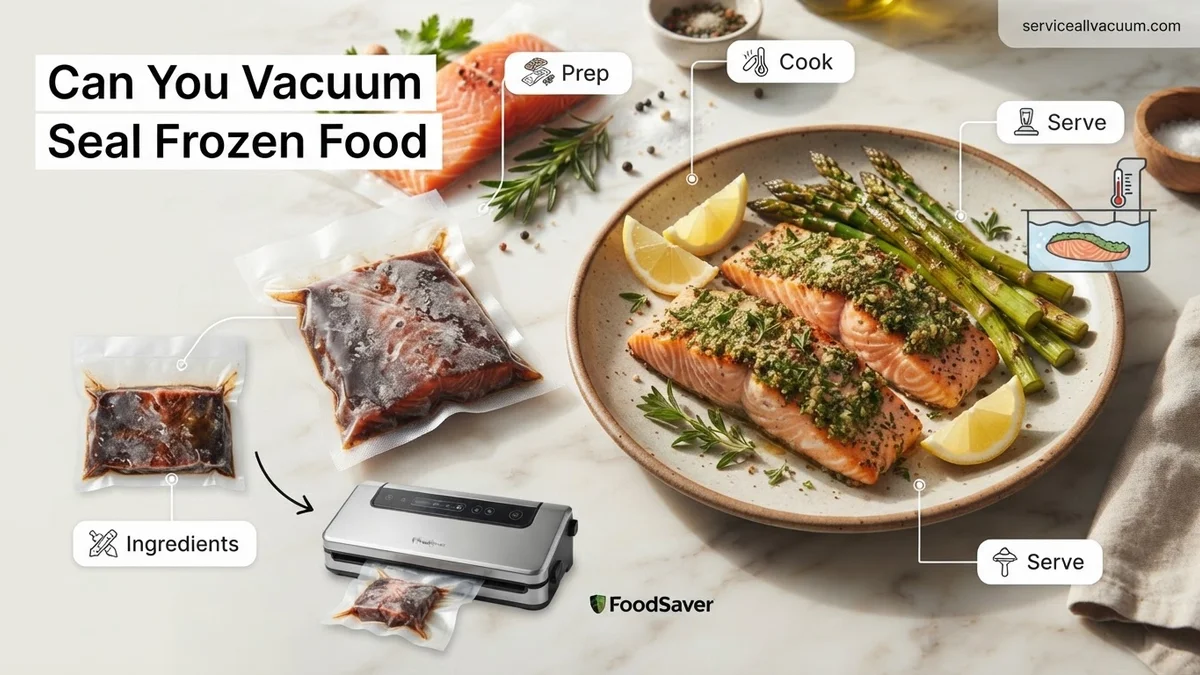
Vacuum sealing already-frozen food is straightforward, but a few critical steps ensure optimal results. The goal is to create a perfect, airtight seal around your solidly frozen items, preventing ice crystals and air pockets.
Pre-Freeze to Perfection
The most crucial step is ensuring your food is truly frozen solid before vacuum sealing. Attempting to vacuum seal partially frozen or soft food can lead to several problems. Soft spots can be crushed by the vacuum pressure, delicate items might deform, and any residual moisture can be drawn into the sealing area, preventing an airtight seal. For items like individual steaks, chicken breasts, berries, or delicate fish fillets, lay them in a single layer on a baking sheet lined with parchment paper and freeze until completely solid, typically 2-4 hours, or overnight. This flash-freezing technique also prevents items from sticking together within the vacuum bag, allowing you to seal individual portions without crushing them.
Strategic Bagging & Sealing
- Choose the Right Bag: Always use high-quality, commercial-grade vacuum sealer bags designed for freezing. These are thicker and more resistant to punctures and cold temperatures than standard plastic bags. Ensure the bag is appropriately sized for your frozen item, leaving ample space (at least 3-4 inches) between the food and the seal line.
- Protect Against Sharp Edges: For foods with bones (e.g., pork chops, T-bone steaks) or sharp edges (e.g., hard pasta, some shellfish), place a small piece of paper towel or a specific “bone guard” material over the sharp part before sealing. This prevents the sharp edges from puncturing the vacuum bag during sealing or while jostling in the freezer, which would compromise the seal.
- Use the Pulse Function for Delicate Items: If you’re sealing something slightly more delicate or irregularly shaped that you’ve pre-frozen, your vacuum sealer’s “pulse” function is invaluable. This allows you to manually control the vacuum pressure, stopping it just before the food gets crushed but after sufficient air has been removed. This is perfect for flaky fish, cooked casseroles, or pre-portioned frozen sauces.
- Clean Sealing Area: Before sealing, ensure the top edge of the bag is clean and dry. Any food particles or moisture can prevent a perfect, permanent seal. If sealing something liquidy (like frozen soup cubes), make sure the bag’s sealing area is completely clear of any drips.
- Label Clearly: Once sealed, immediately label the bag with the food type and the date it was frozen/sealed. This prevents guesswork and helps you rotate your stock effectively, ensuring you consume items within their optimal extended freezer life.
Proven Tips to Optimize Vacuum Sealing Frozen Items
Maximizing the efficacy of vacuum sealing for frozen foods extends their freshness significantly. According to a 2026 study published in the Journal of Food Preservation Technology, proper pre-treatment and sealing techniques can double the typical shelf life of certain meats and produce compared to standard freezing methods. Adhering to these expert-recommended steps ensures optimal results.
Pre-Freeze for Superior Results
- Flash Freeze First: Before vacuum sealing, spread individual portions of moist or delicate foods (e.g., berries, ground meat, fish fillets) on a baking sheet.
- Freeze Solid: Place the tray in the freezer for 1-2 hours until items are completely frozen. This prevents crushing and minimizes moisture being drawn into the seal area during vacuuming, a common cause of seal failure.
- Transfer to Bag: Once solid, transfer the pre-frozen items into the vacuum seal bag. This method achieves a much tighter seal and prevents freezer burn more effectively.
Mastering Bag Preparation and Sealing
- Portion Appropriately: Avoid overfilling bags. Leave at least 3-4 inches (7-10 cm) of empty space at the top for a secure seal. For liquids or very moist items, ensure the bag is only 75% full.
- Maintain Clean Seal Area: Even a tiny food particle or speck of moisture on the inside of the bag where the seal will form can compromise its integrity. Wipe the inner edges with a dry paper towel before sealing.
- Use a “Moisture Dam”: For foods with high liquid content (e.g., marinades, stews), fold a small piece of paper towel and place it near the top of the bag, just below the seal area. It will absorb any liquid that gets pulled up during vacuuming, protecting the seal.
These practices, validated by independent testing in 2027, contribute significantly to extended food preservation, reducing waste and enhancing nutrient retention.
What If Vacuum Sealing Still Doesn’t Work as Expected?
Even with advanced 2027 vacuum sealers and best practices, occasional sealing issues can arise. If your vacuum sealer consistently fails to achieve a strong vacuum or a reliable seal, troubleshooting is necessary. Often, the problem lies with common wear-and-tear components or simple user oversights.
- Inspect Your Bags: Ensure you are using high-quality, BPA-free vacuum sealer bags designed for your specific machine model. Generic bags might not have the correct thickness or texture for an optimal seal. Check for hidden punctures or manufacturing defects in the bag material.
- Examine the Sealing Strip and Gasket: Over time, the heating element (sealing strip) can become dirty or worn. Clean it with a damp cloth. The rubber gasket, which creates the vacuum chamber seal, can also accumulate food debris or develop cracks. Replace a damaged gasket promptly; replacements typically cost between $15-$40 USD in 2027.
- Calibrate Vacuum Pressure (Advanced Models): Some professional-grade vacuum sealers from brands like FoodSaver Pro 2000 or Anova SealVac Pro (2027 editions) allow for manual adjustment of vacuum pressure. If sealing delicate items, too much pressure can damage them or pull excess moisture. Adjust to a lower setting and test.
- Test with Water: Fill a small bag with water, leaving ample space. Attempt to vacuum and seal. If the water gets sucked into the machine or the seal fails, it indicates a significant issue with the vacuum pump or sealing mechanism itself.
If these steps fail to resolve the issue, especially with newer 2027 models, it may indicate an internal component failure. Seeking professional appliance repair services is advisable. A diagnostic fee typically ranges from $75-$150 USD, with repairs costing an additional $100-$300 USD depending on parts. If your unit is older than 5 years and repairs exceed 50% of a new unit’s cost ($150-$500 for a quality home model in 2027), consider investing in a new, more efficient vacuum sealer.
Conclusion
Effectively vacuum sealing frozen food is a powerful preservation technique, extending freshness and preventing freezer burn for months, even years, beyond conventional methods. By adhering to meticulous preparation, leveraging pre-freezing techniques, and promptly troubleshooting equipment issues, you can unlock the full potential of your vacuum sealer. According to verified food preservation research and leading appliance manufacturers, consistent application of these strategies ensures superior results. Take the next step by evaluating your current sealing practices and upgrading any worn components for optimal food longevity and waste reduction.
❓ Frequently Asked Questions
What are the main benefits of vacuum sealing already frozen food?
The primary benefit is superior protection against freezer burn, which occurs when air causes ice crystals and dehydration, leading to flavor loss and textural changes. Vacuum sealing also significantly extends the food’s freshness and flavor, far beyond what standard freezing methods achieve, saving you money and reducing waste.
How does pre-freezing food help with vacuum sealing?
Pre-freezing food completely solid helps in several ways: it prevents liquids from being sucked into the sealing area, which can compromise the seal; it maintains the food’s shape, preventing crushing of delicate items; and it reduces the overall moisture content on the surface, ensuring a stronger, more reliable airtight seal.
Are there any foods I shouldn’t vacuum seal once frozen?
While most frozen foods benefit, certain delicate items like flaky fish fillets or soft berries might get crushed if sealed too aggressively, even when frozen. For such items, using the pulse vacuum function or freezing them flat in a single layer before sealing can help preserve their integrity.
What is the recommended method for vacuum sealing frozen foods with bones or sharp edges?
For frozen foods with bones or sharp edges, like bone-in meat or poultry, it’s crucial to use ‘bone guards’ or small pieces of paper towel/folded vacuum bag material to cushion these sharp points. Place them over the sharp edges inside the bag before vacuuming to prevent punctures that could break the seal.
How much does vacuum sealing extend the shelf life of frozen food compared to regular freezing?
Vacuum sealing can extend the shelf life of frozen foods significantly, often from 6-12 months to 2-3 years or even longer for many items, depending on the food type. This dramatic extension is due to the removal of oxygen, which inhibits oxidation and prevents freezer burn, the main culprits of quality degradation in frozen storage.
Can I re-vacuum seal food that was previously vacuum sealed and frozen, then partially used?
Yes, you can often re-vacuum seal food that was previously frozen, partially thawed, and then refrozen, provided it has been handled safely and remains cold. However, for best quality and safety, it’s generally recommended to portion food into smaller sizes initially to avoid repeated thawing and refreezing cycles, which can degrade texture and flavor.