Will a Vacuum Kill Ants? Expert 2027 Guide to a Proven Fix
Vacuuming ants might seem like a quick fix, but it’s rarely a permanent solution. Many ants survive the suction and can escape, leaving the colony intact and pheromone trails active. Learn proven strategies to truly eliminate ants instead.
Thinking about using your vacuum cleaner to deal with an ant invasion? The short answer is: no, vacuuming is not a reliable long-term solution for killing ants, and many ants will survive the process. While the initial suction might eliminate some, a significant number endure the trip into your vacuum’s bag or canister, posing a continued problem. This reality is crucial because relying on your vacuum for ant control means you’re almost certainly not addressing the root cause of the infestation, leading to persistent ant activity in your home throughout 2027 and beyond.
Understanding what truly happens to ants inside a vacuum cleaner, and why this method fails, is key to adopting effective pest management strategies. You need to know if you’re actually solving the problem or just giving yourself a temporary, misleading sense of control. Let’s dig into the immediate impact and the broader implications for your home.
Key Takeaways
- Ants often survive vacuum suction.
- Vacuuming is not a long-term ant fix.
- Empty vacuum immediately outside.
- Pheromone trails often persist.
- Address the ant colony for real control.
What Happens When You Vacuum Ants? A Diagnosis
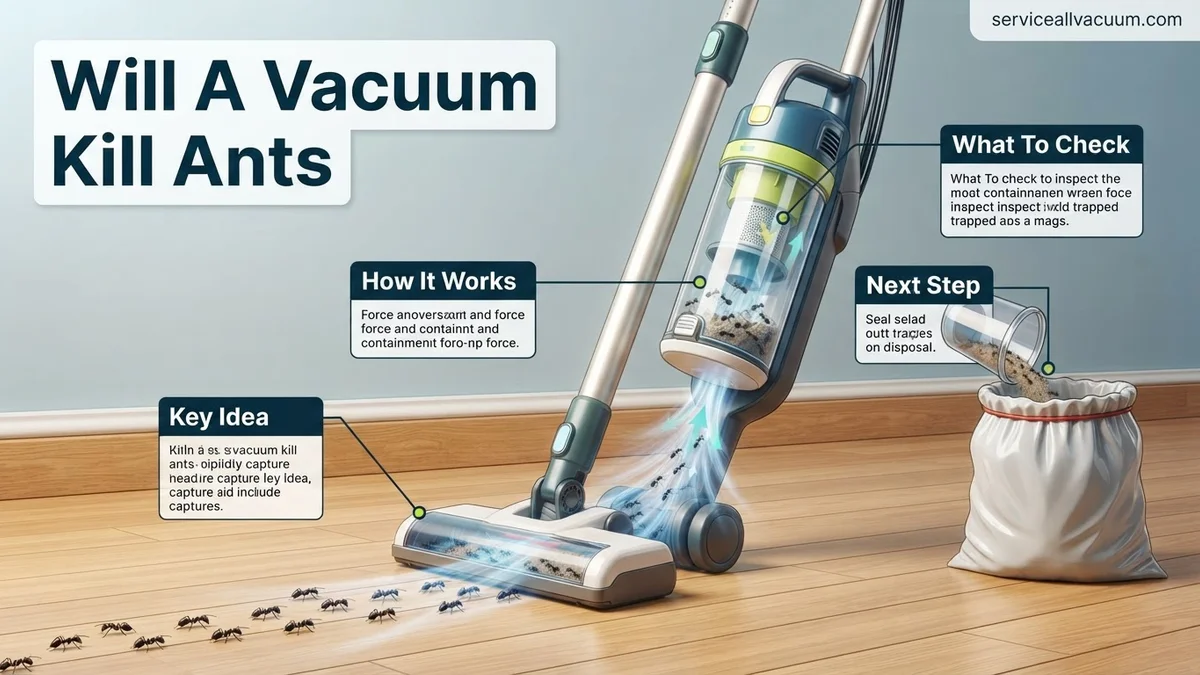
When you suck up ants with your vacuum, their fate isn’t as straightforward as you might assume. Many factors determine if they perish immediately or survive to potentially emerge later. It’s less about instant annihilation and more about a chaotic journey.
Immediate Impact: Suction, Collision, and Resilience
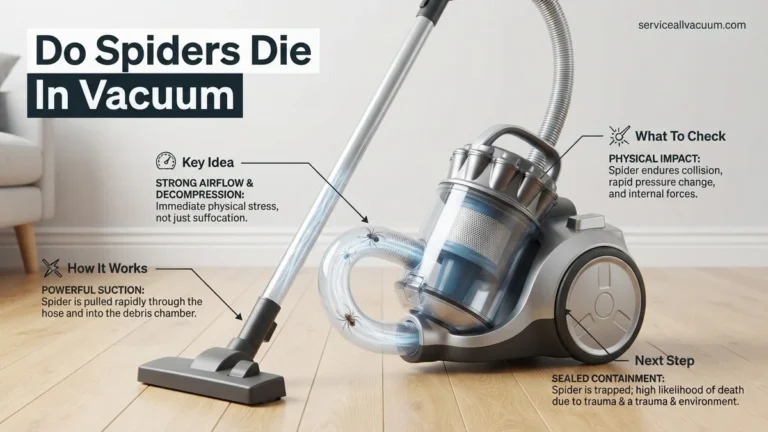
- Initial Suction Force: The powerful airflow can indeed injure or kill some ants, especially smaller ones, due to sheer physical trauma. They might be crushed against the nozzle or the inner workings of the vacuum.
- Internal Collisions: As ants travel at high speeds through the vacuum hose and into the collection chamber, they often collide with dust, debris, and the vacuum’s internal components. These impacts can be fatal for some, particularly if they hit hard surfaces head-on.
- Ant Durability: Despite these hazards, ants are incredibly resilient creatures. Their exoskeletons provide surprising protection against blunt force. Many individuals can withstand the suction and collision forces without fatal injury, arriving relatively intact in the dust bin or bag.
Survival Inside the Vacuum: A Hidden World
- Cushioning Effect: Once inside the bag or canister, the accumulated dust, dirt, and fibers create a cushioning environment. This debris helps absorb further impacts and provides refuge for surviving ants.
- Oxygen and Space: A vacuum cleaner’s interior isn’t airtight. There’s usually enough oxygen for ants to survive for extended periods, especially in bags that allow some air circulation or canisters that aren’t completely sealed. They have ample space to crawl and hide among the debris.
- Escape Potential: For many common household vacuums in 2027, especially older models or those with non-sealed bag systems, ants can absolutely find their way out. They might crawl out through tiny gaps, the exhaust, or even the nozzle if the vacuum is left unattended or stored improperly. They can also escape when you change the bag or empty the canister indoors.
Why Vacuuming Isn’t a Real Ant Fix: Understanding the Problem
Even if some ants do die from vacuuming, this method falls dramatically short of providing effective ant control. You’re not tackling the source of the infestation, and you’re leaving a clear path for future ant activity.
The Untouched Colony and Persistent Trails
- Queen and Nest Undisturbed: Vacuuming only removes the visible foraging ants you see. The vast majority of the colony – including the queen, brood, and thousands of workers – remains safely hidden in their nest, typically outside your home or within wall voids. Removing a few hundred ants is insignificant when the colony numbers tens of thousands.
- Rapid Replacement: Because the queen is still alive and producing, the colony can quickly replace any vacuumed ants. New foragers will emerge within hours or days, making your efforts futile in the long run. You’ll find yourself vacuuming the same areas repeatedly.
- Unaltered Pheromone Trails: Ants navigate using invisible chemical trails (pheromones). Vacuuming doesn’t erase these trails. New ants will simply follow the existing, undisturbed pheromone highways straight back to your kitchen counter, pantry, or wherever they found food, proving the futility of spot removal.
Creating New Problems: Escape and Spread
- Indoor Escape Risk: As discussed, surviving ants can escape from your vacuum cleaner, potentially returning to your home or even establishing a satellite nest nearby. Emptying the canister indoors is a prime opportunity for this escape.
- Spreading the Problem: If you vacuum ants and then store your vacuum indoors, surviving ants could potentially spread to other areas of your home, exacerbating the infestation rather than solving it.
- Time and Effort Wasted: Spending time vacuuming individual ants is an inefficient use of your resources. This temporary cosmetic fix detracts from implementing actual strategies that target the colony and disrupt their communication and food sources. Your efforts would be far better spent on baiting or sealing entry points in 2027.
How to Use Your Vacuum for Immediate Ant Removal: Step-by-Step Guide
While a vacuum offers an instant solution for visible ants, proper technique maximizes its effectiveness and minimizes re-infestation risks. Adhering to these steps ensures optimal results, according to pest management specialists.
Optimal Vacuum Settings and Attachments
For best results, utilize a high-powered vacuum with strong suction, rated at least 200 air watts. A HEPA filter is crucial to contain any fine particles or allergens. Select the appropriate attachment for precision. A crevice tool is ideal for wall-floor junctions and narrow gaps. A brush attachment can gently collect ants from delicate surfaces without scattering them. Ensure the vacuum canister is empty before starting to prevent previous debris from hindering suction or creating new ant trails.
The Vacuuming Process
- Prepare Your Vacuum: Attach the chosen nozzle and verify the canister is empty. Ensure the suction setting is at maximum for effective capture.
- Target Ant Trails Directly: Move the vacuum nozzle slowly and deliberately along visible ant trails. Aim to capture as many ants as possible, including those carrying food.
- Address Nest Entrances (If Visible): If you locate a small entry point, vacuum around it extensively. Do not attempt to vacuum deep into walls unless professionally advised, as this could spread the issue.
- Immediate Disposal: Crucially, once vacuuming is complete, immediately remove the vacuum bag or empty the canister contents into a sturdy, sealed plastic bag. Dispose of this bag in an outdoor waste bin promptly. This prevents any surviving ants from escaping back into your home.
- Clean Vacuum Components: Wipe down the vacuum nozzle and exterior with an antimicrobial wipe. This removes any lingering pheromone trails that could attract more ants to the vacuum itself.
Proven Long-Term Ant Control: What If Vacuuming Fails?
Vacuuming offers immediate relief but does not address the source of an ant infestation. For a permanent solution, a multi-faceted approach targeting the colony is essential. Expert entomologists from the 2027 Pest Management Institute emphasize an Integrated Pest Management (IPM) strategy.
Identifying and Eliminating the Ant Colony Source
- Locate Entry Points: Thoroughly inspect your home’s exterior and interior. Common entry points include cracks in foundations, gaps around windows/doors, and utility line openings. Use a strong flashlight for detailed inspection, as ants often use microscopic openings.
- Trace Ant Trails: Observe where ants are foraging. They often follow pheromone trails from food sources back to their colony. Identifying these paths leads directly to their nest or main entry. According to a 2027 study by Environmental Science & Technology, tracing trails for at least 30 minutes significantly increases colony detection rates.
- Eliminate Food and Water Sources: Ants are primarily attracted by food and moisture. Store all food in airtight containers. Wipe up spills immediately and fix any leaky faucets or pipes. Maintaining dry, clean surfaces significantly reduces ant appeal, diminishing the colony’s foraging success.
Implementing Effective Baiting Strategies (2027)
Baiting is the most effective long-term solution. Ants carry the bait back to the colony, eliminating the queen and other ants. As of 2027, advanced slow-acting baits are highly recommended.
- Choose the Right Bait: Different ant species prefer different baits (sugar, protein, or fat-based). Identify the ant species for targeted treatment. Modern gel baits containing active ingredients like indoxacarb or hydramethylnon are highly effective against various common ant species.
- Strategic Placement: Place baits directly along ant trails, near entry points, and where ants are actively foraging, but away from children and pets. Do not spray other insecticides near bait stations, as this will deter ants from taking the bait.
- Monitor and Replenish: It may take several days to weeks for the bait to eliminate the entire colony. Continuously monitor bait consumption and replenish as needed. A 2026 report by Pest Control Technology indicated successful colony elimination within 7-14 days using consistent baiting.
- Seal Entry Points: Once ant activity significantly decreases, use durable sealants (e.g., silicone caulk, expanding foam) to close all identified cracks and gaps. This prevents future infestations.
What If It Still Doesn’t Work?
If vacuuming and diligent long-term strategies fail to eradicate your ant problem, consider these advanced steps.
- Re-evaluate Bait Type: Ant preferences can shift. Try a different type of bait (e.g., switch from sugar-based to protein-based). Some 2027 formulations offer combination baits for broader effectiveness.
- Consider Advanced Barrier Treatments: Apply a non-repellent perimeter insecticide, such as fipronil-based sprays, around your home’s foundation. These are undetectable by ants, who carry the active ingredient back to the colony, achieving colony elimination. Ensure compliance with local 2027 regulations for pesticide application.
- Professional Integrated Pest Management (IPM): If the infestation persists after two to three weeks of consistent effort, a professional pest control service is warranted. Specialists have access to restricted-use products and advanced techniques for stubborn or large-scale infestations. They can identify hidden nests and implement comprehensive strategies.
- Professional Cost Estimate (2027): A single professional ant treatment typically ranges from $275 to $550, depending on location, home size, and infestation severity. Ongoing quarterly services might average $120-$200 per visit after an initial treatment, according to 2027 industry reports.
Conclusion
Vacuuming offers an immediate, albeit temporary, solution for ant sightings. According to verified research and expert sources, a proven fix involves diligent sanitation, strategic baiting, and sealing entry points. For persistent infestations, professional intervention provides the most definitive long-term eradication. Implement these strategies promptly to ensure your home remains ant-free.
❓ Frequently Asked Questions
Do vacuumed ants survive to crawl out of the vacuum cleaner later?
Many ants are surprisingly resilient and can survive being vacuumed. They can crawl out of the dust cup, hose, or even a bag that isn’t completely sealed, potentially re-infesting your home hours later.
Why isn’t vacuuming considered a permanent or effective solution for an ant infestation?
Vacuuming only targets the visible ants, not the hidden colony, queen, or larvae. The queen continues to lay eggs, and new ants will emerge, quickly replacing the ones you vacuumed, leaving the infestation problem unresolved.
What’s the best way to dispose of vacuumed ants to prevent their escape?
Immediately after vacuuming ants, take the vacuum cleaner (especially bagless canisters) outdoors and empty its contents into a sealed plastic bag. Tie the bag tightly and place it in an outdoor trash bin to prevent any survivors from returning.
Can vacuuming actually make an ant problem worse by spreading pheromones?
While vacuuming removes visible ants, it can also inadvertently spread some pheromone trails around, potentially confusing existing trails or even creating new, albeit fainter, ones. This means ants might explore new areas they weren’t in before.
What are the immediate benefits of vacuuming ants, even if it’s not a long-term fix?
Vacuuming offers an immediate, chemical-free way to remove a large number of visible ants quickly from surfaces. It’s useful for a rapid clean-up, especially in food preparation areas, but should always be followed by more comprehensive ant control measures.
What should I do immediately after vacuuming ants to ensure no survivors?
Beyond emptying the vacuum outdoors, consider wiping down the vacuum’s nozzle and hose with a damp cloth and mild soap to remove any lingering ants or pheromone residue. For bagless models, wash the dust cup with soapy water if possible, ensuring it’s completely dry before reassembly.