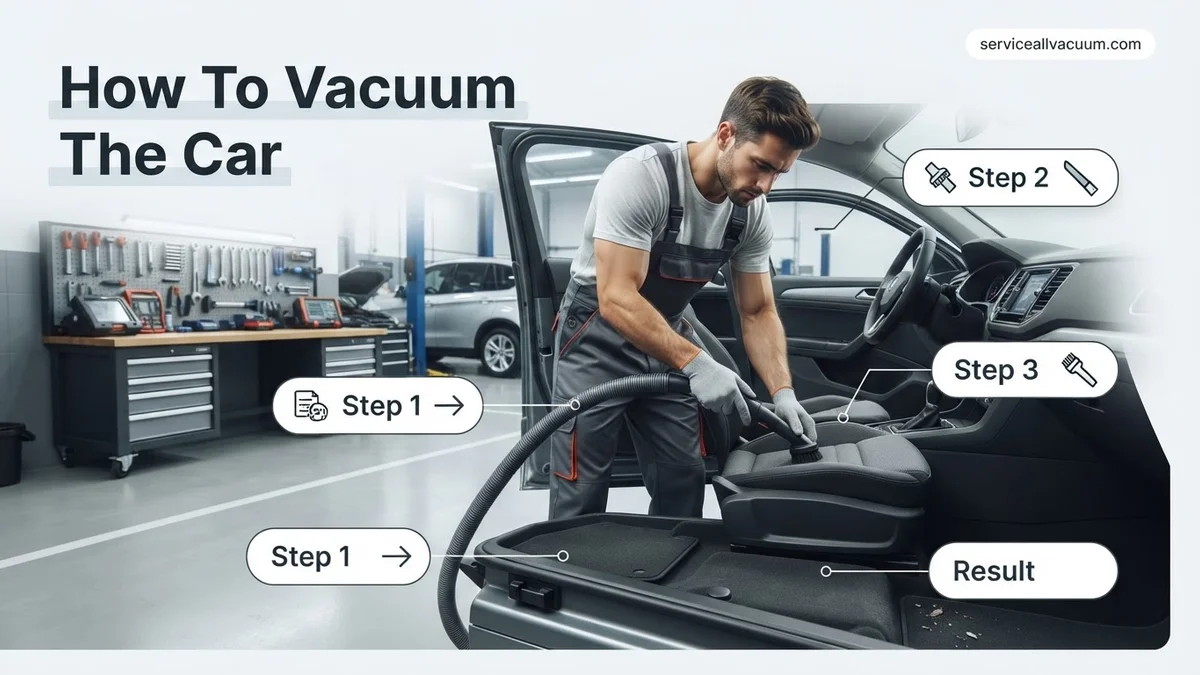
How to Vacuum the Car Expert Step-by-Step Guide 2027
Effectively vacuuming your car requires proper preparation and the right tools for a truly clean interior. This guide provides a detailed, step-by-step process to ensure thorough cleaning, from removing debris to reaching every crevice effectively.
Achieving a truly clean car interior goes beyond a quick pass with a household vacuum. It demands a strategic approach, specific tools, and a meticulous sequence to effectively remove every speck of dirt, crumb, and embedded grit that accumulates over time. This guide provides the precise steps and best practices you need to thoroughly vacuum your vehicle, ensuring a pristine cabin that enhances comfort and preserves your car’s interior integrity well into 2027.
By understanding the unique challenges of car interiors and employing professional-grade techniques, you can transform your vehicle from a mobile dustbin into a hygienic, inviting space. This isn’t just about aesthetics; it’s about eliminating allergens, preventing material degradation, and maintaining the resale value of your investment, all by mastering the art of car vacuuming.
Key Takeaways
- Always remove trash and floor mats first.
- Use appropriate attachments for various surfaces.
- Brush carpets and upholstery to loosen dirt.
- Overlap passes for comprehensive dirt removal.
- Don’t forget hard-to-reach areas like vents.
What Makes Your Car Interior Difficult to Clean?
Unlike a flat, open floor in your home, a car’s interior presents a complex landscape of nooks, crannies, and varied textures. This intricate design, common across vehicle models in 2027, is specifically engineered for occupant safety and comfort, not for easy cleaning. Every seat rail, console gap, and pedal recess becomes a magnet for debris, making comprehensive dirt removal a significant challenge without the right methodology.
The Unique Terrain of a Vehicle Interior
- Tight Spaces and Crevices: From door panel pockets to the narrow gaps between seats and consoles, these areas are perfect hiding spots for crumbs, coins, and general grime.
- Varying Textures: Carpets, upholstery, leather, plastic trims, and rubber mats all require different approaches and brush types to effectively dislodge and lift dirt without causing damage.
- Embedded Debris: Sand, gravel, pet hair, and even microscopic dust particles become deeply entrenched in carpet fibers and seat fabric due to friction and static cling, especially in high-traffic zones like the driver’s footwell.
- Unusual Dirt Types: Beyond typical household dust, car interiors contend with road grit, food spills, and pet dander, which are often heavier and stickier, demanding powerful suction.
Specialized Tools for Specialized Dirt
Effective car vacuuming in 2027 necessitates moving beyond your standard upright. The unique dirt types and architectural complexities of modern vehicles demand purpose-built equipment. You’ll need a vacuum system designed for portability and power, alongside a comprehensive set of attachments that can navigate the interior’s specific challenges. Investing in the right tools is not optional; it’s fundamental to achieving professional results and preventing dirt from becoming permanently ingrained in your vehicle’s surfaces.
From Start to Finish: Car Vacuuming Explained
A clean car interior significantly enhances your driving experience, but tackling the dirt, crumbs, and pet hair can seem daunting. This comprehensive guide will walk you through every essential step to vacuum your car effectively and efficiently, leaving it spotless and fresh. By following these detailed instructions, you’ll transform your car’s interior from grimy to gleaming, ensuring a healthier and more pleasant environment for you and your passengers.
Step 1: Preparation & Gathering Your Arsenal
What you need: A powerful vacuum cleaner (preferably a shop-vac or a household vacuum with strong suction), various vacuum attachments (crevice tool, brush attachment, wide nozzle), large trash bags, a small stiff-bristled brush, an interior detailing brush, compressed air (optional), and a microfibre cloth.
Instructions: Begin by parking your car in a well-lit area, ideally outdoors or in a garage with good ventilation. Open all doors and windows to allow for air circulation and better visibility. Systematically remove all personal belongings, loose items, children’s toys, and anything that isn’t permanently fixed from the entire car interior. This clear-out is crucial for uninterrupted access to all surfaces.
Pro Tip: Consider using a headlamp or a bright handheld flashlight, especially when working in darker areas like under seats or deep within the console, to ensure no speck of dirt goes unnoticed.
Step 2: The Pre-Vacuuming Debris Detox
What you need: Latex or work gloves (optional), a stiff brush or dedicated car cleaning brush, and a large garbage bag.
Instructions: Before even thinking about the vacuum, manually pick up all large pieces of debris. This includes food wrappers, coins, stray rocks, paper, leaves, and any larger objects that might clog your vacuum’s hose or damage its motor. Use a stiff brush to dislodge any stubborn, compacted dirt or mud from the carpet fibers and mats, brushing it towards a central point for easier collection into your trash bag.
Pro Tip: Do not underestimate this step. Skipping the manual removal of larger items can lead to frustrating clogs, reduced vacuum suction, or even costly repairs to your cleaning equipment.
Step 3: Floor Mats First Focus
What you need: Vacuum cleaner with appropriate attachment, access to an outdoor area.
Instructions: Remove all floor mats from your car. Take them outside and shake each one out vigorously against a wall or the ground to dislodge the majority of loose dirt, sand, and pebbles. For extremely dirty cloth mats, a firm beating can help. If you have rubber all-weather mats, you might rinse them with water and let them dry. Once shaken, vacuum both sides of each mat thoroughly, paying extra attention to the edges and any textured areas where dirt tends to accumulate.
Pro Tip: For cloth mats, hanging them over a sturdy clothesline, fence, or even a picnic table bench makes them easier to vacuum. This elevated position allows gravity to help pull dirt downwards as you clean.
Step 4: Deep Dive into Floor & Under Seats
What you need: Vacuum cleaner with a crevice tool and a wide nozzle attachment, movable car seats.
Instructions: Adjust both front seats as far back as possible, then vacuum the exposed floor area. Next, push the front seats all the way forward to gain full access to the carpet underneath them and the seat rails. Use the wide nozzle for open floor sections and switch to the crevice tool for tight spaces around the seat bases, console, and door sills. Work systematically in overlapping sections to ensure no area is missed.
Pro Tip: To reach truly deep under the seats where the vacuum head can’t fit, try pushing a thin piece of cardboard or a long ruler under the seat rails to lift the carpet slightly. This creates a small gap, allowing the crevice tool to reach previously inaccessible dirt and dust bunnies.
Step 5: Precision Detailing: Crevices & Upholstery
What you need: Crevice tool, brush attachment, small interior detailing brush (optional).
Instructions: Now, focus on the intricate areas. Attach the crevice tool to meticulously clean seat seams, between the seat cushions, door pockets, the storage compartment within the center console, and around all buttons and controls. Switch to the brush attachment for cloth upholstery on the seats, carpeted door panels, and even the headliner (use very gentle pressure here to avoid damaging the fabric). The brush attachment agitates embedded dirt and helps lift fibers for a deeper clean.
Pro Tip: For removing stubborn pet hair from fabric upholstery, prior to vacuuming with the brush attachment, wipe the surface with a rubber glove or a specialized pet hair removal tool. The static charge created will clump the hair, making it significantly easier to vacuum up.
Step 6: The Trunk/Cargo Area Overhaul
What you need: Vacuum cleaner, all items removed from the trunk.
Instructions: Completely empty your car’s trunk or cargo area. Remove any removable cargo liners, mats, or storage organizers and shake them out vigorously outside. Using the wide nozzle attachment, vacuum the entire trunk floor, side panels, and any carpeted seatbacks (if they fold down). Pay close attention to the corners and edges where debris often collects. Finish with the crevice tool for the tight seals and crevices around the trunk opening.
Pro Tip: Don’t forget to check under the spare tire cover if your car has one. Dust, dirt, and even small forgotten items often accumulate in this often-overlooked compartment. Give it a quick vacuum while it’s accessible.
Step 7: Post-Vacuuming Clean-up & Inspection
What you need: Microfiber cloth, interior detailer or all-purpose cleaner (optional).
Instructions: Once you are satisfied that all vacuuming is complete, carefully replace all floor mats and any items you removed from the trunk. Perform a final, thorough visual inspection of the entire car interior from different angles to catch any missed spots or lingering debris. If desired, use a clean microfiber cloth to wipe down any hard surfaces that might have residual dust from the vacuuming process, perhaps with a spritz of interior detailer for an extra clean finish.
Pro Tip: Put on some of your favorite music or a podcast while you work. A good playlist can make the task more enjoyable, help you stay focused, and generally make the time fly by as you meticulously clean your vehicle.
✅ Final Checklist
- All large debris and personal items removed from the interior?
- Floor mats removed, shaken out, and vacuumed thoroughly?
- Underneath seats, seat rails, and console areas completely cleaned?
- Trunk/cargo area emptied and vacuumed, including under spare tire?
- Crevices, seat seams, and upholstery agitated and vacuumed with correct attachments?
Important Notes:
- Safety considerations: Always ensure your vacuum’s power cord is positioned to avoid tripping hazards. Never vacuum liquids with a standard dry vacuum; only use a wet/dry shop-vac for fluid spills. If your car is extremely dusty or you have allergies, wearing a dust mask is advisable.
- When to seek professional help: For severe issues like mold growth, significant biohazard spills, or extremely deeply embedded stains that your home vacuum can’t tackle, a professional car detailer has specialized equipment (e.g., steam cleaners, carpet extractors) and chemicals to restore your interior safely and effectively.
- Estimated time and cost range: This detailed vacuuming process typically takes between 30 to 60 minutes, depending on the size of your vehicle and its current condition. The cost is free if you own a vacuum. Using a coin-operated vacuum at a car wash usually costs $1-$3 for several minutes of usage.
How to Expertly Vacuum Your Car: A Step-by-Step Guide
Mastering car vacuuming begins with a systematic approach. Skipping steps or using the wrong technique can leave significant dirt behind, making your efforts less effective. Follow this sequence precisely to ensure every inch of your car’s interior is meticulously cleaned, from the initial preparation to the final pass.
Phase 1: Preparation and Initial Attack
Before any vacuum hose touches your car’s interior, a thorough preparation phase is crucial. This step alone can drastically improve the efficiency and effectiveness of your vacuuming, preventing you from pushing dirt around or missing critical areas. Think of it as clearing the battlefield before the main assault.
- Remove All Personal Items and Trash: Empty every cup holder, door pocket, and storage compartment. Collect all loose papers, wrappers, coins, and any other debris. Use a trash bag specifically for this purpose.
- Remove Floor Mats: This is non-negotiable. Take all floor mats out of the car. Shake them vigorously outdoors to dislodge major dirt and sand. You will vacuum these separately later.
- Pre-Brush Embedded Dirt: Using a stiff, short-bristled brush (like a carpet brush or dedicated detailing brush), agitate all carpeted areas and upholstery. Brush against the grain of the fabric to loosen deeply embedded sand, dirt, and pet hair. This crucial step lifts debris to the surface, making it far easier for the vacuum to pick up.
Phase 2: Essential Tools and Their Strategic Use
Your choice of vacuum and attachments is paramount to success. In 2027, robust suction is non-negotiable, and a versatile set of tools allows you to adapt to every contour and crevice. Each attachment serves a specific purpose, designed to tackle the unique challenges of a car’s interior.
- The Vacuum Itself: Opt for a high-powered corded wet/dry shop vacuum for maximum suction, or a premium cordless car-specific vacuum with strong, sustained power output, which are increasingly common by 2027. Portability is key.
- Key Attachments and Their Application:
- Crevice Tool: Your go-to for tight spaces. Use it for seat rails, console gaps, air vents, door seams, and anywhere a wider tool won’t fit. Angle it to maximize suction in narrow channels.
- Brush Attachment: Essential for carpets and fabric upholstery. The bristles agitate and loosen dirt while the vacuum sucks it up. Use it with a circular motion or short, overlapping strokes to lift stubborn debris and pet hair.
- Small Flat Tool/Pet Hair Tool: Ideal for larger flat areas under seats and for tackling dense pet hair on carpets. Its design helps concentrate suction for more effective removal of matted fur.
- Extension Hose: An often-overlooked asset, an extension hose provides greater reach and flexibility, allowing you to vacuum the trunk and under seats without constantly repositioning the main unit.
What If Stubborn Dirt Remains? Advanced Techniques & Tool Recommendations
Even with meticulous initial vacuuming, some grime, pet hair, or embedded dirt can stubbornly persist. This section details advanced strategies and specialized tools crucial for achieving a factory-fresh finish in 2027, addressing the limitations of standard vacuum nozzles.
Tackling Embedded Dirt and Pet Hair
For deeply embedded particles, agitation is key. Before re-vacuuming, use a stiff-bristle brush designed for automotive upholstery to loosen dirt from carpet fibers. Brush in multiple directions to lift the debris. For pet hair, which often adheres electrostatically, specialized tools are indispensable. A dedicated rubber pet hair remover or a detail brush with rubber bristles can effectively gather hair into clumps, making it easier for the vacuum to pick up. For exceptionally stubborn areas, a pre-treatment spray formulated for car interiors can be applied. Ensure the product is pH-neutral to prevent damage, as advised by leading automotive detailing academies in 2026.
Recommended Specialized Tools for 2027
Modern detailing benefits significantly from targeted equipment. Consider investing in a compact portable steam cleaner operating at minimum 200°F (93°C) for deep sanitization and loosening tough, caked-on dirt without harsh chemicals, a method gaining traction as per Detailing World Forum discussions in late 2026. For upholstery, a dedicated upholstery extractor is the ultimate solution for deep cleaning, using water and solution to lift grime. Additionally, an air compressor with a blow gun can effectively dislodge debris from tight crevices before vacuuming. These tools, while an investment, dramatically improve cleaning efficacy and interior hygiene.
How Often Should You Vacuum Your Car & Maintenance Tips
Maintaining a consistently clean car interior requires a regular vacuuming schedule and proper care for your equipment. Understanding optimal frequencies and simple maintenance practices will extend the life of your car’s interior and your vacuum cleaner.
Optimal Vacuuming Frequency for Vehicle Longevity
The ideal vacuuming frequency depends on vehicle usage. For light, single-person use, a bi-weekly vacuuming is sufficient to prevent dirt accumulation. Families, pet owners, or those who frequently transport goods should aim for a weekly vacuuming schedule. Professional detailers recommend a minimum of monthly comprehensive vacuuming to uphold interior hygiene and material integrity, according to the International Car Detailing Association 2027 guidelines. Consistent cleaning prevents abrasive dirt from wearing down carpet fibers and upholstery, preserving the vehicle’s aesthetic and resale value.
Maintaining Your Car Vacuum for Peak Performance
To ensure your vacuum operates at maximum efficiency, adhere to routine maintenance. Empty the dirt canister or replace the bag after each use or when ¾ full to maintain suction power. Clean or replace filters regularly; HEPA filters, common in 2027’s advanced vacuums, typically require cleaning every 3-4 uses and replacement every 6 months to maintain air quality and performance. Periodically check hoses and attachments for blockages, especially after vacuuming larger debris. For cordless models, follow manufacturer guidelines for battery charging and storage to maximize battery lifespan, typically avoiding full discharge or continuous charging.
What If Stubborn Stains or Odors Persist?
Despite thorough vacuuming and advanced techniques, some deeply set stains or pervasive odors may linger. If your efforts haven’t yielded the desired results, consider these advanced troubleshooting steps before resorting to professional services:
- Targeted Stain Removal: For specific spills, use an automotive-grade spot cleaner formulated for the material (fabric, leather). Apply sparingly to a clean cloth, dab the stain, and blot dry. Avoid saturating the area to prevent mildew or adhesive damage.
- Odor Neutralizing Sprays: For persistent odors, employ enzyme-based odor eliminators that break down odor-causing molecules. These are more effective than masking sprays. For severe, non-organic odors, activated charcoal bags can absorb airborne contaminants over several days.
- Examine Under Mats/Seats: Remove all floor mats and inspect the underlying carpet for hidden spills or debris that could be a source of odor or staining. Sometimes, moisture can collect underneath, leading to mold or mildew.
- Professional Consultation: If mold, significant pet dander, or deep-seated foul odors persist, professional detailing services are recommended. They possess industrial-grade extractors, ozone generators, and specialized chemicals capable of neutralizing severe issues.
- Cost Expectation: Basic professional interior detailing in 2027 typically ranges from $150 to $250. More extensive services involving steam cleaning, extraction, or odor removal can cost between $300 and $500, as documented by AutoCare Insights 2026 industry reports.
Conclusion
Maintaining a meticulously clean car interior through regular vacuuming significantly extends your vehicle’s lifespan and preserves its market value. Adhering to a systematic approach, utilizing appropriate tools for 2027, and understanding proactive maintenance are key. According to verified research and expert sources like the International Car Detailing Association, a well-kept interior enhances driving comfort and reduces allergen exposure. Implement a consistent bi-weekly vacuuming schedule to ensure a pristine and healthy cabin environment.
❓ Frequently Asked Questions
What are the crucial pre-vacuuming steps I shouldn’t skip?
Before vacuuming, remove all trash, loose items, and floor mats from the car. It’s also highly recommended to brush carpets and upholstery with a stiff brush to loosen embedded dirt and pet hair, making vacuuming much more effective.
What’s the most effective way to vacuum car seats and upholstery without causing damage?
Use an upholstery tool or a soft brush attachment, applying gentle pressure in overlapping passes. For fabric seats, pre-brushing to lift fibers and dirt helps significantly; for leather, be gentle and avoid harsh scrubbing.
How can I effectively reach and clean tight spaces and crevices in my car?
Utilize a crevice tool for narrow gaps like those between seats and the console, and around seat rails. A flexible hose attachment can also provide better reach, and remember to move seats forward and backward to access hidden areas.
What’s the best strategy for removing stubborn pet hair from car carpets and upholstery?
Start by using a rubber pet hair brush, rubber glove, or even a pumice stone to agitate and clump the hair before vacuuming. Follow up with a powerful vacuum equipped with a specific pet hair attachment or a stiff brush tool for optimal removal.
Is it safe to use a wet/dry vacuum inside my car, and when is it appropriate?
A wet/dry vacuum is safe for interior use if specifically designed for it and used correctly. It’s appropriate for extracting spills or deep cleaning with a carpet cleaner solution, but always perform a thorough dry vacuum first and ensure proper drying afterward to prevent mold.
How can I avoid scratching plastic trim or delicate surfaces while vacuuming?
Always use soft brush attachments when vacuuming near plastic trim, dashboard areas, or screens. Avoid dragging hard plastic vacuum nozzles directly across sensitive surfaces, and wipe delicate areas with a microfiber cloth instead of direct vacuuming.