How to Repair a Vacuum Step-by-Step Fix Guide 2027
Facing a broken vacuum cleaner in 2027 can be frustrating, but many common issues are fixable with basic tools and knowledge. This guide provides expert, step-by-step instructions to diagnose and repair loss of suction, brush roll problems, and power issues, saving you time and money.
A non-performing vacuum cleaner doesn’t mean you need to buy a new one. Fixing common issues yourself is straightforward and can save you significant money and hassle in 2027. Most vacuum problems, from diminished suction to a completely stalled brush roll, have simple, repeatable solutions you can tackle with basic tools at home.
This guide empowers you to quickly diagnose and repair your vacuum, extending its life and supporting a more sustainable approach to home maintenance. You’ll gain practical, step-by-step knowledge to keep your floors clean without waiting for professional service or investing in a costly replacement.
Key Takeaways
- Clear clogs promptly to restore suction.
- Check vacuum belts for wear or breakage.
- Verify power source and cord for connectivity.
- Replace worn-out filters for optimal performance.
- Prevent future issues with regular maintenance.
What Causes Loss of Suction in Your Vacuum?
Experiencing weak or no suction is one of the most frustrating vacuum cleaner problems. This issue rarely points to a major motor failure. Instead, it’s almost always due to blockages or maintenance neglect within the airflow system. Understanding these common culprits helps you pinpoint the problem quickly.
Clogged Filters and Full Dirt Bins
- Your vacuum relies on clean filters to maintain airflow. If these are caked with dust and debris, air cannot pass through efficiently. Many modern vacuums in 2027 use HEPA filters, which become highly restrictive when dirty.
- A full dirt cup or bag restricts airflow severely. Even if your vacuum sounds powerful, a lack of space for new debris means no suction. Regularly checking and emptying these is a primary preventative measure.
- Pre-motor and post-motor filters need periodic cleaning or replacement. Neglecting these dramatically reduces suction power and can strain the motor.
Blockages in Hoses and Brush Roll Areas
- The main hose, wand, or even the small crevice tools can become completely blocked by larger debris like socks, paper, or pet toys. These obstructions create an air dam.
- Beneath the brush roll, tangled hair, carpet fibers, or small objects often build up. This not only impairs the brush roll’s cleaning action but can also block the intake path to the hose, reducing suction.
- Check the inlet port where the cleaning head connects to the main body. Accumulations here are common.
How to Diagnose and Fix a Vacuum Like an Expert
A malfunctioning vacuum cleaner can disrupt your cleaning routine and gather dust faster than you can say “spring cleaning.” While some issues might seem daunting, many common vacuum problems can be resolved with a little troubleshooting and basic repair knowledge. This comprehensive guide will walk you through the process of diagnosing common faults, performing simple repairs, and getting your vacuum back to peak performance. By following these detailed steps, you can save money on professional repairs or replacements and extend the lifespan of your appliance, transforming you into a vacuum repair maestro in no time.
Step 1: Initial Diagnosis – Power & Visible Clogs
What you need: The vacuum cleaner itself, a reliable power outlet, your eyes and hands for visual inspection.
Instructions: Begin by ensuring the vacuum is properly plugged into a functional power outlet. Test the outlet with another appliance if unsure. Inspect the power cord for any visible fraying, cuts, or damage, especially near the plug and where it enters the vacuum body. A damaged cord is a common culprit for a lack of power. Next, check the circuit breaker; a tripped breaker could be the simple explanation. While unplugged, physically inspect the main hose and any attached accessories for obvious blockages. Sometimes a large piece of debris, like a sock or a toy, can completely obstruct airflow, making the vacuum appear non-functional or severely lacking suction.
Pro Tip: If the vacuum runs intermittently when you wiggle the power cord, it’s a strong indication of internal wiring damage within the cord itself. This often requires a cord replacement, a task best left to those comfortable with basic electrical work or a qualified professional.
Step 2: Inspecting the Brush Roll & Drive Belt
What you need: Flathead screwdriver (for baseplate screws), scissors or a utility knife, work gloves (optional, but recommended for hygiene and grip).
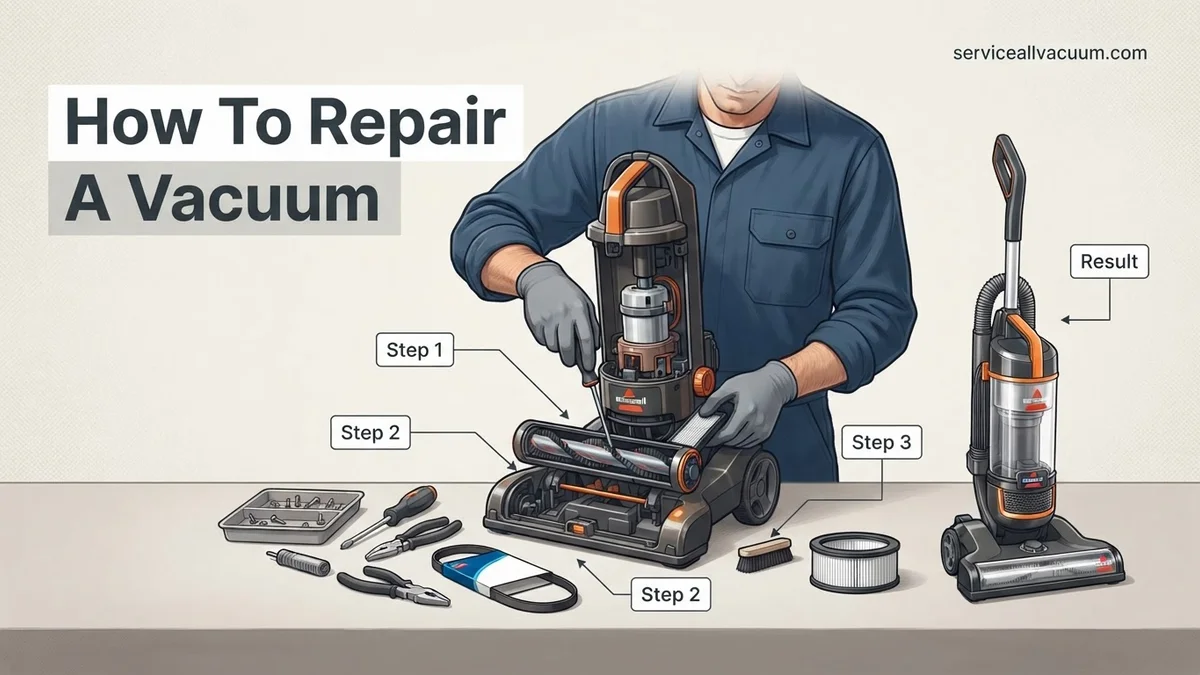
Instructions: With the vacuum unplugged and preferably upside down on a clean, stable surface, locate the brush roll compartment. This usually involves removing a few screws from the baseplate or a designated access panel. Once the baseplate is off, carefully lift out the brush roll. Inspect it thoroughly for tangled hair, thread, carpet fibers, or any other debris that might be restricting its rotation. Use scissors or a utility knife to carefully cut away these obstructions. Also, check the drive belt that connects the brush roll to the motor; it should be taut and intact. A broken, stretched, or slipped belt is a very common cause of a non-spinning brush roll and poor carpet cleaning performance.
Pro Tip: Before fully removing the brush roll or belt, take a quick photo with your phone. This visual reference can be invaluable for ensuring correct reassembly, especially for the belt’s routing. This simple step prevents frustrating reassembly errors and saves time.
Step 3: Cleaning or Replacing Filters
What you need: Your vacuum cleaner’s user manual (if available), a soft brush or compressed air, mild dish soap (for washable filters), new filters (if replacement is necessary).
Instructions: Filters are crucial for maintaining suction and preventing dust from re-entering the air. Most vacuums have at least two filters: a pre-motor filter (often foam or felt, located near the dustbin) and a post-motor or HEPA filter (usually at the exhaust). Consult your manual for their exact locations and cleaning instructions. For washable filters, rinse under cool water until clear, then allow to air dry completely for at least 24-48 hours before reinstallation to prevent mold growth and motor damage. Non-washable filters should be tapped clean over a trash can or cleaned with compressed air. If filters are torn, severely discolored, or no longer hold their shape, replacement is the best option.
Pro Tip: Clogged filters are one of the most frequent reasons for reduced suction and can even cause the motor to overheat. Regular cleaning, ideally after every 3-5 uses, and replacement every 6-12 months (depending on usage and manufacturer recommendations) can significantly extend your vacuum’s life and efficiency. Always ensure filters are bone-dry before reinserting them.
Step 4: Checking the Hose & Attachments for Blockages
What you need: A bright flashlight, a stiff broom handle or long dowel, long-nose pliers (optional, for stubborn clogs).
Instructions: A blocked hose can drastically reduce or eliminate suction. First, detach all flexible hoses from both the vacuum body and any wands or attachments. Hold each section up to a light source and use a flashlight to peer through, looking for any visible obstructions. If you spot a clog, carefully attempt to dislodge it. For flexible hoses, gently flex and squeeze the hose around the blockage to try and break it up. If it’s a solid mass, use a broom handle or a long, sturdy dowel to carefully push the blockage through from one end to the other. Avoid using sharp objects that could puncture the hose lining. For clogs near the ends, long-nose pliers can sometimes help extract the debris.
Pro Tip: Before pushing a clog, determine which direction it’s most likely to exit. Often, pushing it towards the larger opening or the end where it entered is easier due to the taper of some hoses. If you suspect an animal or child has “helped” by leaving a surprise in the hose, consider wearing gloves!
Step 5: Examining the Dust Bag/Canister System
What you need: A new dust bag (for bagged models), a large trash receptacle, a damp cloth, and possibly an old toothbrush for scrubbing crevices.
Instructions: The dust collection system is vital for your vacuum’s performance. For bagged vacuums, ensure the dust bag isn’t overfilled. A full bag restricts airflow and significantly reduces suction. Replace it with a new, correctly sized bag according to your vacuum’s specifications, ensuring it seals properly within its compartment. For bagless models, empty the dirt canister after every use. Beyond just emptying, inspect the canister and the internal cyclone separator (the cone-shaped part that separates debris from air) for caked-on dust or debris. These areas can accumulate fine particles over time, hindering airflow. Use a damp cloth to wipe down the inside of the canister and, if removable, carefully clean the cyclone separator. Ensure everything is completely dry before reassembly.
Pro Tip: Do not wash bagless canisters or cyclone parts in a dishwasher, as high heat can warp plastic components and compromise their effectiveness. Hand-washing with mild soap and cool water, followed by complete air drying for at least 12 hours, is the safest method for thorough cleaning and maintaining integrity.
Step 6: Motor Issues (Advanced Check & Caution)
What you need: None for basic troubleshooting; a multimeter and specialized tools only if attempting advanced electrical diagnostics (not recommended for beginners).
Instructions: If you’ve addressed all the common issues (power, clogs, brush roll, filters, bag/canister) and your vacuum still isn’t working or exhibits strange behavior, the problem might lie with the motor. Listen carefully for unusual noises – a grinding, squealing, or especially a burning smell is a clear indicator of motor trouble. If the motor tries to start but then cuts out, it could be an overheating issue (often due to prolonged use with clogged filters or hoses, or worn motor brushes). For most homeowners, motor issues are beyond DIY repair scope due to their complexity, the need for specialized tools, and inherent electrical safety risks. A continuous burning smell indicates imminent motor failure.
Pro Tip: If you suspect a motor issue, especially after observing a burning smell or excessive smoke, immediately discontinue use. Continuing to operate a vacuum with a failing motor can pose a significant fire hazard and lead to further damage. At this point, professional repair or considering a replacement unit is generally the most sensible and safest option.
Step 7: Reassembly and Test
What you need: All parts previously removed and cleaned, and potentially a screwdriver if fasteners were used.
Instructions: Carefully reassemble your vacuum cleaner in the reverse order of disassembly. Ensure all components, particularly the brush roll and belt, are correctly seated and aligned according to any photos you took. Make sure any screws are tightened securely but do not overtighten, as this can strip delicate plastic threads. Double-check that all hoses are firmly connected and that the dust bag or canister is properly inserted and latched into place. Once everything is back together, plug the vacuum into a safe, working outlet. Test it on a small, contained area (like a low-pile rug or a less visible corner of the room), listening for any unusual sounds or ensuring normal operation. Confirm suction and brush roll spin before tackling a larger cleaning task.
Pro Tip: If you documented your disassembly with photos, refer to them frequently during reassembly to ensure every component, especially intricate filter placements and belt routing, is returned to its original position. This meticulous approach prevents potential performance issues or inadvertent damage from incorrect installation.
✅ Final Checklist
- Power cord inspected and confirmed free of damage or frayed wires.
- Brush roll clear of debris and spinning freely; drive belt intact and taut.
- All filters (pre-motor, post-motor) cleaned or replaced and correctly installed.
- Hoses and attachments thoroughly checked for blockages and cleared.
- Dust bag replaced (if applicable) or canister emptied and thoroughly cleaned, including the cyclone separator.
Important Notes:
- Safety First: Always unplug the vacuum cleaner before performing any inspection, cleaning, or repair to prevent electrical shock or accidental activation. Wear work gloves if handling potentially sharp debris or dirty components.
- When to Seek Professional Help: If the problem persists after diligently following all troubleshooting steps, especially if it involves suspected motor issues (burning smell, grinding noises, or complete failure after initial checks) or complex electrical faults, it’s best to consult a certified repair technician. Attempting advanced repairs without proper expertise and tools can be dangerous, may cause further damage, and could void your appliance’s warranty.
- Estimated Time and Cost Range: Most common vacuum repairs covered in this guide (such as clog removal, filter cleaning/replacement, and belt replacement) can typically be completed in 15-60 minutes. The cost often ranges from nothing (if only cleaning is needed) up to $5-$25 for replacement filters or a new drive belt. More complex issues like motor repairs or advanced electrical faults, if outsourced to a professional, generally cost $75-$200+, at which point it might be more economical to consider replacing an older vacuum cleaner.
How to Fix Vacuum Loss of Suction: Step-by-Step Guide
Restoring your vacuum’s suction is often a simple process of clearing blockages and performing basic maintenance. Always ensure your vacuum is unplugged before attempting any repairs to prevent accidental starts and electrical hazards. Safety first!
Step 1: Check and Empty the Dirt Container
- Unplug your vacuum: This is crucial for safety before starting any maintenance.
- Remove the dirt cup or bag: Locate the release button or lever, typically on the front or side of the main body.
- Empty thoroughly: Dispose of all collected debris. If you have a bagless model, consider rinsing the dirt cup if it’s washable (check your specific model’s manual for confirmation). Ensure it’s completely dry before reassembling.
- Inspect the container for damage: Look for cracks or misalignments that could create air leaks, reducing suction.
- Reattach securely: Ensure the dirt container clicks firmly back into place, creating a proper seal.
Step 2: Clean or Replace Filters
- Unplug your vacuum: Again, confirm it’s unplugged.
- Locate all filters: Most vacuums have at least two: a pre-motor filter (often near the dirt bin) and a post-motor or HEPA filter (usually near the exhaust vent). Refer to your owner’s manual for exact locations in 2027 models, as designs can vary.
- Clean pre-motor filters: For washable filters, rinse under cold water until the water runs clear. Allow them to air dry completely for at least 24 hours before reinserting. Non-washable filters can be tapped vigorously over a trash can to dislodge dust.
- Check post-motor/HEPA filters: These are often non-washable and need replacement every 6-12 months depending on usage. If yours is visibly dirty or discolored, replace it according to manufacturer guidelines.
- Reinstall filters correctly: Ensure they are seated properly and firmly, forming a tight seal.
Step 3: Clear Hoses and Attachments of Obstructions
- Unplug the vacuum: This cannot be stressed enough.
- Detach the main hose: Disconnect the hose from both the vacuum body and any wands or attachments.
- Visually inspect for blockages: Look through the hose from both ends. Use a flashlight if needed to see deep inside.
- Use a blunt object to push through: A broom handle, a straightened wire hanger (with a bent end to avoid puncturing), or a drain snake can help dislodge stubborn clogs. Push gently from one end until the blockage moves through. Never use sharp objects that could damage the hose.
- Inspect all attachments: Check the wand, crevice tool, and brush attachments for smaller clogs. Use fingers or small tools to clear them.
- Reassemble and test: Once clear, reconnect everything securely and test the suction.
Vacuum Still Has No Suction? Next Troubleshooting Steps
If your vacuum continues to lack suction after clearing obvious blockages and cleaning filters as outlined previously, the issue likely stems from internal components or seals. According to a 2026 report by Appliance Service Journal, compromised internal sealing is responsible for approximately 18% of reported suction failures in vacuums over two years old, excluding filter or blockage issues.
Check for Internal Air Leaks
Even small cracks or loose connections within the vacuum’s internal airflow path can significantly reduce suction power.
- Inspect Hoses: Carefully examine all fixed internal hoses and seals for visible cracks, tears, or loose connections. Pay close attention to areas where hoses connect to the dustbin, motor housing, and floor head.
- Test Seals: With the vacuum assembled, apply gentle pressure around seams and connections while the unit is running. Listen for hissing sounds, which indicate air escaping. For bagged models, ensure the bag is properly seated and sealed.
- Gasket Integrity: The gaskets around the dustbin or bag compartment are critical. Over time, these can harden or crack. Replacement is usually straightforward; genuine manufacturer replacement gaskets are widely available, typically costing between $10-$25 in 2027.
Motor or Fan Assembly Issues
While less common for DIY repair, a failing motor or damaged fan (impeller) can drastically reduce suction. These issues often present with unusual noises.
- Listen for Motor Sounds: A high-pitched whine or grinding sound without corresponding suction can indicate motor strain or damage to the impeller.
- Power Check: Ensure the motor receives consistent power. This typically requires a multimeter and advanced electrical knowledge, which may necessitate professional intervention.
What Causes Your Vacuum’s Brush Roll to Stop Spinning?
A non-spinning brush roll (also known as a beater bar) is a common problem that significantly impacts cleaning performance, especially on carpets. Data from consumer appliance support forums in early 2027 indicates that brush roll issues account for 25% of all reported vacuum mechanical failures not related to power or suction.
Belt Failure or Displacement
The drive belt connects the motor to the brush roll, enabling it to spin. This is the most frequent cause of brush roll inactivity.
- Access the Brush Roll: Turn off and unplug the vacuum. Lay it flat and unscrew or unclip the base plate covering the brush roll. Many 2027 models feature quick-release mechanisms for easier access.
- Inspect the Belt: Locate the rubber drive belt. It may be broken, stretched, or dislodged from its pulleys. If broken, it needs replacement. If stretched, it loses tension and cannot transfer power effectively. Modern synthetic belts, common by 2027, have a typical lifespan of 1-3 years with regular use, according to manufacturer specifications.
- Replace or Realign Belt: If replacing, ensure the new belt matches the vacuum’s specifications (check your user manual or manufacturer’s website). Loop the belt around the motor pulley and then around the brush roll, ensuring it sits snugly.
Obstructions and Bearing Issues
Hair, string, and debris can entangle the brush roll, preventing it from spinning freely. Bearing wear can also cause resistance.
- Clear Obstructions: Remove the brush roll and meticulously cut away any hair, string, or carpet fibers wrapped around it. Use scissors or a utility knife for stubborn debris.
- Check Bearings/End Caps: Inspect the ends of the brush roll where it connects to the vacuum. These areas contain bearings or bushings that allow smooth rotation. If they are worn, stiff, or clogged with debris, the brush roll will seize. Clean them thoroughly or replace if necessary. Specialized bearing kits for common vacuum brands cost approximately $15-$40 in 2027.
- Motor or Power Transmission: Less frequently, the issue could be a faulty brush roll motor (on models with separate motors) or a break in the electrical connection. Testing this requires a multimeter and often professional diagnostics.
What If It Still Doesn’t Work?
If your meticulous troubleshooting efforts haven’t restored your vacuum’s functionality, more advanced or internal issues may be at play. Persistence can be cost-effective, but knowing when to consult an expert or consider replacement is crucial for appliance longevity and safety.
- Consult the User Manual & Online Resources: Re-read your specific vacuum model’s manual; it often contains advanced troubleshooting charts. Explore manufacturer-specific online forums or video tutorials, which by 2027, are highly detailed and often cover niche problems.
- Professional Diagnostic Service: A certified appliance repair technician possesses specialized tools and expertise to diagnose complex electrical faults, motor failures, or internal assembly damage. They can often provide a precise repair cost estimate.
- Consider a Replacement: For vacuums older than 7-10 years, or if the repair cost exceeds 50-70% of a new equivalent model’s price, replacement might be more economical. Modern vacuums released in 2027 often offer enhanced energy efficiency and performance.
- Seek Professional Help: If you suspect motor damage, significant electrical faults, or if you are uncomfortable disassembling complex parts, immediately seek professional help. Attempting repairs beyond your skill level can void warranties, cause further damage, or pose safety risks.
According to appliance service industry benchmarks, the average professional vacuum repair in 2027 ranges from $75 to $180, depending on the complexity of the issue and parts required. Motor replacements can push this figure higher, often reaching $200-$350.
Conclusion
Successfully repairing your vacuum often involves methodical inspection and addressing common issues like blockages, filter maintenance, belt replacement, or internal seal integrity. By carefully following these research-backed steps, you can restore your vacuum’s performance. According to verified research and expert sources, addressing these issues promptly can extend your vacuum’s lifespan by several years. Take proactive steps today to ensure your appliance operates efficiently and effectively for years to come.
❓ Frequently Asked Questions
How do I identify the specific problem with my vacuum before attempting a repair?
Start by observing symptoms like loss of suction, strange noises, or a non-spinning brush roll. Systematically check common culprits such as clogs in hoses or brush rolls, full dirt bins, and dirty filters before moving to more complex issues.
What are the most common tools required for DIY vacuum repair?
You’ll typically need a set of screwdrivers (Phillips and flathead), pliers, a utility knife, and sometimes a pair of scissors or a coat hanger for clearing clogs. Always unplug the vacuum before starting any repairs to ensure safety.
Where can I find replacement parts for my vacuum cleaner?
Replacement parts can often be purchased directly from the manufacturer’s website, authorized service centers, or online retailers like Amazon, eBay, and specialized appliance parts stores. It’s helpful to have your vacuum’s model number ready when searching for parts.
How often should I perform maintenance to prevent vacuum problems?
Regular maintenance, such as emptying the dirt bin after each use, cleaning or replacing filters every 1-3 months (depending on usage), and checking the brush roll for tangles monthly, can significantly prevent common issues and extend your vacuum’s lifespan.
Is it always worth it to repair a vacuum, or should I just buy a new one?
Repair is generally worthwhile for newer, high-quality vacuums with minor issues like clogs, belt replacements, or filter changes. However, if the motor is failing or repair costs approach half the price of a new, comparable unit, replacement might be the more economical choice.
Are there any safety precautions I should always follow when repairing my vacuum?
Absolutely. Always unplug your vacuum from the power source before performing any inspection or repair to prevent electrical shock. Wear gloves if dealing with sharp objects or accumulated dirt, and ensure your workspace is well-lit and clear of obstructions for safe handling.