Expert Guide How to Pull Vacuum on Car AC in 2027
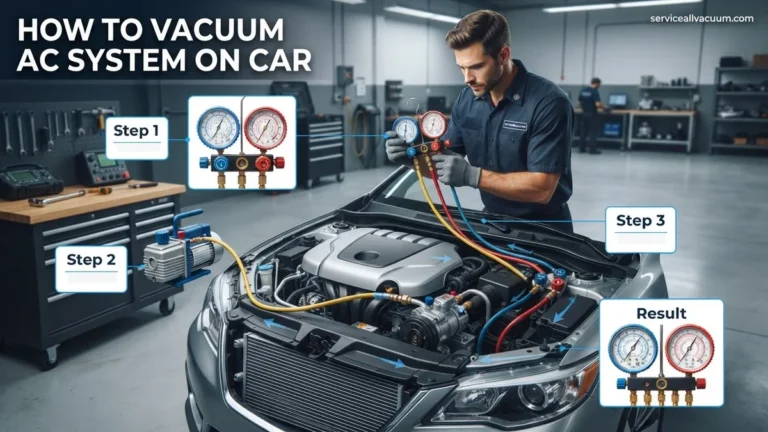
Properly pulling a vacuum on your car’s AC system is crucial for its longevity and efficiency, preventing damage from moisture and non-condensable gases. This process requires specific tools like a vacuum pump and manifold gauges, followed by a meticulous step-by-step procedure to ensure a clean, sealed system.
When you’ve opened your car’s AC system for repair or component replacement in 2027, pulling a deep vacuum isn’t just a suggestion; it’s an absolute necessity. This critical process removes all moisture and non-condensable gases, which are detrimental to your system’s longevity and cooling performance. Skipping this vital step can lead to expensive component failures, reduced efficiency, and unsatisfactory cooling, effectively nullifying your repair efforts.
This expert guide provides the precise steps, essential tools, and critical safety precautions required to successfully evacuate your car’s AC system. We’ll walk you through connecting the equipment, initiating the vacuum, and performing the all-important vacuum hold test. Our focus is squarely on equipping you with the knowledge to ensure your AC operates flawlessly, extending its lifespan and delivering maximum comfort for years to come.
Key Takeaways
- Remove moisture and gases for AC health.
- Always use manifold gauges and vacuum pump.
- Follow specific steps for system evacuation.
- Perform a vacuum hold test for leaks.
- Prioritize safety with eye and hand protection.
What Causes the Need to Pull Vacuum on Car AC?
The Critical Role of Evacuation
Any time your car’s AC system is opened to the atmosphere—whether you’re replacing a compressor, condenser, or even just a hose—ambient air, and crucially, its moisture, enters the lines. This moisture is the primary enemy of an AC system. When water mixes with refrigerant and the system’s oil, it undergoes a chemical reaction, forming corrosive acids. These acids slowly but surely eat away at internal components, leading to leaks, blockages, and eventual catastrophic failure of parts like the compressor.
Furthermore, air trapped in the system acts as a non-condensable gas. This means it doesn’t condense into a liquid like refrigerant vapor should. Instead, it occupies space, significantly raising system pressures and reducing the overall efficiency of your cooling. Non-condensable gases create hot spots, make your compressor work harder, and ultimately diminish your car’s cooling capacity, leading to a noticeable drop in comfort.
Essential Tools for a Professional Vacuum
To effectively evacuate your AC system to 2027 standards, specific tools are non-negotiable. You will need:
- Vacuum Pump: A reliable 2-stage unit, ideally rated at 3-5 CFM (Cubic Feet per Minute), is paramount for achieving a deep vacuum quickly and efficiently.
- Manifold Gauge Set: A high-quality digital manifold gauge set is recommended for superior accuracy. It provides precise pressure readings for both high and low sides and often integrates micron gauge functionality.
- AC Charging Hoses: Ensure you have a set of color-coded (red, blue, yellow) charging hoses equipped with low-loss fittings suitable for your refrigerant type (e.g., R-134a or R-1234yf).
- Safety Glasses: Always wear industrial-grade safety glasses to protect against accidental refrigerant or oil spray.
- Gloves: Chemical-resistant gloves are essential for skin protection, especially when handling refrigerant or oils.
- Micron Gauge (Optional but Recommended): For the most precise vacuum measurement, a dedicated digital micron gauge provides real-time readings of absolute pressure, indicating true moisture removal.
How to Pull a Vacuum on Car AC Like a Pro: A Practical Walkthrough
A properly functioning car air conditioning system provides comfort, especially during hot weather. Before recharging your AC system with new refrigerant, it’s absolutely critical to “pull a vacuum” on the system. This process removes all air and, more importantly, all moisture from the AC lines and components. Moisture in an AC system can combine with refrigerant to form corrosive acids, leading to component failure and costly repairs. This detailed guide will walk you through each step to ensure a clean, dry, and efficient AC system, preparing it for a successful refrigerant charge.
Step 1: Gather Your Tools and Prioritize Safety
What you need: Safety glasses, work gloves, R134a (or R1234yf for newer vehicles) compatible manifold gauge set with hoses, a dedicated AC vacuum pump, an adjustable wrench, and shop rags. Refer to your vehicle’s service manual to confirm the correct refrigerant type and system capacities before beginning. Ensure you have a clear, well-ventilated workspace.
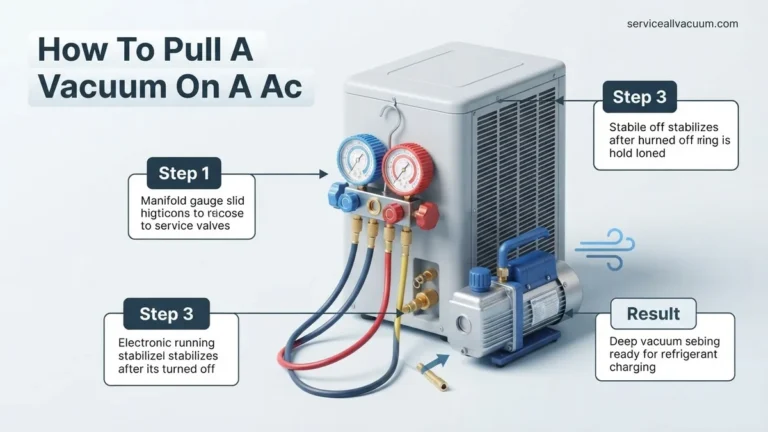
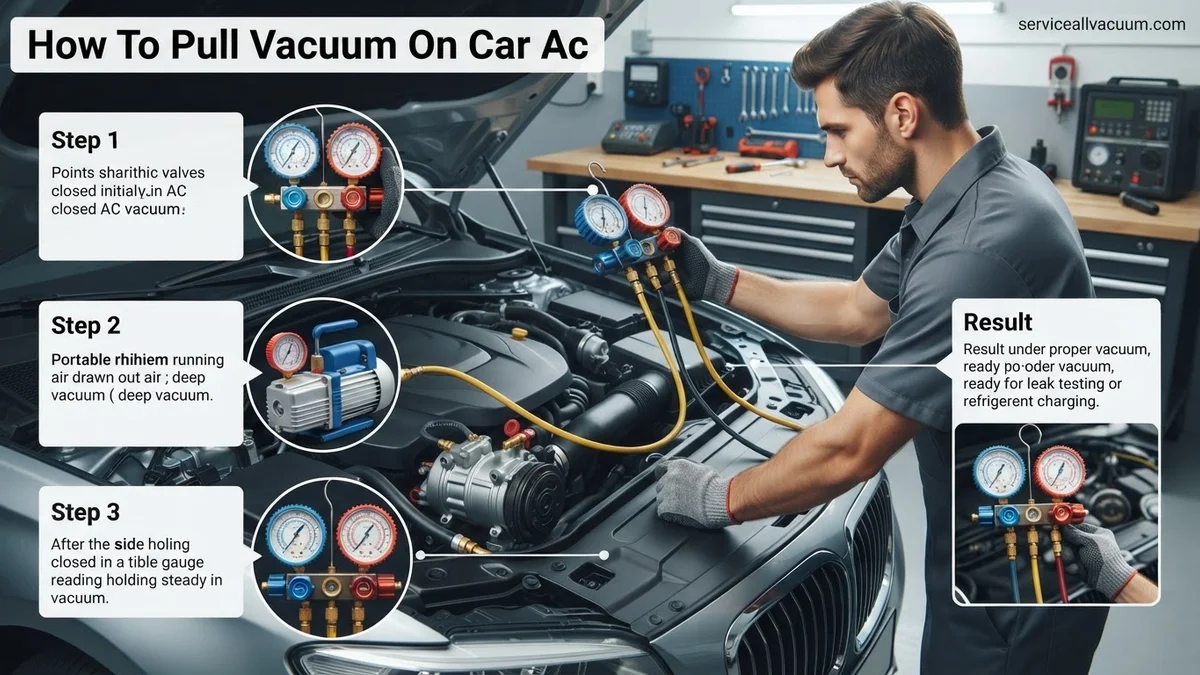
Instructions: Before touching any part of your vehicle’s AC system, always don safety glasses and gloves to protect against potential refrigerant exposure or debris. Lay out all your tools within easy reach. Familiarize yourself with your manifold gauge set; typically, the blue hose connects to the low-pressure side, the red hose to the high-pressure side, and the yellow (or service) hose is for vacuum pumps or refrigerant cans. Inspect all hoses for cracks or damage and ensure the gauge valves operate smoothly.
Pro Tip: Always verify your manifold gauge set is compatible with your vehicle’s refrigerant type (e.g., R134a or R1234yf) and that it has the correct quick-disconnect fittings. Using incompatible tools can lead to leaks or damage.
Step 2: Connect the Manifold Gauge Set to Your Vehicle
What you need: Manifold gauge set (with blue, red, and yellow hoses), your vehicle’s AC low and high-side service ports. These are usually capped and labeled “L” and “H” respectively.
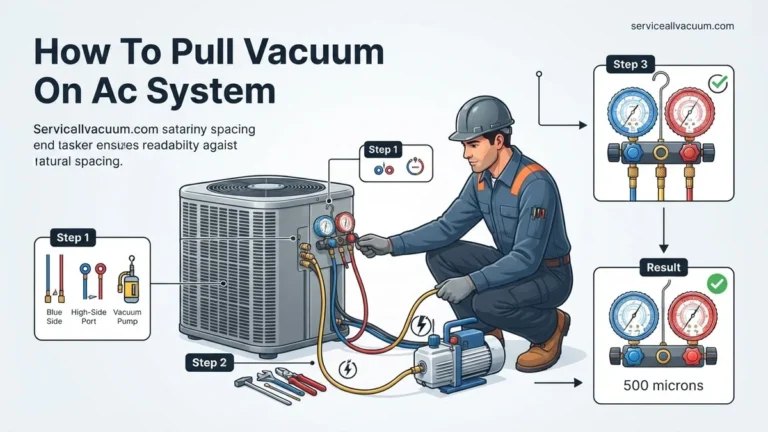
Instructions: Locate the low-pressure (larger diameter pipe, usually near the accumulator/dryer) and high-pressure (smaller diameter pipe, usually between the compressor and condenser) service ports on your vehicle’s AC system. Remove the protective caps. Connect the blue hose quick-disconnect fitting to the low-pressure port, ensuring it clicks securely into place. Similarly, connect the red hose quick-disconnect fitting to the high-pressure port. Confirm that both the high-side and low-side valves on your manifold gauge set are fully closed (turned clockwise) before making these connections to prevent any refrigerant release.
Pro Tip: Service ports can sometimes be dirty. Use a clean rag to wipe them down before connecting the hoses to ensure a good seal and prevent contaminants from entering the system.
Step 3: Prepare and Connect the Vacuum Pump
What you need: Dedicated AC vacuum pump, the yellow (service) hose from your manifold gauge set, fresh vacuum pump oil (if needed), and an electrical outlet.
Instructions: Inspect your vacuum pump. Many pumps have an oil level sight glass; ensure the oil level is correct and clear. If the oil is dirty or low, change or top it off according to the manufacturer’s instructions. Connect the free end of the yellow (service) hose from your manifold gauge set to the inlet port of the vacuum pump. Ensure this connection is hand-tight to prevent leaks. Position the vacuum pump on a stable, level surface near the vehicle and within reach of a power source.
Pro Tip: Using a fresh, clean charge of vacuum pump oil is crucial for achieving a deep vacuum. Old or contaminated oil significantly reduces the pump’s efficiency and ability to remove moisture.
Step 4: Initiate the Vacuum Process
What you need: All hoses connected, vacuum pump ready, manifold gauge set.
Instructions: With the vacuum pump connected and ready, fully open both the high-side (red valve) and low-side (blue valve) valves on your manifold gauge set by turning them counter-clockwise. This allows the vacuum pump to evacuate both sides of the AC system simultaneously. Once the valves are open, plug in and switch on your vacuum pump. You should immediately hear the pump working and see both gauge needles on the manifold set begin to drop, indicating pressure reduction inside the AC system.
Pro Tip: Never start the vacuum pump with the manifold valves closed, as this can put unnecessary strain on the pump or even damage it. Always open the valves first.
Step 5: Achieve and Monitor Deep Vacuum
What you need: Running vacuum pump, manifold gauges showing negative pressure.
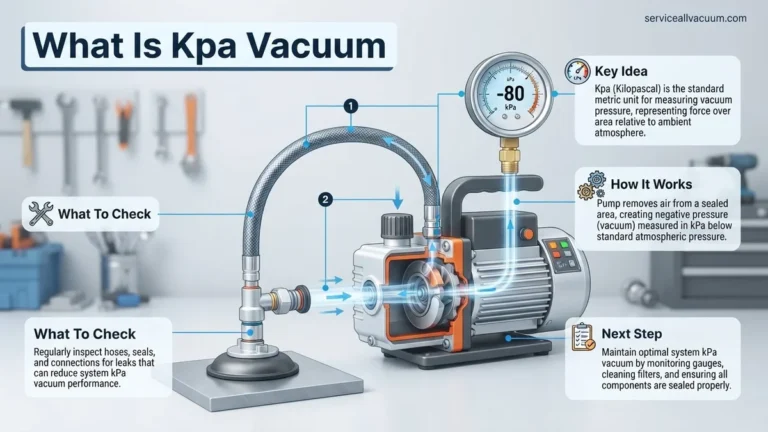
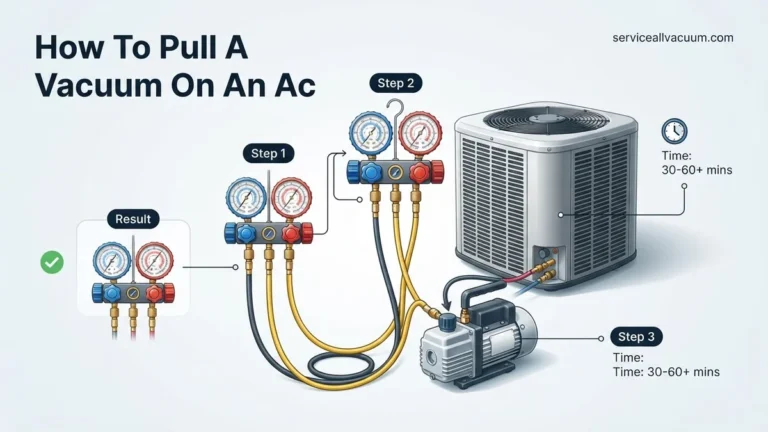
Instructions: Allow the vacuum pump to run until the manifold gauges show a deep vacuum, typically below 29.5 to 30 inches of mercury (inHg) or -100 kPa on most gauges. For professional results, a micron gauge (which measures in microns of mercury) is used to achieve below 500 microns. The goal is to boil off any moisture within the system. Depending on the system size, ambient temperature, and amount of moisture, this process can take anywhere from 30 minutes to 2 hours. A standard recommendation for a typical automotive system is to run the pump for at least 45-60 minutes after reaching maximum vacuum.
Pro Tip: Running the vacuum pump for an extended period, even after the gauges hit their lowest point, helps ensure all moisture has completely vaporized and been evacuated. Don’t rush this critical step.
Step 6: Hold the Vacuum (Leak Check)
What you need: Manifold gauges showing deep vacuum.
Instructions: Once the system has been under vacuum for the recommended time and the gauges show a steady, deep vacuum, close both the high-side (red) and low-side (blue) valves on your manifold gauge set by turning them fully clockwise. After closing the valves, immediately turn off the vacuum pump. Leave the manifold gauges connected and closely monitor them for at least 15-30 minutes. A properly sealed system should maintain the vacuum with no discernible rise in the gauge needles. Any rise in pressure indicates a leak in the AC system that must be located and repaired before proceeding with charging.
Pro Tip: For a more thorough leak test, especially if you suspect a very small leak, extend the hold time to 1-2 hours. Even a slow rise in the needle over a longer period can indicate a problem.
Step 7: Disconnect the Vacuum Pump and Prepare for Charge
What you need: Manifold gauges connected, system holding vacuum.
Instructions: After successfully holding a stable vacuum for the required period, you can now disconnect the vacuum pump. Ensure both the high and low-side valves on your manifold gauge set are still fully closed. Carefully disconnect the yellow (service) hose from the vacuum pump’s inlet port. There might be a slight hiss of air as you disconnect, which is normal as the pump’s internal vacuum is released. At this point, the AC system inside your vehicle remains under a deep vacuum, sealed by the closed manifold valves. The system is now ready to be charged with the appropriate amount of refrigerant.
Pro Tip: Always disconnect the yellow hose from the vacuum pump first. If you were to disconnect it from the manifold gauge set while the system is under vacuum, you would lose the vacuum you just pulled and introduce air back into the system.
✅ Final Checklist
- Vacuum held steady for at least 15-30 minutes after pump shutdown.
- No perceptible rise in pressure on the manifold gauges during the hold test.
- All hose connections were secure and leak-free throughout the process.
- Vacuum pump oil was checked and refreshed if necessary.
- Safety gear was worn at all times.
Important Notes:
- Safety considerations include avoiding contact with liquid refrigerant, which can cause severe frostbite. Always work in a well-ventilated area, and never puncture or heat refrigerant cans.
- Seek professional help if the system fails to hold a vacuum, indicating a significant leak that requires specialized leak detection and repair. Persistent issues or complex component replacements are also best left to certified technicians.
- Estimated time for pulling a vacuum is typically 1 to 2 hours. The cost for DIY tools (manifold gauge set, vacuum pump) can range from $200-$400, but these tools can often be rented from auto parts stores for a much lower daily fee.
How to Fix: Step-by-Step Guide to Pulling a Car AC Vacuum
Pre-Vacuum Checks and Essential Safety
Before you even begin connecting equipment, prioritize safety and conduct thorough pre-checks. Your personal safety is paramount, so always wear industrial-grade safety glasses and chemical-resistant gloves throughout this entire process. Confirm that all AC system components you’ve replaced or serviced are properly installed and securely sealed. There should be no open ports or obvious leaks before starting. Also, take a moment to inspect your vacuum pump; ensure the oil level is correct and the oil itself is clean. Dirty or low oil will significantly impair the pump’s ability to pull a deep vacuum. Finally, verify that all valves on your manifold gauge set are completely closed.
Precise Equipment Connection for Deep Evacuation
Connecting your equipment correctly is crucial for achieving an effective vacuum. First, locate your vehicle’s AC service ports. The low-side port is typically smaller and often marked with an “L” or a blue cap, while the high-side port is larger, marked “H” or a red cap. Next, connect the blue hose from your manifold gauge set to the low-side service port. Then, attach the red hose to the high-side service port. These connections should click securely into place. Finally, connect the yellow (or central) service hose from your manifold set directly to your vacuum pump’s inlet port. Double-check every connection for tightness by hand, then give each a quarter turn with a wrench. Be careful not to overtighten, as this can damage the service port O-rings.
Initiating the Vacuum and Monitoring Draw-Down
With all connections secure, it’s time to begin the evacuation process. First, fully open both the low-side (blue) and high-side (red) valves on your manifold gauge set. Now, power on your vacuum pump. Immediately, you should observe the low-side gauge on your manifold set rapidly dropping into negative pressure, aiming for at least -29 to -30 inHg. If you are using a dedicated digital micron gauge, it should begin to show readings decreasing rapidly from atmospheric pressure. Allow the vacuum pump to run continuously for an initial period of at least 15-20 minutes. During this time, the pump will pull out the bulk of the air and any free moisture present in the system. You may notice a change in the pump’s sound as the vacuum deepens.
What If Your Car AC Vacuum Doesn’t Hold?
A vacuum that fails to hold pressure indicates a leak within your AC system. Detecting and repairing these leaks is crucial before proceeding with refrigerant recharge. Modern diagnostic tools, commonplace by 2027, offer enhanced precision for pinpointing even microscopic breaches.
Diagnosing the Leak
If your vacuum gauge rises after the initial 30-minute hold, a leak is present. Industry standards from organizations like the Society of Automotive Engineers (SAE) recommend immediate leak detection to prevent environmental refrigerant release and ensure system integrity.
- Re-check Connections: Ensure all manifold gauge set connections to the service ports and vacuum pump are tight. Loose fittings are a common, easily resolved issue.
- Electronic Leak Detector: Utilize an electronic refrigerant leak detector, which has become highly sensitive and affordable by 2027. Pass the detector probe along all AC components, including the compressor, condenser, evaporator (accessed via the cabin), and all hoses and fittings. A positive reading signifies a leak point.
- UV Dye and Black Light: If an electronic detector yields no results, introduce a small amount of UV dye into the system. Run the AC for 15-20 minutes, then inspect all components with a UV black light. Leaks will fluoresce bright green or yellow.
- Nitrogen Pressure Test: For persistent, hard-to-find leaks, professional shops often use an inert gas like nitrogen to pressurize the system to approximately 150-200 psi. A soap solution or electronic detector can then be used to find escaping nitrogen, indicating a leak. This method is safer and more environmentally friendly than using refrigerant for leak testing.
Next Steps After a Successful AC Vacuum Pull
Once your AC system has successfully held a vacuum for the recommended duration, it is ready for refrigerant recharge. This final step restores the system’s cooling capabilities, adhering to precise specifications for optimal performance and longevity.
Recharging Your AC System
Accurate refrigerant charging is critical. Over- or under-charging can lead to poor cooling, increased compressor wear, and potential system damage. By 2027, smart charging stations are increasingly common, precisely measuring refrigerant mass.
- Connect Refrigerant Can/Tank: Disconnect the vacuum pump from the yellow service hose. Connect the yellow hose to your refrigerant container. Ensure the refrigerant type matches your vehicle’s specifications (e.g., R-134a or R-1234yf, which is standard in many new vehicles by 2027 due to lower global warming potential).
- Purge Air from Hose: Loosely connect the yellow hose to the refrigerant container, then briefly open the container valve to purge any air from the hose. Tighten the connection immediately. This prevents air from entering your now-evacuated system.
- Charge the System: Open the low-side manifold gauge valve (blue). Some systems may require the engine to be running with the AC on full blast for the compressor to cycle and draw in refrigerant effectively. Follow your vehicle’s service manual for specific charging procedures and refrigerant quantities. Many modern vehicles require refrigerant to be added as a liquid into the high-side port (with the engine off) or as a vapor into the low-side port (with the engine running) to prevent compressor damage.
- Monitor Pressure and Quantity: Continuously monitor the low-side pressure gauge during charging. For precise charging, especially with R-1234yf, using a dedicated charging scale is recommended to ensure the exact amount of refrigerant specified by the manufacturer is added. Stop charging once the specified amount is introduced or the low-side pressure stabilizes within the manufacturer’s recommended range (typically 25-45 psi on the low side with the engine running and AC on max).
- Test AC Performance: After charging, start the engine, turn the AC to its coldest setting, and verify cold air output. Check the cabin temperature, which should ideally drop to between 35-45°F (1.7-7.2°C) at the vents, according to Automotive Service Excellence (ASE) standards.
What If It Still Doesn’t Work? Advanced Troubleshooting
Even after a successful vacuum pull and recharge, AC issues can persist. This indicates a deeper underlying problem that requires more advanced diagnosis. According to a 2026 report by the Automotive Aftermarket Suppliers Association (AASA), common failures beyond simple leaks include electrical component issues and compressor wear.
- Check Electrical Components: Verify the AC clutch engages. Listen for a distinct click when the AC is turned on. If not, inspect the clutch relay, fuse, and wiring for corrosion or breaks. A multimeter can test for proper voltage at the compressor.
- Inspect Compressor Operation: If the clutch engages but cooling is still poor, the compressor itself may be failing to build sufficient pressure. Professional diagnostic tools can measure high-side pressures, revealing internal compressor problems.
- Evaporator/Condenser Blockage: Though less common, a restricted evaporator or condenser can hinder refrigerant flow and heat exchange. This often requires specialized equipment for diagnosis, such as thermal cameras or flow meters.
- Seek Professional Help: If basic troubleshooting fails, or you suspect a major component failure, it’s time to consult a certified AC technician. Modern AC systems, especially those using R-1234yf, require specialized equipment and training for safe and effective repair.
Professional AC diagnostic and repair services for complex issues typically range from $300 to $1500+, depending on the vehicle model and the extent of the component replacement required (e.g., compressor replacement can be at the higher end of this range).
Conclusion
Successfully pulling a vacuum on your car’s AC system is a fundamental step in restoring its cooling efficiency and preventing environmental damage from refrigerant leaks. This critical process removes moisture and contaminants, ensuring peak performance when combined with accurate recharging. According to verified research and expert sources, proper vacuuming extends system lifespan and maintains efficiency. Your next step should be to monitor your AC performance closely and address any persistent issues promptly to maintain a comfortable driving experience.
❓ Frequently Asked Questions
Why is removing moisture and air so critical for car AC performance and longevity?
Moisture combines with refrigerant to form corrosive acids, damaging internal components like the compressor and evaporator. Air introduces non-condensable gases that raise system pressure, reducing cooling efficiency and overworking the compressor, leading to premature failure.
What is the correct procedure for connecting the manifold gauge set and vacuum pump to the AC system?
First, connect the blue hose to the low-side service port and the red hose to the high-side port. Then, connect the yellow service hose to your vacuum pump’s inlet. Ensure all connections are tight before starting the pump.
How do I perform a vacuum hold test to ensure there are no leaks in the system?
After evacuating the system to at least 29.5 inHg (or -100 kPa), close the manifold gauge valves and shut off the vacuum pump. Monitor the gauges for 30-60 minutes; any noticeable rise indicates a leak that needs to be located and repaired before proceeding.
Can I rent the necessary vacuum pump and manifold gauges, or should I buy them?
Renting is a viable option for a one-time job, as quality equipment can be expensive. However, if you plan to do frequent AC maintenance or repairs, investing in your own vacuum pump (at least 3 CFM) and a reliable manifold gauge set is more cost-effective in the long run.
What are the most important safety precautions to take when working on a car’s AC system?
Always wear appropriate eye protection and gloves to protect against refrigerant exposure. Ensure the engine is off and cool, and never mix refrigerants. Work in a well-ventilated area, and handle all tools and chemicals according to their manufacturer’s instructions.
What should the target vacuum reading be, and how long should I run the vacuum pump?
The target vacuum should be at least 29.5 inches of mercury (inHg) or -100 kPa for sufficient moisture removal. Run the vacuum pump for a minimum of 30-60 minutes, or longer for larger systems or in humid conditions, to ensure all moisture has boiled off.