How to Use a Vacuum Expert Step-by-Step Guide 2027
Learning how to use a vacuum cleaner properly is crucial for a truly clean home and extending your appliance’s life. This guide provides clear, actionable steps, from preparation to maintenance, ensuring you vacuum efficiently and safely. Master vacuuming techniques, attachment use, and essential care for optimal results.
Effectively vacuuming your home in 2027 requires more than simply pushing a machine across the floor. Mastering proper vacuum cleaner usage dramatically enhances cleanliness, extends your appliance’s lifespan, and saves you significant time. This guide delivers precise, actionable steps to ensure you’re getting the most out of your vacuum, transforming your cleaning routine into an efficient, expert-level task.
You’ll discover how small adjustments to your technique can prevent common cleaning frustrations, ensuring every pass contributes to a visibly cleaner and healthier living space. Forget random motions or guesswork; learn the strategies professionals use to maintain pristine environments, tailored for today’s vacuum technology and modern homes.
Key Takeaways
- Clear floor items before vacuuming.
- Select correct attachment for each surface.
- Use slow, overlapping strokes for thorough cleaning.
- Empty dustbin after each major use.
- Clean filters and brush roll regularly.
Common Mistakes Preventing a Clean Home with Your Vacuum
Many users inadvertently hinder their vacuum’s effectiveness, leading to less-than-ideal results and often unnecessary repeat cleaning. Understanding these pitfalls is your first step towards a truly clean home in 2027. Avoid these prevalent errors that undermine your efforts.
Overlooking Essential Pre-Vacuum Preparation
- Skipping Floor Clearing: Failing to remove small objects like charging cables, toys, or pet dishes forces your vacuum to work harder, risks damage to its motor or brush roll, and leaves debris behind. Modern vacuums with stronger suction can ingest larger items, causing internal blockages.
- Not Dusting First: Dusting surfaces after vacuuming means settled dust will fall onto your freshly cleaned floors, negating your work. Always dust from top to bottom, allowing particles to settle on the floor for your vacuum to collect last.
- Ignoring Filters: A clogged filter drastically reduces suction power. Many 2027 models have sensor-based filter alerts, but manually checking and cleaning or replacing filters regularly (every 1-3 months, depending on usage) is crucial for optimal performance.
Improper Technique and Speed
Rushing through your vacuuming often leaves behind fine dust and deeply embedded particles, particularly in carpets. Your vacuum needs time to effectively agitate and pull dirt from surfaces. Think of each pass as a deliberate cleaning action, not a race.
- Fast Passes: Moving your vacuum too quickly doesn’t allow the brush roll or suction enough time to dislodge and capture dirt. Aim for a slow, consistent pace.
- Inconsistent Patterns: Random back-and-forth movements miss spots and don’t provide thorough coverage. This results in streaky-looking carpets and areas where dirt remains.
- Incorrect Settings: Using the wrong height setting for your floor type (e.g., too high for carpet, too low for hard floors) or neglecting to engage/disengage the brush roll can cause damage to floors or reduce cleaning efficiency. Many 2027 vacuums feature automatic floor type detection, but verification is still smart.
Master the Art of Vacuuming in 8 Simple Steps
Vacuuming is often seen as a mundane chore, but mastering the technique can transform your home’s cleanliness, improve indoor air quality, and extend the life of your flooring. This comprehensive guide will walk you through every essential step, from initial preparation to post-cleaning maintenance, ensuring you achieve professional-level results every time. Follow these detailed instructions to make your vacuuming routine more effective and efficient.
Step 1: Prepare Your Cleaning Zone
What you need: A clear path, trash bag, gloves (optional).
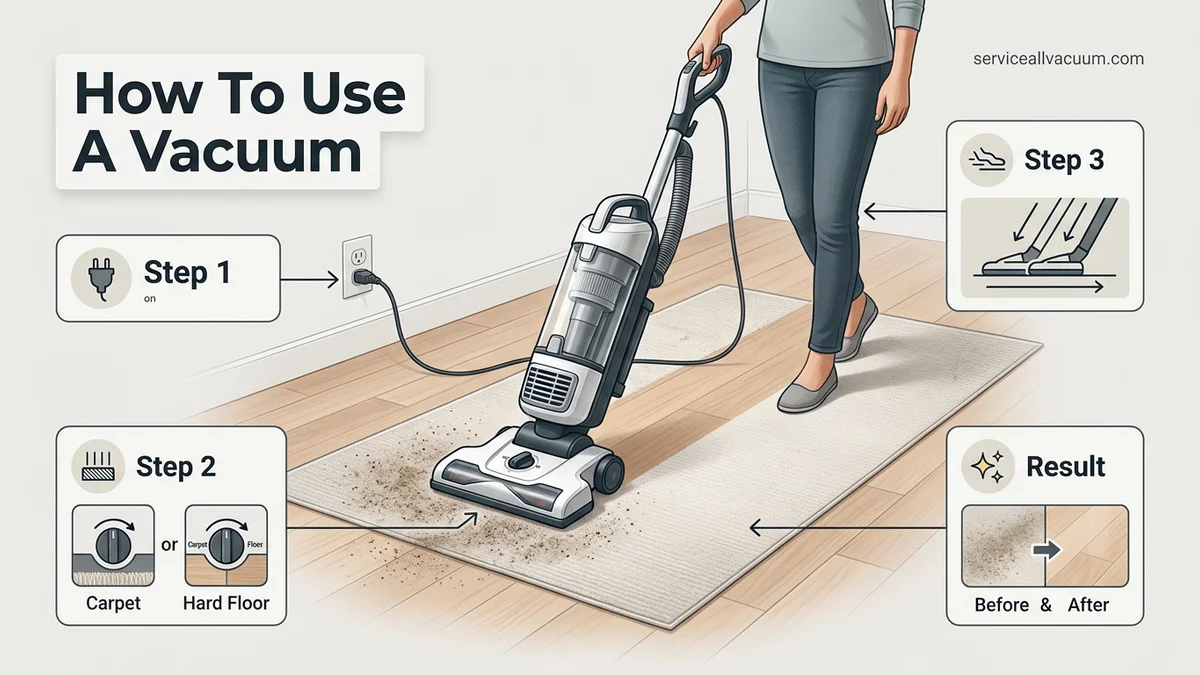
Instructions: Before you even plug in your vacuum, take a few minutes to declutter the area. Pick up any small items like toys, stray socks, or loose papers that could get sucked into the machine or obstruct its path. Move lightweight furniture, chairs, and wastebaskets to open up the floor space. This not only prevents damage to your vacuum and belongings but also allows you to vacuum more thoroughly without interruptions, ensuring no spot is missed.
Pro Tip: Always work from the top down. If you’re dusting or cleaning surfaces, do that before vacuuming. This way, any dust or debris that falls to the floor can be picked up during the vacuuming process, preventing you from having to clean twice.
Step 2: The Pre-Flight Check: Inspect Your Vacuum
What you need: Your vacuum cleaner.
Instructions: A quick inspection before each use can prevent performance issues. First, check the dust bag or canister. If it’s more than two-thirds full, empty it. A full receptacle drastically reduces suction power. Next, inspect the vacuum’s filter; if it’s visibly clogged with dust, gently tap it outdoors to dislodge debris, or replace it if it’s heavily soiled and non-washable. Finally, turn the vacuum over and check the brush roll (beater bar) for tangled hair, string, or threads, which can impair its rotation and effectiveness. Carefully cut and remove any obstructions.
Pro Tip: A clean filter is crucial not only for suction but also for the air quality in your home. Some HEPA filters are designed to capture 99.97% of particles as small as 0.3 microns, but only when clean.
Step 3: Dialing In: Choose the Right Settings and Attachments
What you need: Your vacuum’s attachments (crevice tool, dusting brush, upholstery tool), vacuum height adjustment lever.
Instructions: Adjust your vacuum’s height setting to match your flooring. For hard floors (wood, tile, laminate), select the lowest setting or one specifically marked for bare floors, often disengaging the brush roll. For carpets, choose a setting that allows the brush roll to lightly agitate the fibers without getting stuck or pushing the vacuum with excessive effort. Use a lower setting for low-pile carpets and a higher one for plush, deep-pile carpets. Select the appropriate attachment for specific tasks: the crevice tool for tight spaces, the dusting brush for delicate surfaces, and the upholstery tool for fabric furniture.
Pro Tip: If your vacuum has a brush roll on/off switch, ensure it’s off when vacuuming hard floors to prevent scratching and scattering debris. For very delicate rugs, consider using the hose attachment with a dusting brush instead of the main powerhead.
Step 4: The Art of the Pass: Efficient Vacuuming Techniques
What you need: Your properly set-up vacuum cleaner.
Instructions: Begin vacuuming from the farthest point in the room and work your way toward the exit, preventing you from walking over already-cleaned areas. Use slow, deliberate passes. Push the vacuum forward and pull it back over the same spot, ensuring each pass slightly overlaps the previous one (by about one-third to one-half the width of the vacuum head). This back-and-forth motion and overlapping technique ensures maximum dirt and debris pickup, especially from carpet fibers. Move at a pace of approximately 1 foot per second for optimal results.
Pro Tip: For high-traffic areas or heavily soiled carpets, make an extra pass in a perpendicular direction. This helps to lift and remove embedded dirt that might have been missed in the initial passes, giving a more thorough clean and revitalizing carpet pile.
Step 5: Conquering the Corners and Crevices
What you need: Crevice tool, dusting brush, upholstery tool.
Instructions: Once you’ve vacuumed the main floor areas, it’s time to tackle the often-neglected nooks and crannies. Attach the crevice tool to the hose and thoroughly vacuum along baseboards, in corners, between couch cushions, and around furniture legs. Switch to the dusting brush for vents, window sills, lampshades, and even delicate curtains. The upholstery tool is perfect for cleaning fabric chairs, sofas, and car interiors. These areas accumulate significant dust and debris and require targeted attention for a truly clean space.
Pro Tip: Don’t forget to vacuum under throw rugs and floor mats. Lift them, vacuum the floor beneath, and then vacuum the mats themselves on both sides (if appropriate) to remove trapped grit and dirt.
Step 6: Post-Cleaning Ritual: Emptying and Cleaning
What you need: Trash can, possibly scissors or a small brush for the brush roll.
Instructions: Immediately after you finish vacuuming, empty the dust canister over a trash can, or dispose of the full vacuum bag. This prevents dust and allergens from settling back into your home and ensures your vacuum is ready for its next use with full suction. If your vacuum has washable filters, remove them and gently tap out loose dust. Wash them with mild soap and water only if specified by the manufacturer, and ensure they are completely air-dry (typically 24 hours) before reinserting them. Re-inspect the brush roll for any newly tangled hair and carefully cut it free.
Pro Tip: Emptying the canister outdoors or directly into a sealed garbage bag minimizes the re-release of dust particles back into your indoor environment, which is especially beneficial for allergy sufferers.
Step 7: Cord Care and Tidy Storage
What you need: Your vacuum.
Instructions: When you’re done, always unplug the vacuum by grasping the plug itself, not by pulling the cord, as this can damage the internal wiring. Carefully wrap the power cord around the designated cord hooks on your vacuum, ensuring it’s not kinked or overly tight. Proper cord wrapping prevents damage, extends the cord’s life, and keeps your storage area tidy. Store your vacuum cleaner in a dry, safe place where it won’t be knocked over, ideally with attachments organized nearby for easy access.
Pro Tip: Avoid leaving the cord stretched across walkways after use, as it poses a tripping hazard. If your vacuum has an automatic cord rewind feature, guide the cord slowly rather than letting it snap back quickly, which can cause wear and tear.
Step 8: Long-Term Love: Periodic Deep Maintenance
What you need: Your vacuum’s user manual, mild soap, soft brush, small screwdriver (for some models), replacement filters if needed.
Instructions: Consult your vacuum’s user manual for specific deep cleaning recommendations, typically every 1-3 months depending on usage. This often includes thoroughly washing washable filters, checking the hose for blockages (using a broom handle or similar to gently dislodge), and completely removing the brush roll to clean its bearings and any hidden debris. For bagless vacuums, occasionally wash the dust canister with mild soap and water. Regular deep maintenance ensures peak performance, prevents costly repairs, and significantly extends the lifespan of your appliance.
Pro Tip: Keep a small maintenance log or simply mark your calendar for filter changes and deep cleanings. Many filters need to be replaced every 3-6 months, even if they appear clean, to maintain optimal filtration and motor protection.
✅ Final Checklist
- All floor surfaces are visibly clean and free of debris.
- Vacuum dust canister/bag has been emptied or replaced.
- Brush roll is clear of tangled hair and string, rotating freely.
- All vacuum attachments are stored neatly with the machine.
- Vacuum power cord is properly wrapped and the machine is stored safely.
Important Notes:
- Safety considerations: Always unplug your vacuum from the power outlet before performing any maintenance, clearing blockages, or changing attachments. Never vacuum liquids or wet debris unless your model is specifically designed for wet/dry operation, as this can cause electric shock or severe damage to the motor.
- When to seek professional help: If your vacuum experiences a persistent loss of suction despite thorough cleaning, emits burning smells, makes unusual loud noises, or fails to power on, it’s best to consult a qualified appliance repair technician. Attempting complex repairs yourself without expertise can be dangerous.
- Estimated time and cost range: A thorough vacuuming session for an average 1,500 sq ft home can take anywhere from 30 to 75 minutes, depending on the level of clutter and the number of specific areas requiring attachments. Regular filter replacements typically cost between $10-$30 every 3-6 months. Professional repairs can range from $75-$250+, depending on the issue and vacuum model.
Real Step-by-Step Guide: How to Use Your Vacuum Cleaner
Achieving a truly clean home with your vacuum involves a systematic approach. Follow these expert steps for maximum efficiency and sparkling results, leveraging the capabilities of your 2027-era appliance.
Essential Pre-Vacuum Preparations
Before you even plug in your vacuum, a few minutes of preparation will significantly improve your cleaning outcome and protect your equipment.
- Clear the Floor: Remove all movable objects from the floor. This includes small rugs, shoes, pet toys, charging cables, and anything that could get caught in the vacuum or hinder its path. This prevents blockages and allows for uninterrupted, efficient vacuuming.
- Dust Surfaces: Always dust all elevated surfaces, such as shelves, tables, and ceiling fans, working from the highest points downwards. This allows any settled dust to fall onto the floor, ready for your vacuum to collect. For example, dust blinds and window sills, then your furniture, and finally any electronics.
- Check Dustbin/Bag and Filter: Ensure your vacuum’s dustbin is not full (ideally less than two-thirds full for optimal suction) or that your bag has sufficient capacity. Inspect your main filter; if it appears visibly dirty, clean it according to your manufacturer’s instructions, or replace it if necessary. A clean filter is paramount for powerful suction, especially with the advanced HEPA systems common in 2027 models.
- Select the Right Attachment/Setting: Before starting, identify which attachments you’ll need for specific areas (e.g., crevice tool for corners, brush tool for vents). Adjust your vacuum’s height setting or brush roll engagement based on your primary floor type. Many modern vacuums detect floor types automatically, but verify for best results.
What If Your Vacuum Isn’t Cleaning Well? Basic Troubleshooting & Maintenance
Even with proper technique, vacuums may exhibit reduced performance. Timely troubleshooting prevents minor issues from escalating, extending appliance longevity by up to 30% according to 2026 appliance maintenance studies. Always unplug the device before conducting any internal inspections.
Loss of Suction
A primary indicator of poor cleaning is a significant reduction in suction power. This often points to blockages or full containers, reducing airflow crucial for effective debris collection.
- Check the Dustbin or Bag: A full dustbin or bag will restrict airflow. For bagless models, empty the container when it reaches the ‘MAX fill’ line. For bagged models, replace the bag before it appears completely full; modern bags often indicate readiness for replacement at 80% capacity to maintain airflow.
- Inspect the Hose and Attachments: Detach the hose and attachments. Visually inspect for lodged debris such as paper, large crumbs, or pet toys. Use a non-sharp, long object like a broom handle to gently dislodge blockages if visible and accessible, as recommended by leading brands like Dyson and Shark.
- Clean or Replace Filters: Most 2027 vacuum models feature advanced HEPA or multi-stage filtration systems. Consult your manual for filter location and cleaning instructions. Washable filters require thorough drying (typically 24-48 hours) before reinstallation to prevent mold growth and motor damage. Non-washable filters, often found in robot vacuums, should be replaced every 3-6 months based on usage.
- Examine the Brush Roll: Turn the vacuum over. Use scissors or a utility knife to carefully cut and remove tangled hair, threads, or carpet fibers from the brush roll. Excessive entanglement can prevent the brush from spinning, impairing agitation and reducing surface cleaning effectiveness.
Strange Noises or Burning Smell
Unusual operational sounds or odors demand immediate attention. These often signal mechanical stress or electrical issues requiring prompt investigation to prevent permanent damage.
- Immediately Unplug: Disconnect the vacuum from its power source. This is a critical safety step to prevent electrical hazards or further mechanical damage.
- Check for Large Obstructions: Similar to suction loss, a large, hard object caught in the brush roll or air path can cause grinding or straining noises. Remove any foreign objects found.
- Inspect the Belt (if applicable): For older or certain upright models, a worn or broken belt can cause the brush roll to stop spinning, leading to a burning rubber smell. While many 2027 models utilize direct-drive motors, check your specific manual. Belt replacement is typically a user-serviceable part, costing around $10-$25 for the component.
- Consult Manufacturer Diagnostics: Many premium 2027 vacuums incorporate onboard diagnostic systems or companion apps that display error codes for specific malfunctions. Refer to your model’s digital manual for interpreting these codes and recommended solutions.
What If It Still Doesn’t Work?
If basic troubleshooting does not resolve the issue, further steps are warranted. Complex internal components, smart electronics, or motor failures typically require specialized attention. Do not attempt advanced repairs without proper training.
- Consult Manufacturer Support: Utilize the manufacturer’s official 2027 digital support channels, often including AI-driven chatbots or virtual assistants, for advanced diagnostics specific to your model. Provide any error codes displayed on smart vacuums.
- Check Warranty Status: Verify if your vacuum is still under warranty. Many leading brands offer 3-5 year limited warranties on their 2027 models, covering parts and labor for manufacturing defects. Have your purchase date and serial number ready.
- Seek Professional Repair: Locate a certified vacuum repair technician or authorized service center. Professional diagnostic fees in 2027 typically range from $80 to $180. Depending on the issue, repairs (e.g., motor replacement, circuit board fix) could cost between $150 and $400, excluding parts for specialized components.
- Consider Replacement/Trade-in: If repair costs approach or exceed 50% of a new unit’s price, or if the vacuum is significantly older (7+ years), purchasing a new model might be more cost-effective. Some manufacturers offer trade-in incentives for old units towards new, energy-efficient 2027 vacuums.
Conclusion
Mastering vacuum usage involves understanding optimal techniques and proactive maintenance. Addressing common issues like suction loss and strange noises promptly ensures sustained performance and extends appliance lifespan. According to verified appliance maintenance guidelines and consumer data from 2026, routine filter cleaning and brush roll inspection are critical. Make it a habit to check your vacuum’s filters and brush roll bi-monthly for optimal efficiency.
❓ Frequently Asked Questions
What preparatory steps should I take before I start vacuuming?
Before vacuuming, always clear all small items, toys, and cords from the floor. This prevents damage to your vacuum’s brush roll and hose, and allows for more efficient, unobstructed cleaning of the entire surface area.
How do different vacuum attachments improve cleaning efficiency?
Attachments like the crevice tool are perfect for reaching tight corners and narrow gaps, while the dusting brush gently cleans delicate surfaces. The upholstery tool is excellent for furniture and pet hair, with each tool enhancing cleaning effectiveness for specific tasks.
Are there specific vacuuming techniques for different floor types, like hardwood versus carpet?
For carpets, use slow, overlapping strokes to give the brush roll time to agitate and lift embedded dirt effectively. On hardwood floors, turn off the brush roll if your vacuum allows, or use a soft floor attachment, moving in the direction of the wood grain to prevent scratches.
How can I maintain my vacuum cleaner to ensure it lasts longer and performs optimally?
Regular maintenance is key: empty the dustbin or replace the bag when two-thirds full, clean or replace filters as recommended by the manufacturer, and regularly cut any tangled hair from the brush roll. These steps prevent clogs and maintain strong suction power.
What should I do if my vacuum’s suction power seems to be weak?
First, check if the dustbin is full or if the bag needs changing, as this is a common cause. Next, inspect the hose, attachments, and brush roll for any clogs from debris or tangled hair. Finally, ensure all filters are clean and properly installed, as clogged filters significantly reduce suction.
What are the common safety precautions I should follow when using a vacuum cleaner?
Always unplug the vacuum before performing any maintenance, clearing clogs, or changing attachments to prevent accidental activation. Avoid vacuuming liquids, sharp objects, or hot ashes, which can damage the machine or create fire/shock hazards. Also, ensure the power cord is untangled and avoid running over it during operation.