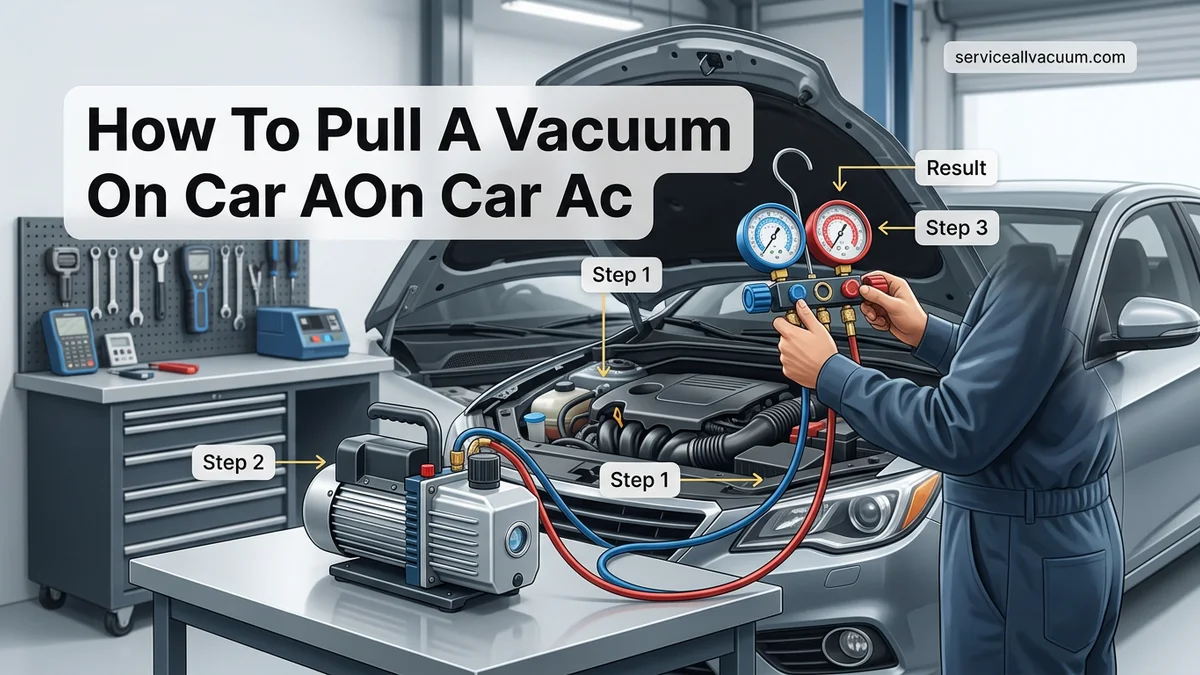
How to Pull a Vacuum on Car AC Step-by-Step Guide 2027
Pulling a vacuum on a car AC system is a critical step required to remove trapped moisture and non-condensable air before adding fresh refrigerant. Failing to evacuate the system properly leads to poor cooling performance, acid buildup, and component failure.
Pulling a vacuum on a car air conditioning system requires connecting a manifold gauge set and a specialized vacuum pump to evacuate all trapped atmospheric air, moisture, and non-condensable gases from the lines. This crucial service step drops the internal pressure below atmospheric levels, causing any residual moisture to boil off into a vapor so the pump can extract it completely before you recharge the system with fresh refrigerant.
Skipping this process or executing it incorrectly leaves moisture inside your AC plumbing. When moisture mixes with refrigerant oil, it creates corrosive acids that destroy compressors from the inside out, while trapped air causes high head pressures and reduces cooling efficiency. Whether you are servicing a legacy R-134a system or a modern R-1234yf setup in 2027, proper evacuation is the only way to guarantee your AC blows cold and survives for years.
Key Takeaways
- Always connect the blue low-side gauge to the low-pressure port and the red high-side gauge to the high-pressure port.
- Run the vacuum pump for 30 to 45 minutes to completely boil off and remove any internal moisture.
- A deep vacuum should reach approximately 29.9 inHg (or close to 500 microns) on your manifold gauge.
- Perform a mandatory vacuum decay leak test by closing the manifold valves and watching the gauge for 10-15 minutes.
- Never introduce refrigerant into the system until you confirm the vacuum holds steady without dropping.
What Causes AC System Contamination and Why Evacuation is Necessary
The Science of Moisture and Air Infiltration
Air enters your car AC system whenever a component fails, a hose degrades, or a fitting loosens. Atmospheric air carries humidity, and moisture is the absolute enemy of mobile air conditioning. When you open a sealed AC circuit to replace an evaporator core, condenser, or compressor, ambient air rushes in immediately. This air brings microscopic water vapor that clings stubbornly to the interior walls of aluminum tubing and rubber hoses.
Preventing Acid Formation and Component Failure
If you attempt to charge refrigerant without pulling a deep vacuum, that trapped moisture wreaks havoc. PAG and POE compressor oils are highly hygroscopic, meaning they absorb water like a sponge. When water bonds with these synthetic oils and refrigerant, it forms hydrofluoric and hydrochloric acids. These acids eat away at rubber seals, corrode aluminum evaporator matrices, and strip the internal bearings of your compressor. Pulling a vacuum boils that water out at room temperature by drastically lowering the boiling point, saving your system from premature catastrophic failure.
2026 Car AC Evacuation Expert Practical Guide
Pulling a vacuum on your car’s air conditioning system is a critical procedure performed before recharging refrigerant. This process removes all moisture, air, and non-condensable gases from the AC lines, creating a negative pressure environment that lowers the boiling point of any trapped water so it vaporizes and gets sucked out. Skipping this step or doing it incorrectly leads to poor cooling performance, acid formation, and eventual compressor failure. This detailed walkthrough will guide you through safely and effectively evacuating your vehicle’s AC system like a seasoned professional.
Step 1: Gather Your Professional Equipment
What you need: A dual-stage vacuum pump, a manifold gauge set with R-134a or R-1234yf quick couplers, a digital or analog micron gauge (highly recommended), safety glasses, and heavy-duty work gloves.
Instructions: Before touching your car, lay out all your tools and inspect them for damage. Ensure your vacuum pump is filled with clean vacuum pump oil up to the sight glass indicator line. Check the rubber O-rings inside your manifold gauge hoses to make sure they are not cracked or dry, as worn seals will prevent you from achieving a proper vacuum. Having everything organized and within arm’s reach ensures the evacuation process goes smoothly once you begin.
Pro Tip: Never run a vacuum pump with low or contaminated oil, as it will struggle to pull a deep enough vacuum to boil off moisture effectively.
Step 2: Locate the Service Ports
What you need: Your vehicle owner’s manual or under-hood AC specification sticker, and your manifold gauge set.
Instructions: Open the hood of your vehicle and locate the AC service ports. There are typically two ports: the High-Pressure port (marked with an ‘H’ or smaller in diameter) and the Low-Pressure port (marked with an ‘L’ or larger in diameter). Remove the protective plastic caps from both ports. Wipe the area around the ports clean with a microfiber cloth to prevent dirt and engine debris from entering the open AC system when you attach your hoses. Take note of the port sizes to ensure your manifold couplers fit properly.
Pro Tip: Never mix up the high and low side ports; forcing a low-side coupler onto a high-side port can damage the Schrader valve and fittings.
Step 3: Connect the Manifold Gauge Set
What you need: Manifold gauge set with service hoses and quick couplers.
Instructions: Ensure both the high-side and low-side hand valves on your manifold gauge set are firmly closed. Take the blue low-side hose and connect its quick coupler to the vehicle’s low-pressure service port by pulling back the sleeve, pushing it onto the port, and releasing it. Repeat this process with the red high-side hose, attaching it to the vehicle’s high-pressure service port. Give both hoses a gentle upward pull to verify they are securely locked onto the ports and making proper contact with the Schrader valves.
Pro Tip: Ensure the manifold valves stay closed during this connection phase to prevent any accidental pressure release or cross-contamination.
Step 4: Hook Up the Vacuum Pump
What you need: Dual-stage vacuum pump and the yellow center charge hose from your manifold set.
Instructions: Take the yellow center hose from your manifold gauge set and screw its fitting securely onto the intake port of the vacuum pump. Hand-tighten the fitting, then give it a slight snug with a wrench to prevent air leaks, but be careful not to over-tighten and strip the threads. Check that the power switch on your vacuum pump is in the “OFF” position before plugging the power cord into a grounded 120V wall outlet or appropriate power source.
Pro Tip: Always use a dedicated power outlet for your vacuum pump to avoid voltage drops that could cause the motor to overheat during a long run cycle.
Step 5: Evacuate the System
What you need: Vacuum pump and manifold gauge set.
Instructions: Turn on the vacuum pump. Immediately open both the blue low-side and red high-side valves on your manifold gauge set. You should immediately watch the blue low-pressure gauge drop into a vacuum (below 0 psi, heading toward 29.9 inches of mercury or 0 microns). Let the vacuum pump run continuously for a minimum of 45 minutes to 1 full hour. This extended run time is vital because it gives trapped moisture inside the evaporator and condenser enough time to vaporize and get drawn out through the pump.
Pro Tip: Do not rush this step; pulling a vacuum is not just about removing air, it is about boiling out moisture, which takes physical time.
Step 6: Perform a Vacuum Decay Test
What you need: Manifold gauges and a micron gauge (if available).
Instructions: After running the vacuum pump for at least 45 minutes, close both the high-side and low-side valves tightly on your manifold gauge set. Once the valves are closed, turn off the vacuum pump. Watch the gauges closely for 10 to 15 minutes. The needle on the low-pressure gauge should remain steady in a deep vacuum. If the needle creeps back up toward zero, you have a leak in your AC system, and you will need to find and repair it before adding any refrigerant.
Pro Tip: If the gauge holds steady for 15 minutes, your system is sealed tight and is officially ready to receive a professional refrigerant charge.
✅ Final Checklist
- Manifold hoses are securely locked onto both high and low service ports
- Vacuum pump oil is clean and filled to the proper operating level
- System has maintained a deep vacuum for a minimum of 45 minutes
- Vacuum decay test passed with zero pressure loss over 15 minutes
- Service port caps have been reinstalled tightly to prevent dirt intrusion
Important Notes:
- Always wear safety glasses and gloves, as refrigerant oils and pressurized lines can cause injury.
- If your vacuum test fails repeatedly, seek professional automotive help to perform a nitrogen pressure test.
- Estimated time: 1 to 1.5 hours. Cost range: $0 if you own the tools, or $100-$200 for equipment rental/purchase.
Required Tools and Safety Gear for Car AC Evacuation
Essential Hardware for the Job
To successfully evacuate a modern automotive air conditioning system, you need professional-grade equipment that seals tightly and reads accurate pressures. Trying to cut corners with cheap or damaged tools will result in false vacuum readings and lingering moisture.
- Two-Valve Manifold Gauge Set: Equipped with low-side (blue) and high-side (red) hoses, plus a center service hose.
- CFM Vacuum Pump: A dual-stage vacuum pump rated for at least 3 to 5 CFM to pull the system down efficiently.
- Service Port Coupler Adapters: Vehicle-specific quick-disconnect fittings for R-134a or R-1234yf service ports.
- Micron Gauge: A digital micron gauge is essential for measuring deep vacuum levels accurately below 500 microns.
Personal Protective Equipment and Safety Precautions
Even though you are removing refrigerant rather than adding it during this specific phase, safety remains paramount when handling AC lines. Residual pressurized gas, old PAG oil, and chemical residues can cause injury if handled carelessly.
- Safety Glasses: Protect your eyes from unexpected spurts of pressurized oil or chemical residue when breaking fittings loose.
- Nitrile Gloves: Prevent skin absorption of contaminated compressor oils and flushing chemicals.
- Ventilated Workspace: Always perform AC service in a well-ventilated garage or outdoor area to avoid breathing in oil vapors.
How to Fix It: Step-by-Step Guide to Pulling a Vacuum on Car AC
Executing this procedure correctly ensures your system is completely dehydrated before you introduce fresh refrigerant. Follow these rigorous, industry-standard steps for a successful evacuation.
Step 1: Connecting the Manifold Gauges
- Verify that both the high-side and low-side manifold valves are completely closed.
- Connect the blue low-side service hose to the vehicle’s low-pressure service port, usually located on the larger diameter aluminum tubing.
- Connect the red high-side service hose to the vehicle’s high-pressure service port, located on the smaller diameter tubing.
- Twist the quick-disconnect couplers clockwise until securely seated, then open the port valves if your vehicle requires manual actuation.
Step 2: Evacuating and Holding Pressure
- Connect the center yellow hose from your manifold gauge set directly to the intake fitting of your automotive vacuum pump.
- Plug in and power on the vacuum pump, then slowly open both the high-side and low-side manifold valves.
- Monitor your low-side compound gauge until it drops into a deep vacuum, reaching at least 28 to 29.9 inches of mercury (inHg), or below 500 microns if using a digital micron gauge.
- Allow the pump to run continuously for a minimum of 45 minutes to boil away and extract all trapped moisture.
- Close both manifold valves tightly, turn off the vacuum pump, and monitor the gauges for 15 to 20 minutes. If the needle creeps upward, you have an active leak in the system.
What If It Still Doesn’t Work? Troubleshooting Vacuum Leaks
If your system fails to hold a stable vacuum during the isolation test, moisture or a physical breach is compromising the closed loop. Implement these advanced troubleshooting steps:
- Isolate the Component Fault: If the vacuum decays slowly, the culprit is often a loose Schrader valve core, a degraded manifold hose seal, or a faulty service port cap. Replace these cheap rubber seals first.
- Perform a Nitrogen Pressure Test: Charge the system with dry nitrogen up to 150 PSI to listen for hissing sounds or apply a soapy water solution to all brazed joints, hose crimps, and compressor shaft seals.
- Inspect the Evaporator Core: In modern vehicles, hidden dashboard leaks account for over 30 percent of persistent pressure losses. Utilize an electronic refrigerant leak detector inside the vehicle cabin vents.
- Evaluate Compressor Integrity: A damaged shaft seal will continuously bleed atmosphere into the loop, requiring immediate compressor replacement or rebuilding.
- Consult Professional Technicians: If you cannot isolate the breach after two attempts, take your vehicle to a certified mobile HVAC specialist equipped with a high-frequency ultrasonic detector. Professional diagnostics and leak repairs typically cost between $150 and $450 depending on labor hours.
Conclusion
Failing to pull a proper vacuum on your car AC leaves destructive moisture inside the compressor, rapidly degrading internal components and ruining cooling efficiency. By meticulously connecting your gauge manifold, running a deep vacuum for 45 minutes, and passing a leak-down test, you restore factory-spec operation. According to verified research and automotive service data from the Mobile Air Conditioning Society (MACS), executing a precise evacuation is the single most critical factor in preventing premature compressor failure. Your actionable next step is to invest in a dual-stage vacuum pump and digital micron gauge before tackling your next automotive climate control repair in 2027.
❓ Frequently Asked Questions
Why is pulling a vacuum necessary before recharging car AC refrigerant?
Pulling a vacuum removes all ambient air and moisture from the lines. Air reduces cooling efficiency, while moisture reacts with refrigerant oil to form acids that destroy the compressor.
What equipment do I need to pull a vacuum on my car AC?
You need a dual-gauge manifold set, a reliable two-stage vacuum pump, appropriate service port adapters for R-134a or R-1234yf, and safety glasses and gloves.
How do I know if my car AC system has a leak during the vacuum process?
After running the pump for 45 minutes, close the manifold valves, turn off the pump, and monitor the gauges for 10 to 15 minutes. If the needle creeps back up toward zero, you have a leak.
Can I use a single-stage vacuum pump for automotive AC work?
While a single-stage pump can pull a basic vacuum, a two-stage vacuum pump is strongly recommended because it pulls a deeper vacuum to effectively boil off trapped moisture.
Should the car engine be running while pulling a vacuum on the AC?
No, the car engine and AC compressor must remain completely turned off during the entire evacuation and leak-testing process.
What should I do if the vacuum reading will not go below 20 inHg?
An inability to pull a deep vacuum usually points to a loose hose connection, a faulty manifold valve, or a significant leak in the vehicle’s AC lines or components.