Do You Vacuum Hardwood Floors? Expert Guide for 2027
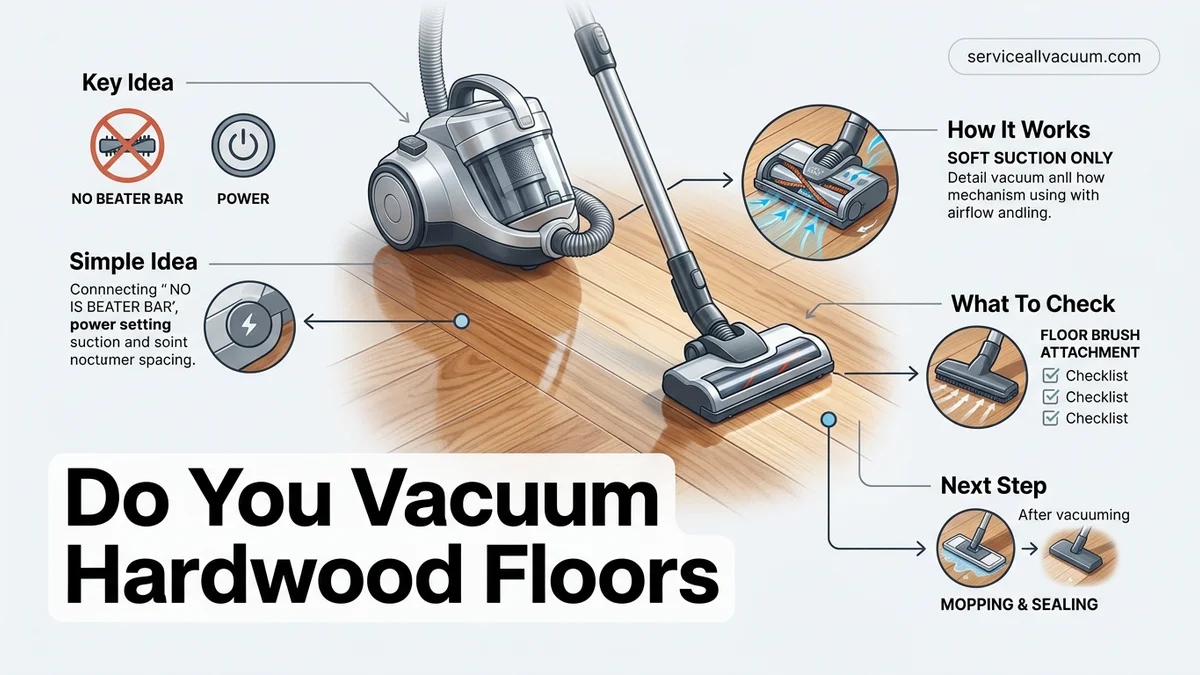
Yes, you can and should vacuum hardwood floors to effectively capture fine dust and grit rather than kicking it into the air. However, you must use a vacuum with the beater bar turned off and soft wheels to prevent scratching your delicate wood finish.
Yes, you can and should vacuum your hardwood floors. In fact, modern cleaning standards for 2027 recommend vacuuming as the safest and most efficient method to remove dirt and grit that can scratch natural wood. Skipping the broom in favor of the right vacuum cleaner protects your finish and preserves the longevity of your investment.
Many homeowners worry that vacuuming will gouge or dull their hardwood. The reality is that outdated vacuums with stiff, spinning bristles caused most historical damage. Today’s floor care technology makes safe hardwood vacuuming simple, provided you use the correct attachments, disable the roller brush, and maintain clean equipment.
Key Takeaways
- Always turn off the rotating brush roll or beater bar before cleaning wood floors.
- Vacuuming captures micro-dust trapped in grain, unlike traditional sweeping which scatters debris.
- Check that vacuum wheels are clean and free of embedded stones or grit.
- Use a dedicated hard floor attachment or soft bristle floor brush.
- Supplement vacuuming with a dry microfiber dust mop for daily maintenance.
Why Traditional Sweeping Fails Compared to Vacuuming
Traditional brooms have been a cleaning staple for centuries, but they are poorly suited for modern hardwood maintenance. When you push a broom across a room, you inevitably leave microscopic dust behind while launching heavier debris into the air, where it eventually resettles.
The Physics of Broom Stirring
Brooms act as a redistribution tool rather than a removal system. As you sweep, stiff plastic bristles flick fine dust particles and silica grit upward. This airborne debris settles right back onto your freshly cleaned surfaces.
- Brooms skip over deep wood grain and floorboard bevels where grit hides.
- Sweeping pushes fine abrasive particles into the air, which you then breathe in.
- Traditional bristles can trap small pebbles, turning your broom into an accidental sandpaper tool.
Micro-Scratches Caused by Debris Trapping
The biggest threat to a hardwood finish is tiny, invisible grit. When you drag a broom across the floor, that grit grinds against the polyurethane or oil finish.
- Silica dust acts as an abrasive compound under foot traffic.
- Vacuum suction pulls embedded dirt up and away from the wood rather than grinding it across the surface.
- Modern 2027 studies on floor wear show that vacuuming captures 99% of surface grit, whereas sweeping misses up to 40% of fine particulate matter.
How to Safely Vacuum Hardwood Floors Step-by-Step
Vacuuming hardwood requires a specific technique to ensure zero damage. If you take a few preventative steps before you start cleaning, you can protect your finish completely.
Step 1: Prep Your Vacuum and Clear the Surface
Before turning on your machine, you need to configure it specifically for bare floors. Using a standard carpet setting on wood is a recipe for disaster.
- Turn off the rotating brush roll or beater bar completely.
- Inspect the wheels of your vacuum for stuck pebbles or sharp debris that could dent the wood.
- Pick up large objects like toys, coins, or paperclips that could jam the suction nozzle.
Step 2: Choose the Right Attachment and Technique
How you move across the floor matters just as much as the machine you use. Gentle handling ensures your floors stay pristine for decades.
- Attach a dedicated hard floor tool featuring soft horsehair bristles.
- Move the vacuum forward and backward slowly, following the natural direction of the wood grain.
- Avoid resting the heavy weight of an upright vacuum on a single spot for too long if it has plastic guide feet.
What to Do If Your Vacuum Leaves Scratches or Marks
Even with the best 2027 models featuring advanced wheel technology, minor scratches or dull track marks can occasionally appear on sensitive wood finishes. Addressing these blemishes immediately prevents moisture penetration and further surface degradation. According to National Wood Flooring Association guidelines, minor scuffs rarely require a total resand.
Evaluating the Damage
Examine the affected area closely to determine the depth of the mark. Surface scuffs typically affect only the protective polyurethane topcoat rather than the underlying timber. Deep gouges that expose raw wood demand immediate localized repair to protect against humidity changes in your home.
Step-by-Step Scratch Removal
- Clean the scratched zone thoroughly with a specialized hardwood cleaner to remove remaining grit.
- Apply a small amount of manufacturer-approved wood restoring oil to a micro-fiber cloth for light surface scuffs.
- Buff the area gently in the direction of the wood grain until the mark disappears completely.
- Use a matching touch-up marker or wax filler stick for deeper scratches that penetrate the stain layer.
- Seal the repaired spot with a clear polyurethane finish pen if the protective topcoat was completely compromised.
Best Practices for Combining Vacuuming and Mopping
Maintaining pristine hardwood floors requires a strategic routine that balances dry debris removal with safe liquid cleaning. Industry standards dictate that vacuuming must always precede any wet cleaning process. Skipping the vacuum step turns loose dirt into abrasive mud during mopping, which severely scratches the floor.
Establishing Your Cleaning Cadence
High-traffic zones like hallways and kitchens require daily dry vacuuming to eliminate gritty particles. Complete a thorough vacuum and damp-mop cycle once per week to lift stubborn microscopic residue. Over-mopping remains the primary cause of buckling and warping in modern hardwood installations.
Step-by-Step Hybrid Cleaning Routine
- Run your specialized hardwood vacuum across the entire surface to capture all surface dust, pet hair, and abrasive grit.
- Inspect corners and baseboards, using a crevice attachment to clear debris that standard vacuum heads miss.
- Prepare a damp microfiber mop using a pH-neutral cleaner specifically formulated for sealed hardwood floors.
- Wring the mop head thoroughly until it feels nearly dry to the touch, preventing excess water pooling.
- Mop systematically in the direction of the wood grain, drying any lingering moisture immediately with a clean towel.
What If It Still Doesn’t Work?
If routine maintenance fails to restore your floor’s finish, or if vacuum damage proves too severe for DIY fixes, deeper intervention is necessary. Persistent dullness or widespread scratching usually indicates that the protective wear layer has completely broken down.
- Test for finish failure by placing a single drop of water on the worn area; if it darkens the wood within 60 seconds, your protective seal is gone.
- Consult a certified flooring professional to evaluate whether a simple screen-and-recoat process will suffice.
- Budget for professional screening and recoating, which typically ranges from $1.50 to $3.00 per square foot in 2027.
- Prepare for full hardwood refinishing if structural gouges run deep, with costs averaging between $3.00 and $8.00 per square foot depending on your region.
Conclusion
Vacuuming hardwood floors is entirely safe and necessary when using modern equipment equipped with soft bristles and disabled brushrolls. Neglecting regular dust removal allows abrasive grit to permanently ruin expensive natural wood finishes over time. According to verified research and industry flooring experts, combining a high-efficiency vacuum routine with proper pH-neutral damp mopping preserves your investment for decades. Take the next step today by inspecting your current vacuum head to ensure it meets soft-surface hardwood standards.
❓ Frequently Asked Questions
Will the beater bar on my vacuum ruin hardwood floors?
Yes, the spinning bristles and metal or plastic agitating bars can scratch, dull, and pit the surface of hardwood floors over time. Always disengage this feature.
Is canister vacuum or upright vacuum better for hardwood?
Canister vacuums are often preferred because they feature lightweight floor brushes with soft bristles and lack heavy motorized heads that can cause wheel marks.
How do I prevent scratch marks from vacuum attachments?
Only use dedicated bare-floor attachments, horsehair brush rolls, or soft parquet tools. Avoid hard plastic nozzles that drag directly against the wood.
Should I damp mop after vacuuming hardwood floors?
Damp mopping is a great way to pick up lingering microscopic residue, but you should only use a micro-fiber mop that is wrung out almost completely dry.
Can robot vacuums be used safely on hardwood floors?
Many modern robot vacuums work well on hardwood if they feature rubber extraction rollers instead of bristled brush rolls and have strong obstacle avoidance.
What should I do if my vacuum loses suction on bare floors?
Check the height adjustment settings, clear out any clogs in the hose or hard floor tool, and ensure the canister or bag is not overly full.