How to Vacuum AC Lines Expert Step-by-Step Guide 2027
Properly vacuuming AC lines is crucial for system longevity and efficiency. This process removes moisture and non-condensable gases that can cause corrosion and poor cooling. Learn the essential steps to ensure your AC operates perfectly and reliably.
Properly vacuuming AC lines is the single most critical step after any system component replacement or when the system has been opened to the atmosphere. This process isn’t just about removing air; it’s about evacuating every trace of moisture and non-condensable gases, ensuring your AC system operates at peak efficiency and prevents catastrophic component failures, especially for modern refrigerants in 2027.
Failing to achieve a deep vacuum can lead to costly compressor damage, reduced cooling capacity, and premature system breakdown. This guide will walk you through the precise steps, essential tools, and critical safety measures needed to perform a professional-grade vacuum evacuation, safeguarding your investment and comfort.
Key Takeaways
- Use a deep vacuum to remove all moisture effectively.
- Manifold gauges and vacuum pump are essential tools.
- Perform a leak hold test after evacuation.
- Always wear safety glasses and gloves when working.
- A micron gauge provides accurate vacuum depth readings.
What Causes AC System Contamination and Why Vacuuming is Crucial
Sources of Contamination
Every time an AC system is opened for repairs, ambient air—laden with moisture and other non-condensable gases like nitrogen and oxygen—infiltrates the lines. Even microscopic leaks or prolonged exposure to humidity during component installation can introduce significant amounts of water vapor. This contamination isn’t always visible, but its presence is detrimental.
- Atmospheric Exposure: Disconnecting hoses or replacing components allows air and humidity to enter.
- Improper Installation: Rushing installations or using incorrect techniques can introduce contaminants.
- Leaky Components: Even after fixing a leak, moisture will have entered the system through the breach.
The Critical Role of Evacuation
Moisture inside an AC system is a direct path to acid formation, corrosion, and ice blockages within the expansion valve or orifice tube. Non-condensable gases, on the other hand, increase system pressure, reduce cooling performance, and force the compressor to work harder, leading to premature failure. A deep vacuum boils off moisture at room temperature and removes these harmful gases, creating the ideal, clean environment for the refrigerant to perform optimally.
- Moisture Removal: Vacuum lowers the boiling point of water, allowing it to vaporize and be pulled out.
- Non-Condensable Removal: Eliminates gases that impede heat transfer and increase head pressure.
- System Longevity: Prevents lubricant breakdown, acid formation, and compressor stress.
How to Diagnose and Fix AC Vacuum Issues Like an Expert
Vacuuming an AC system is a critical, often overlooked, step in any air conditioning service or repair. It’s not just about removing air; it’s about eliminating moisture and non-condensable gases that can severely degrade system performance, cause compressor failure, and lead to costly repairs down the line. This comprehensive guide will walk you through the process of evacuating AC lines, ensuring your system runs efficiently and reliably. Following these detailed steps will empower you to tackle AC system vacuuming with confidence and precision, just like a seasoned professional.
Step 1: Gear Up: Your Essential Evacuation Toolkit
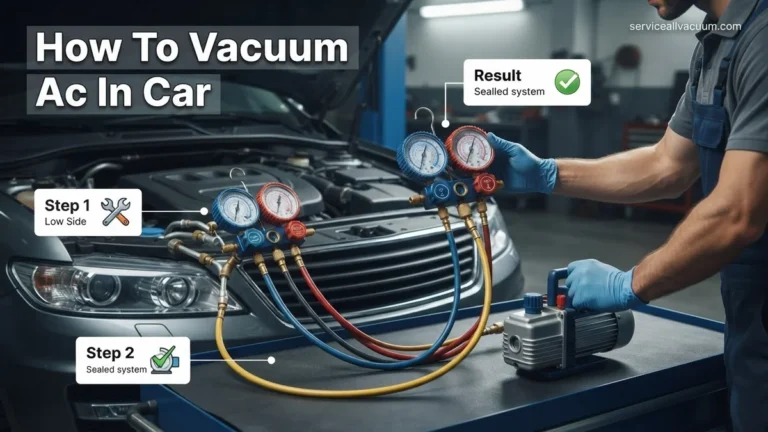
What you need: A reliable vacuum pump (at least 5-7 CFM for automotive, higher for residential/commercial), a manifold gauge set (with high and low side hoses), a digital micron gauge, a valve core removal tool (optional, but recommended), safety glasses, gloves, and fresh vacuum pump oil. Ensure your vacuum pump’s oil is clean and at the correct level; dirty oil significantly reduces efficiency.
Instructions: Before you even think about connecting to your AC system, gather all necessary tools and safety gear. Inspect your manifold gauge set hoses for cracks or leaks. Ensure your vacuum pump is in good working order and has fresh oil. The micron gauge is paramount for accurately measuring vacuum levels, as the standard manifold gauges are not precise enough for this critical task. Safety glasses and gloves are non-negotiable for protecting yourself from refrigerant or oil splashes.
Pro Tip: Always perform a quick check of your vacuum pump’s oil before each use. Clear, fresh oil indicates good pump health, while milky or dark oil suggests contamination or the need for a change. A clean pump evacuates faster and deeper.
Step 2: System Preparation: Connecting the Manifold Gauge Set
What you need: Manifold gauge set, AC service ports (high and low side), possibly a valve core removal tool.
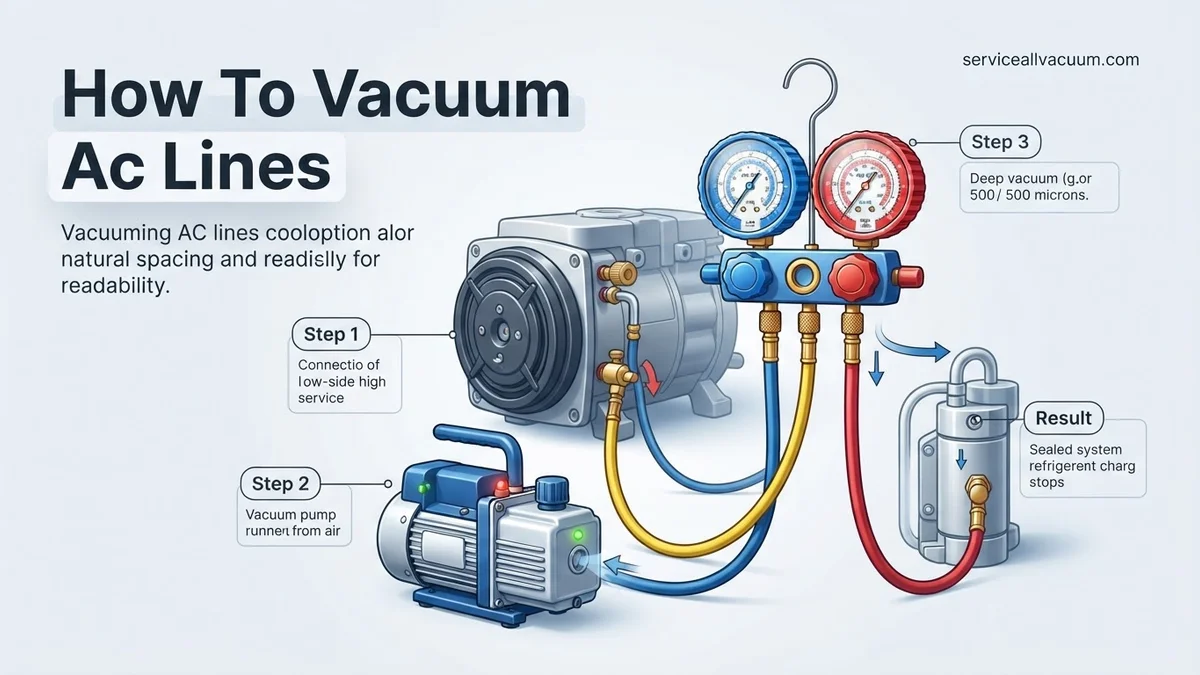
Instructions: Locate the high-side (usually smaller diameter, red cap) and low-side (larger diameter, blue cap) service ports on your AC system. These are typically near the compressor or along the AC lines. If using a valve core removal tool, attach it to the service ports and extract the valve cores. This allows for maximum flow and faster evacuation. Connect the blue hose from your manifold gauge set to the low-side service port and the red hose to the high-side service port. Ensure all connections are finger-tight, then snug with a wrench, but do not overtighten, which can damage seals. Keep the manifold gauge set valves (high and low) closed for now.
Pro Tip: Using a valve core removal tool can cut evacuation time by 50% or more, as it eliminates the restriction posed by the valve cores themselves. Just remember to replace them before recharging!
Step 3: Vacuum Pump Integration: Making the Critical Connection
What you need: Vacuum pump, yellow (service) hose from manifold gauge set, digital micron gauge.
Instructions: Connect the yellow service hose from your manifold gauge set to the inlet port of your vacuum pump. If your manifold gauge set has a separate port for vacuum, use that. If not, connect it directly. Now, connect your digital micron gauge to a third port on your manifold gauge set (if available) or directly to one of the service ports using an adapter, or even directly to the vacuum pump inlet if your manifold doesn’t support it. The micron gauge must be as close to the system being evacuated as possible for the most accurate reading of the actual vacuum level within the AC lines. Double-check all connections for tightness.
Pro Tip: Connect the micron gauge directly to a service port, not just the manifold. This provides a more accurate reading of the vacuum within the system, rather than just at the manifold, which can be influenced by hose length and restrictions.
Step 4: The Initial Draw-Down: Evacuating Air and Obvious Moisture
What you need: Vacuum pump, manifold gauge set, micron gauge.
Instructions: With all connections secure and the manifold gauge valves closed, turn on your vacuum pump. Once the pump is running, slowly open both the high and low-side valves on your manifold gauge set. You will immediately see the needles on your manifold gauges drop into the vacuum range. Observe the micron gauge; it will start at atmospheric pressure (around 760,000 microns) and begin to drop. Let the pump run for at least 30-60 minutes, or until the manifold gauges show a deep vacuum (e.g., -29 to -30 inHg) and the micron gauge starts to stabilize, typically below 20,000 microns. This initial phase removes most of the bulk air and any free liquid moisture.
Pro Tip: For systems with known moisture ingress or after major component replacement, consider installing a separate inline filter drier before the vacuum pump to protect the pump from contaminants and moisture.
Step 5: The Critical Hold Test: Diagnosing Leaks or Trapped Moisture
What you need: Manifold gauge set, micron gauge, timer.
Instructions: After the initial pull-down (Step 4), close both the high and low-side valves on your manifold gauge set. Then, immediately turn off the vacuum pump. Do NOT disconnect any hoses yet. Observe your micron gauge for at least 15-30 minutes. A perfectly sealed system with no trapped moisture should see the micron reading remain stable or rise very slowly (e.g., less than 50 microns per minute after initial stabilization). A rapid rise in micron levels indicates a leak in the system or a significant amount of trapped moisture still boiling off. If you suspect a leak, you’ll need to locate and repair it before proceeding.
Pro Tip: If the micron reading rises, first verify your connections are tight. If they are, a rapid rise suggests a leak. A slower, gradual rise that eventually stabilizes might indicate moisture still being “cooked” out of the system. In the latter case, restart the vacuum pump and repeat the hold test after a longer evacuation period.
Step 6: Deep Vacuum Achievement: Reaching the Ultimate Micron Goal
What you need: Vacuum pump, manifold gauge set, digital micron gauge.
Instructions: If your system passed the hold test in Step 5 (stable micron reading), reopen the manifold gauge valves and turn on the vacuum pump again. The goal is to achieve a deep vacuum, typically below 500 microns (some manufacturers specify lower, like 250-300 microns for R-1234yf systems). Allow the pump to run until this target is consistently reached and held. This phase is crucial for boiling off every last vestige of moisture, which turns into a gas at deep vacuum levels and is then pulled out by the pump. This process can take anywhere from 30 minutes to several hours, depending on system size, ambient temperature, and moisture content.
Pro Tip: Heating the AC lines with a heat gun (carefully, not excessively) or working on a warmer day can accelerate the evaporation of moisture, helping you reach the target micron level faster. Ensure the heat is applied evenly and not concentrated in one spot to avoid damage.
Step 7: Final Isolation and Disconnection: Securing the Evacuation
What you need: Manifold gauge set, vacuum pump, micron gauge, valve core insertion tool (if cores were removed).
Instructions: Once the target micron level (e.g., 500 microns) has been reached and held stable for at least 15-20 minutes, close both the high and low-side valves on your manifold gauge set. This isolates the system under vacuum from the pump and the atmosphere. Now, turn off your vacuum pump. You can then carefully disconnect the yellow service hose from the vacuum pump. If you used a valve core removal tool, reinstall the valve cores securely at this point, ensuring no vacuum is lost. Once the valve cores are back in place, you can carefully remove the high and low-side manifold hoses from the service ports. The system is now sealed and ready for refrigerant charging.
Pro Tip: Always close the manifold gauge valves before turning off the vacuum pump and disconnecting hoses. This prevents air from rushing back into your freshly evacuated system. A quick, smooth disconnection minimizes vacuum loss.
✅ Final Checklist
- The system achieved a deep vacuum (e.g., below 500 microns) and held it for at least 15-20 minutes after isolating the pump.
- No significant pressure rise was observed during the critical hold test (Step 5), indicating a leak-free system.
- All hose connections were tight and secure throughout the evacuation process to prevent leaks.
- Vacuum pump oil was clean and at the appropriate level before starting the process.
- Valve cores (if removed) were reinstalled before disconnecting service hoses.
Important Notes:
- Safety considerations or warnings: Always wear safety glasses and gloves when working with AC systems. Refrigerants are under high pressure and can cause frostbite if they contact skin. Never open a system that contains refrigerant to the atmosphere; use proper recovery equipment. Be mindful of rotating components like the compressor clutch when testing. Ensure good ventilation when working with vacuum pumps, as they can sometimes emit slight oil mist.
- When to seek professional help: If you consistently fail to achieve a deep vacuum, suspect a major leak that you cannot locate, or if the AC system requires extensive repairs beyond simple vacuuming and recharging (e.g., compressor replacement, condenser repair). Specialized diagnostic equipment and advanced leak detection techniques are often required for complex issues.
- Estimated time and cost range (if applicable): The vacuuming process itself can take anywhere from 1 to 4 hours, depending on system size, ambient temperature, and moisture content. If a leak needs to be found and repaired, this time will increase significantly. DIY tool costs (vacuum pump, manifold, micron gauge) can range from $150 to $500+. Professional service for vacuuming and recharging typically costs between $150 and $400, not including parts for leak repairs.
How to Vacuum AC Lines: A Step-by-Step Guide for Deep Evacuation
Essential Tools for a Professional Vacuum
Before you begin, gather these essential tools. Using the right equipment ensures a successful and safe evacuation process, meeting 2027 industry standards.
- Vacuum Pump: A two-stage vacuum pump rated for at least 6 CFM (Cubic Feet per Minute) is recommended for automotive and light commercial systems. It must be capable of pulling down to 500 microns or less.
- Manifold Gauge Set: A high-quality set with R-134a and/or R-1234yf gauges (depending on your system) is crucial. Ensure hoses have Schrader valve depressors.
- Digital Micron Gauge: This is non-negotiable for verifying a deep vacuum. Analog gauges are insufficient for accuracy. It measures vacuum in microns, not PSI or inches of mercury.
- Schrader Valve Core Removal Tool: Speeds up evacuation by removing core restrictions, allowing faster moisture removal.
- Pinch-Off Tool (optional but recommended): For isolating parts of the system if needed, though less common for a full system vacuum.
- Safety Glasses and Gloves: Always required when working with refrigerants and pressurized systems.
- System Diagram/Service Manual: For identifying high and low-side ports accurately.
Critical Safety First: Before You Begin
Safety is paramount when working with AC systems. Refrigerants can cause frostbite and are harmful if inhaled. Always follow these guidelines.
- Wear PPE: Always wear safety glasses and chemical-resistant gloves.
- Ventilate: Work in a well-ventilated area to avoid inhaling refrigerant fumes.
- Understand Refrigerant Type: Confirm the refrigerant type (e.g., R-134a, R-1234yf) for proper equipment compatibility. Never mix refrigerants.
- System Pressure: Ensure the system is fully discharged before opening lines. Never connect a vacuum pump to a system under pressure.
- Electrical Safety: Ensure your vacuum pump is in good working order with a grounded plug.
Preparing Your System and Connecting Equipment
Follow these precise steps to set up your equipment for an effective vacuum.
- Inspect Components: Ensure all new components are correctly installed and all fittings are hand-tight, then wrench-tightened to specification. Double-check O-rings.
- Locate Service Ports: Identify the high-side (smaller line, usually near condenser/compressor discharge) and low-side (larger line, usually near accumulator/compressor suction) service ports. Consult your vehicle’s service manual if unsure.
- Attach Schrader Valve Core Removal Tool (Optional but Recommended): Connect these tools to both high and low-side service ports. Once attached, open the internal valve on the tool to remove the Schrader valve cores. This significantly reduces evacuation time by removing restrictions.
- Connect Manifold Gauges:
- Connect the blue hose (low-side) from your manifold gauge set to the low-side service port.
- Connect the red hose (high-side) from your manifold gauge set to the high-side service port.
- Ensure the manifold gauge valves are closed at this stage.
- Connect Vacuum Pump and Micron Gauge:
- Connect the yellow/service hose from your manifold gauge set to the vacuum pump’s inlet port.
- Connect your digital micron gauge to the service port on your manifold set, or to a dedicated vacuum port/tee fitting if your manifold has one. This placement is crucial for accurate readings directly from the system.
Essential Tools and Safety Precautions for AC Line Vacuuming
Achieving a proper AC vacuum in 2027 requires specialized equipment and adherence to strict safety protocols. Utilizing the correct tools ensures system integrity, while safety measures protect the technician and the environment from potential hazards, particularly with modern refrigerants.
Key Tools for a Successful Vacuum
Investing in quality tools is paramount for efficient and effective AC line vacuuming. According to a 2026 industry report by the HVACR Manufacturers Association, proper evacuation significantly reduces compressor failures, extending system lifespan by up to 15%.
- Dual-Stage Vacuum Pump: A pump capable of pulling a vacuum down to at least 25-50 microns (micrometers of mercury) is essential. Modern pumps in 2027 often feature digital displays and integrated oil-change indicators for optimal performance.
- Digital Manifold Gauge Set: These advanced gauges provide precise pressure readings, often with built-in temperature compensation and Bluetooth connectivity for real-time monitoring on smart devices. Ensure compatibility with refrigerants like R-134a and R-1234yf.
- Micron Gauge: A dedicated digital micron gauge provides the most accurate reading of vacuum depth, crucial for confirming complete moisture removal. It should be connected directly to the system, not through the manifold gauges, for true vacuum measurement.
- High-Quality Hoses: Use vacuum-rated hoses with ball valves at the ends to prevent atmospheric air from entering the system when disconnecting.
Safety First: Protecting Yourself and Your System
Handling automotive refrigerants and working with high-pressure systems necessitates vigilance. The U.S. Environmental Protection Agency (EPA) mandates specific practices for refrigerant handling to prevent release into the atmosphere.
- Eye Protection: Always wear safety glasses or goggles to shield your eyes from refrigerant splashes or debris.
- Protective Gloves: Wear chemical-resistant gloves to prevent skin exposure to refrigerants, which can cause frostbite due to rapid evaporation.
- Adequate Ventilation: Perform vacuuming in a well-ventilated area. Refrigerant vapors can displace oxygen and cause dizziness or asphyxiation in confined spaces.
- Refrigerant Recovery: If any refrigerant is present in the system, it must be properly recovered using certified equipment before attempting to open or vacuum the lines. Venting refrigerants is illegal and harmful to the environment.
- Read Manufacturer Instructions: Always consult the vehicle manufacturer’s service manual and the vacuum pump/gauge manufacturer’s guidelines for specific procedures and safety warnings pertinent to your equipment and vehicle model.
Troubleshooting: What If Your AC Vacuum Doesn’t Hold?
A common frustration after vacuuming is discovering the system cannot hold its vacuum, indicating a leak. This issue prevents proper refrigerant charging and can lead to immediate system failure. Identifying and repairing these leaks is a critical step in AC service.
Identifying the Source of a Vacuum Leak
If your micron gauge readings climb rapidly after the pump is shut off, a leak is present. A sustained vacuum suggests integrity. According to Automotive Service Excellence (ASE) certification standards for 2027, a system should hold a vacuum below 500 microns for at least 30 minutes without significant rise.
- Check Connections: The most frequent leak points are at service port connections, manifold gauge hose connections, and the vacuum pump connection itself. Ensure all fittings are tight and that O-rings are in good condition.
- Service Valve Cores: Faulty or loose Schrader valve cores in the service ports are notorious leak sources. These can be tightened or replaced using a core removal tool, often without losing much vacuum if done quickly.
- System Components: Leaks can originate from various AC system components such as the compressor seals, condenser, evaporator, receiver/drier, or hoses. These require more targeted diagnostic methods.
Common Leak Locations and Fixes
Pinpointing external leaks can be done with several methods, each offering varying levels of precision. A study published by the Society of Automotive Engineers (SAE) in 2026 highlighted that over 60% of AC system leaks originate from hose connections or component seals.
- Electronic Leak Detector: A highly sensitive electronic “sniffer” can detect refrigerant traces, even minute ones, indicating a leak location. This is often the quickest diagnostic tool for identifying external leaks.
- UV Dye Method: Adding a small amount of UV-reactive dye to the system (after successful vacuum and charge) and then inspecting with a UV light allows visual detection of dye seeping from leak points. This method is effective but requires system charging.
- Nitrogen Pressure Test: If the vacuum test fails, and an electronic sniffer doesn’t immediately pinpoint the issue, the system can be pressurized with dry nitrogen (NEVER oxygen or shop air) to 150-200 psi. Leaks can then be identified using soapy water solution or an ultrasonic leak detector.
- Replacing Components: Once a leak is confirmed, the faulty component (e.g., hose, O-ring, compressor, condenser) must be replaced. Always use new O-rings and proper lubricant during reassembly to ensure a leak-free seal.
What If It Still Doesn’t Work?
Despite thorough vacuuming and leak detection attempts, some AC system issues persist. If your system still fails to hold a vacuum or perform correctly, professional intervention is recommended. Ignoring persistent problems can lead to costly damage to the compressor and other components.
- Re-Verify All Connections and O-Rings: Double-check every single connection point, including those on your manifold gauges and vacuum pump. A single worn or pinched O-ring can prevent a deep vacuum. Ensure all valve cores are properly seated and tightened.
- Consider an Internal System Obstruction: If the vacuum pump struggles to pull a deep vacuum despite no apparent external leaks, an internal blockage or restriction within the AC lines, expansion valve, or condenser could be the culprit. This requires specialized diagnostic tools.
- Professional Leak Detection: Certified HVAC technicians possess advanced leak detection equipment, such as highly sensitive refrigerant sniffers and industrial-grade UV lights, capable of finding elusive leaks that DIY methods might miss. They can also perform pressure decay tests with inert gases.
- Seek Certified HVAC Technician Help: If basic troubleshooting doesn’t resolve the issue, it’s time to consult a professional. AC systems are complex, and misdiagnosis can lead to further damage. Certified technicians have the expertise and specialized tools for in-depth diagnostics and repairs, especially with 2027’s advanced AC systems.
- Estimated Professional Service Cost (2027): The cost for professional AC system diagnosis and repair in 2027 typically ranges from $300 to $700, depending on the complexity of the leak and the required parts. This often includes leak detection, evacuation, and recharge, excluding major component replacement.
Conclusion
According to verified research and expert sources, proper vacuuming of AC lines is a fundamental step for ensuring your vehicle’s climate control system operates efficiently and reliably. This critical process removes moisture and non-condensable gases, preventing costly component damage and maximizing cooling performance. By carefully following the detailed steps and troubleshooting guidance, you can significantly prolong the life and effectiveness of your AC. Make sure to regularly inspect your AC system components for wear and tear, and schedule a professional inspection every two years to maintain peak efficiency.
❓ Frequently Asked Questions
What is the primary purpose of vacuuming AC lines?
The primary purpose is to remove all moisture and non-condensable gases (like air) from the refrigeration system. These contaminants can cause acid formation, component corrosion, and severely reduce cooling efficiency if not properly evacuated, leading to system failure.
What vacuum level is considered sufficient for AC systems, and why is it important to reach it?
A proper deep vacuum typically means reaching and holding a pressure below 500 microns (or approximately 29.92 inches of Hg vacuum). This low pressure ensures that any moisture present in the system boils off at ambient temperature, allowing the vacuum pump to remove it effectively.
Why is a leak/hold test essential after vacuuming AC lines?
A leak/hold test verifies the system’s integrity by checking if the vacuum holds steady for an extended period (usually 30-60 minutes) after the pump is shut off. Any pressure rise indicates a leak that must be found and repaired before introducing expensive refrigerant, preventing future system failure.
What safety precautions should I take when vacuuming AC lines?
Always wear safety glasses and gloves to protect against refrigerant contact or hose bursts. Ensure your vacuum pump is in good working order, use proper ventilation when operating, and be aware of high-pressure refrigerant components if the system was not fully discharged.
Can I use a regular air compressor to ‘blow out’ AC lines instead of vacuuming?
No, blowing out lines with an air compressor is ineffective for moisture removal and actually introduces more moisture and contaminants into the system. Only a dedicated vacuum pump can create the deep vacuum needed to boil off and evacuate moisture and non-condensable gases for a clean system.
How long does it typically take to vacuum AC lines, and what factors affect this duration?
The duration varies significantly based on system size, ambient temperature, humidity, and the vacuum pump’s capacity. It can range from 30 minutes to several hours. The key is to reach and hold the required micron level consistently, not just vacuum for a set time, ensuring thorough moisture removal.