How to Check for a Vacuum Leak Step-by-Step 2027 Guide
Diagnosing a vacuum leak in your vehicle is crucial for optimal engine performance and fuel efficiency. This guide provides clear, step-by-step instructions for multiple DIY methods to effectively locate and confirm vacuum leaks. Understand the symptoms and common locations to efficiently troubleshoot your engine.
Locating a vacuum leak in your vehicle is a critical step for restoring engine performance and preventing further issues. If your engine is sputtering, idling roughly, or triggering diagnostic codes, a vacuum leak is a prime suspect. This guide walks you through the initial stages of understanding and pinpointing these elusive leaks, equipping you with the knowledge needed for effective DIY diagnosis on your 2027 model or older.
Successfully identifying a vacuum leak can save you significant diagnostic fees and potentially avoid more expensive repairs down the line. It ensures your engine receives the correct air-fuel mixture, crucial for optimal operation, emissions compliance, and fuel efficiency. Knowing where to look and what symptoms to watch for dramatically streamlines the troubleshooting process.
Key Takeaways
- Identify key symptoms like rough idle.
- Perform a safe spray test using carb cleaner.
- Use a DIY smoke machine for hidden leaks.
- Listen for distinct hissing or whistling sounds.
- Inspect common leak areas thoroughly.
Identifying Vacuum Leak Symptoms
Before you dive under the hood, understanding the common indicators of a vacuum leak will confirm you’re on the right diagnostic path. These symptoms arise because unmetered air enters the engine, disrupting the precise air-fuel ratio the Engine Control Unit (ECU) expects. By 2027, vehicle ECUs are incredibly sensitive, making even small leaks noticeable.
Performance Degradation You’ll Notice
- Rough or Unstable Idle: Your engine might feel like it’s shaking or struggling to maintain a steady RPM, especially when stopped. This is often the most noticeable symptom, with RPMs fluctuating erratically between 500 and 1000.
- Engine Stalling: Particularly common when decelerating or coming to a stop, the engine may abruptly die as the vacuum system struggles to maintain proper operation at lower RPMs.
- Hesitation or Poor Acceleration: When you press the accelerator, the vehicle might feel sluggish, lack power, or hesitate before responding. This is due to the lean air-fuel mixture making combustion less efficient.
- Reduced Fuel Economy: Your engine’s computer will try to compensate for the extra air by adding more fuel, leading to a noticeable drop in your miles per gallon (MPG). Modern fuel economy gauges will reflect this change.
Warning Lights and Other Indicators
- Check Engine Light (CEL): A vacuum leak almost invariably triggers the CEL. You’ll likely see codes related to a “lean condition,” such as P0171 (System Too Lean, Bank 1) or P0174 (System Too Lean, Bank 2). Misfire codes (P030x) can also appear if the lean condition is severe enough to cause combustion issues in specific cylinders.
- Audible Hissing or Whistling: With the engine running, especially at idle, listen carefully under the hood. A distinct hissing, whistling, or sucking sound is often the direct audible signature of air being drawn through a leak point. This sound may change in pitch or volume with engine RPM fluctuations.
- Hard Starts: While less common than other symptoms, a significant vacuum leak can sometimes make the engine harder to start, as the initial air-fuel mixture is too lean for effective ignition.
If you experience several of these symptoms, a vacuum leak is a highly probable cause, warranting further investigation using the detection methods we’ll discuss.
How to Diagnose and Fix a Vacuum Leak Like an Expert
A vacuum leak can be a sneaky culprit behind a host of engine performance issues, ranging from a rough idle and poor fuel economy to an illuminated Check Engine Light (CEL) and failed emissions tests. This comprehensive guide will walk you through a series of systematic checks, from simple visual inspections to more advanced diagnostic techniques, empowering you to pinpoint and resolve vacuum leaks with confidence. Following these steps carefully will not only save you time and money but also restore your vehicle’s performance and efficiency.
Step 1: Recognize the Symptoms and Gather Your Arsenal
What you need: Safety glasses, work gloves, basic hand tools (screwdriver set, pliers), a bright flashlight, and a rag.
Instructions: Before you even pop the hood, pay attention to your vehicle’s behavior. Common symptoms of a vacuum leak include a rough, high, or fluctuating idle, whistling or hissing sounds from the engine bay (especially at idle), reduced engine power, poor acceleration, and increased fuel consumption. You might also encounter specific trouble codes like P0171 or P0174 (lean condition). Begin by putting on your safety glasses and gloves, and ensure your engine is cool to the touch before proceeding.
Pro Tip: Don’t dismiss subtle symptoms. A small leak can grow, and addressing it early can prevent further complications and more expensive repairs down the line. Listen for sounds that weren’t there before, especially right after startup.
Step 2: The Initial Visual Scrutiny
What you need: Flashlight, small mirror (optional), a diagram of your engine’s vacuum lines (often found in service manuals or online).
Instructions: With the engine off and cool, use your flashlight to meticulously inspect all accessible vacuum hoses, lines, and caps. Look for obvious signs of damage: cracks, brittle sections, loose connections, or hoses that have completely disconnected. Pay close attention to areas around the intake manifold, throttle body, PCV valve, brake booster, and any emissions control components. Gently wiggle each hose to confirm it’s securely attached and not just resting in place. Follow the routing of each hose as best as you can to check for kinks or chafing.
Pro Tip: Vacuum lines often become brittle and crack where they connect to a fitting. Pay extra attention to the ends of the hoses and any vacuum tees or elbows, as these are common failure points due to heat and age.
Step 3: The Auditory Hunt: Listening for Leaks
What you need: Mechanic’s stethoscope, or a 3-foot section of rubber or plastic hose (about 1/4-inch diameter).
Instructions: Start the engine and let it warm up to normal operating temperature. With the engine idling, carefully use your stethoscope (or one end of the hose to your ear, the other end directed) to listen around the intake manifold, vacuum lines, fuel injectors, and throttle body. Move the listening end slowly across these areas. You are listening for any distinct hissing, whistling, or sucking sounds that indicate air being drawn into the system. These sounds will often become louder as you get closer to the leak source. Be extremely cautious of moving engine parts like belts and fans.
Pro Tip: If you hear a change in engine RPM as you move the listening device, it might indicate you are very close to a significant leak. Sometimes, simply applying slight pressure to a suspect hose can temporarily seal a small leak and change the engine’s sound.
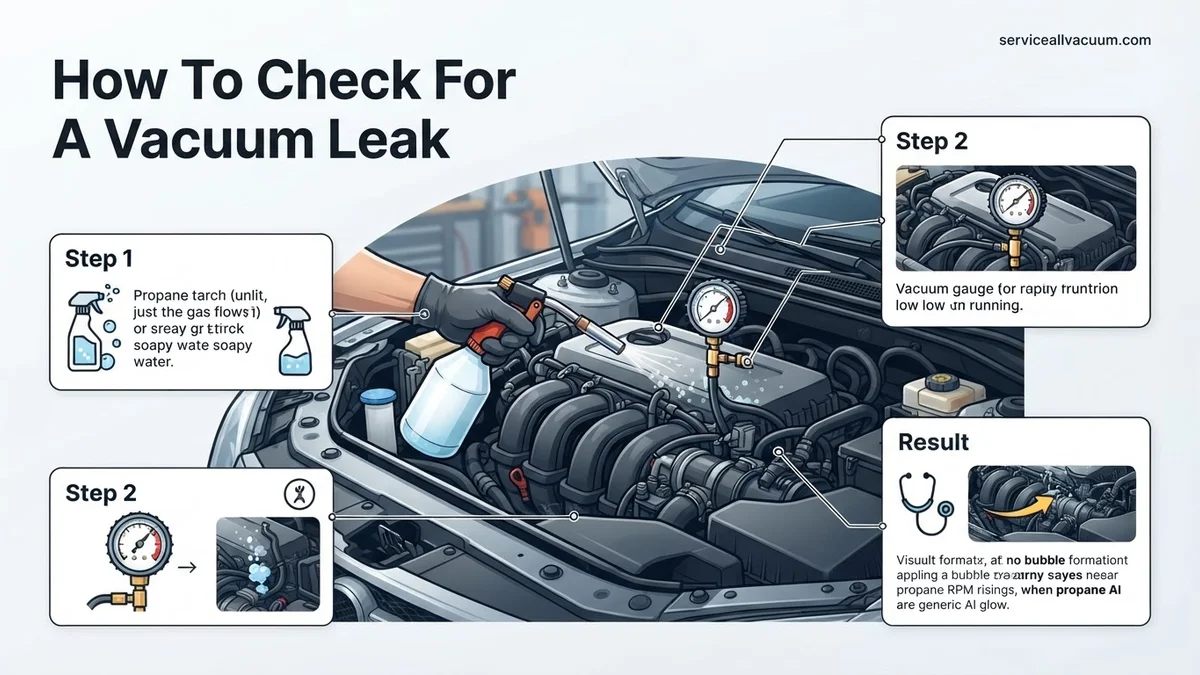
Step 4: The Flammable Spray Test (Carburetor/Brake Cleaner or Propane)
What you need: Can of carburetor cleaner (non-chlorinated preferred) or non-flammable brake cleaner, or an unlit propane torch with a hose attachment, and a fire extinguisher (for safety).
Instructions: With the engine idling, spray short bursts of cleaner around suspected vacuum leak areas. These include vacuum hoses, intake manifold gaskets, throttle body gaskets, and injector O-rings. If the engine RPM temporarily increases or smooths out, you’ve likely found a leak, as the engine is “sucking in” the flammable cleaner. For propane, direct the gas (without igniting it!) towards suspect areas; a change in RPM indicates a leak. Always have a fire extinguisher nearby and ensure good ventilation. Avoid spraying directly into the air intake.
Pro Tip: Apply sprays in very short bursts (1-2 seconds) and wait a few seconds for the engine to react before spraying again. This prevents overwhelming the engine with fuel, which could mask the RPM change or cause it to stall. Start with less volatile brake cleaner if you are uncomfortable with carb cleaner.
Step 5: The Diagnostic Smoke Test (Advanced but Definitive)
What you need: Automotive smoke machine (can be rented or purchased), adapter cones, shop air (if the machine requires it), appropriate safety gear.
Instructions: This is arguably the most effective method for finding elusive vacuum leaks. With the engine off, locate a suitable vacuum port to connect the smoke machine (e.g., a main vacuum line off the intake manifold or the EVAP purge line). Seal off the air intake system (throttle body opening) with a shop rag or adapter to prevent smoke from escaping there. Introduce smoke into the vacuum system. Carefully observe the engine bay for any wisps of smoke escaping from hoses, gaskets, or cracked components. This visual confirmation is precise and often reveals leaks that other methods miss.
Pro Tip: For a more effective test, ensure the entire intake system is sealed as best as possible. You might need to temporarily plug other vacuum ports to build sufficient pressure with the smoke. Patience is key; it might take a few minutes for the smoke to fill the system and escape through small leaks.
Step 6: Manifold Vacuum Gauge Analysis
What you need: Vacuum gauge with appropriate adapters, service manual for your vehicle (to know specifications).
Instructions: Connect the vacuum gauge to a direct manifold vacuum port (typically a large vacuum line or a dedicated port). Start the engine and let it idle. Observe the gauge reading. A healthy engine should show a steady reading, typically between 18-22 inches of mercury (inHg) at sea level. A vacuum leak will usually manifest as a lower than normal reading, often accompanied by a fluctuating needle. For example, a steady low reading might indicate a large, constant leak, while a rapidly fluctuating needle could point to intermittent issues or multiple small leaks.
Pro Tip: Briefly rev the engine to about 2,000 RPM and then release the throttle quickly. A healthy engine’s vacuum gauge should drop to near zero and then quickly recover to a reading higher than idle, before settling back to the normal idle vacuum. A slow recovery or failure to return to normal indicates a potential leak or other engine issue.
Step 7: Scrutinizing the PCV System and Brake Booster
What you need: Pliers, screwdriver, replacement PCV valve and hoses (if suspected). If testing brake booster: no additional tools.
Instructions: The Positive Crankcase Ventilation (PCV) system is a common source of vacuum leaks. Locate your PCV valve, often found in a valve cover. Remove it and shake it; if it doesn’t rattle, it’s likely clogged and needs replacement. Inspect its hose for cracks or splits. For the brake booster, disconnect the large vacuum hose going from the intake manifold to the booster. Plug the manifold port. If the idle smooths out, the booster or its check valve is likely leaking. You can also test the booster by pumping the brake pedal several times with the engine off, then holding the pedal down while starting the engine; the pedal should drop slightly if the booster is working correctly.
Pro Tip: A faulty PCV valve can cause significant vacuum issues and is relatively inexpensive to replace. Many DIYers overlook this component. When checking the brake booster, listen for a distinct hissing sound from the pedal area inside the cabin if the diaphragm is compromised.
Step 8: Confirming the Fix and Clearing Codes
What you need: Basic hand tools for reassembly, OBD-II scanner (if a Check Engine Light was present).
Instructions: Once you’ve identified and replaced the faulty vacuum component(s), reassemble everything carefully, ensuring all connections are tight and secure. Start the engine and listen for the absence of hissing sounds and observe for a smooth, stable idle. If you had a Check Engine Light, use an OBD-II scanner to clear any stored diagnostic trouble codes (DTCs). Take the vehicle for a test drive under various conditions (city, highway) to confirm the symptoms are gone and the CEL does not reappear. Monitoring fuel trims with a scanner during the drive can provide additional confirmation of a successful repair.
Pro Tip: After replacing parts, let the engine idle for 5-10 minutes to allow the computer (ECU) to re-learn its idle parameters. If possible, a second smoke test or flammable spray test after the repair can provide ultimate peace of mind that all leaks have been sealed.
✅ Final Checklist
- Engine idles smoothly and consistently, without rough surging or stalling.
- No abnormal hissing, whistling, or sucking sounds are audible from the engine bay.
- The Check Engine Light (CEL) is off and remains off after driving.
- Vehicle performance (acceleration, fuel economy) has returned to normal.
- All vacuum lines, caps, and connections are securely attached and free from damage.
Important Notes:
- Safety Considerations: Always ensure the engine is cool before handling components, wear appropriate personal protective equipment (safety glasses, gloves), be aware of hot engine parts and moving belts/fans, and have a fire extinguisher on hand when using flammable sprays. Work in a well-ventilated area.
- When to Seek Professional Help: If you are uncomfortable performing any of these tests, if you cannot locate the leak after diligent searching, if the leak is in a hard-to-reach area requiring specialized tools, or if symptoms persist after your repair attempts, it’s best to consult a qualified mechanic.
- Estimated Time and Cost Range: Diagnosing a vacuum leak can take anywhere from 1 to 4 hours for a DIYer, depending on the leak’s severity and location. The cost can range from $0 (if it’s just a loose hose) to $150 for common replacement parts (e.g., a few feet of vacuum hose, PCV valve, intake manifold gasket). Professional diagnosis and repair typically cost between $100 and $500+, depending on shop rates and the specific parts/labor involved.
Common Locations for Vacuum Leaks
Knowing where vacuum leaks typically occur is half the battle. Automotive vacuum systems are a network of hoses, gaskets, and components that rely on the engine’s intake vacuum to operate various systems. These components are exposed to heat, vibration, and age, making them prone to failure. In 2027, while materials are improved, wear and tear remain inevitable.
Common Hose and Gasket Culprits
- Vacuum Hoses: These are the most frequent culprits. Inspect all rubber or plastic vacuum lines for cracks, splits, brittleness, or complete disconnection. Pay close attention to elbows and T-connectors, as these areas are highly susceptible to dry rot and cracking over time.
- Intake Manifold Gaskets: These gaskets seal the intake manifold to the cylinder head. Over years of heat cycling, they can dry out, crack, or become compressed, allowing unmetered air to enter the engine. This is a very common source of lean codes.
- PCV (Positive Crankcase Ventilation) Valve and Hoses: The PCV system manages crankcase gases. The valve itself can fail (stick open or closed), or its associated hoses can crack or become loose, creating a significant vacuum leak. Inspect the rubber grommet where the valve seats into the valve cover or intake.
- Throttle Body Gasket: This gasket seals the throttle body to the intake manifold. It can be damaged during service or simply deteriorate from heat and age, allowing air to bypass the throttle plate.
- Brake Booster Vacuum Line and Diaphragm: The brake booster uses engine vacuum to assist braking. Check the large vacuum hose connecting the booster to the intake manifold for cracks. The booster’s internal diaphragm can also fail, causing a very large vacuum leak that often results in a hard brake pedal and rough idle.
Accessory System Connections
- EGR (Exhaust Gas Recirculation) Valve: Some EGR valves are vacuum-operated. A leak in the vacuum lines leading to the EGR valve or a faulty diaphragm within the valve itself can cause issues. A stuck-open EGR valve can also mimic a vacuum leak.
- Vacuum Reservoirs: Many vehicles have small plastic or metal vacuum reservoirs that store vacuum for various systems. These can develop cracks over time, especially at their connections.
- HVAC Vacuum Lines and Actuators: In older or certain modern vehicles, heating, ventilation, and air conditioning (HVAC) blend doors are vacuum-controlled. A leak in these lines (often running into the cabin) can manifest as incorrect vent operation, but can also contribute to engine vacuum issues.
- Cruise Control Actuator: If your vehicle uses a vacuum-operated cruise control system, leaks in its diaphragm or associated lines can draw in unmetered air.
A thorough visual inspection of these areas is your first step. Look for obvious signs of damage, disconnected lines, or perished rubber. Often, the culprit is visible once you know where to focus your attention.
Step-by-Step Methods to Check for a Vacuum Leak
Locating a vacuum leak requires systematic investigation. While some methods require specialized tools, others can be performed with common items. For optimal accuracy and safety, always ensure your vehicle is in a well-ventilated area and the engine is cool before beginning. Modern vehicles, especially those from 2027 and newer, often integrate more sensitive sensors, making precise diagnostics crucial.
Smoke Machine Method (Recommended for Accuracy)
The smoke machine is the most reliable method for detecting vacuum leaks, favored by professional technicians. These machines introduce a non-toxic, visible smoke into the intake system, revealing cracks or breaches.
- Access Vacuum System: Locate a suitable vacuum line or intake manifold port. This is often the brake booster vacuum line or a PCV hose. Ensure a secure connection for the smoke machine’s nozzle.
- Introduce Smoke: Activate the smoke machine and allow it to pressurize the intake system with smoke. According to a 2026 Automotive Service Excellence (ASE) report, proper pressurization is key for comprehensive leak detection.
- Observe for Leaks: Carefully inspect all vacuum lines, hoses, gaskets, and intake manifold seams for any wisps of smoke escaping. Pay close attention to hard-to-reach areas and the base of injectors. A modern smoke machine with UV dye can aid visibility in complex engine bays.
- Repair and Re-test: Once a leak is identified, replace the faulty component. Re-test the system with the smoke machine to confirm the repair is successful and no other leaks are present.
Unlit Propane Torch or Starting Fluid Method (Caution Advised)
This method utilizes a combustible gas to detect changes in engine idle speed, indicating a leak. This technique requires extreme caution due to flammability risks.
- Prepare Engine: Start the engine and allow it to reach normal operating temperature. Ensure the vehicle is in Park/Neutral with the parking brake engaged.
- Spray or Wave Gas: With the engine idling, slowly wave an unlit propane torch (without igniting) or briefly spray small bursts of starting fluid (ether-based) around suspected vacuum leak areas.
- Monitor Engine RPM: Listen for an increase in engine RPM. If the engine’s speed momentarily increases, it indicates that the engine is drawing in the gas through a vacuum leak, causing a richer mixture and temporary speed bump.
- Isolate Leak: Pinpoint the exact location by narrowing down the area where the RPM change occurs. Use very short bursts or precise movements to avoid affecting too broad an area.
What If You Can’t Locate the Vacuum Leak?
Even with systematic methods, some vacuum leaks can be elusive. If you’ve thoroughly followed the steps above and still experience symptoms, it’s time to expand your diagnostic approach. Modern vehicle systems can often present symptoms that mimic vacuum leaks but stem from other sources.
Deep Dive into Component-Specific Checks
Not all vacuum leaks are from easily visible hoses. Complex components also rely on vacuum.
- Brake Booster Inspection: Disconnect the vacuum hose from the brake booster and plug it. If symptoms disappear or change, the booster itself may be leaking internally. Specialized brake booster testers can confirm this.
- PCV System Scrutiny: The Positive Crankcase Ventilation (PCV) valve and its hoses are frequent failure points. Check for cracks, clogs, or a faulty valve (a rattling sound when shaken usually indicates it’s functioning, but a vacuum test is more definitive).
- EGR Valve & Gasket: An Exhaust Gas Recirculation (EGR) valve that is stuck open or has a leaking gasket can cause vacuum-like symptoms. Use a vacuum pump to test the diaphragm’s integrity.
- Manifold Gasket Integrity: While smoke testing often reveals these, heat cycling can cause intermittent leaks. Consider a specialized leak detection spray designed to react to pressure drops.
Advanced Diagnostic Scan Tool Analysis
For 2027 vehicles, advanced OBD-II scan tools are indispensable for pinpointing issues not visible to the naked eye.
- Monitor Fuel Trims: Connect a professional-grade scan tool and observe Short-Term (STFT) and Long-Term Fuel Trim (LTFT) data at idle and at various RPMs. Persistently high positive fuel trims (e.g., +15% or more) often indicate an unmetered air intake (vacuum leak) as the engine tries to compensate for a lean condition.
- Oxygen Sensor Readings: A rapid fluctuation or consistent lean reading from the O2 sensors can corroborate fuel trim data, especially if they are within normal operating temperature.
- MAP/MAF Sensor Correlation: Check if the Manifold Absolute Pressure (MAP) or Mass Air Flow (MAF) sensor readings are within specifications. A leak can affect these readings, leading to incorrect air-fuel calculations.
What If It Still Doesn’t Work?
If, after exhaustive personal checks and even advanced scan tool analysis, the vacuum leak remains elusive or the symptoms persist, it’s prudent to seek professional assistance. Modern vehicles feature complex, integrated systems that often require specialized diagnostic equipment beyond what is available to the average enthusiast.
- Professional Diagnostic Service: A certified automotive technician possesses high-end diagnostic smoke machines, sonic leak detectors, and proprietary manufacturer scan tools that can identify minute leaks or underlying electronic issues mimicking vacuum problems.
- Consider Intermittent Leaks: Some leaks only manifest under specific engine loads, temperatures, or vibrations. These are nearly impossible to detect without specialized equipment or extensive experience.
- Comprehensive System Review: A professional will perform a holistic review, ensuring other components like fuel injectors, evaporative emissions (EVAP) system, or even transmission vacuum modulators aren’t the true source of the issue.
- Estimated Cost Range: A professional diagnostic fee in 2027 typically ranges from $180 to $350. The cost to repair a vacuum leak can vary wildly, from $200 for a simple hose replacement to over $1,200 for a complex intake manifold gasket or brake booster replacement, depending on parts and labor rates.
Conclusion
Detecting and repairing a vacuum leak is crucial for maintaining optimal vehicle performance and fuel efficiency. According to verified automotive service data, neglected vacuum leaks can lead to premature wear on catalytic converters and spark plugs due to persistent lean conditions. By systematically employing the methods outlined, from visual inspections to advanced smoke testing and scan tool analysis, you can effectively diagnose these issues. If uncertainty persists, consult a qualified technician to ensure your vehicle’s long-term health and reliability.
❓ Frequently Asked Questions
What are the primary symptoms that suggest my car has a vacuum leak?
The primary symptoms of a vacuum leak include a rough or unstable idle, engine stalling, poor acceleration, a noticeable decrease in fuel economy, and potentially a ‘Check Engine’ light illuminated with lean diagnostic trouble codes (DTCs).
How does a vacuum leak impact my engine’s air-fuel mixture and overall performance?
A vacuum leak introduces unmetered air into the engine, bypassing the mass airflow sensor. This leans out the air-fuel mixture, causing the engine’s computer to try and compensate, leading to erratic engine behavior, misfires, and reduced power output.
Are there different types of methods to check for a vacuum leak, and which is most effective for DIYers?
Yes, common DIY methods include the spray test (using carb cleaner or propane), listening for audible hisses, and visual inspection. For DIYers, combining the spray test and careful listening is often very effective, though a homemade smoke machine can find more elusive leaks.
What specific areas under the hood should I focus on when visually inspecting for a vacuum leak?
Focus on all rubber and plastic vacuum hoses, the intake manifold gaskets, PCV valve and its associated hoses, the brake booster vacuum hose, EGR valve connections, and any caps or plugs on unused vacuum ports.
When performing a spray test, what safety precautions are absolutely necessary?
When performing a spray test, ensure you work in a well-ventilated area, wear eye protection, have a fire extinguisher nearby, and avoid spraying flammable liquids directly onto extremely hot exhaust components or electrical connections to prevent fire hazards.
If DIY methods fail to locate the leak, what is the next recommended step for a thorough diagnosis?
If DIY methods prove unsuccessful, the next recommended step is to take your vehicle to a professional mechanic. They have specialized diagnostic tools, such as professional smoke machines, capable of pressurizing the intake system with smoke to reveal even the smallest, hardest-to-find vacuum leaks.