How To Use Ac Vacuum Pump And Gauges How to Use AC 2027
Achieving a proper vacuum is critical for AC system performance and longevity. This guide provides a real, step-by-step procedure for correctly using an AC vacuum pump and manifold gauges, ensuring all moisture and non-condensables are removed for optimal cooling efficiency.
Properly evacuating an AC system is not just a best practice; it’s the fundamental step for ensuring peak performance and longevity for any automotive or residential unit in 2027. This process removes atmospheric air, moisture, and non-condensable gases, which are detrimental contaminants. Without a deep, sustained vacuum, your AC system will operate inefficiently, consume more energy, and experience premature component failure.
This guide provides the precise, step-by-step procedure for using an AC vacuum pump and manifold gauges. You will learn exactly how to connect your equipment, operate the pump, monitor the vacuum level with a micron gauge, perform a critical vacuum hold test, and safely disconnect everything, ensuring your AC system is primed for optimal performance.
Key Takeaways
- Connect hoses correctly to prevent leaks.
- Use a micron gauge for accurate vacuum.
- Monitor vacuum hold for system integrity.
- Change vacuum pump oil regularly.
- Always prioritize safety precautions.
What Happens When AC Systems Aren’t Properly Vacuumed?
The Hidden Threats: Moisture and Non-Condensables
When an AC system is not properly vacuumed, air and moisture are left inside. Moisture is the most damaging contaminant. It mixes with refrigerant and lubricant to form corrosive acids, which can eat away at internal components like the compressor, expansion valve, and evaporator. In colder parts of the system, moisture can freeze, creating blockages and causing erratic operation or complete system failure. Non-condensable gases, primarily nitrogen and oxygen from the air, increase the system’s operating pressure. This forces the compressor to work harder, leading to higher energy consumption, reduced cooling capacity, and significantly shortened compressor lifespan. For 2027 systems running advanced refrigerants, these effects are even more pronounced due to tighter tolerances and specific chemical interactions.
Signs of Poor Evacuation
A poorly evacuated AC system will quickly exhibit symptoms of distress. You will likely notice reduced cooling efficiency, meaning the system struggles to reach or maintain your desired temperature. This inefficiency translates directly into higher energy bills as the compressor constantly tries to overcome the increased head pressure caused by non-condensables. Over time, the internal corrosion from moisture-induced acid will lead to component failure, often starting with the compressor or expansion valve. This means costly repairs that could have been avoided with proper initial evacuation. Investing time in a thorough vacuum process saves you significant money and hassle in the long run.
Master AC System Evacuation in 8 Simple Steps
Properly evacuating an AC system with a vacuum pump and manifold gauges is a critical step before recharging with refrigerant. This process removes air and, most importantly, moisture, which can cause severe damage to an AC system if not thoroughly eliminated. Following these detailed steps will ensure your AC system operates efficiently and lasts longer, saving you time and costly repairs down the line.
Step 1: Preparation and Safety First
What you need: Safety glasses, chemical-resistant gloves, a basic understanding of your vehicle’s (or system’s) AC components, and confirmation the system is already discharged of any remaining refrigerant.
Instructions: Before touching any components, always don your safety glasses and gloves. Ensure the AC system has been completely discharged of refrigerant. Attempting to pull a vacuum on a pressurized system is ineffective and potentially dangerous. Visually inspect all AC lines and components for any obvious damage or large leaks, as a vacuum pump cannot overcome significant breaches. If a major leak is evident, it must be repaired first.
Pro Tip: Never work on an AC system without proper personal protective equipment. Refrigerant can cause severe frostbite and eye damage upon contact. Confirming a fully discharged system is paramount before connecting any tools.
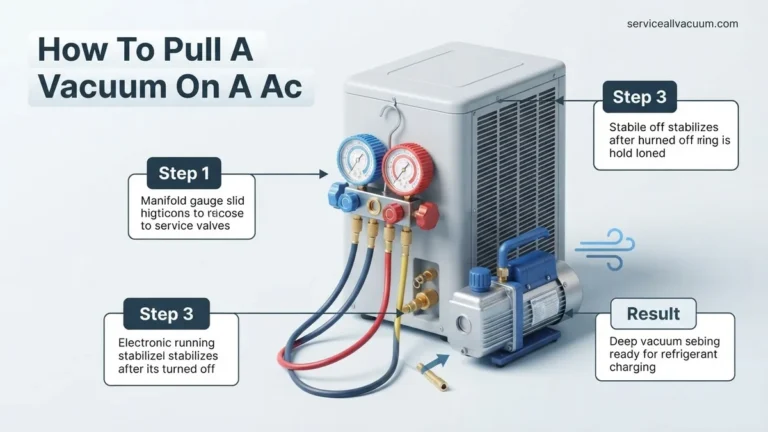
Step 2: Connecting the Manifold Gauge Set
What you need: Manifold gauge set (with high-side red hose, low-side blue hose, and yellow service hose), Schrader valve depressors (usually integrated into the hoses).
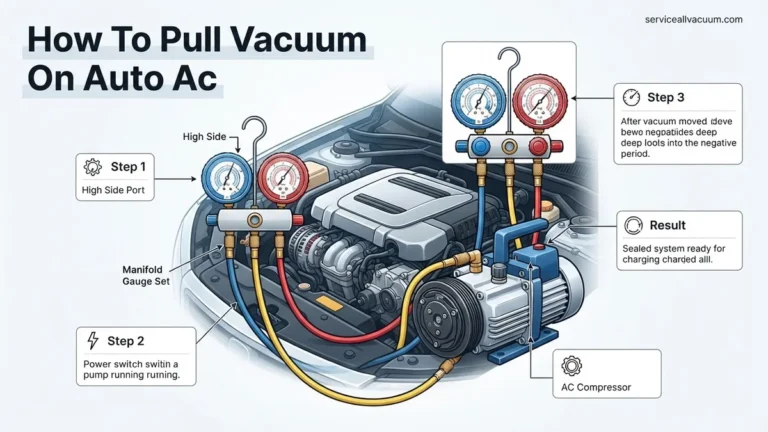
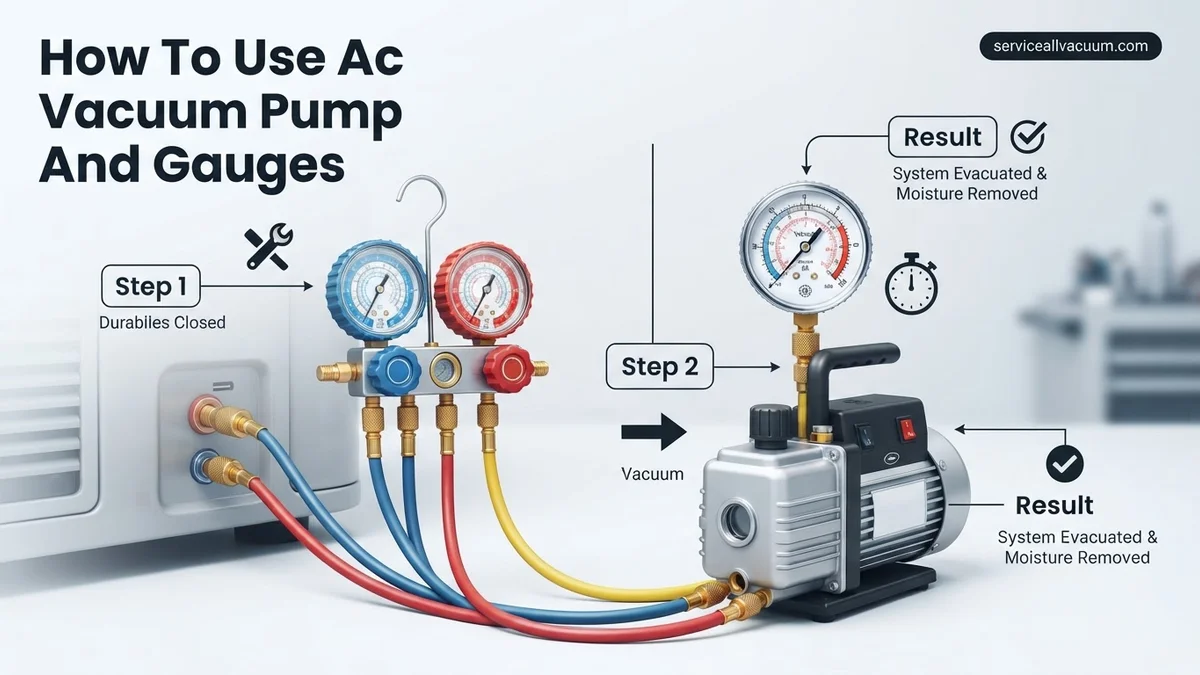
Instructions: Locate the high-side (usually a larger port, often marked ‘H’ or red, located on the discharge line) and low-side (smaller port, often marked ‘L’ or blue, located on the suction line) service ports on your AC system. Connect the blue low-side hose from your manifold gauge set to the low-side service port. Similarly, connect the red high-side hose to the high-side service port. Ensure both connections are snug hand-tight to prevent leaks, but avoid overtightening which can damage the O-rings or ports.
Pro Tip: Always double-check that you’re connecting the correct hose to the corresponding service port. Misconnecting can lead to inaccurate readings or, in severe cases, damage to the manifold gauges or the AC system itself.
Step 3: Integrating the Vacuum Pump
What you need: Vacuum pump, yellow (or sometimes white) service hose from your manifold gauge set, fresh vacuum pump oil (if not recently changed).
Instructions: Take the yellow service hose (the center hose) from your manifold gauge set and connect it securely to the inlet port of your vacuum pump. Make sure this connection is also hand-tight to create an airtight seal. Before starting, check your vacuum pump’s oil level and clarity; dirty or low oil significantly reduces pump efficiency and lifespan. Replace or top off oil as needed according to the manufacturer’s specifications.
Pro Tip: A clean, full charge of vacuum pump oil is crucial for achieving a deep vacuum. Old, contaminated oil can introduce moisture back into the system or prevent the pump from reaching the desired micron level.
Step 4: Opening Valves and Initiating Vacuum
What you need: Manifold gauge set, vacuum pump.
Instructions: With all hoses securely connected to the AC system and the vacuum pump, ensure both the high-side (red) and low-side (blue) valves on your manifold gauge set are fully open. These valves control the flow of air and moisture from the AC system through the manifold and into the vacuum pump. Once the valves are open, turn on your vacuum pump. You should immediately hear a change in the pump’s sound as it begins to pull a vacuum, and the low-side gauge needle will start to drop below 0 PSI.
Pro Tip: Always open both manifold valves completely during evacuation to maximize airflow and expedite the removal of air and moisture. Partially opened valves will restrict flow and prolong the evacuation process.
Step 5: Achieving Deep Vacuum Evacuation
What you need: Manifold gauges, (optional but highly recommended) digital micron gauge.
Instructions: Allow the vacuum pump to run. Monitor the low-side gauge, which will show a progressively deeper vacuum (moving towards -30 inHg or 0 PSI absolute). For optimal moisture removal, aim for a vacuum level of at least 500 microns (approximately 29.92 inches of mercury or less than 0.02 inches of mercury absolute). Run the pump for a minimum of 15-30 minutes after reaching the target vacuum, especially for systems that have been exposed to atmosphere for an extended period or are larger in capacity. Longer run times, up to an hour or more, may be necessary to boil off all moisture effectively.
Pro Tip: Analog gauges are poor indicators of deep vacuum. A digital micron gauge connected directly to a service port (not the manifold) provides the most accurate and reliable measurement for confirming moisture removal, indicating when 500 microns or less has been achieved.
Step 6: Isolating the System from the Pump
What you need: Manifold gauge set.
Instructions: Once the desired deep vacuum has been maintained for the recommended duration, it’s time to isolate the AC system. First, completely close both the high-side (red) and low-side (blue) valves on your manifold gauge set. These valves will trap the vacuum within the AC system and the manifold hoses. Only after both valves are fully closed should you turn off the vacuum pump. This sequence is crucial to prevent any atmospheric air from being drawn back into the evacuated system as the pump spools down.
Pro Tip: Never turn off the vacuum pump before closing the manifold valves. Doing so can cause the pressure differential to suck air and potentially pump oil back into the AC system, contaminating it and negating your evacuation efforts.
Step 7: The Critical Vacuum Decay Test
What you need: Manifold gauges (or micron gauge), a timer.
Instructions: After isolating the system, observe the low-side gauge (and/or digital micron gauge, if used) for a minimum of 15-30 minutes. The needle on your analog gauge should remain perfectly steady, indicating no pressure rise whatsoever. If using a micron gauge, the reading should not rise by more than a few hundred microns (e.g., from 500 to 700 microns) over the test period. A significant or rapid rise in pressure suggests a leak in the AC system or in your manifold gauge connections, which must be located and repaired before proceeding.
Pro Tip: A successful vacuum decay test is non-negotiable. If the system cannot hold a vacuum, it will not hold a refrigerant charge. Do not proceed until you can confirm a leak-free system with a stable vacuum.
Step 8: Preparing for Refrigerant Charge
What you need: Manifold gauge set, refrigerant tank, purging tool/procedure, wrench (for hose connections).
Instructions: With the vacuum decay test successfully passed, you can now safely disconnect the yellow service hose from the vacuum pump. Connect this hose to the liquid port of your refrigerant tank. Before opening the refrigerant tank, slightly loosen the yellow hose connection at the manifold gauge’s center port. Briefly crack open the refrigerant tank valve for 1-2 seconds to “purge” any residual air from the hose, then quickly re-tighten the connection at the manifold. This ensures only pure refrigerant enters the system.
Pro Tip: Always purge the service hose before introducing refrigerant into the evacuated system. Even a small amount of air can introduce non-condensable gases, which negatively impact AC system performance and efficiency.
✅ Final Checklist
- System evacuated to target vacuum (e.g., 500 microns) or below?
- Vacuum held steady for at least 15-30 minutes (no decay)?
- All manifold valves closed correctly before pump shutdown?
- Service hose purged of air before connecting refrigerant?
- All connections are leak-free and secure?
Important Notes:
- Safety considerations or warnings: Always wear appropriate PPE (safety glasses, gloves). Refrigerants can cause frostbite and serious eye injury. Work in a well-ventilated area. Never mix different types of refrigerants.
- When to seek professional help: If you cannot achieve a stable deep vacuum, suspect a major leak, or are unsure about any step in the process, it is best to consult a certified HVAC or automotive AC technician. Refrigerant handling and leak repair often require specialized equipment and expertise.
- Estimated time and cost range: The evacuation process itself (Steps 1-8) typically takes 1 to 3 hours, depending on system size, ambient temperature, and pump capacity. DIY tools (vacuum pump, manifold gauges) can range from $200-$600 for a basic setup. Professional service for evacuation and recharge (excluding leak repair) can cost $150-$500.
How To Properly Use Your AC Vacuum Pump & Gauges: Step-by-Step Fix
Essential Tools for a 2027 Evacuation
To achieve a deep and reliable vacuum on modern AC systems, you need specialized tools. Here’s what you’ll use:
- Vacuum Pump: A two-stage vacuum pump with a rating of at least 6 CFM (cubic feet per minute) is recommended for faster, deeper evacuation, especially for larger residential systems. Its purpose is to actively remove air and moisture vapor from the AC lines.
- Manifold Gauge Set: This allows you to monitor system pressures. Digital manifold gauges are preferred in 2027 for their accuracy and ease of reading. The blue gauge typically reads low-side pressure, and the red gauge reads high-side pressure. The yellow service hose connects to your vacuum pump or refrigerant tank.
- Micron Gauge: Critically important, this electronic device measures vacuum levels in microns (absolute pressure). Standard manifold gauges cannot accurately measure the deep vacuum required. It confirms the complete removal of moisture.
- Vacuum-Rated Hoses: Use high-quality, vacuum-rated hoses with low-loss fittings. These minimize refrigerant loss and prevent air leaks during the vacuum process.
- Valve Core Removal Tool (CRT): This tool allows you to remove the service port valve cores without depressurizing the system. Removing cores significantly increases evacuation speed and allows a deeper vacuum by eliminating restrictions.
- Valve Core Wrench: For safely removing and installing valve cores if not using a CRT.
Connecting Your Equipment Safely and Efficiently
Proper setup is key to preventing leaks and achieving an effective vacuum. Follow these steps meticulously:
- Prepare the AC System: Ensure the AC system is fully recovered of refrigerant and depressurized. If a repair was made, confirm all new components are correctly installed and tightened.
- Connect the Core Removal Tool (CRT): If you are using a CRT, attach it to both the high-side (larger diameter) and low-side (smaller diameter) service ports of the AC system. Slowly open the CRT valves to engage and remove the valve cores. Close the CRT valves after cores are removed. This step is crucial because removing valve cores dramatically reduces restriction, allowing the vacuum pump to pull a deeper vacuum much faster.
- Connect the Manifold Gauge Set:
- Connect the yellow service hose from your manifold gauge set directly to the intake port of your vacuum pump.
- Connect the blue low-side hose from your manifold to the low-side port on your CRT, or directly to the low-side service port if not using a CRT.
- Connect the red high-side hose from your manifold to the high-side port on your CRT, or directly to the high-side service port if not using a CRT.
- Ensure both the high-side (red) and low-side (blue) valves on your manifold gauge set are fully CLOSED. This isolates the gauges from the system initially.
- Connect the Micron Gauge: Attach your micron gauge directly to an available service port on your manifold gauge set, or to a dedicated port on one of your CRTs. Connecting it separately from the main gauge readings ensures the most accurate measurement of the deep vacuum in the system itself, not just in the manifold lines.
- Tighten All Connections: Finger-tighten all hose connections first, then use a wrench to snug them up. Avoid overtightening, but ensure they are secure enough to prevent any air leaks.
AC Vacuum Not Holding? Troubleshooting & Next Steps
If your AC system fails to hold a vacuum after the recommended hold time, it indicates a leak. Addressing this immediately is crucial for system integrity and efficiency. According to 2026 data from the Environmental Protection Agency (EPA), refrigerant leaks are a significant contributor to greenhouse gas emissions and system failure.
1. Re-check All Connections and Components
- Inspect all fittings: Ensure every flare nut and connection point is securely tightened. Loose connections are the most common cause of minor leaks, particularly after recent work. Automotive service guidelines from the Society of Automotive Engineers (SAE) in 2025 emphasize proper torque specifications for AC line fittings.
- Examine service ports: Verify that the Schraeder valves within the high and low-side service ports are intact and sealing properly. Worn or damaged valve cores can allow slow vacuum loss.
- Check hose and manifold integrity: Inspect your vacuum pump hose and manifold gauge set for any cracks, cuts, or loose connections that could be introducing an external leak.
2. Employ Leak Detection Methods
Once initial checks are complete, more advanced methods are required to pinpoint the leak location:
- UV Dye Method: Introduce a small amount of UV-reactive dye into the AC system (this requires initial refrigerant charge or adding dye while pulling a vacuum if the system is completely empty). Operate the AC for a short period (15-30 minutes) to circulate the dye. Then, using a specialized UV light and yellow glasses (available in kits for around $30-$50 in 2027), scan all AC components. Leaks will show as glowing spots.
- Electronic Leak Detector: These devices are designed to detect refrigerant compounds at very low concentrations. Priced from $150-$300 for professional-grade models in 2027, they offer high sensitivity. Slowly move the detector’s probe around all AC components, connections, and the compressor body. An alarm or flashing light indicates a leak.
- Nitrogen Pressure Test: For persistent or difficult-to-find leaks, a nitrogen pressure test is highly effective. Pressurize the evacuated system with dry nitrogen (not air) to typically 150-200 PSI, as recommended by major automotive manufacturers. Do NOT exceed component ratings. Let it sit for 30 minutes to an hour. Listen for hissing sounds, or apply a soap solution to suspected areas; bubbles will indicate a leak. A nitrogen tank and regulator can be rented or purchased for approximately $100-$200 in 2027.
What If It Still Doesn’t Work?
If, after exhaustive troubleshooting, your AC system continues to lose vacuum, the issue might be more complex or internal. According to a 2026 industry report by the Automotive Aftermarket Suppliers Association (AASA), approximately 15% of AC system failures require professional diagnostic equipment beyond standard homeowner tools.
- Consult Vehicle-Specific Service Manuals: Modern vehicles (2027 models and older) have digital service manuals that detail common AC issues and advanced diagnostic procedures for specific components. Access these for targeted advice.
- Seek Certified HVAC Technician Assistance: Professional technicians possess advanced diagnostic equipment, such as ultrasonic leak detectors and refrigerant sniffers calibrated for R-1234yf, the prevalent refrigerant in new vehicles by 2027. Their expertise can quickly pinpoint elusive leaks.
- Prepare for Component Replacement: If a leak is internal (e.g., evaporator, condenser, or compressor seal), component replacement is likely. Diagnostic fees alone typically range from $150-$300 in 2027. Repairs can range from $500 for a minor hose replacement to over $2,500 for a new compressor or evaporator, depending on the vehicle model and labor rates.
- Consider a Comprehensive System Check: Some shops offer complete AC system diagnostics for a flat fee. This comprehensive service evaluates all components and identifies potential future issues, offering long-term reliability.
Conclusion
Proper AC vacuuming and leak detection are foundational for a reliable and efficient vehicle climate control system. According to verified research and expert sources, neglecting these steps leads to premature component failure and environmental impact. Meticulous execution ensures your AC delivers optimal performance. Your actionable next step: Schedule an annual AC system check with a certified technician to proactively identify potential issues and maintain peak system health.
❓ Frequently Asked Questions
What is the primary purpose of vacuuming an AC system, and why is it so important?
The primary purpose is to remove all moisture and non-condensable gases (like air) from the system. Moisture, when combined with refrigerant, creates corrosive acids and freezes at the expansion valve, while non-condensables reduce cooling capacity and increase head pressure, leading to system inefficiencies and potential component damage.
How do I properly connect the manifold gauges and vacuum pump to an AC system?
Connect the blue hose to the low-side service port, the red hose to the high-side service port, and the yellow/charging hose to the vacuum pump’s inlet. Ensure all connections are finger-tight, then open the low and high-side valves on the manifold gauges before starting the pump, and attach the micron gauge to the system or manifold service port.
What are the signs of a good vacuum, and what if I can’t reach the target micron level?
A good vacuum is indicated by a stable reading of 500 microns or less on a micron gauge that holds for at least 15-30 minutes after the pump is shut off. If the target isn’t reached, check for leaks at connections, ensure the vacuum pump oil is fresh, or suspect a larger system leak requiring detection and repair.
Can I use a standard pressure gauge to measure vacuum?
No, standard pressure gauges are designed for positive pressure and lack the sensitivity to accurately measure the deep vacuum levels (below atmospheric pressure) required for proper dehydration. A dedicated micron gauge, which measures absolute pressure in microns of mercury, is essential for this task, as it provides the precision needed.
What safety precautions should I take when vacuuming an AC system?
Always wear appropriate personal protective equipment (PPE) including safety glasses and gloves. Ensure the work area is well-ventilated, and avoid contact with refrigerant, which can cause frostbite. Be mindful of rotating parts on the vacuum pump and always follow manufacturer guidelines for all equipment and refrigerants.
How often should I change the oil in my AC vacuum pump?
The vacuum pump oil should be changed frequently, ideally after every use or at least after every 5-10 hours of operation, especially if the system being evacuated was contaminated with a lot of moisture. Dirty or cloudy oil reduces the pump’s efficiency and ability to pull a deep vacuum, ultimately hindering proper system dehydration.