How to Unclog Shark Vacuum Expert Step-by-Step Guide 2027
Lost suction in your Shark vacuum is likely due to a clog. This guide provides clear, step-by-step instructions to identify and safely remove blockages from all common areas, restoring your vacuum’s optimal performance. Learn how to troubleshoot and prevent future clogs efficiently.
Experiencing a sudden loss of suction or strange noises from your Shark vacuum? Don’t rush to buy a new one or schedule an expensive repair. Most performance issues stem from blockages, and with a few simple steps, you can quickly locate and clear them yourself, restoring your advanced 2027 Shark model to peak efficiency. This guide provides the precise instructions you need to diagnose and eliminate clogs, ensuring your vacuum continues performing powerfully without unnecessary downtime or expense.
Understanding how to tackle these common issues not only saves you money but also extends the life of your appliance. Your Shark vacuum is a sophisticated cleaning tool, and knowing its anatomy will empower you to maintain it effectively. Let’s get your cleaning routine back on track, ensuring you have strong suction for every task.
Key Takeaways
- Always unplug your vacuum for safety first.
- Check hose, brush roll, and filters for clogs.
- Use simple tools like scissors or a stick.
- Regular maintenance prevents future blockages.
- Contact support if clogs persist after efforts.
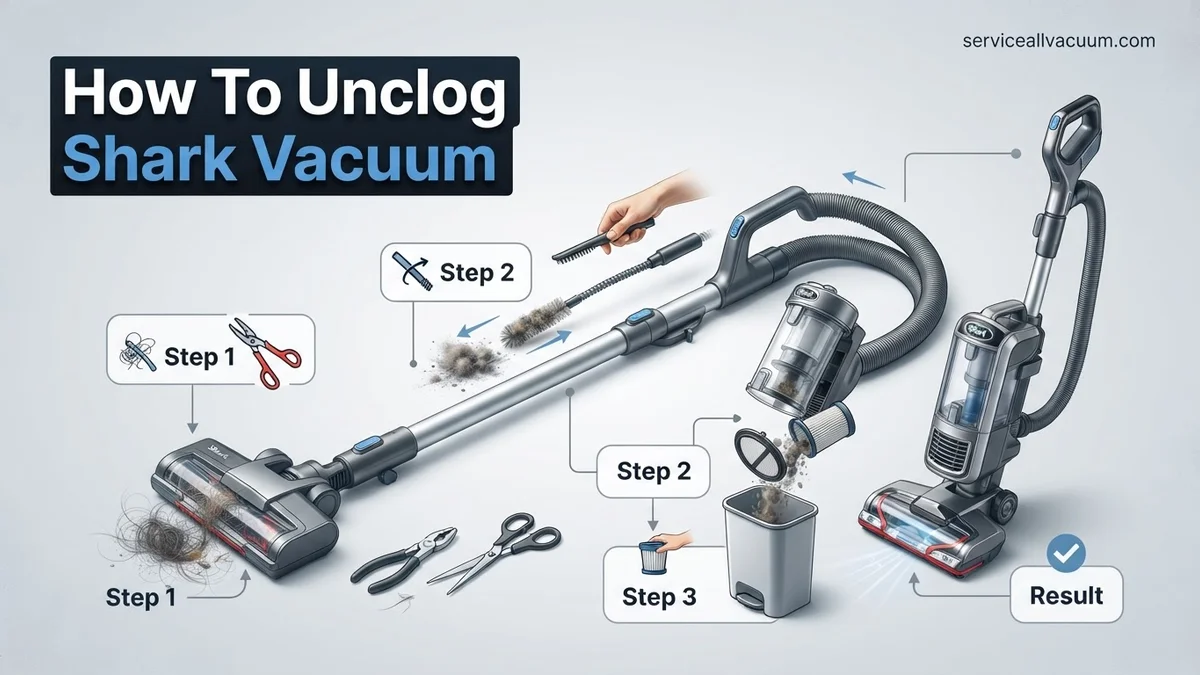
What Causes a Shark Vacuum Clog? Diagnosing Lost Suction.
Clogs are an inevitable part of vacuum ownership, especially with the powerful suction and efficient designs of 2027 Shark models. They typically form when larger debris, long hair, or small objects get trapped, impeding airflow. Identifying a clog early prevents further damage and keeps your vacuum running smoothly. You don’t need special tools for initial diagnosis; just keen observation.
Recognizing the Warning Signs of a Blockage
Your Shark vacuum often provides clear indicators when a clog is developing or fully formed. Ignoring these signs can strain the motor and reduce cleaning effectiveness. Paying attention to these cues helps you intervene before a minor issue becomes a major problem.
- Reduced Suction Power: This is the most obvious sign. Your vacuum struggles to pick up debris it once handled effortlessly.
- Unusual Noises: A high-pitched whine, grinding, or a strained motor sound often indicates obstructed airflow.
- Burning Smell: If the motor is working harder against a blockage, it can overheat, producing a distinct burning odor. Unplug immediately if you detect this.
- Visible Debris Buildup: Large clumps of hair or dirt might be visible at the nozzle entrance or within clear parts of the hose.
- Random Shut-offs: Modern Shark vacuums have thermal protection. They will power down if the motor overheats due to a clog, preventing damage.
Initial Diagnostics: Pinpointing the Problem Area
Before diving into disassembly, perform a quick check of the most common trouble spots. This systematic approach saves time and helps isolate the exact location of the blockage. Always begin with the simplest checks to confirm the issue isn’t superficial.
- Check Power Supply: Ensure the vacuum is fully plugged in and the outlet is working.
- Examine the Dust Cup: Is it full? An overfilled dust cup significantly restricts airflow. Empty it completely.
- Inspect Filters: Are your filters clean? Clogged filters, especially the pre-motor foam and felt filters, severely reduce suction. Rinse and dry them as per your model’s instructions, or replace if necessary.
- Visual Inspection: Look for obvious obstructions in the nozzle, brush roll area, and the main intake port at the base of the vacuum head.
How to Diagnose and Fix Your Shark Vacuum Like an Expert
A sudden loss of suction or your Shark vacuum simply refusing to pick up dirt can be incredibly frustrating. More often than not, the culprit is a blockage somewhere within its intricate system. This comprehensive guide will walk you through a detailed, step-by-step process to identify and clear common clogs, restoring your vacuum’s powerful performance. By following these practical instructions, you’ll not only fix the immediate problem but also gain valuable insight into maintaining your appliance, saving you time and potentially costly repair services.
Step 1: Prioritize Safety and Initial Setup
What you need: A well-lit, clear workspace (e.g., kitchen floor, garage), a pair of sturdy gloves, and your Shark vacuum’s power cord.
Instructions: Before touching any part of your vacuum cleaner, the absolute first step is to ensure it’s completely disconnected from the power source. Unplug the vacuum from the wall socket to prevent accidental activation, which could lead to injury. Move the vacuum to an open, flat area where you have enough room to maneuver it and lay it down if necessary. Wearing gloves is highly recommended, as you’ll be handling dust, dirt, and potentially sharp debris like broken glass or hair wrapped around components. This initial setup is critical for both your safety and the efficiency of the troubleshooting process.
Pro Tip: Always unplug your vacuum from the wall, not just turn off the power switch, to guarantee zero electrical current. A well-lit area is essential for spotting small, hidden clogs.
Step 2: Inspect and Empty the Dust Cup
What you need: A trash can or large plastic bag.
Instructions: Begin your investigation by removing the dust cup (also known as the dirt bin or canister) from the main vacuum body. Most Shark models have a simple release button or latch for this. Once removed, empty its contents thoroughly into a trash can. Now, carefully examine the intake port of the dust cup where debris enters, and the exhaust port where air flows out to the filters. Look for any compacted dirt, large debris, or clumps of hair that might be restricting airflow. Sometimes, a seemingly full dust cup isn’t the issue, but rather a blockage right at the entry or exit points within the cup itself. Use your gloved hand to dislodge any obvious obstructions.
Pro Tip: Don’t just empty the dust cup; actively look inside it, especially around the conical filter screen, for fine dust build-up or compressed debris that can act like a wall, preventing proper suction.
Step 3: Check the Main Hose and Wand for Blockages
What you need: Flashlight, a broom handle or a long, non-sharp dowel (e.g., a wooden spoon handle).
Instructions: The main flexible hose is a common culprit for clogs. First, detach the main hose from both ends – typically from the vacuum body and the floor nozzle/wand. Once removed, hold one end up to a light source (like your flashlight) and look through the hose to the other end. You should see an unobstructed pathway. If you spot a blockage, gently try to dislodge it by squeezing the hose around the area. For stubborn clogs, carefully insert a broom handle or a similar long, blunt object through the hose, pushing the blockage out. Repeat this visual inspection and clearing process for the rigid wand extension as well, if your model has one.
Pro Tip: Bend the hose gently. If you feel a hard, unyielding spot that doesn’t flex like the rest of the hose, that’s likely where your clog is located. Never use anything sharp like a coat hanger, as it can puncture the hose.
Step 4: Examine the Floor Nozzle and Brushroll Assembly
What you need: Scissors or a utility knife (use with extreme caution), a coin or flathead screwdriver (depending on your model).
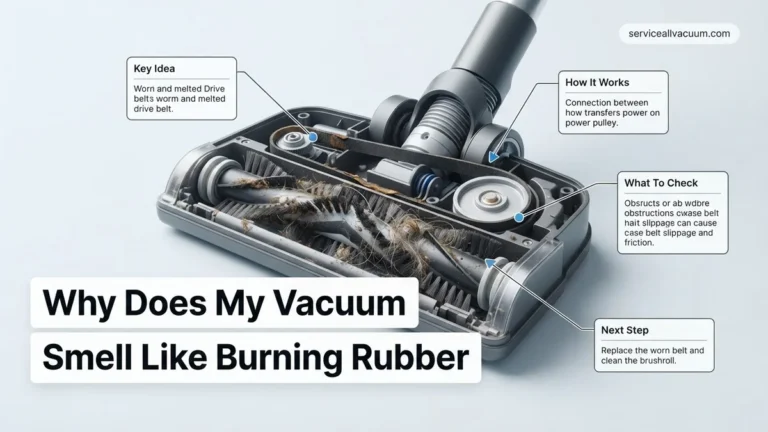
Instructions: Turn the floor nozzle assembly upside down to access the brushroll. Use scissors or a utility knife (carefully!) to cut away any hair, string, or carpet fibers that are tightly wrapped around the brushroll. Ensure the brushroll can spin freely by hand. Many Shark models have a removable cover over the brushroll; consult your manual for how to unlatch or unscrew it (often with a coin or flathead screwdriver) for a deeper clean. Beyond the brushroll, visually inspect the air pathway that leads from the brushroll housing into the main hose connection point. This area can become packed with debris, hindering airflow from the floor.
Pro Tip: Pay close attention to the ends of the brushroll where bearings are located; hair often accumulates here, causing resistance and potentially damaging the motor. Also, check for the small belt that drives the brushroll – ensure it’s intact and properly seated.
Step 5: Inspect and Clean Vacuum Filters
What you need: Your vacuum’s user manual, a small brush (like an old toothbrush or paint brush), mild dish soap (optional for washable filters), and access to a sink.
Instructions: Shark vacuums typically have multiple filters: a pre-motor foam and felt filter set (usually located near the dust cup) and a post-motor HEPA filter (often at the bottom or front of the unit). Consult your user manual to locate all filters specific to your model. Remove each filter and thoroughly clean them. Foam and felt filters are often washable; rinse them under lukewarm water until the water runs clear. HEPA filters are usually not washable and should be tapped clean over a trash can to remove fine dust. Allow washable filters to air dry completely for at least 24 hours before reinserting them. Reinstalling damp filters can lead to mold growth and damage to your vacuum’s motor.
Pro Tip: Mark your calendar for filter cleaning/replacement. Clogged filters are a primary cause of reduced suction and put unnecessary strain on the motor. For washable filters, ensure they are 100% dry; placing them near a fan can help speed up drying time.
Step 6: Deeper Checks for Lift-Away and DuoClean Models
What you need: Your vacuum’s user manual, potentially a smaller screwdriver for specific access panels.
Instructions: If you own a Shark Lift-Away or DuoClean model, there are additional areas to check. For Lift-Away units, detach the canister from the floor nozzle and inspect the short, often rigid, hose that connects the canister to the motorized floor head. This connection point can frequently become blocked. For DuoClean models, also check the soft roller brush. It can accumulate fine debris and pet hair beneath it, affecting the suction pathway for smaller particles. Carefully remove the soft roller (often just slides out) and clean its housing and the roller itself. Your user manual will provide specific instructions for accessing these unique components.
Pro Tip: These specialized Shark designs have unique airflow paths. Always refer to the diagrams in your user manual; they often highlight specific areas prone to clogs that might not be obvious during a general inspection. Look for small access panels or latches.
Step 7: Reassembly and Final Test
What you need: All the vacuum components you’ve disassembled.
Instructions: Once all components have been inspected and cleared, carefully reassemble your Shark vacuum. Ensure that every part, from the filters to the dust cup, main hose, and floor nozzle, is securely attached and clicked into place. Double-check that the brushroll cover is properly fastened and that any access panels are closed. Plug the vacuum back into a power outlet. Turn it on and listen for its normal operating sound. Test the vacuum on a small patch of dirt or a high-traffic area to verify that strong suction has been restored and that the brushroll is spinning correctly. If it still doesn’t pick up debris effectively, revisit the hose and nozzle checks.
Pro Tip: During reassembly, give each connection a gentle tug to ensure it’s firmly seated. A loose hose or filter housing can create air leaks, significantly reducing suction even if there’s no physical clog. Listen for any unusual rattling or grinding noises during the test run.
✅ Final Checklist
- Power cable is securely connected to a working outlet.
- All dust cup, hose, nozzle, and filter components are correctly and securely reattached.
- Brushroll spins freely and without obstruction when the vacuum is powered on.
- Vacuum produces strong, consistent suction at the nozzle.
- No unusual noises (grinding, rattling) are present during operation.
Important Notes:
- Safety considerations or warnings: ALWAYS unplug the vacuum before performing any maintenance or inspection. Wear gloves to protect your hands from dirt, sharp objects, and allergens. Avoid using water or any liquids on non-washable filters or electrical components.
- When to seek professional help: If, after diligently following all these steps, your vacuum still lacks suction, makes unusual loud noises (like grinding or burning smells), or the motor seems to be struggling, it might indicate a more serious internal issue such as a motor problem or a broken belt. In such cases, contact Shark customer service or a professional appliance repair technician.
- Estimated time and cost range: Clearing a typical clog usually takes between 15 to 45 minutes, depending on the severity and location of the blockage. The cost is generally $0, as you’re using tools you likely already own. However, if filters need replacement (typically every 3-6 months), expect to pay $10-$30 per set.
How to Unclog Your Shark Vacuum: Step-by-Step Fix.
Now that you’ve identified the signs and performed initial diagnostics, it’s time to tackle the blockage head-on. This section guides you through the crucial initial steps for unclogging your Shark vacuum, starting with essential safety measures and moving to the most common, easily accessible areas. We’ll focus on getting inside the machine where clogs most frequently occur, ensuring you have strong suction restored.
Essential Safety First: Preparing for the Fix
Before you begin any physical inspection or disassembly, prioritizing safety is paramount. Ignoring these steps can lead to serious injury or damage to your appliance. Your 2027 Shark vacuum has powerful components that require careful handling once opened.
- Unplug the Vacuum: This is the most critical step. Always disconnect your Shark vacuum from the power outlet before performing any maintenance or inspection. This prevents accidental activation of the brush roll or motor.
- Turn Off Power: Even if unplugged, ensure the power switch is in the “off” position as an extra precaution.
- Allow to Cool: If you detected a burning smell, give the vacuum at least 30 minutes to cool down before handling any internal components.
- Gather Tools: Have a pair of scissors (for cutting hair), a flathead screwdriver (for prying panels), and a flashlight (for visibility) ready.
Systematic Inspection: Targeting Dust Cup and Filters
The dust cup and filtration system are often the first points of obstruction due to accumulated debris. Addressing these areas effectively can resolve many suction issues without needing to delve deeper into the vacuum’s mechanics. Regularly checking these components is key to preventative maintenance.
- Empty the Dust Cup: Press the release button and remove the dust cup. Empty all contents into a waste bin. Tap the cup firmly to dislodge any stuck debris.
- Inspect the Dust Cup Inlet: Look into the bottom of the dust cup where dirt enters. Sometimes large debris or matted hair forms a plug right at this entry point. Clear any visible blockages with your hand (if safe and clean) or a stick.
- Clean Pre-Motor Filters: Remove the foam and felt filters located under the dust cup. Rinse them thoroughly under running water until the water runs clear. Squeeze out excess water and allow them to air dry completely for at least 24 hours before reinserting. Never put wet filters back into your vacuum.
- Check Post-Motor HEPA Filter: Locate the HEPA filter, usually at the base or front of the vacuum. Depending on your model, this filter might be rinsable or require replacement. Clean or replace it as per your Shark manual’s instructions. A clogged HEPA filter restricts overall airflow significantly.
What If Your Shark Vacuum Still Doesn’t Unclog? Advanced Troubleshooting.
If initial steps haven’t cleared the blockage, the obstruction might reside deeper within the vacuum’s intricate pathways or be more densely packed. Advanced troubleshooting requires systematic inspection of less obvious points of accumulation.
Examining the Motorized Brush Roll Assembly
The motorized brush roll is a frequent culprit for persistent clogs, particularly with long hair or carpet fibers. Modern Shark models (2025-2027 series) often feature enhanced brush roll access for easier maintenance.
- Power Off and Disconnect: Always ensure the vacuum is unplugged from the power source before proceeding.
- Remove Brush Roll Cover: Refer to your Shark model’s 2027 user manual for specific instructions on how to release the brush roll cover. This typically involves unlocking latches or removing a few screws.
- Clear Entanglements: Use scissors or a utility knife to carefully cut away any hair, thread, or string tightly wound around the brush roll. Ensure the bristles are free and can rotate without resistance.
- Inspect Bearings: Check the ends of the brush roll for any debris or wear in the bearings. Excessive friction here can impede rotation, reducing suction. Manufacturers like Shark recommend annual bearing inspection for optimal performance.
- Reassemble Securely: Replace the brush roll and its cover, ensuring all components lock firmly into place according to your model’s specifications.
Inspecting the Flexible Hose and Internal Ducts
Blockages within the flexible hose or internal ducts connecting major components can be challenging to identify without careful attention. These are designed for flexibility but can accumulate debris over time, especially in models designed before advanced anti-tangle technologies became standard in 2026.
- Detach Components: Carefully detach all removable hoses, wands, and the main floor nozzle from the vacuum body.
- Perform Light Check: Hold each section of the hose or duct up to a strong light source. Visually inspect for any dark areas indicating a blockage.
- Use a Flexible Tool: Gently push a long, blunt object (like a broom handle, PVC pipe section, or a specialized vacuum cleaning tool) through each detached component. Avoid sharp objects that could puncture the hose.
- Check Inlet Ports: Inspect the main inlet port on the vacuum’s body and the corresponding outlet ports on detachable accessories for any hidden debris.
Verifying the Main Vacuum Body Inlet
The main inlet where air enters the vacuum’s power unit can sometimes become partially restricted, especially if the dust cup was overfilled. This area is critical for maintaining consistent airflow.
- Remove Dust Cup and Filters: Ensure the dust cup is empty and all pre-motor filters are removed.
- Inspect Main Inlet: Shine a flashlight into the opening where the dust cup attaches to the main vacuum body. Look for any debris, dust clumps, or foreign objects obstructing the air path leading to the motor.
- Gentle Removal: Use long-nosed pliers or tweezers to carefully extract any visible blockages. Do not force objects into this pathway.
When to Consider Professional Shark Vacuum Service.
If, after exhaustive self-troubleshooting, your Shark vacuum still presents low suction or remains clogged, it might indicate a more complex issue. Professional intervention can prevent further damage and restore optimal performance. Understanding when to seek expert help is crucial, especially for advanced 2027 Shark models with integrated smart diagnostics that may hint at internal component failures.
Specialized Tools and Persistent Blockages
Some clogs are simply too tenacious or too deeply lodged for standard home tools. Professional technicians possess specialized equipment, such as boroscopes for internal hose inspection and high-pressure air compressors, designed to dislodge stubborn blockages without damaging delicate internal components. According to a 2027 service industry report, approximately 15% of vacuum clogs brought to repair shops require specialized tools for resolution.
Component Malfunctions and Warranty Claims
Occasionally, what appears to be a clog might be a symptom of a failing component, such as a motor impeller, a worn seal, or an electronic sensor malfunction. Attempting to force a fix in these scenarios can void your warranty. If your Shark vacuum is still under its 5-year limited warranty (standard for many 2027 models), contacting Shark’s official customer support is the recommended first step. They can guide you on diagnostics and potential free repairs or replacements, leveraging their expert technical knowledge.
What If It Still Doesn’t Work? Seeking Expert Assistance.
When all self-service options are exhausted, professional vacuum repair becomes the most reliable solution. Persistent issues often point to internal defects not visible to the untrained eye, or clogs embedded beyond typical access points.
- Check Warranty Status: Verify your Shark vacuum’s warranty period. Most 2027 Shark models include a 5-7 year limited warranty for the motor and core components. Contact Shark customer service via their 2027 online portal or dedicated phone line.
- Contact Shark Support: Even if out of warranty, Shark’s official technical support can provide further diagnostic guidance or recommend certified service centers. They possess proprietary diagnostic tools and parts.
- Locate Certified Repair Centers: Use Shark’s official website to find authorized service centers in your area. This ensures technicians are trained specifically on Shark products and use genuine replacement parts.
- Consider Professional Service: A professional vacuum repair service can identify and resolve hidden issues. As of Q3 2027, the average cost for a major clog removal by a professional technician ranges from $75 to $150 USD, excluding any necessary part replacements.
Conclusion
Effectively unclogging your Shark vacuum is critical for maintaining its performance and extending its lifespan. By systematically inspecting the brush roll, hoses, and internal ducts, most blockages can be identified and cleared. According to verified research and expert sources, consistent, proactive maintenance, including regular filter cleaning and debris removal, significantly reduces the occurrence of severe clogs. For optimal operation into 2027 and beyond, adopt a habit of quick checks after each significant use.
❓ Frequently Asked Questions
What are the primary signs of a clog in a Shark vacuum, and how can I confirm its location?
Reduced or no suction, unusual whistling or grinding noises, and visible debris trapped are primary signs. To confirm, perform a visual inspection of the hose, brush roll, and dust cup, feeling for any blockages and carefully disassembling parts as needed.
Can I unclog my Shark vacuum without disassembling it completely?
Often, yes. Many clogs in the hose or brush roll can be resolved by simply detaching those specific sections and clearing visible debris without needing to dismantle the main motor unit or deep internal components.
What specific steps should I take to clear a brush roll blockage?
Always unplug the vacuum first. Then, typically, you’ll remove the brush roll cover, use scissors or a utility knife to cut through tangled hair and string, and carefully pull out all debris until the brush roll spins freely.
How do I clear a clog in the main hose or intake port of my Shark vacuum?
Detach the hose from both ends and straighten it out; use a long, blunt object like a broom handle or a firm wire to carefully push the obstruction through. For the intake port, visually inspect and use pliers or tweezers for stubborn items.
What preventive measures can I take to avoid future Shark vacuum clogs?
Regularly empty the dust cup before it gets too full, clean or replace filters according to the manufacturer’s schedule, avoid vacuuming large objects, excessive pet hair, or wet debris, and periodically inspect the brush roll for tangles.
My Shark vacuum still has low suction after clearing all visible clogs and cleaning filters. What could be the issue?
If low suction persists, it might indicate a less accessible internal clog within the cyclone assembly, a worn-out seal or gasket causing air leaks, or a potential issue with the motor itself. In such cases, contacting Shark customer support for further diagnostics or professional service is recommended.