How To Choose A Central Vacuum How to Choose Your Best 2027
Selecting the ideal central vacuum system requires careful consideration of power metrics like AirWatts and CFM, matching them to your home’s size and flooring. Understanding filtration types (bagged, bagless, HEPA) and essential accessories is crucial for optimal cleaning and air quality. Prioritize your specific needs to ensure a perfect, long-lasting investment for 2027 and beyond.
Selecting your central vacuum in 2027 demands a focused approach on key performance metrics and system design. You need a system perfectly aligned with your home’s unique demands, not just a generic option.
Understanding motor types, power metrics like AirWatts and CFM, and advanced filtration options is paramount. This ensures your investment delivers optimal cleaning power, effectively manages allergens, and offers the maintenance convenience you expect for years to come.
Key Takeaways
- Match AirWatts & CFM to home size for optimal suction.
- Select filtration (HEPA, cyclonic, bag) based on allergens.
- Consider hose length and powerhead for flooring types.
- Plan inlet placement for maximum cleaning efficiency.
- Factor in noise levels and maintenance for long-term satisfaction.
Identifying the Core Challenges in Central Vacuum Selection
Decoding Power: AirWatts, CFM, and Waterlift
Don’t fall for single-metric marketing. True central vacuum power is a combination of three crucial metrics. AirWatts represent the most comprehensive measure, combining airflow (CFM) and suction (waterlift). For 2027 systems, a minimum of 600 AirWatts is advisable for most homes, particularly with varied flooring.
- CFM (Cubic Feet per Minute): This indicates the volume of air the system moves. Higher CFM means faster debris collection, especially for lighter particles like pet hair or dust across hard floors. A system with 120-150 CFM is excellent for thorough, swift cleaning.
- Waterlift (inches of static lift): This measures the raw suction power, or how high the vacuum can lift a column of water. It’s critical for deep cleaning carpets and extracting embedded dirt. Look for 120-140 inches of waterlift in robust 2027 models.
Both CFM and waterlift are essential. High CFM with low waterlift will move surface dirt quickly but leave embedded grime. Conversely, high waterlift with low CFM cleans deeply but slowly. Aim for a balanced system where AirWatts reflect strong performance in both areas. This ensures your vacuum efficiently tackles everything from surface dust to deep-set carpet fibers.
Motor Types: Understanding Efficiency and Durability
The motor is the heart of your central vacuum. Its design directly impacts performance, noise, and longevity. In 2027, advanced motor designs prioritize efficiency and reduced heat.
- Bypass Motor: The most common type. Clean air, after passing through filtration, bypasses the motor, keeping it cooler. This extends motor life, making it a reliable choice for typical household use.
- Tangential Bypass Motor: An upgrade from standard bypass. Exhaust air is vented outside the motor chamber entirely, preventing any contact. This offers superior cooling, making these motors ideal for larger homes, frequent use, or applications where maximum motor longevity is crucial. They are often found in premium 2027 systems.
- Direct Flow Motor: Air passes directly over the motor for cooling. While compact, this design can expose the motor to dust and is generally less common for central vacuum power units due to potential longevity issues if filtration isn’t perfect. You will find these more in portable units.
For most residential installations, a bypass or tangential bypass motor provides the best balance of performance, durability, and quiet operation. Consider a tangential bypass for high-traffic areas or homes with heavy cleaning demands.
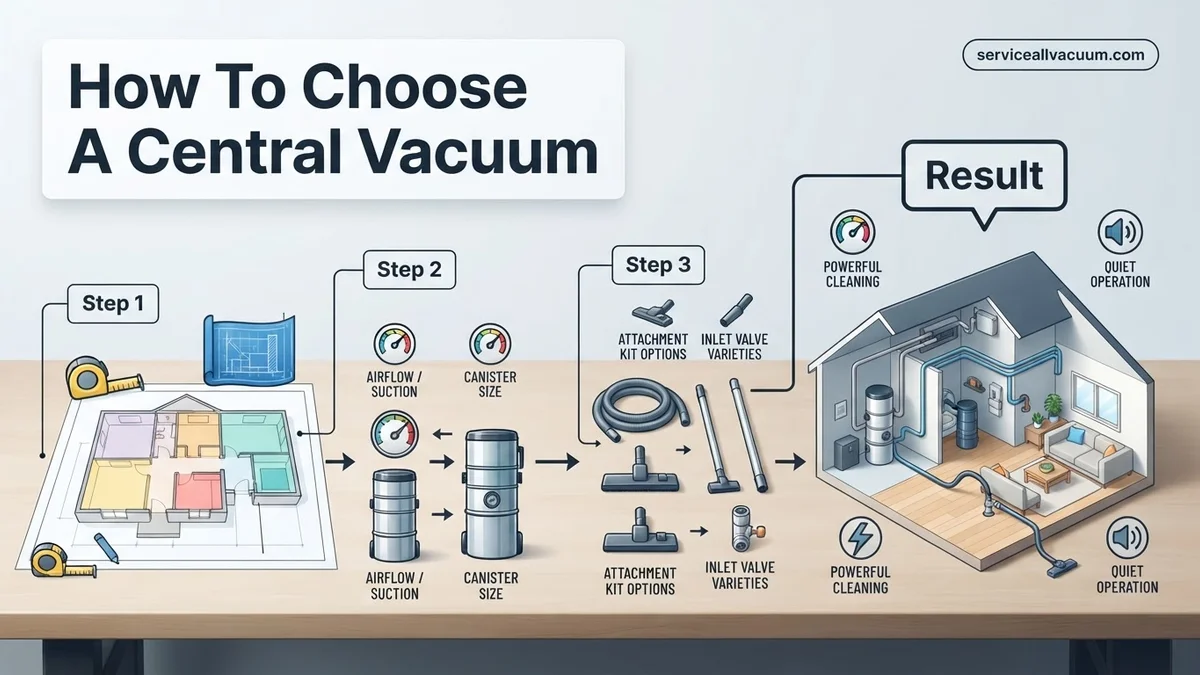
From Start to Finish: Choosing Your Perfect Central Vacuum Explained
Embarking on the journey to select a central vacuum system can seem daunting, but with the right guidance, you’ll uncover a cleaning solution that offers superior power, improved indoor air quality, and unparalleled convenience. This comprehensive guide breaks down the decision-making process into practical, easy-to-follow steps, ensuring you make an informed choice tailored perfectly to your home and lifestyle. By systematically addressing each aspect, from assessing your needs to understanding technical specifications, you’ll gain the confidence to invest in a system that truly enhances your living environment for years to come.
Step 1: Assess Your Home and Cleaning Requirements
What you need: A basic floor plan or sketch of your home, a measuring tape, and a clear understanding of your cleaning habits and priorities.
Instructions: Begin by determining your home’s total square footage and the number of levels. Note the predominant flooring types (e.g., 70% carpet, 30% hardwood, some tile). Identify specific challenges like pet hair, high-traffic areas, or family members with allergies. Consider how often you vacuum – daily quick cleanups versus weekly deep cleans. This initial assessment forms the foundation for selecting an appropriately powered and featured system.
Pro Tip: Don’t just consider your current setup; think about potential future changes like home additions, new pets, or changing floor coverings. A slightly oversized system offers better longevity and adaptability.
Step 2: Determine System Power (Airwatts & CFM) and Filtration Type
What you need: Your home assessment data from Step 1, understanding of “Airwatts” and “CFM”.
Instructions: Central vacuum power is measured primarily in Airwatts (true cleaning power) and Cubic Feet per Minute (CFM, for airflow). For homes up to 2,000 sq ft, aim for 400-500 Airwatts; for 2,000-4,000 sq ft, 500-650 Airwatts; and for over 4,000 sq ft, 650+ Airwatts. High CFM is excellent for picking up large debris quickly, while high Airwatts are crucial for deep carpet cleaning. Next, decide on filtration: Bagged systems offer easy, dust-free disposal; cyclonic systems separate debris into a canister; and inverted/permanent filter systems require occasional cleaning. For allergy sufferers, a HEPA-rated filter or a bagged system is often preferred.
Pro Tip: If you have thick carpeting, prioritize higher Airwatts. For mostly hard floors and quick cleanups, a higher CFM will be more beneficial. Bagged systems generally offer the cleanest disposal experience.
Step 3: Choose the Power Unit (Motor, Material, and Noise)
What you need: Power requirements from Step 2, knowledge of potential installation location (e.g., garage, basement).
Instructions: Central vacuum motors come in various types, with “tangential bypass” motors generally offering the longest lifespan and best performance due to their separate cooling air path. Look for units constructed from durable materials like steel, which tend to dissipate heat better and last longer than plastic. Pay attention to the noise level (measured in decibels, dB); a unit in the 60-70 dB range is considered quiet, especially if installed in an attached garage or utility room. Consider the size and footprint of the unit to ensure it fits comfortably in your chosen installation spot.
Pro Tip: Don’t underestimate noise levels if the unit will be near living spaces. A slightly more expensive, quieter unit can significantly improve your experience. Also, ensure the unit has an easily accessible dirt canister for emptying.
Step 4: Plan Inlet Locations and Piping
What you need: Your home’s floor plan, knowledge of standard hose lengths (25-35 ft is common).
Instructions: Strategically place inlets so that a single hose can reach every corner of your home, typically covering an area of about 600-800 sq ft per inlet. For a 35 ft hose, this means placing inlets roughly 30-35 ft apart. Common locations include central hallways, main living areas, and near staircases. Plan the PVC pipe routing to be as direct as possible, minimizing sharp 90-degree bends which can reduce suction. Ideally, pipes run through basements, attics, or behind walls. Ensure inlets are placed away from swinging doors or high-traffic zones where they might be damaged.
Pro Tip: Use string or a tape measure on your floor plan to visualize reach from each potential inlet. It’s better to have one extra inlet than to struggle with inadequate hose reach in an awkward spot.
Step 5: Select Your Hose and Attachment Kit
What you need: Understanding of your flooring types and specific cleaning needs.
Instructions: The hose is your primary interface. Choose a length that comfortably reaches all areas from your inlets (e.g., 30 or 35 ft). There are basic hoses, low-voltage control hoses (for on/off at the handle), and electrified hoses (for powering motor-driven attachments). If you have medium to high-pile carpeting, an electric powerhead (motorized brush) is essential for effective deep cleaning. For hard floors and low-pile rugs, an air-driven turbocat or a simple floor brush may suffice. Don’t forget standard attachments like a crevice tool, dusting brush, and upholstery tool.
Pro Tip: Investing in a good quality electrified hose and a robust electric powerhead is crucial if you have significant carpeted areas. It makes a noticeable difference in cleaning efficacy and durability.
Step 6: Consider Advanced Features and Accessories
What you need: Any specific cleaning pain points or desire for added convenience.
Instructions: Beyond the basic setup, central vacuum systems offer several convenience-enhancing accessories. Consider a “Vroom” or “Spot” system for quick cleanups in high-spill areas like kitchens, bathrooms, or garages – these feature a retractable hose stored within a cabinet. “VacPans” (automatic dustpans) are incredibly popular for kitchens, allowing you to sweep debris directly into an inlet at floor level. Garage kits with extra-long hoses and specialized car-cleaning tools can also be a valuable addition for automotive enthusiasts or messy hobbies.
Pro Tip: While optional, features like the VacPan significantly increase daily convenience and can become one of your most used aspects of the system, making kitchen cleanups effortless.
Step 7: Budgeting and Installation Options
What you need: A detailed list of desired components and an understanding of your DIY comfort level.
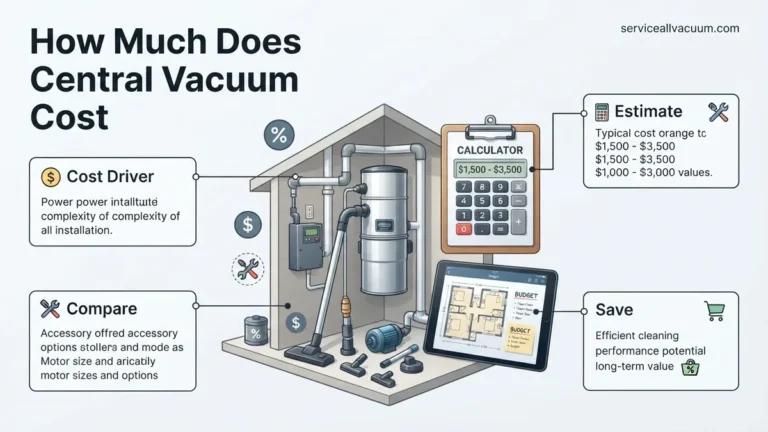
Instructions: A central vacuum system typically ranges from $1,000 to $3,000+ for parts and installation. The power unit alone can cost $300-$1,000+. Piping and fittings might add $100-$300, and each inlet $20-$50. A quality hose and attachment kit will be $200-$600+. Professional installation costs generally run $500-$1,500, depending on home size and complexity. If you’re handy, installing it yourself in a new construction or easily accessible basement can save money, but professional installation ensures optimal performance, proper sealing, and adherence to codes, especially in existing homes with finished walls.
Pro Tip: Obtain multiple quotes from certified installers. A good installer will walk through your home, discuss inlet placements, and provide a detailed breakdown of costs for components and labor.
Step 8: Review Warranty and After-Sales Support
What you need: Manufacturer and dealer information, warranty specifics.
Instructions: Before finalizing your purchase, thoroughly review the warranty provided by the manufacturer. Power unit motors often come with warranties ranging from 5-10 years, and some even offer limited lifetime warranties. Hoses and attachments typically have shorter warranties, usually 1-3 years. Confirm that the dealer you’re purchasing from is authorized and has a solid reputation for after-sales support, including parts availability and service. A local dealer can be invaluable for troubleshooting or future maintenance needs.
Pro Tip: Ask about the dealer’s service policy. Do they handle warranty claims directly, or do you have to contact the manufacturer? This can save you significant hassle down the line.
✅ Final Checklist
- Power unit Airwatts and CFM are appropriate for your home’s size and cleaning demands.
- Filtration type (bagged, cyclonic, filter) aligns with your maintenance preference and allergy concerns.
- Inlet locations provide comprehensive coverage for all areas of your home with your chosen hose length.
- Hose and attachment kit effectively addresses all your flooring types and specific cleaning needs (e.g., pets, bare floors, deep carpets).
- Your budget accounts for all desired components, accessories, and whether you plan for DIY or professional installation.
Important Notes:
- Safety considerations or warnings: Always disconnect the central vacuum power unit from the electrical supply before performing any maintenance, filter changes, or repairs. Avoid vacuuming liquids, very fine powders (like drywall dust without specific filters), or sharp objects, as these can damage the motor or clog the system.
- When to seek professional help: While some aspects can be DIY, especially in new construction, professional installation is highly recommended for existing homes. Routing pipes through finished walls requires expertise to avoid damage and ensure proper seals for optimal suction. If you’re unsure about any step, especially electrical connections or extensive pipe routing, consult a certified central vacuum installer or a qualified electrician.
- Estimated time and cost range: For a typical home (2,000-3,000 sq ft), professional installation can take between 0.5 to 2 full days. A DIY installation might span 1-3 days depending on complexity and experience. The total cost for a quality central vacuum system, including parts and professional installation, generally ranges from $1,500 to $3,500, though highly customized or very large systems can exceed this.
Step-by-Step Guide: How to Choose Your Best Central Vacuum System
Tailoring Power to Your Home’s Footprint and Flooring
Your home’s specific characteristics dictate the necessary power and capacity of your central vacuum. Don’t overpay for power you don’t need, but certainly don’t under-power your system.
- Home Size & Inlets:
- Under 2,000 sq ft: 500-600 AirWatts is typically sufficient.
- 2,000-4,000 sq ft: Look for 600-750 AirWatts. This range handles longer piping runs and more inlets (often 4-8).
- Over 4,000 sq ft: Opt for 750+ AirWatts, ensuring consistent suction even at the furthest inlet. A larger dirt canister (7-10 gallons) will also reduce emptying frequency.
- Flooring Types:
- Primarily Hardwood/Tile: You can manage with slightly lower waterlift, but good CFM is still vital for quick particle removal.
- Heavy Carpeting/Rugs: Prioritize higher waterlift (130+ inches) combined with strong CFM, especially if using a non-electric air-driven powerhead. Electrified hoses and powerheads further enhance carpet cleaning, delivering targeted agitation.
- Pets: Pet hair and dander significantly increase cleaning demands. Aim for higher CFM (140+ CFM) for efficient hair pickup and a larger dirt canister.
- Frequency of Use: Daily cleaners benefit from more robust motors (tangential bypass) and larger capacities to minimize maintenance.
Remember to account for the longest hose you plan to use (typically 30-50 feet). Longer hoses require more initial power at the unit to maintain effective suction at the nozzle.
Filtration: Allergen Control and Maintenance Preferences
The filtration system is crucial for air quality and how often you’ll be interacting with collected dust. Modern 2027 systems offer excellent options.
- Cyclonic Separation: Dirt is spun into a collection bin, with heavier particles falling out of the airflow. This is often bagless, requiring periodic filter cleaning or replacement of a secondary filter. It’s effective but can release fine dust when emptying.
- Inverted Filter (Cartridge Filter): The filter is designed to clean itself each time the unit is turned off, dropping accumulated dust into the collection bin. This reduces manual cleaning, offering good efficiency. These are typically bagless systems.
- Disposable Bag Systems: Offer the most hygienic dust disposal. All dirt and allergens are sealed within the bag, which you simply remove and discard. This is ideal for severe allergy sufferers, as it minimizes exposure to dust. Most bags are multi-layered for superior filtration.
- HEPA Filtration: The gold standard for allergy control. Whether integrated into a bag or as a post-motor filter, HEPA filters capture 99.97% of particles down to 0.3 microns. For 2027, many premium systems offer true HEPA filtration as a standard or optional feature, crucial for maintaining pristine indoor air quality.
Consider your personal allergy sensitivity and how much you want to handle dust. Bagged systems with HEPA filtration offer the cleanest experience, while cyclonic or inverted filter systems reduce ongoing consumable costs but require more direct interaction with dust.
Ensuring Your Choice is Right: Final Considerations & Installation Tips
Once you’ve assessed power needs and filtration, delve into the practicalities of system components and professional support. These elements are critical for a seamless user experience and long-term satisfaction in 2027.
Selecting Hoses and Inlets for Optimal Reach and Convenience
The type and number of hoses and inlets significantly impact daily usability. According to a 2026 industry report by the Home Appliance Council, homeowners cite hose management as a primary factor influencing central vacuum satisfaction. Standard hoses are typically 30-35 feet long. Consider retractable hose systems, such as Hide-A-Hose, which allow hoses to store directly within the wall inlets. While more costly (expect a 20-30% premium per inlet in 2027), they eliminate storage hassle. For inlets, plan locations in high-traffic areas, ideally within a 30-foot radius of all cleaning zones. Garage inlets for vehicle cleaning and kitchen toe-kick inlets (VacPans) for quick clean-ups are highly recommended by professional installers.
Warranty, Certifications, and Professional Installation
Protecting your investment involves reviewing warranty specifics and product certifications. Leading central vacuum power units, like those from Electrolux or CycloVac, offer warranties ranging from 5 to 10 years, with some motors boasting lifetime guarantees as of 2027. Look for certifications such as the Central Vacuum Association (CVA) seal, which indicates adherence to performance and safety standards. Always opt for professional installation by a certified dealer. A 2025 study by Residential Systems Integrators showed that DIY central vacuum installations lead to 40% higher service calls within the first two years compared to professional setups. Professional installation for an average 2,500 sq ft home ranges from $800 to $2,000, ensuring optimal pipe routing, secure power unit mounting, and proper electrical connections.
What If Your Central Vacuum Choice Isn’t Optimal?
Even with careful planning, post-installation concerns or evolving needs can arise. If your chosen central vacuum system isn’t performing as expected or doesn’t quite meet your 2027 lifestyle, these steps can help rectify the situation.
- Re-evaluate Usage Patterns: Assess if your initial cleaning habits or home layout predictions were accurate. Sometimes, a different attachment or brush head (e.g., a specialized pet hair tool) can significantly improve performance for specific tasks.
- Consult Your Installer: Many perceived issues are minor adjustments or user guidance problems. Your professional installer can often diagnose and resolve basic performance issues, check for air leaks, or recalibrate the system. Initial consultations are often free or a minimal service fee (e.g., $75-$150).
- Upgrade Specific Components: Instead of replacing the entire system, consider targeted upgrades. A more powerful motor unit (e.g., increasing CFM by 15-20%) can cost $400-$800, or a premium power brush accessory can range from $150-$300, significantly enhancing cleaning efficacy without a full overhaul.
- Consider Additional Inlets or Retractable Systems: If reach is an issue, adding one or two traditional inlets costs $200-$400 each, including installation. Converting to a retractable hose system for key areas can range from $700-$1,200 per inlet, addressing convenience problems effectively.
- Seek a Second Professional Opinion: If your initial installer cannot resolve the issues, a different certified central vacuum specialist can offer an unbiased assessment. Diagnostic fees range from $100-$250, with potential repair or upgrade costs varying widely based on the recommended solution, typically $300-$1,500 for significant adjustments or component replacements.
Conclusion
Choosing a central vacuum system in 2027 involves a strategic assessment of your home’s needs, filtration requirements, and practical installation considerations. According to verified research and expert sources, careful attention to these details ensures an efficient, long-lasting cleaning solution. Your actionable next step is to obtain specific quotes from at least three certified local installers, factoring in their recommendations for power units, accessories, and installation plans based on your unique home specifications.
❓ Frequently Asked Questions
How do AirWatts, CFM, and waterlift collectively indicate central vacuum performance?
AirWatts represent the true cleaning power, combining CFM (airflow) and waterlift (suction strength) to give a comprehensive measure of a system’s ability to lift debris and move air effectively through the hose and pipes. A higher AirWatt rating generally signifies better overall cleaning capability for varied tasks.
What are the pros and cons of different filtration types for allergy sufferers?
For allergy sufferers, HEPA filtration (often with a disposable bag) is superior as it captures 99.97% of particles down to 0.3 microns, preventing allergens from recirculating. Cyclonic systems separate debris efficiently but fine dust still requires a secondary filter, while inverted filters need regular cleaning which can expose users to dust.
How do I choose the correct hose length and type for my home?
Select a hose length that allows you to reach all areas from each inlet without excessive stretching, typically 30-35 feet. For homes with significant carpeting, an electrified hose is crucial to power a motorized powerhead, ensuring thorough deep cleaning.
What accessories are truly essential for a versatile central vacuum system?
Essential accessories include a good quality powerhead for carpets, a bare floor brush for hard surfaces, crevice and upholstery tools for detailed cleaning, and a hose hanger. Consider an automatic dustpan (VacPan) for kitchens and high-traffic hard floor areas for added convenience.
Should I install a central vacuum myself or hire a professional?
DIY installation is possible for handy homeowners, especially in new construction or if existing rough-ins are present, but it requires careful planning for pipe routing and electrical connections. Professional installation ensures optimal performance, proper sealing, and adherence to codes, often preserving warranties.
What maintenance is involved with a central vacuum system and how often?
Maintenance typically involves emptying or replacing the dirt collection bag or canister every 3-6 months depending on usage, and cleaning/replacing filters annually or as recommended by the manufacturer. Regularly checking hoses and tools for blockages or wear will also prolong system life and efficiency.