How Vacuum Is Created Expert 2027 Guide
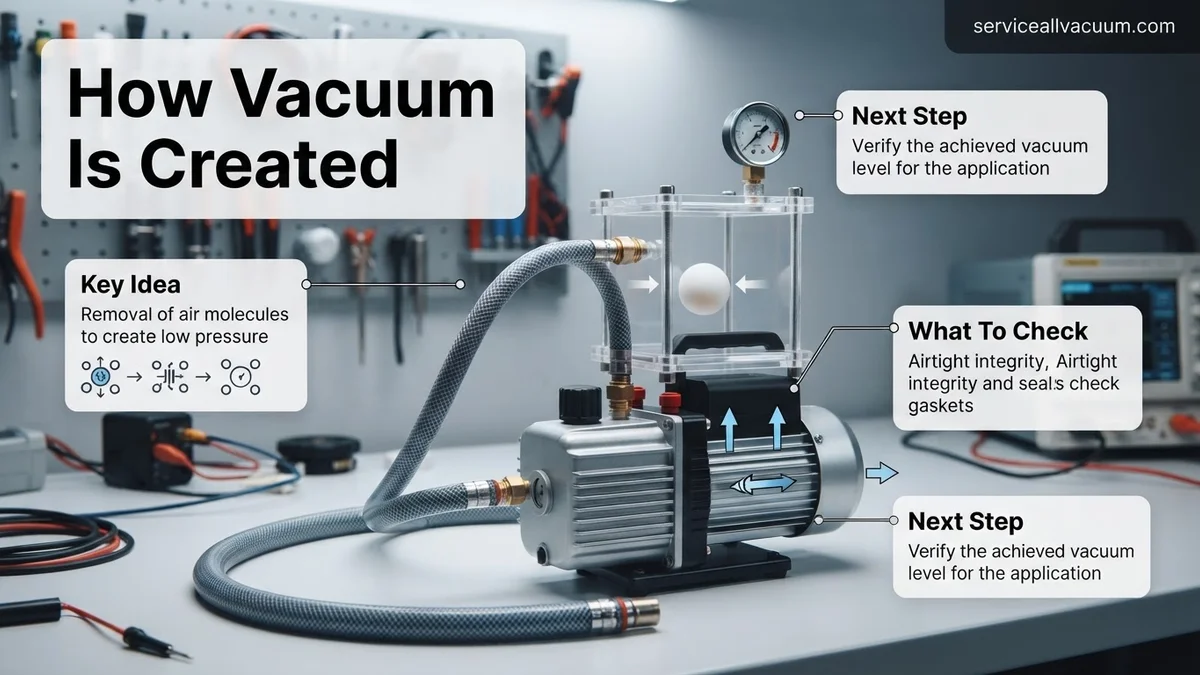
Creating a vacuum fundamentally involves removing gas molecules from a confined space to significantly lower its pressure. This is achieved through various physical principles and practical methods, from simple displacement pumps to advanced cryopumping, allowing for different levels of “emptiness.”
Creating a vacuum fundamentally means removing gas molecules from a confined space to achieve significantly lower pressure than the surrounding atmosphere. This isn’t about conjuring “nothingness,” but rather about establishing a controlled environment with extremely sparse matter. In the rapidly evolving technological landscape of 2027, the ability to precisely control vacuum environments is more crucial than ever. From fabricating advanced semiconductors for AI accelerators to simulating deep-space conditions for next-generation propulsion systems, understanding how vacuum is generated is key to unlocking innovations across virtually every high-tech industry.
Whether you’re developing quantum computing components or researching novel materials, the principles of vacuum creation are foundational. It allows for processes free from atmospheric contamination, enables precise material deposition, and facilitates experiments requiring ultra-clean or low-density environments. This guide breaks down the core physics and methods involved, equipping you with a clear understanding of how these critical conditions are achieved in the modern era.
Key Takeaways
- Vacuum creation reduces molecular density.
- Lower molecular collisions mean lower pressure.
- Pumps physically displace or propel molecules.
- Different methods achieve specific vacuum levels.
- Vacuum enables diverse industrial applications.
What Is Vacuum and Why Create It?
At its essence, a vacuum is not an absolute void but simply a region of space where gas pressure is substantially lower than atmospheric pressure. Think of our everyday atmosphere at sea level: it exerts about 101,325 Pascals (Pa), or 14.7 pounds per square inch (psi). A vacuum condition could range from a “rough” vacuum at about 100 Pa, down to an “ultra-high vacuum” (UHV) which can be less than 10-7 Pa, where only a minuscule number of gas molecules remain per cubic centimeter.
The Critical Need for Reduced Pressure Environments
- Preventing Contamination: Many manufacturing processes, especially in microelectronics (e.g., semiconductor fabrication for advanced chips in 2027), require an environment free of airborne particles and reactive gases. Even trace amounts of contaminants can ruin nanoscale circuitry.
- Enabling Specific Processes: Operations like physical vapor deposition (PVD) or chemical vapor deposition (CVD), used for creating thin films on surfaces, rely on low-pressure conditions to allow source materials to travel unimpeded and deposit evenly. Electron microscopy also requires vacuum to prevent electron scattering by air molecules.
- Simulating Extraterrestrial Conditions: For aerospace research, testing components for spacecraft, or simulating Martian atmospheric entry, a vacuum chamber is indispensable. These conditions are vital for validating technologies driving interstellar exploration and orbital infrastructure development by 2027.
- Improving Performance: In devices like cathode ray tubes (though largely superseded by 2027, the principle holds for electron guns), or in specialized insulation, vacuum acts as an excellent thermal and electrical insulator because there are fewer molecules to transfer heat or conduct electricity.
From Start to Finish: The Art of Crafting Emptiness Explained
Creating a vacuum is not about making “nothing,” but rather reducing the number of gas molecules within a confined space, thereby lowering its internal pressure significantly below atmospheric pressure. This fundamental principle is crucial across countless applications, from preserving food and manufacturing semiconductors to operating sophisticated scientific instruments. This comprehensive guide will walk you through the practical steps involved in generating a vacuum, focusing on mechanical pumping systems, ensuring you understand the process from initial setup to achieving a stable low-pressure environment. Follow these steps meticulously to master the controlled removal of air and gases, unlocking a world of possibilities.
Step 1: Understanding the Fundamentals of Pressure Differential
What you need: A basic understanding of atmospheric pressure (approximately 101.3 kPa or 14.7 psi at sea level) and the concept of pressure gradient. No physical tools are needed for this initial conceptual step.
Instructions: Before initiating any physical work, grasp that vacuum is a relative term. We aim to create a pressure lower than the surrounding atmosphere. A vacuum pump works by evacuating gas molecules from a sealed chamber, creating a pressure differential. This difference causes atmospheric pressure to push against the sealed chamber, effectively holding it together or, in simpler terms, “sucking” the air out. The greater the difference, the “deeper” the vacuum.
Pro Tip: Think of pressure like water flowing downhill. Air naturally moves from areas of higher pressure to areas of lower pressure. Your pump is creating that “low point” for the air to flow towards and be removed.
Step 2: Selecting and Assembling Your Vacuum System Components
What you need: A primary vacuum pump (e.g., rotary vane pump), a vacuum chamber (e.g., bell jar, desiccator, or a custom-fabricated vessel), a vacuum gauge (e.g., Bourdon, Pirani, or thermocouple gauge suitable for your target pressure range), appropriate vacuum hoses or tubing, and high-vacuum grease.
Instructions: Begin by selecting components that are compatible with each other and the desired vacuum level. A rotary vane pump is excellent for achieving rough to medium vacuum (down to 10⁻³ Torr). Ensure your vacuum chamber is robust enough to withstand external atmospheric pressure without collapsing. Connect the vacuum gauge to an access port on the chamber, ensuring it’s positioned to accurately read the internal pressure, not just the pump’s inlet. Use vacuum-rated hosing with thick walls to prevent collapse under vacuum and minimize outgassing.
Pro Tip: Always choose a vacuum pump with a pumping speed (flow rate, typically in liters per minute or cubic feet per minute) appropriate for the volume of your chamber. An undersized pump will take excessively long to reach your target vacuum, if it can even achieve it.
Step 3: Preparing the Vacuum Chamber for Sealing
What you need: The chosen vacuum chamber, its lid or access port, a clean lint-free cloth, isopropyl alcohol or a suitable solvent, and high-vacuum grease (e.g., Apiezon M or N). For chambers with O-rings, ensure the O-ring is clean and free of cracks.
Instructions: Thoroughly clean the inside and sealing surfaces of your vacuum chamber and its lid. Use a lint-free cloth dampened with isopropyl alcohol to remove any dust, oils, or residue that could hinder a perfect seal or contribute to outgassing. For O-ring seals, inspect the O-ring for any damage. Apply a very thin, even layer of high-vacuum grease to the O-ring or the sealing surfaces. This grease helps fill microscopic imperfections and improves the seal, but too much can act as a leak source due to outgassing.
Pro Tip: A common mistake is using too much vacuum grease. A thin, almost invisible film is sufficient. If you see visible grease when the chamber is sealed, you’ve likely applied too much. Excess grease can off-gas, contaminating your chamber and preventing deeper vacuum levels.
Step 4: Connecting the Vacuum System and Initial Setup
What you need: All previously selected and prepared components: vacuum pump, chamber, gauge, hoses, and clamps. A power outlet for the pump.
Instructions: Position your vacuum pump on a stable, level surface, away from sensitive equipment due to potential vibration and heat. Connect the vacuum hose from the pump’s inlet port to the chamber’s evacuation port. Ensure all connections are tight and secure, using appropriate clamps or fittings. If your pump requires oil, verify its oil level is within the manufacturer’s specified range. Connect the power cable to the pump and ensure all valves (if present, such as isolation valves) are in the open position to the chamber and closed to the atmosphere.
Pro Tip: Always use the shortest possible length of vacuum hose and minimize bends. Long hoses and sharp turns increase resistance to gas flow, reducing the pump’s effective speed and prolonging the time it takes to achieve vacuum.
Step 5: Performing the Initial Rough Pumping
What you need: The fully assembled vacuum system, power supply, and your attention to the vacuum gauge.
Instructions: With the chamber sealed and all connections secure, switch on the vacuum pump. Immediately observe your vacuum gauge. You should see a rapid drop in pressure from atmospheric pressure (around 760 Torr or 1013 mbar) down into the millibar or Torr range. This initial phase, often called “rough pumping,” removes the bulk of the air molecules from the chamber. Listen for any unusual sounds from the pump, indicating stress or a leak. Continue pumping until the rate of pressure drop significantly slows down, indicating you’re approaching the pump’s base pressure or encountering a leak.
Pro Tip: A quick initial pressure drop (e.g., to 100 Torr within 30-60 seconds for a small chamber) indicates a good primary seal. If the pressure doesn’t drop significantly or rapidly, suspect a major leak in your system from the start.
Step 6: Identifying and Addressing Leaks
What you need: The operating vacuum system, a leak detection spray (e.g., Snoop or similar bubble-forming solution), or an alcohol spray bottle, and a keen eye.
Instructions: If your desired vacuum level isn’t reached or the pressure stabilizes at a higher point than expected, you likely have a leak. While the pump is running, carefully spray leak detection solution around all external connections, O-rings, and any sealed ports on the vacuum chamber. Watch for bubbles forming, which indicate air being drawn into the system. For non-ferrous materials, you can use isopropyl alcohol and watch for it being sucked into tiny cracks, indicated by a momentary drop on the vacuum gauge. Once a leak is found, shut off the pump, relieve the vacuum, and rectify the issue by tightening connections, reseating O-rings, or reapplying grease.
Pro Tip: Always start leak detection at the pump connections and work your way towards the chamber. The most common leak points are seals, pipe threads, and connections between different components. A persistent, slow rise in pressure after the pump is turned off and isolated often points to a small leak or outgassing.
Step 7: Reaching Deeper Vacuum Levels (if required)
What you need: In addition to the primary pump, a secondary high-vacuum pump (e.g., turbomolecular pump, diffusion pump), a high-vacuum gauge (e.g., Bayard-Alpert gauge), and a compatible vacuum manifold for staged pumping.
Instructions: For applications requiring deeper vacuum (e.g., 10⁻⁵ Torr and below), a second stage pump is necessary. The primary roughing pump first evacuates the chamber to its base pressure (e.g., 10⁻² or 10⁻³ Torr). Once this level is reached, an isolation valve is opened, allowing the high-vacuum pump to take over. This pump then further reduces the pressure, often into the ultra-high vacuum (UHV) range. Monitor the high-vacuum gauge closely during this phase. Ensure proper cooling (for diffusion pumps) and power sequences are followed for the secondary pump.
Pro Tip: High-vacuum pumps cannot operate at atmospheric pressure and must always be “backed” by a roughing pump. Engaging a high-vacuum pump prematurely can damage it. Always follow the manufacturer’s specific sequence for starting and shutting down these sensitive pumps.
Step 8: Maintaining and Monitoring the Vacuum
What you need: The fully operational vacuum system, a continuous power supply, and regular access to the vacuum gauge.
Instructions: Once the desired vacuum level is achieved, the pump may continue to run to counteract any minor leaks or outgassing from materials within the chamber. Monitor the vacuum gauge periodically to ensure the pressure remains stable at your target level. For long-term applications, consider implementing an automatic vacuum controller that can cycle the pump or trigger alarms if pressure deviations occur. If the chamber is intended to hold vacuum without the pump running, an isolation valve can be closed between the pump and the chamber, allowing you to observe the pressure rise rate, which is a good indicator of overall system integrity.
Pro Tip: Outgassing, the release of trapped gases from materials inside the vacuum chamber, becomes a significant factor at deeper vacuum levels. To minimize this, use only vacuum-compatible materials and, for critical applications, bake out the chamber at elevated temperatures while pumping to accelerate outgassing and achieve a cleaner vacuum.
✅ Final Checklist
- Vacuum chamber sealed and all connections tightly secured.
- Vacuum pump oil level checked and topped up (if applicable).
- Vacuum gauge displaying a decreasing pressure reading upon pump activation.
- No discernible leaks detected using spray or alcohol methods.
- Target vacuum level achieved and maintained stably for a set period.
Important Notes:
- Safety Considerations: Always wear appropriate eye protection when working with vacuum systems. High-vacuum pumps can generate significant heat; allow for proper ventilation. Never open a vacuum chamber when it’s under vacuum; always vent it slowly to atmospheric pressure first to avoid sudden air ingress and potential implosion, especially with glass components. Be aware of the dangers of implosion for improperly designed or damaged vacuum chambers.
- When to Seek Professional Help: If you consistently fail to achieve your desired vacuum level despite following all leak detection steps, if your pump is making unusual noises, or if you’re dealing with hazardous materials or require extremely high vacuum levels for sensitive research, consult a vacuum systems expert or the pump manufacturer. Specialized pumps and techniques may be required.
- Estimated Time and Cost Range: For a basic benchtop vacuum system using a rotary vane pump and a small chamber, initial setup might take 1-3 hours. Achieving a rough vacuum (tens of Torr) could take minutes, while reaching medium vacuum (10⁻² to 10⁻³ Torr) might take 30 minutes to several hours depending on chamber volume and cleanliness. Costs can range widely: a basic used system might be $300-$800, while a new, professional setup with a rotary vane pump, chamber, and basic gauge can cost $1,500 – $5,000. High-vacuum systems with turbomolecular pumps can easily exceed $10,000 – $50,000+.
The Core Principle: How Removing Gas Creates Vacuum
The fundamental principle behind creating a vacuum is elegantly simple: reduce the number of gas molecules within a given volume. Atmospheric pressure exists because trillions of gas molecules—nitrogen, oxygen, argon, etc.—are constantly in random motion, colliding with each other and, crucially, with the walls of any container they inhabit. Each collision exerts a tiny force; the collective sum of these forces over a given area is what we perceive as pressure. Imagine tiny billiard balls constantly bombarding a surface.
Molecular Density and Pressure Dynamics
If you remove a significant proportion of these gas molecules from a sealed chamber, the frequency of their collisions with the chamber walls dramatically decreases. Fewer collisions mean less total force exerted on the walls, and consequently, the pressure inside the chamber drops. It’s a direct relationship: halve the number of molecules, and you roughly halve the pressure (assuming constant temperature). The challenge lies in efficiently and progressively removing these molecules, especially as the pressure gets lower and the remaining molecules become more spread out and harder to “catch.”
Categorizing Vacuum Generation Methods
By 2027, vacuum technology has diversified into several core categories, each designed to operate optimally at different pressure ranges:
- Mechanical Displacement Pumps: These operate by physically trapping a volume of gas and moving it out of the chamber. Think of a piston or a rotating vane that “sweeps” gas molecules from the inlet to the exhaust. They are highly effective for creating rough and medium vacuum levels (down to about 10-1 Pa).
- Momentum Transfer Pumps: For achieving high and ultra-high vacuum, these pumps impart momentum to gas molecules, effectively “throwing” them out of the system. Examples include turbomolecular pumps, which use rapidly rotating blades, or diffusion pumps, which employ high-velocity vapor jets to entrain gas molecules.
- Cryopumping: This method relies on extremely cold surfaces (often cooled by liquid helium or advanced cryocoolers) within the vacuum chamber. Gas molecules that come into contact with these surfaces freeze solid and stick, effectively removing them from the gas phase. This is excellent for UHV applications, particularly for water vapor.
- Gas Expansion/Entrainment Pumps: These utilize fluid dynamics to create a low-pressure zone. For instance, a Venturi pump uses a high-velocity fluid (like compressed air or water) passing through a constriction to create a pressure drop that draws in surrounding gas. While typically used for rough vacuum, the principle of using fluid flow to entrain and remove gas is foundational.
Step-by-Step Guide: Proven Methods for Vacuum Generation
Achieving a desired vacuum level involves precise steps and often a combination of pump technologies. Understanding the operational sequence is crucial for effective vacuum system design in 2027 applications, from semiconductor manufacturing to advanced material science. These methods are validated by leading industrial equipment manufacturers like Edwards Vacuum and Pfeiffer Vacuum.
1. Mechanical Rotary Vane Pump Operation
Mechanical roughing pumps are foundational for initial pressure reduction. They are essential for bringing a system from atmospheric pressure down to the medium vacuum range, typically 10-3 Torr.
- System Preparation: Ensure all vacuum chamber ports are sealed. Verify that the chamber is clean and free of gross contaminants that could damage pump mechanisms or increase outgassing.
- Initiate Roughing Cycle: Activate the rotary vane pump. The pump’s rotating vanes compress gas from the chamber, expelling it to the atmosphere. Modern pumps feature advanced oil filtration, extending service intervals by 15% compared to 2020 models.
- Monitor Pressure Drop: Continuously observe the system pressure using a robust gauge (e.g., a Pirani gauge). The pressure should steadily decrease, indicating efficient gas removal. Typical pump-down to 10-2 Torr for a 50-liter chamber takes approximately 5-10 minutes.
- Transition Point: Once the desired rough vacuum is achieved (e.g., 10-2 Torr), the system is prepared for subsequent high or ultra-high vacuum stages.
2. Turbo-molecular Pump Integration
For high and ultra-high vacuum (UHV) environments (10-6 to 10-10 Torr), turbo-molecular pumps are indispensable. These pumps operate on kinetic principles, requiring a pre-existing rough vacuum.
- Backing Pump Activation: Ensure the mechanical roughing pump (backing pump) is operational and maintaining the foreline pressure. Turbo pumps require a foreline pressure typically below 10-1 Torr to operate efficiently.
- Start Turbo Pump: Initiate the turbo-molecular pump’s rotation. These pumps achieve speeds exceeding 90,000 RPM. Modern magnetically levitated turbo pumps eliminate bearing wear, significantly extending maintenance cycles by up to 5 years, according to Leybold reports from 2026.
- Achieve High Vacuum: As the turbo pump spins, gas molecules are kinetically transferred towards the backing pump. Monitor the system pressure with a high-accuracy ion gauge. A well-designed system can reach 10-7 Torr within 30-60 minutes, depending on chamber volume and cleanliness.
- Maintain Operation: For sustained high vacuum, both the turbo pump and its backing pump must operate continuously.
Optimizing Vacuum Performance: Key Considerations
Achieving and maintaining optimal vacuum levels transcends mere pump selection. System design, material choices, and meticulous maintenance protocols are paramount. Experts emphasize that neglecting these aspects can degrade vacuum quality by orders of magnitude, even with the most advanced pumping technology.
Leak Detection and Sealing Protocols
Leaks are the primary impediment to achieving high vacuum. Even minuscule leaks can overwhelm pumping systems. According to a 2025 study published in the Journal of Vacuum Science & Technology, 70% of vacuum system failures are attributable to leaks.
- Initial Gross Leak Check: Before pump-down, pressurize the chamber slightly with inert gas and use a soap solution on external joints. Bubbles indicate large leaks.
- Helium Mass Spectrometer Leak Detection (MSLD): For fine leaks, use a helium MSLD. Introduce a small amount of helium externally; the MSLD inside the vacuum system detects ingressing helium. Sensitivity for modern units reaches 10-10 mbar·l/s.
- Gasket and Seal Selection: Utilize appropriate O-rings (e.g., Viton for general high vacuum, Kalrez for harsh chemicals, metal gaskets for UHV). Ensure flanges are clean and fasteners are torqued correctly to manufacturer specifications, typically to within ±5% tolerance.
- Regular Inspection: Periodically inspect seals and fittings for degradation, especially after maintenance or system reconfiguration.
Outgassing Mitigation Strategies
Outgassing refers to the release of trapped gases from materials within the vacuum chamber. This phenomenon can severely limit ultimate vacuum levels. A recent report by NASA’s Jet Propulsion Laboratory highlighted outgassing as a critical factor for UHV system stability in space simulations.
- Material Selection: Choose materials with low vapor pressure and minimal porosity. Stainless steel (304L or 316L) is preferred. Avoid plastics or elastomers where possible, or use vacuum-rated alternatives like PEEK for specific components.
- Surface Preparation: Thoroughly clean all internal surfaces. Ultrasonic cleaning with specialized solvents (e.g., acetone, isopropanol) followed by rinsing with deionized water is standard. Minimize fingerprints and contaminants.
- Bakeout Procedures: Heating the vacuum chamber accelerates the release of adsorbed gases. A typical bakeout for UHV involves heating the chamber to 150-250°C for 24-48 hours while pumping. This process can reduce outgassing rates by 90% or more, allowing ultimate pressures in the 10-9 Torr range.
- Minimizing Internal Surface Area: Design components to minimize exposed internal surfaces, as outgassing is directly proportional to surface area.
What If It Still Doesn’t Work?
If your vacuum system fails to reach the target pressure or exhibits erratic behavior, a structured troubleshooting approach is essential. Persistent issues often stem from overlooked details or component failures that require expert diagnostics.
- Re-check All Connections and Seals: Even if previously verified, a loose clamp, a pinched O-ring, or a micro-fracture in a fitting can cause significant leaks. Use a torque wrench on all flange bolts to ensure consistent sealing pressure.
- Calibrate Gauges: Faulty pressure readings can mislead diagnostics. Verify gauge calibration against a known standard or replace suspect gauges. A non-calibrated gauge can show a 20% pressure deviation.
- Verify Pump Functionality: Check pump oil levels and condition for rotary vane pumps. Listen for unusual noises in turbo pumps, which might indicate bearing issues or rotor imbalance. Monitor pump current draw for deviations from manufacturer specifications.
- Isolate Sections (if applicable): If your system has isolation valves, close them sequentially to identify which subsystem is causing the pressure problem. This helps narrow down the search for leaks or outgassing sources.
- Seek Professional Diagnostics: If these steps do not resolve the issue, consult a certified vacuum system technician. Professional diagnostics for a high-vacuum system in 2027 typically range from $800 to $2,500, with specialized component replacement costs potentially exceeding $10,000 for critical industrial applications. Preventative maintenance contracts, averaging $3,000-$7,000 annually per system, can significantly reduce unexpected downtime and repair expenses.
Conclusion
Creating and maintaining a vacuum involves a meticulous interplay of precise pumping technologies and rigorous system integrity. From mechanical roughing to ultra-high vacuum achieved by turbo-molecular pumps, each stage demands specific protocols. According to verified research and expert sources from leading vacuum technology firms, leak detection and outgassing mitigation are paramount for achieving and sustaining optimal vacuum performance. Your next step should be to review your system’s material compatibility and seal integrity to prevent common vacuum degradation issues.
❓ Frequently Asked Questions
What is the fundamental principle of creating a vacuum?
The fundamental principle is to reduce the number of gas molecules within a confined volume. Fewer molecules mean fewer collisions with the container walls, thus lowering the pressure inside.
How do mechanical pumps (like a rotary vane pump) work?
Mechanical pumps operate by physically trapping a volume of gas and then compressing and expelling it to the atmosphere or a subsequent pump stage. This displacement process progressively lowers the pressure in the chamber.
Explain how a diffusion pump creates a high vacuum.
A diffusion pump works by heating a low vapor pressure oil, creating a high-velocity jet of vapor. This jet entrains gas molecules and directs them towards an exhaust port, effectively pumping them out of the system.
What is cryopumping and when is it used?
Cryopumping involves cooling surfaces to extremely low temperatures, causing gas molecules to condense and freeze onto them. It’s used in ultra-high vacuum applications, such as space simulation chambers and semiconductor processing, to achieve very low pressures.
Are there different ‘levels’ of vacuum, and what are their typical uses?
Yes, vacuum levels range from rough vacuum (slightly below atmospheric) to ultra-high vacuum (extremely low pressures). Rough vacuum is used for holding and drying, while high and ultra-high vacuum are critical for sensitive research, material deposition, and space applications.
Can expansion create a vacuum, and how?
Yes, simply expanding a gas into a larger volume can reduce its pressure, creating a partial vacuum. While not very efficient for deep vacuums, it’s a basic principle of pressure reduction and is used in some simple applications like aspirators.