How Do I Find a Vacuum Leak Expert Step-by-Step Guide 2027
Finding a vacuum leak can resolve rough idling and poor engine performance. This guide provides practical, step-by-step methods using common tools or specialized equipment to pinpoint the exact source of the leak safely and efficiently.
Struggling with a rough idle, an illuminated “Check Engine Light,” or poor fuel economy in your vehicle? The culprit could very well be a vacuum leak. Pinpointing the exact source of a vacuum leak is crucial for restoring your engine’s optimal performance and preventing further complications, especially with the increasingly sophisticated engine management systems seen in 2027 models. This guide will walk you through precise, step-by-step methods to expertly locate these elusive leaks.
Don’t let a tiny crack or a loose hose derail your vehicle’s reliability. Knowing how to efficiently find a vacuum leak saves you time, money, and the frustration of chasing vague symptoms. We’ll focus directly on the practical techniques and essential tools you need to diagnose this common issue with confidence and accuracy, ensuring your vehicle runs smoothly.
Key Takeaways
- Visual inspection often reveals obvious hose cracks.
- Smoke machines offer the most accurate leak detection.
- Propane/carb cleaner tests identify leaks by RPM changes.
- Listen carefully for hissing sounds around engine.
- Always prioritize safety with proper ventilation and gear.
What Causes Vacuum Leaks & Their Symptoms
Common Culprits in 2027 Vehicles
Vacuum leaks occur when unmetered air enters your engine’s intake system, bypassing the mass airflow sensor. This throws off the air-fuel ratio, leading to performance issues. In 2027 vehicles, common failure points often include:
- Aged or Cracked Vacuum Hoses: Rubber and plastic components degrade over time due to heat cycling and exposure to engine bay contaminants.
- Intake Manifold Gaskets: These seals can harden and crack, creating pathways for air to leak into the intake runners.
- PCV (Positive Crankcase Ventilation) System Components: Hoses, valves, and grommets in the PCV system are frequent sources of leaks.
- Brake Booster Diaphragm/Hose: A leak here affects both braking performance and engine idle.
- Faulty Evap System Components: While less common, issues with the EVAP purge valve or lines can sometimes manifest as vacuum leaks.
Telltale Signs You Have a Leak
Identifying these symptoms early can save significant diagnostic time:
- Rough or High Idle: The engine struggles to maintain a consistent RPM, often surging or dipping erratically.
- Check Engine Light (CEL): Commonly accompanied by diagnostic trouble codes like P0171 or P0174 (System Too Lean Bank 1/2), indicating an air-fuel imbalance.
- Hissing or Whistling Sounds: Often heard from the engine bay, indicating air being drawn into a compromised seal or hose.
- Stalling or Poor Acceleration: Especially noticeable at low speeds or when coming to a stop.
- Harder Brake Pedal: If the brake booster vacuum line is compromised, the power assist for braking is reduced.
How to Diagnose and Fix Vacuum Leaks Like an Expert
A vacuum leak might seem like a minor annoyance, but it can lead to a host of performance issues in your vehicle, including rough idling, poor fuel economy, loss of power, and even a “Check Engine” light illumination. This comprehensive guide will walk you through systematic methods, from simple visual inspections to more advanced diagnostic techniques, to pinpoint the source of a vacuum leak. Following these steps carefully will not only help you identify and fix the problem but also save you time, money, and the frustration of chasing elusive engine issues.
Step 1: Understand the Symptoms & Prioritize Safety
What you need: Your vehicle’s owner’s manual (for understanding normal operating parameters), a quiet environment, common sense.
Instructions: Before you even start looking, familiarize yourself with the common symptoms of a vacuum leak. These often include a rough or high idle, a distinct hissing or whistling sound coming from the engine bay, a decrease in engine power or acceleration, and an illuminated “Check Engine” light, often accompanied by lean fuel mixture codes (e.g., P0171, P0174). Crucially, ensure your work area is well-ventilated, especially if you plan to use chemicals. Always wear appropriate personal protective equipment, such as safety glasses and gloves, and keep a fire extinguisher nearby, especially when working with flammable substances.
Pro Tip: Pay close attention to when the symptoms appear. Do they worsen when the engine is cold or hot? Does turning on accessories (like AC) change anything? These observations can provide valuable clues about the leak’s location or nature.
Step 2: Visual Inspection: The Low-Tech Approach
What you need: A bright flashlight, mechanic’s gloves, a flathead screwdriver (optional, for gentle probing).
Instructions: With the engine off and cool, begin by thoroughly examining all visible vacuum lines and hoses under the hood. Look for obvious signs of damage: cracks, tears, brittle sections, loose connections, or hoses that have completely disconnected. Pay particular attention to smaller diameter lines that connect to various components like the PCV valve, EGR valve, brake booster, and various sensors. Gently wiggle hoses and connections to see if any are loose. Don’t forget to check the intake manifold gaskets and throttle body gasket for any visible signs of degradation or oil seepage, which can indicate a sealing issue.
Pro Tip: Vacuum lines often become brittle and crack where they bend sharply or connect to fittings. Follow each hose from start to end, checking its entire length, and don’t overlook less accessible areas that might be hidden under other components.
Step 3: The Engine Idling Test: Listen and Feel
What you need: A pair of mechanic’s gloves, a stethoscope (optional, for pinpointing sounds).
Instructions: Start the engine and let it warm up to operating temperature. Listen carefully for any hissing, whistling, or sucking sounds that weren’t present before. These sounds are often the tell-tale sign of air being drawn into the intake system through an unintended opening. Systematically move your head around the engine bay, listening closely to different areas, particularly around the intake manifold, vacuum lines, and throttle body. You might also feel a slight rush of air with your hand if a leak is significant. If you have a mechanic’s stethoscope, use it to amplify sounds and narrow down the precise location of the noise, placing the probe near suspected leak points.
Pro Tip: A vacuum leak can sometimes manifest as a fluctuating or high idle. If the engine RPMs surge or drop erratically, it’s a strong indicator. Try listening for changes in sound or idle quality when gently manipulating various hoses.
Step 4: Propane/Unlit Carburetor Cleaner Test (Extreme Caution!)
What you need: An unlit propane torch (with gas on low), OR a can of unlit carburetor cleaner with a straw nozzle, safety glasses, fire extinguisher.
Instructions: This method requires extreme caution due to flammability. With the engine idling, slowly and carefully direct a small stream of propane gas (unlit torch, valve slightly open) or carburetor cleaner around suspected vacuum leak areas. If there’s a leak, the engine’s RPMs will momentarily increase as the engine draws in the flammable substance, enriching the air-fuel mixture. Start with the intake manifold gasket, then move to vacuum hoses, PCV valve, and brake booster. Work in small sections, waiting a few seconds between applications to observe any change in idle speed. Have a fire extinguisher ready and ensure excellent ventilation.
Pro Tip: Always start with very small bursts of propane or cleaner. An excessive amount could cause a significant RPM surge, making it harder to pinpoint the exact location. If the idle increases, immediately stop applying the substance and focus your attention on that specific area.
Step 5: Smoke Machine Test: The Professional Touch
What you need: Automotive smoke machine, shop air compressor, appropriate adapters (often included with the machine), safety glasses.
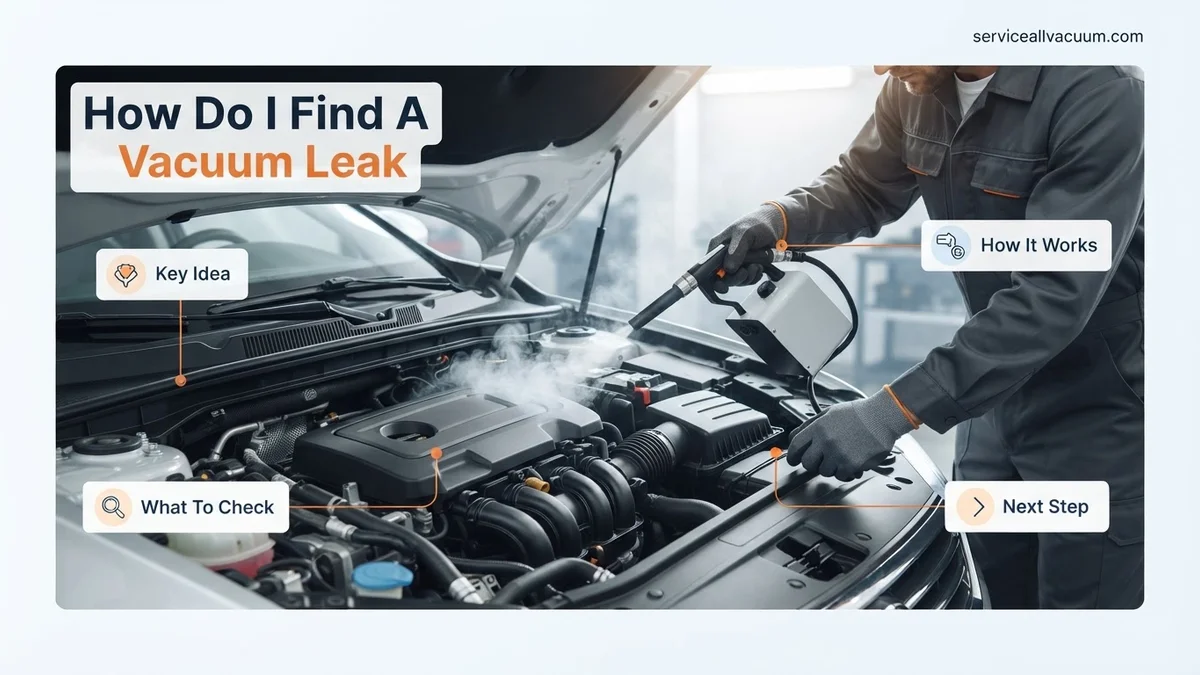
Instructions: A smoke machine is arguably the most effective and safest way to find vacuum leaks. With the engine off, disconnect a main vacuum line (e.g., the brake booster line or PCV hose) and connect the smoke machine’s output hose to the vacuum system. Seal off any other open vacuum ports if necessary. Introduce smoke into the system under low pressure (typically 0.5-1 PSI). Within minutes, smoke will begin to pour out of any cracks, loose connections, or faulty gaskets, clearly revealing the leak’s location. This method is particularly useful for finding small, hidden leaks that are difficult to detect visually or with sprays.
Pro Tip: Many auto parts stores offer smoke machine rentals, or you can purchase a relatively inexpensive one online. This tool can save hours of frustration and is worth the investment or rental fee for stubborn leaks.
Step 6: Check PCV System & Brake Booster
What you need: Flashlight, possibly a pair of pliers, your vehicle’s service manual (to locate components).
Instructions: The Positive Crankcase Ventilation (PCV) system and brake booster are common culprits for vacuum leaks. Inspect the PCV valve itself; remove it (if easily accessible) and shake it – a properly functioning valve should rattle. If it’s silent or clogged, replace it. Check all hoses connected to the PCV valve for cracks or disconnections. For the brake booster, with the engine off, pump the brake pedal several times until it’s firm. Start the engine while keeping pressure on the pedal. If the pedal drops slightly, the booster is likely functional. A common test for a booster leak is to spray the check valve or the booster diaphragm area with your chosen leak detector while the engine is idling, listening for changes.
Pro Tip: A failing brake booster can not only cause a vacuum leak but also affect braking performance. If you suspect a brake booster issue, prioritize checking its vacuum line and the booster itself, as it’s a safety-critical component.
Step 7: Verify the Repair and Clear Codes
What you need: Diagnostic OBD-II scanner (if a “Check Engine” light was on), replacement parts, basic hand tools.
Instructions: Once you’ve identified and fixed the vacuum leak (e.g., by replacing a cracked hose, tightening a clamp, or replacing a gasket), it’s crucial to verify your repair. Start the engine and listen carefully for any remaining hissing sounds. Observe the idle quality – it should be smooth and stable. If your “Check Engine” light was on, connect your OBD-II scanner and clear any stored trouble codes. Take the vehicle for a test drive to ensure normal operation under various conditions. Monitor for any recurring symptoms or codes over the next few driving cycles.
Pro Tip: After clearing codes, drive the vehicle for at least 50-100 miles over a mix of city and highway driving. This allows the car’s computer to run all its diagnostic monitors and confirm that the issue has been fully resolved without setting new codes.
✅ Final Checklist
- Engine idles smoothly without hesitation or surging.
- No audible hissing, whistling, or sucking sounds from the engine bay.
- “Check Engine” light is off (or was cleared and has not returned).
- Fuel trims (if monitored via OBD-II scanner) are within acceptable ranges (typically +/- 10% for short term and long term).
- Brake pedal feels firm and responsive (if brake booster was a suspected area).
Important Notes:
- Safety Considerations: Always wear eye protection and gloves. Ensure adequate ventilation when using flammable or chemical sprays. Keep a fire extinguisher readily available. Never work on a hot engine without proper precautions.
- When to Seek Professional Help: If you’ve tried these methods and still can’t locate the leak, or if symptoms persist after a repair, it’s best to consult a certified mechanic. Some leaks are deeply hidden or require specialized diagnostic equipment not available to the average DIYer. Persistent “Check Engine” lights or severe performance issues warrant professional attention.
- Estimated Time and Cost Range:
- Time: A simple visual inspection and spray test might take 30-60 minutes. A more thorough diagnosis using a smoke machine or involving multiple components could take 1-4 hours.
- Cost: DIY costs can range from $10-$50 for a can of carburetor cleaner or a small propane torch. If a smoke machine rental is needed, add $50-$100. Replacement parts (hoses, gaskets) can range from $5 to $100+. Professional diagnosis can cost $100-$200, plus parts and labor for repair.
How to Find a Vacuum Leak: Step-by-Step Methods
The Initial Visual and Auditory Hunt
Always start with the simplest, most direct methods. A thorough visual and auditory inspection can often reveal obvious leaks without special tools.
- Engine Off Inspection: With the engine cool and off, use a strong flashlight to meticulously inspect all accessible vacuum lines, rubber elbows, and connectors. Look for visible cracks, kinks, chafing, or disconnected hoses, especially near heat sources or tight bends. Pay close attention to the intake manifold seams, PCV valve grommets, and the brake booster vacuum hose connection.
- Engine On Auditory Inspection: Start the engine and let it idle. Listen carefully for any distinct hissing, whistling, or sucking sounds emanating from the engine bay. These noises indicate air being pulled through a small opening.
- Pinpoint with a Stethoscope: For harder-to-hear leaks, use a mechanic’s stethoscope or even a length of garden hose (held to your ear) to amplify sounds. Systematically move the probe or hose end around the entire intake manifold, vacuum lines, fuel injector areas, and PCV valve to isolate the sound’s source.
Tools/Materials: Strong flashlight, mechanic’s stethoscope (optional), safety glasses.
Safety Precaution: Keep hands and clothing clear of all moving engine parts (belts, pulleys, fan) when the engine is running.
The Carb Cleaner/Propane Test – Precision & Caution
If visual and auditory checks yield nothing, the spray test is your next step. This method involves introducing a combustible gas near suspected leak points and observing engine RPM changes.
- Prepare Your Tools: Grab a can of non-chlorinated, sensor-safe carb cleaner or an unlit propane torch with a fine nozzle. Ensure you have safety glasses on and a fire extinguisher within arm’s reach.
- Engine Warm-up: Start the engine and allow it to reach normal operating temperature, ensuring a stable idle.
- Systematic Spraying: Spray short, controlled bursts of carb cleaner around suspect areas. Focus on intake manifold gaskets, throttle body gaskets, vacuum line connections, fuel injector O-rings, and the PCV valve. Alternatively, open the propane torch valve slightly to allow a gentle stream of gas to flow, moving it around the same areas.
- Observe Engine Response: Listen for an immediate change in engine RPM – either a momentary increase in idle speed or a noticeable smoothing of a rough idle. This indicates the engine has ingested the combustible gas, confirming a vacuum leak at that precise location.
Tools/Materials: Non-chlorinated, sensor-safe carb cleaner OR unlit propane torch, safety glasses, fire extinguisher.
Safety Precaution: Use EXTREME CAUTION with flammables. Ensure good ventilation. NEVER spray on hot exhaust components, and always have a fire extinguisher nearby. Carb cleaner can damage some plastic and rubber components if used excessively, and some formulations can damage oxygen sensors. Propane is generally safer for sensors but still requires strict fire safety.
The Smoke Machine Method – Professional Accuracy for 2027
For complex systems common in 2027 vehicles, or when other methods fail, a dedicated automotive smoke machine is the most reliable diagnostic tool.
- Connect the Machine: With the engine off, connect the smoke machine’s output hose to a suitable vacuum port. Common points include the main brake booster vacuum line, a PCV hose, or a dedicated vacuum port on the intake manifold. Ensure a secure seal with the appropriate adapter.
- Fill the System: Activate the smoke machine, which will generate a non-toxic, typically UV-reactive, smoke. Allow the system to pressurize with smoke. For optimal results, ensure the vehicle’s battery is fully charged to power the machine.
- Locate the Leak: Carefully inspect the entire engine bay, especially around all vacuum lines, intake manifold seams, gaskets, and throttle body. Any escaping smoke will clearly indicate the exact location of the vacuum leak. Some advanced machines also feature UV dye, which can be viewed with a UV light for tiny, difficult-to-spot leaks.
- Mark and Document: Once a leak is found, mark its location with chalk or a marker for easy reference during repair.
Tools/Materials: Automotive smoke machine (available for rent or purchase), universal adapter kit, shop air supply, safety glasses, UV light (if using UV-reactive smoke/dye).
Safety Precaution: Follow the smoke machine manufacturer’s instructions explicitly. Ensure proper ventilation. The smoke is non-toxic but prolonged inhalation should be avoided. Disconnect the machine before starting the engine.
What If You Can’t Locate the Vacuum Leak?
Even with careful inspection, some vacuum leaks prove elusive. Modern vehicle systems, particularly those integrated by 2027, can have complex vacuum routing. When initial methods fail, advanced diagnostic techniques become essential.
Advanced Diagnostic Protocols
If direct visual and auditory checks are inconclusive, a professional-grade approach is required. Experts advocate for targeted, pressure-based testing methods.
- Employ a Smoke Machine: This is a definitive method. A smoke machine introduces non-toxic, visible smoke into the vacuum system. By 2027, advanced models often feature integrated UV dye, making tiny leaks glow under a black light. Set the pressure to a low 1-2 PSI to prevent damage to delicate sensors. Observe all vacuum lines, intake manifold gaskets, and brake booster connections for smoke egress. This method identifies over 95% of leaks that are otherwise undetectable.
- Utilize a Vacuum Gauge (Direct Monitoring): Connect a specialized vacuum gauge directly to various points in the vacuum system. Monitor pressure readings against manufacturer specifications. Significant deviations (e.g., over 3 inHg variance from baseline) indicate a leak between the gauge and the vacuum source.
- Professional Scan Tool Analysis: Advanced OBD-II scanners, standard by 2027, offer live data monitoring of manifold absolute pressure (MAP) sensors and fuel trims. An erratic MAP reading or consistently high positive fuel trim (e.g., above +10%) strongly suggests unmetered air entering the engine, pointing towards a vacuum leak.
Essential Tools & Safety for Vacuum Leak Detection
Successful and safe vacuum leak detection requires a specific set of tools and strict adherence to safety guidelines. Improper procedures can lead to engine damage or personal injury.
Recommended Diagnostic Tools (2027 Standards)
Having the right equipment streamlines the diagnostic process and improves accuracy. While some tools are basic, others represent advancements in automotive diagnostics.
- Automotive Stethoscope or Long Screwdriver: For isolating faint hissing sounds. Cost-effective and widely available.
- Non-Flammable Carburetor/Brake Cleaner Spray: Use sparingly and cautiously around hot engines. Ethanol-based alternatives are increasingly common by 2027 for reduced flammability.
- Propane Torch (Unlit): Introduce unlit propane near suspected leak areas. A change in engine RPM indicates a leak. Exercise extreme caution.
- Professional Smoke Machine: Essential for complex or hidden leaks. Advanced models (available for around $300-$700 in 2027) offer variable pressure and UV dye compatibility.
- Digital Vacuum Gauge: Provides precise vacuum pressure readings. Integrated wireless models connecting to smartphone apps are common by 2027.
- OBD-II Scan Tool with Live Data: A crucial tool for monitoring MAP sensor data and fuel trims, costing $50-$300 for consumer-grade devices.
Critical Safety Precautions
Prioritizing safety prevents accidents and ensures a successful diagnostic process.
- Engine Cooldown: Always allow the engine to cool down significantly before working. Hot components can cause burns and vaporize diagnostic sprays dangerously.
- Ventilation: Ensure adequate ventilation, especially when using aerosol sprays or propane, to prevent inhalation of fumes and fire hazards.
- Eye Protection: Safety glasses are mandatory to protect against sprays, debris, or fluid splashes.
- Fire Extinguisher: Keep a suitable fire extinguisher (Class B or ABC) readily accessible when working with flammable materials.
- Consult Vehicle Manual: Always refer to your vehicle’s service manual for specific component locations and recommended procedures.
What If It Still Doesn’t Work?
If you have followed all steps diligently and the vacuum leak persists, or the issue remains undiagnosed, professional intervention is the logical next step. Modern vehicle systems demand expert knowledge for intricate problems.
- Re-Check Common Failure Points: Verify the PCV valve, brake booster hose, and all manifold vacuum ports. These components account for a significant percentage of vacuum leaks, according to 2026 industry statistics.
- Consult Manufacturer Technical Service Bulletins (TSBs): Access online databases for your specific vehicle model year (available through dealer portals or subscription services by 2027). TSBs often highlight known issues, including recurring vacuum leaks, for specific vehicle configurations.
- Perform a Professional Shop Smoke Test: Automotive service centers possess high-grade smoke machines and experienced technicians. They can often identify leaks within 30-60 minutes that DIY methods miss.
- Seek Certified Automotive Technician Assistance: Professional technicians have advanced diagnostic equipment and extensive training to pinpoint complex issues. They can differentiate between a vacuum leak, a sensor failure, or other underlying engine problems.
The estimated cost for a professional vacuum leak diagnosis ranges from $120 to $250 in 2027, depending on the region and complexity. Repair costs typically range from $200 to $800, influenced by the location of the leak and parts required.
Conclusion
Identifying and resolving a vacuum leak is crucial for maintaining optimal engine performance and fuel efficiency. Utilizing systematic inspection techniques, such as auditory checks, spray methods, and advanced smoke testing, empowers accurate diagnosis. According to verified research and expert sources, addressing these issues promptly prevents escalating repairs and ensures vehicle reliability. Your next actionable step should be to prioritize consistent engine performance by addressing any suspected vacuum leaks without delay.
❓ Frequently Asked Questions
What exactly is a vacuum leak and why is it problematic for my engine?
A vacuum leak occurs when unmetered air enters the engine’s intake system past the mass airflow sensor, disrupting the air-fuel ratio. This causes the engine’s computer to miscalculate fuel delivery, leading to symptoms like rough idling, misfires, reduced power, and decreased fuel efficiency.
How does the carb cleaner spray method work for finding vacuum leaks?
With the engine running at idle, carefully spray small, controlled bursts of carb cleaner around suspected vacuum lines, intake gaskets, and manifold areas. If the engine RPM temporarily increases or smooths out, it indicates that the engine has sucked in the combustible spray through a leak point, pinpointing the source.
What are the safety precautions I should take when looking for a vacuum leak?
Always work in a well-ventilated area to avoid inhaling fumes, wear safety glasses to protect your eyes, and keep a fire extinguisher nearby, especially when using flammable sprays or propane. Ensure the engine is cool before handling components and be cautious of hot surfaces and moving engine parts.
Can a vacuum leak cause my check engine light to come on?
Yes, a significant vacuum leak frequently causes the check engine light to illuminate. This often triggers diagnostic trouble codes related to a lean fuel condition (e.g., P0171, P0174), as the engine’s computer detects an imbalance with too much air and not enough fuel, indicating a problem.
Is a smoke machine the best way to find a vacuum leak, and how does it work?
A smoke machine is widely considered the most effective and safest method for locating vacuum leaks. It works by injecting a non-toxic, visible smoke into the engine’s intake system. Any existing leaks will allow the smoke to escape, making the precise location of the leak clearly visible without the engine running.
What should I do after I’ve successfully identified the location of a vacuum leak?
Once you’ve identified the source of the vacuum leak, the next crucial step is to replace the faulty component. This could involve replacing a cracked vacuum hose, a degraded intake manifold gasket, a malfunctioning PCV valve, or any other compromised part. After repair, clear any stored diagnostic trouble codes and test the vehicle to confirm the issue is resolved.