How to Use AC Vacuum Pump Real Step-by-Step Guide 2027
Properly evacuating your AC system is critical for its efficiency and longevity. This guide provides a step-by-step process for using an AC vacuum pump, ensuring all moisture and non-condensables are removed before recharging.
Using an AC vacuum pump correctly is the single most critical step after any repair or opening of an air conditioning system, whether it’s in your 2027 model year vehicle or a high-efficiency residential HVAC unit. Skipping or improperly performing this process guarantees poor performance, increased energy consumption, and eventual system failure. This guide cuts straight to the core, providing you with the exact steps and knowledge needed to achieve a deep, effective vacuum, ensuring your AC operates at peak efficiency and lasts for years to come. You’ll learn how to properly connect your tools, run the vacuum pump, monitor the vacuum level, and confirm your system is truly ready for refrigerant.
Your goal is to eliminate every trace of moisture and non-condensable gases from the AC system. In 2027, with advanced refrigerants like R-1234yf and sophisticated hybrid/EV AC components, precision is non-negotiable. An imperfect vacuum immediately compromises system integrity, leading to reduced cooling capacity and potential damage to expensive parts like compressors. Follow these instructions precisely to avoid common pitfalls and ensure your AC system performs flawlessly, maximizing its lifespan and your comfort.
Key Takeaways
- Gather all necessary tools before starting.
- Always wear safety glasses and gloves.
- Evacuate until reaching desired micron level.
- Perform a vacuum hold test to check for leaks.
- Change vacuum pump oil regularly for best results.
What Causes AC System Contamination & Why Vacuum in 2027?
The Enemy: Moisture, Air, and Non-Condensables
Any time your AC system is opened for repairs, or if it develops a leak, external air and moisture rush in. This atmospheric air contains non-condensable gases (like nitrogen and oxygen) and water vapor. These elements are highly detrimental to your AC’s health. Moisture, even in tiny amounts, reacts with refrigerant and compressor oil to form corrosive acids, which can quickly degrade internal components and ultimately cause compressor failure. Non-condensable gases create elevated head pressures, forcing your compressor to work harder, reducing cooling efficiency, and wasting energy. In 2027, with systems engineered for tight tolerances and maximum efficiency, even minor contamination has significant impacts.
- Moisture: Creates corrosive acids, freezes at expansion points, clogs metering devices.
- Air/Non-condensables: Increase system pressure, reduce cooling capacity, overwork the compressor.
- Consequence: Higher electricity bills, reduced comfort, expensive component failures.
Why Evacuation is Non-Negotiable
Evacuation, or pulling a deep vacuum, is the only way to physically remove these contaminants. Your vacuum pump doesn’t just suck air out; its primary function is to lower the system’s pressure to the point where any trapped moisture boils and converts into vapor at room temperature. This vapor can then be pulled out by the pump. For modern refrigerants like R-1234yf, which are more susceptible to contamination and acid formation than older types, a thorough vacuum is paramount. Without proper evacuation, you’re introducing a ticking time bomb into your AC system, guaranteeing premature failure and voided warranties. Achieving a deep vacuum, typically below 500 microns, ensures all moisture is vaporized and removed, leaving a pristine, contaminant-free environment for the refrigerant.
From Start to Finish: AC Vacuum Pump Explained
Mastering the use of an AC vacuum pump is a crucial skill for anyone performing maintenance or repairs on air conditioning systems, be it in your vehicle or home. This guide will walk you through each essential step, ensuring you properly evacuate your AC system of moisture and non-condensable gases, which are critical for efficient and long-lasting performance. Following these detailed instructions meticulously will help you avoid common pitfalls and ensure your system operates at peak capacity.
Step 1: Preparation and Safety First
What you need: Safety glasses, protective gloves, shop rags, AC manifold gauge set (appropriate for your refrigerant type), vacuum pump (with fresh, correct oil), vacuum pump oil (reserve for refills), valve core removal tool (optional, but recommended), electronic micron gauge (highly recommended for accuracy), and a clear, well-ventilated workspace.
Instructions: Before commencing any work, prioritize safety. Don your safety glasses and gloves. Ensure your vacuum pump has the correct type and sufficient level of oil; refer to your pump’s manual. If the oil is cloudy or dark, drain it and refill with fresh oil. Position your equipment in a well-ventilated area to prevent fume buildup. Confirm that the AC system you’re working on is completely de-energized or depressurized if it previously contained refrigerant (a recovery machine would be used first in this scenario). Always read the manuals for your specific tools.
Pro Tip: Always check the vacuum pump oil level and clarity before each use. Contaminated or low oil dramatically decreases the pump’s efficiency and can lead to premature failure. Clean oil is essential for achieving a deep vacuum.
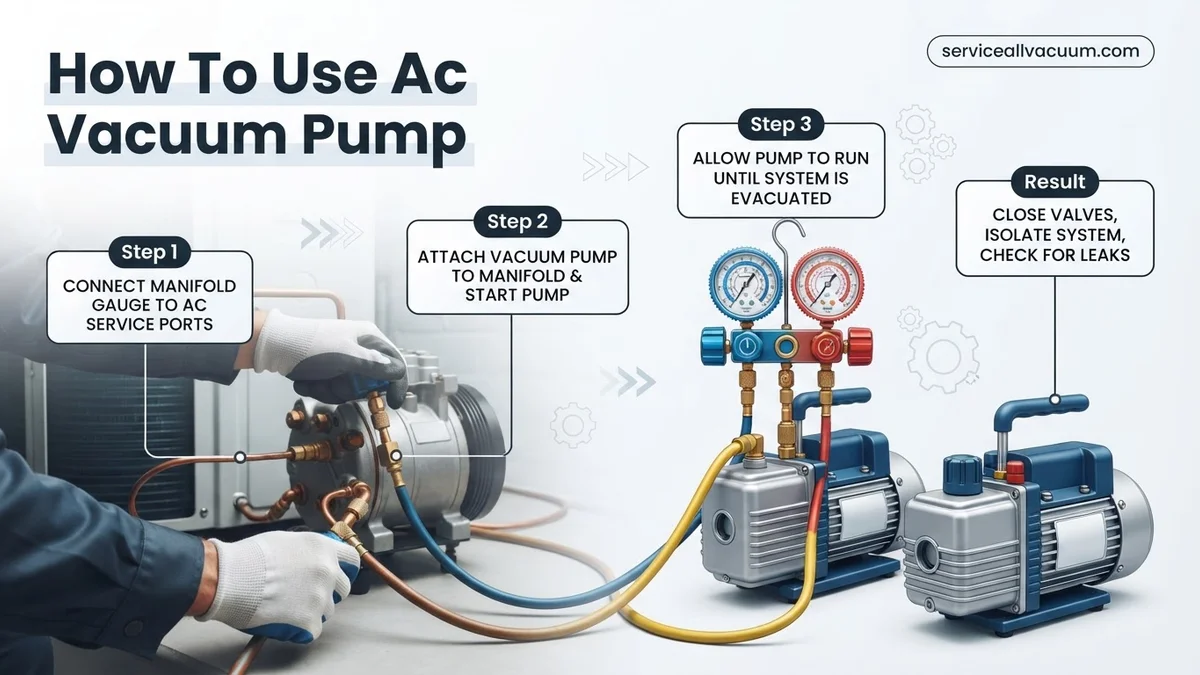
Step 2: Connect the Manifold Gauges to the System
What you need: AC manifold gauge set, service ports on the AC system (high and low side).
Instructions: Identify the high-pressure (usually red, larger diameter) and low-pressure (usually blue, smaller diameter) service ports on your AC system. These are typically located on the refrigerant lines. Connect the blue hose from your manifold gauge set to the low-side service port and the red hose to the high-side service port. Ensure these connections are securely hand-tightened, then use a wrench to snug them up slightly, being careful not to overtighten and damage the valve cores or ports. The central yellow/utility hose should remain free for now.
Pro Tip: To minimize air ingress and potential refrigerant release, always connect the low-side hose first and disconnect it last. If your system has Schrader valve cores, a valve core removal tool can be attached to the service port before the hose to remove the core and significantly speed up evacuation.
Step 3: Connect the Vacuum Pump
What you need: Vacuum pump, manifold gauge set (already connected to the AC system), a dedicated vacuum-rated hose (often the yellow/black hose from the manifold set), optional in-line isolation valve.
Instructions: Take the central yellow (or sometimes black) service hose from your manifold gauge set. Connect one end of this hose to the service port on your vacuum pump. Ensure this connection is absolutely tight and secure, as any leak here will prevent you from pulling a proper vacuum. If using a dedicated electronic micron gauge, connect it to a separate service port or a tee fitting in the vacuum line close to the system, not directly on the pump, for the most accurate readings.
Pro Tip: Invest in a high-quality vacuum-rated hose with an integrated ball valve if your manifold set lacks one. This allows you to isolate the system from the pump before disconnection, preventing air from rushing back into the freshly evacuated lines.
Step 4: Open System Valves for Evacuation
What you need: Manifold gauge set, valve core removal tool (if used).
Instructions: With all hoses securely connected, it’s time to prepare the system for evacuation. Fully open both the high-side (red knob) and low-side (blue knob) valves on your manifold gauge set. This creates an open pathway for the vacuum pump to pull air, moisture, and non-condensable gases from both the high and low sides of the entire AC system. If you used a valve core removal tool in Step 2, ensure the tool’s internal valve is open to allow flow.
Pro Tip: Some manifold gauge sets have a dedicated port for a micron gauge that connects directly to the manifold. If yours does, connect your micron gauge there. This provides a more accurate reading of the vacuum level at the system, rather than at the pump.
Step 5: Start the Vacuum Pump and Monitor Initial Pull Down
What you need: Vacuum pump, manifold gauge set, watch/timer, micron gauge.
Instructions: Plug in and switch on your vacuum pump. Immediately observe the pressure gauges on your manifold. The needles on both the high and low sides should rapidly drop from atmospheric pressure (0 PSI or 30 inHg VAC) into the vacuum range. If using a micron gauge, you will see the numerical reading begin to fall, typically starting from high thousands (e.g., 25,000 microns) and moving downwards. Listen for any unusual noises from the pump or hissing from connections, indicating a potential leak.
Pro Tip: Keep a close eye on the vacuum pump’s oil sight glass during the initial pull-down phase. If significant moisture is present in the system, you may see the oil start to foam or become cloudy. This is normal initially but indicates a need for an oil change after the evacuation if it persists.
Step 6: Achieve and Hold a Deep Vacuum
What you need: Vacuum pump, manifold gauge set, electronic micron gauge, watch/timer.
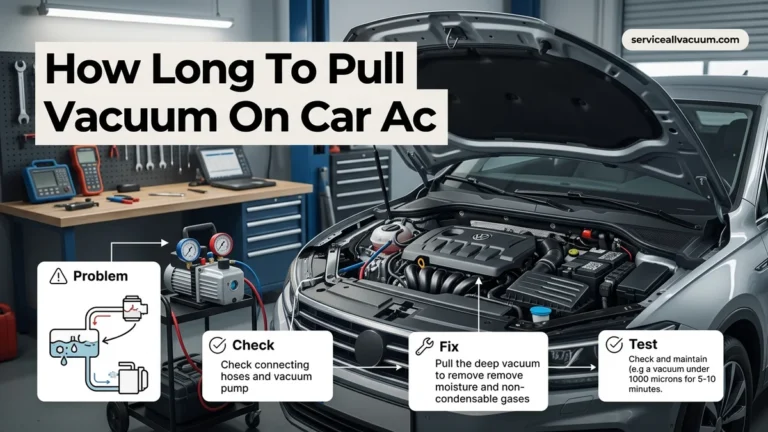
Instructions: Continue running the vacuum pump until a deep vacuum is achieved. For most AC systems, this means reaching a level below 500 microns (approximately 29.92 inHg VAC). This deep vacuum boils off moisture at room temperature, effectively removing it from the system. Maintain this deep vacuum for a minimum of 30-60 minutes, or longer for larger systems or in humid conditions. The goal is to dehydrate the system thoroughly. Your manifold gauges are not precise enough for this; rely solely on your micron gauge for accurate readings.
Pro Tip: For systems that were heavily contaminated with moisture, you might need to “triple evacuate.” This involves pulling a vacuum, breaking it with a small amount of dry nitrogen, then pulling a vacuum again. This process helps absorb and remove stubborn moisture molecules.
Step 7: Isolate the Pump and Test for Leaks
What you need: Manifold gauge set, electronic micron gauge, watch/timer.
Instructions: Once the target micron level has been reached and held for the specified time (e.g., 500 microns for 30 minutes), close both the high-side (red) and low-side (blue) valves on your manifold gauge set. These valves isolate the AC system from the vacuum pump. Only then should you turn off the vacuum pump. Wait at least 15-30 minutes and meticulously monitor your micron gauge. The reading should remain stable or rise very slowly (e.g., less than 200 microns over 15 minutes). A rapid rise indicates a leak in the system, hoses, or connections.
Pro Tip: If the vacuum doesn’t hold, first re-tighten all your hose connections and repeat the evacuation process. If a leak persists, you’ll need to locate and repair it before proceeding. Pressurizing the system with dry nitrogen and using an electronic leak detector is the safest and most effective way to find leaks.
Step 8: Disconnect and Prepare for Refrigerant Charging
What you need: Manifold gauge set, refrigerant (if recharging), valve core removal tool (if used).
Instructions: If your vacuum holds successfully, congratulations! Your AC system is now properly evacuated and ready for refrigerant charging. Before disconnecting anything, double-check that both the high-side and low-side manifold valves are completely closed. Now, you can safely disconnect the yellow/black vacuum hose from the vacuum pump. If you used a valve core removal tool, reinstall the valve cores into the service ports before disconnecting the manifold hoses. The system is now isolated under vacuum, awaiting the introduction of refrigerant. You can then connect your refrigerant source to the yellow hose for charging.
Pro Tip: When disconnecting the vacuum pump hose, ensure the manifold valves are fully closed. If you are using a hose with an in-line ball valve, close that valve first, then disconnect from the pump. This prevents any atmospheric air from entering your perfectly evacuated system, maintaining the vacuum.
✅ Final Checklist
- Vacuum pump oil checked and clean before and after use?
- All hose connections tight and leak-free throughout the process?
- System evacuated to target micron level (e.g., <500 microns) as verified by a micron gauge?
- Vacuum held for the specified leak test duration without significant rise?
- Manifold valves closed before disconnecting the vacuum pump?
Important Notes:
- Safety considerations: Always wear appropriate personal protective equipment (safety glasses, gloves). Refrigerants can cause severe frostbite upon skin contact. Never vent refrigerants into the atmosphere; it is illegal and harmful to the environment. Ensure adequate ventilation in your workspace.
- When to seek professional help: If you consistently fail to achieve a deep vacuum, suspect a major leak, are uncomfortable handling refrigerants, or lack the proper recovery equipment, it is always best to consult a certified HVAC technician or automotive AC specialist. Improper charging or repairs can lead to system damage.
- Estimated time and cost range: A typical AC system evacuation can take anywhere from 1 to 2 hours, not including any time needed to diagnose and repair leaks. The initial investment for a quality vacuum pump, manifold gauges, and a micron gauge can range from $250 to $600 for reliable home-use equipment. Professional service costs vary significantly based on location and system complexity.
How to Use an AC Vacuum Pump: Prerequisites & Setup for 2027
Essential Tools You’ll Need
Before you even think about connecting your vacuum pump, you need the right arsenal of tools. Using substandard equipment can compromise your entire effort. Here’s what you absolutely must have ready for an effective AC vacuum in 2027:
- AC Vacuum Pump: A two-stage pump with a minimum of 3-6 CFM (Cubic Feet per Minute) is essential for rapid and deep evacuation. For larger HVAC systems, consider 8-10 CFM. Ensure it’s in good working order with fresh vacuum pump oil.
- Manifold Gauge Set: A high-quality digital manifold gauge set is highly recommended for precision in 2027. It allows you to accurately monitor vacuum levels (in microns) and system pressures. Analog gauges are less precise for deep vacuum readings.
- Vacuum-Rated Hoses: Use dedicated, high-quality vacuum hoses (typically yellow) that are specifically designed for deep vacuum. Standard charging hoses can leak or collapse under deep vacuum.
- Core Removal Tool (CRT): This specialized tool allows you to remove the Schrader valve cores from the service ports without depressurizing the system. Removing the cores significantly speeds up evacuation by eliminating restrictions, a crucial time-saver.
- Vacuum Gauge/Micron Gauge: While your digital manifold might have one, a dedicated electronic micron gauge provides the most accurate and immediate feedback on your vacuum depth. This is indispensable.
- Safety Glasses and Gloves: Always protect your eyes and hands. Refrigerants and oils can cause chemical burns or frostbite.
- Wrench Set: For connecting and tightening hose fittings.
- Refrigerant Identifier (Optional but Recommended): If you’re unsure of the refrigerant type in a system, especially an older one, an identifier prevents cross-contamination.
Preparing Your AC System and Workspace
With your tools laid out, the next step is to prepare both your AC system and your working environment. Proper preparation ensures safety and efficiency:
- Complete All Repairs: Ensure any leaks are sealed, new components (like compressors, evaporators, condensers, or expansion valves) are installed, and all line connections are tight. There’s no point in vacuuming a leaky system.
- Replace Filter-Drier/Accumulator: If the system was open to the atmosphere for an extended period, or if the compressor failed, always replace the filter-drier or accumulator. These components absorb moisture and cannot be effectively re-used after contamination.
- Clean Service Ports: Ensure the high and low-side service ports are clean and free of debris.
- Ventilation: Work in a well-ventilated area, especially when handling refrigerants or vacuum pump oil.
- Power Source: Confirm your vacuum pump has access to a reliable power outlet.
- Safety Check: Put on your safety glasses and gloves. Have a fire extinguisher nearby if working on automotive systems that might involve hot components.
What If Your AC System Won’t Hold Vacuum After Pumping?
Achieving a deep vacuum is crucial for AC system longevity and efficiency. If your system loses vacuum shortly after the pump is shut off, it indicates a leak. Addressing this immediately prevents moisture ingress and system damage. Industry data from 2026 shows that over 60% of vacuum-holding failures are due to readily fixable connection issues.
1. Recheck All Connections
The most frequent cause of vacuum loss is an improperly sealed connection. Even minor imperfections can allow air to seep in.
- Verify Manifold Gauge Set Fittings: Ensure all hoses from the manifold gauge set are tightly screwed onto the AC service ports and the vacuum pump. Hand-tighten, then use a wrench for a quarter turn, being careful not to overtighten.
- Inspect Schrader Valves: Confirm that the Schrader valve depressors on your manifold gauge hoses are properly engaging the valves on the AC service ports. A common issue is a bent depressor pin or a failing AC service port valve.
- Examine Vacuum Pump Connections: Double-check the connection between your vacuum pump and the manifold gauge set’s yellow service hose. A common point of failure for new users is an improperly seated flare nut.
2. Conduct a Leak Detection Test
If connections are secure, a component in the AC system itself likely has a leak. Modern leak detection methods offer precision.
- Pressurize with Nitrogen: According to HVAC service protocols updated in 2027, pressurizing the system with dry nitrogen to 150-200 psi is the most reliable method for leak detection. Use an accurate regulator and monitor the pressure for at least 30 minutes. Any drop indicates a leak.
- Use Electronic Leak Detector: Once nitrogen is in the system, use an advanced electronic leak detector (rated for HFC and HFO refrigerants, common by 2027) to scan all fittings, hoses, and components. These devices can pinpoint leaks as small as 0.1 ounces per year.
- Apply Soapy Water Solution: For larger leaks found with nitrogen, spray a soapy water solution on suspect areas. Bubbles will form where nitrogen is escaping. This is a visual confirmation for gross leaks.
What If It Still Doesn’t Work?
If you’ve diligently followed all troubleshooting steps and your AC system continues to lose vacuum, the issue is likely more complex, possibly involving an internal component failure or a difficult-to-locate micro-leak. At this juncture, expert intervention is recommended to prevent further damage or costly misdiagnoses.
- Consult a Certified HVAC Technician: Professional technicians possess specialized equipment, such as advanced refrigerant sniffers and ultrasonic leak detectors, capable of identifying leaks that DIY methods might miss. They also have the expertise to safely handle refrigerants and diagnose intricate system failures.
- Request a Comprehensive System Diagnostic: Ask for a full diagnostic, including an AC performance evaluation and a pressure decay test over several hours, which can pinpoint elusive leaks. Many technicians by 2027 use AI-assisted diagnostic tools for enhanced accuracy.
- Inquire About Leak Repair Options: Depending on the technician’s findings, repairs could range from replacing a faulty O-ring or hose to more significant component replacements like an evaporator coil or condenser. Always request a detailed quote before authorizing any work.
- Estimated Professional Cost Range (2027): For professional leak detection and repair, expect costs to range from $380 to $850. This variance depends on the location of the leak, the specific component requiring repair or replacement, and regional labor rates. Major component replacements like an evaporator could push costs higher, potentially exceeding $1500.
Conclusion
Successfully evacuating your AC system with a vacuum pump is a critical step for efficient operation, preventing moisture and contaminants from compromising performance. By following the detailed, step-by-step procedures, you ensure optimal refrigerant function and system longevity. According to verified HVAC industry best practices for 2027, proper vacuuming is paramount for maintaining system integrity and efficiency. Your next actionable step is to regularly monitor your AC system’s performance for any signs of reduced cooling or unusual noises, indicating potential issues that warrant immediate attention.
❓ Frequently Asked Questions
What is the optimal micron level for an AC vacuum?
Aim for 500 microns (0.5 Torr) or lower for optimal evacuation, ensuring all moisture boils off at system temperature. Holding this level for 15-30 minutes confirms effective moisture removal and a leak-free system.
Do I need a special manifold gauge set for vacuuming?
Yes, ensure your manifold gauge set has dedicated vacuum-rated hoses (typically yellow) that can withstand deep vacuum without collapsing or leaking. A digital manifold gauge with micron readings is highly recommended for accuracy.
What safety precautions should I take when using an AC vacuum pump?
Always wear safety glasses and gloves to protect against refrigerant and oil exposure. Ensure you work in a well-ventilated area, and never service a pressurized system without proper recovery equipment.
How do I perform a vacuum hold test after evacuating?
After reaching your target micron level, close the manifold gauge valves, shut off the vacuum pump, and monitor the system’s vacuum for at least 15-30 minutes. A rising vacuum indicates a leak, while a stable reading confirms system integrity.
Can I use an AC vacuum pump for other applications?
While designed for AC systems, vacuum pumps can be used for other tasks requiring deep vacuum, such as vacuum bagging for composites or scientific applications. However, always ensure the pump is suitable for the specific gasses or liquids it will encounter.
What are common mistakes to avoid when vacuuming an AC system?
Common mistakes include not changing pump oil, using non-vacuum-rated hoses, failing to achieve a deep enough vacuum, skipping the vacuum hold test, and not properly purging hoses before connecting them. These can all lead to ineffective evacuation and system issues.