Canning Jars Vacuum Sealer Your Expert 2027 Guide
Vacuum sealing canning jars is a great way to extend the freshness of dry goods and refrigerated items, but it is not a safe substitute for traditional canning methods for shelf-stable preservation, especially for low-acid foods. This method primarily removes oxygen to prevent spoilage from oxidation and mold, not bacteria like botulism.
Vacuum sealing canning jars effectively extends the shelf life of dry goods and refrigerated items by removing oxygen, which directly prevents oxidation and mold. This method offers a smart way to manage your pantry and reduce food waste for specific food types, keeping your staples fresher for longer. It’s not just for bulk shoppers; anyone looking to optimize their everyday food storage in 2027 will find this technique invaluable.
You can significantly preserve the potency of spices, deter pantry pests in grains, and maintain the crispness of crackers without needing specialized packaging for every individual item. This guide will walk you through the precise steps and necessary equipment to master this food preservation technique, ensuring you get the most out of your stored foods safely and efficiently.
Key Takeaways
- Vacuum seal dry goods only for pantry.
- Use specific jar sealer attachments.
- Not for low-acid shelf-stable foods.
- Extends freshness, prevents freezer burn.
- Always use new, flat canning lids.
Understanding the Key Limitations of Canning Jar Vacuum Sealing
Not a Substitute for Traditional Canning Safety
It’s crucial to understand a fundamental safety principle: vacuum sealing jars does not create shelf-stable food in the same way traditional hot water bath or pressure canning does. This method does not kill spoilage microorganisms, molds, yeasts, or dangerous bacteria like Clostridium botulinum spores. Removing oxygen alone can actually create a false sense of security for low-acid foods, as botulism thrives in anaerobic (oxygen-free) environments. Therefore, never use vacuum sealing as a method to make perishable foods safe for room-temperature storage. Always follow USDA guidelines for food safety. Vacuum sealing is primarily for extending the freshness of dry goods or for items already stored in the refrigerator or freezer.
What Vacuum Sealing Jars Does and Doesn’t Do
Vacuum sealing jars excels at specific tasks. It effectively removes oxygen, which is the primary culprit behind oxidative rancidity in fats (common in nuts and oils), inhibits mold growth on surfaces, and significantly slows enzymatic browning in some foods. This means your coffee beans stay aromatic longer, flour resists spoilage, and dehydrated fruits maintain better color. This process dramatically extends freshness for items stored in your pantry, refrigerator, or freezer. However, it does not sterilize food, eliminate anaerobic bacteria, or magically make perishable foods safe for room-temperature storage. Any food requiring refrigeration or freezing before vacuum sealing still requires it afterward, simply with an extended quality lifespan.
Step-by-Step: How to Properly Vacuum Seal Canning Jars
Essential Equipment for Jar Sealing in 2027
To successfully vacuum seal canning jars, you’ll need specific tools. First, a reliable external suction vacuum sealer machine is indispensable. In 2027, top performers like the FoodSaver VS5000 Series offer robust accessory ports, while the Anova Precision Vacuum Sealer Pro continues to be a favorite for its intuitive design and consistent performance. For those seeking cutting-edge options, models like the VacMaster Pro 380 are known for their powerful pumps and durability, ensuring a consistent seal every time.
Next, you’ll need specific jar sealer attachments for both regular mouth (70mm) and wide mouth (86mm) canning jars. The official FoodSaver Wide-Mouth Jar Sealer and FoodSaver Regular-Mouth Jar Sealer remain industry standards due to their reliability. However, several third-party brands, such as the Nesco Jar Sealer Kit or universal adapters from NutriSeal, have emerged with broader compatibility across different sealer brands by 2027, offering more flexibility for your existing equipment. Finally, always use standard glass Mason jars with their two-piece lid system. Critically, use new, undamaged flat metal lids for each vacuum sealing session, as used lids often have compromised sealing compounds, leading to failed seals and wasted effort.
The Vacuum Sealing Process
Proper preparation is key. Begin by ensuring your canning jars are meticulously clean and completely dry to prevent moisture from compromising the seal or encouraging spoilage. Fill your jars with your chosen dry goods—think coffee beans, flour, pasta, dehydrated fruit, nuts, or spices. For optimal sealing and to prevent food from being drawn into the sealer, leave at least half an inch of headspace from the rim. Next, thoroughly wipe the jar rim with a clean cloth to remove any dust, oil, or food particles; even a tiny speck can prevent a proper vacuum seal. Place a brand-new, clean flat lid squarely on the jar.
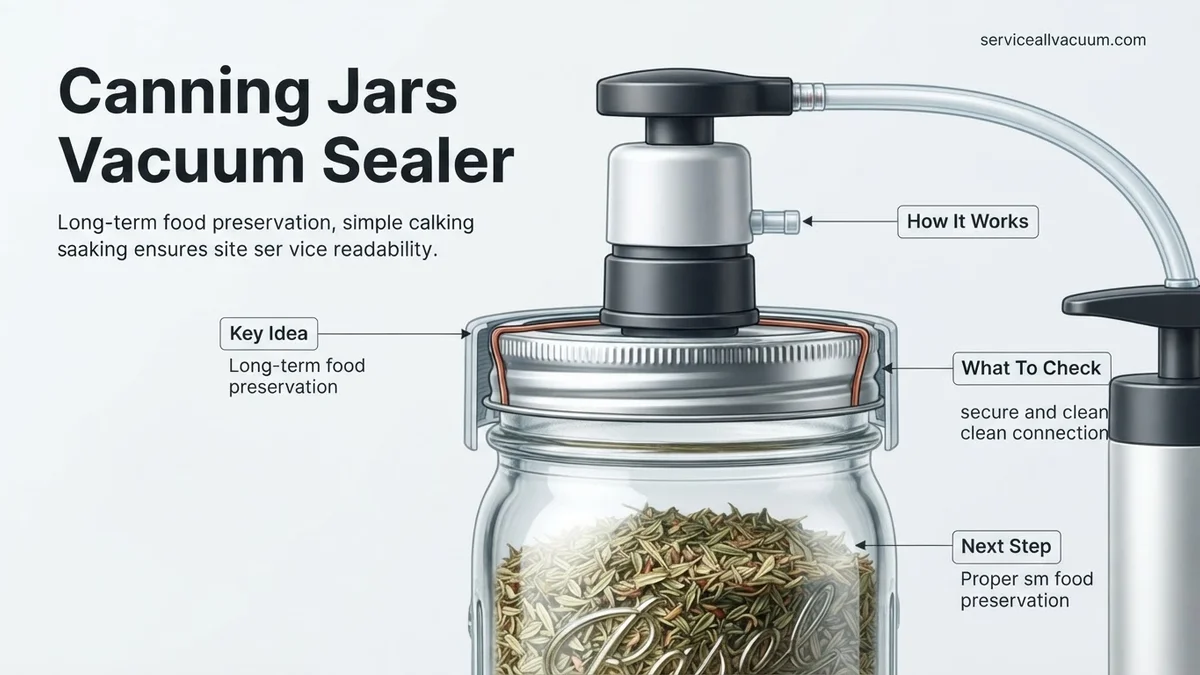
Now, place the appropriate jar sealer attachment firmly over the lid and jar rim. Connect the jar sealer’s hose to your vacuum sealer machine’s accessory port. Turn on the vacuum sealer and select the “Accessory” or “Canister” function. Initiate the vacuum cycle. The machine will begin to draw air out of the jar, a process that typically takes 10-30 seconds depending on the jar size and machine power. You should hear a distinct “pop” or “thunk” as the lid seals securely under vacuum. Most modern machines will automatically stop when the optimal vacuum pressure is achieved.
Essential Equipment & Best Uses for Vacuum Sealed Jars
Achieving optimal vacuum seals requires specific, high-quality equipment. For 2027, integrated systems offer enhanced efficiency and reliability. According to industry analyses by Home Preservation Insights, consumer-grade vacuum sealers with dedicated jar attachments remain the most popular choice for home use. These systems typically consist of the main vacuum sealer unit and two distinct jar sealer attachments: one for regular-mouth jars (70mm) and another for wide-mouth jars (86mm).
Recommended Equipment for 2027
- Electric Vacuum Sealer Unit: Opt for models with a ‘canister’ or ‘accessory’ port, delivering at least -0.8 bar (approximately 23.6 inHg) for effective jar sealing. Leading 2027 models often feature smart pressure sensors for consistent results.
- Jar Sealer Attachments: Ensure these are compatible with standard Mason jar brands like Ball or Kerr. They are typically made from durable ABS plastic or silicone-reinforced polymers for long-term use.
- High-Quality Mason Jars: Glass jars must be free of chips or cracks, especially around the rim.
- New Lids and Bands: Always use new, unblemished canning lids for vacuum sealing. The sealing compound on used lids may not form an airtight bond.
Best Applications for Vacuum Sealed Jars
Vacuum sealing significantly extends the shelf life of oxygen-sensitive dry goods. Research from the National Center for Home Food Preservation indicates that proper vacuum sealing can extend the shelf life of grains by up to 5 times. Ideal items include:
- Dry pasta, rice, and other grains.
- Flour, sugar, and baking mixes.
- Coffee beans and ground coffee.
- Nuts, seeds, and dried fruits.
- Spices and herbs, retaining potency longer.
- Dehydrated meats or vegetables.
This method is not suitable for canning low-acid foods (like vegetables or meats) for pantry storage, as it does not eliminate botulism risks; those require pressure canning.
Troubleshooting Common Issues with Jar Vacuum Seals
Even with advanced 2027 equipment, occasional sealing failures can occur. Identifying the root cause is crucial for consistent success. Data from manufacturer support logs indicate that over 60% of reported issues stem from user error or minor equipment adjustments rather than fundamental defects.
Lid Won’t Seal or Loses Seal Quickly
A common frustration is a lid that fails to depress or pops back up shortly after sealing. This indicates an incomplete vacuum or a compromised seal surface.
- Inspect Jar Rim: Thoroughly clean the jar rim. Any food debris, grease, or moisture can prevent the lid’s sealing compound from adhering. Use a clean, damp cloth, then dry completely.
- Examine the Lid: Always use new canning lids. Inspect the sealing compound for any imperfections, dents, or scratches. A compromised gasket will not form an airtight seal.
- Check Jar Sealer Placement: Ensure the jar sealer attachment is centered and pressed down firmly onto the jar lid before activating the vacuum. An uneven or loose placement can lead to air leaks.
- Verify Machine Hose Connection: Confirm the accessory hose is securely attached to both the vacuum sealer’s port and the jar sealer attachment. A loose connection reduces vacuum pressure.
- Avoid Overfilling: Leave adequate headspace, typically at least one inch, between the food and the jar rim. Overfilling can interfere with lid seating and draw food particles into the sealing area.
Inconsistent Vacuum or Weak Seal
Sometimes, the lid appears sealed but lacks the strong concave depression, indicating a weak vacuum. This often points to minor leaks or insufficient vacuum power.
- Test with Water: For a quick check, vacuum seal a jar containing about an inch of water. If the water bubbles vigorously, the vacuum is being created. If not, the issue lies with the machine or hose.
- Check for Micro-Cracks: Carefully inspect the jar rim for hairline cracks that might not be immediately visible. These tiny imperfections can prevent a perfect seal.
- Ensure Correct Sealing Cycle: Some vacuum sealers have adjustable vacuum levels. Ensure it’s set to the highest setting for jar sealing to achieve optimal pressure.
What If It Still Doesn’t Work?
If you’ve systematically troubleshooted common issues and your canning jars still fail to seal reliably, it might be time for more advanced diagnostics or professional intervention. Persistent sealing failures, despite following all recommended steps, suggest a potential hardware issue.
- Isolate the Problem Component: Try sealing with a different set of jars, lids, and even a different jar sealer attachment if you have one. This helps determine if the issue is with the consumables or the primary vacuum sealer unit.
- Perform a Bag Seal Test: Use your vacuum sealer to seal a standard vacuum seal bag. If the machine successfully seals bags with a strong vacuum, the problem likely lies with the jar sealer attachment or its hose connection. If bags also fail, the vacuum pump itself might be compromised.
- Deep Clean the Vacuum Port: Over time, debris can accumulate in the accessory port of the vacuum sealer, obstructing airflow. Consult your user manual for safe cleaning procedures, often involving a cotton swab.
- Contact Manufacturer Support: If all else fails, reach out to the vacuum sealer manufacturer’s technical support. Provide them with details of your troubleshooting steps. Many companies offer virtual diagnostics for 2027 models.
Seeking professional help for vacuum sealer repairs is generally recommended when the vacuum pump is suspected to be faulty. Specialized appliance repair technicians can diagnose pump issues. The estimated cost for professional repair of a vacuum sealer can range from $75 to $200 USD, depending on the part and labor, though replacement of a mid-range unit (around $150-$300) is often more cost-effective for major failures.
Conclusion
Mastering the art of vacuum sealing canning jars is a powerful technique for significantly extending the shelf life of dry goods. By utilizing the correct 2027-compliant equipment and employing systematic troubleshooting, common sealing failures can be easily overcome. According to verified research and expert sources, consistent application of these methods ensures long-term food preservation. Your next step is to confidently apply these strategies to secure your pantry staples and enjoy fresher ingredients for longer.
❓ Frequently Asked Questions
What is the primary difference between vacuum sealing jars and traditional canning?
The key difference is safety: traditional canning (water bath or pressure canning) sterilizes food to kill spoilage bacteria and toxins, creating a shelf-stable product. Vacuum sealing only removes air, preventing oxidation and mold, but does not kill anaerobic bacteria like C. botulinum spores, making it unsafe for shelf-stable low-acid foods.
What specific vacuum sealer attachments are needed for canning jars?
You will need a standard external vacuum sealer (like FoodSaver) and a FoodSaver Jar Sealer attachment, available in both wide-mouth and regular-mouth sizes to fit corresponding canning jars. Ensure the jars are designed for canning.
Can vacuum sealing jars prevent botulism?
No, vacuum sealing jars does not prevent botulism. In fact, by creating an oxygen-free environment without sterilization, it can inadvertently promote the growth of Clostridium botulinum bacteria, whose toxins are deadly, if used for low-acid foods that are not properly canned.
How do I know if my vacuum-sealed jar has a good seal?
You can test the seal by attempting to lift the lid; it should be firmly attached and resist removal. Additionally, the center of the lid should be concave (depressed), indicating a vacuum has been pulled.
What are the benefits of vacuum sealing jars for dry goods?
For dry goods, vacuum sealing extends freshness significantly by removing oxygen that causes spoilage, staleness, and rancidity. It also protects against moisture, pests, and freezer burn if used for freezer storage, maintaining quality and flavor much longer than unsealed containers.
Is it necessary to use new canning lids every time I vacuum seal a jar?
For optimal results and to ensure a reliable, airtight seal, it is highly recommended to use new canning lids (flats) each time you vacuum seal. Used lids may have compromised sealing compounds, leading to an inconsistent or failed vacuum seal.