Can You Vacuum Tile Floors in 2027? Expert Guide
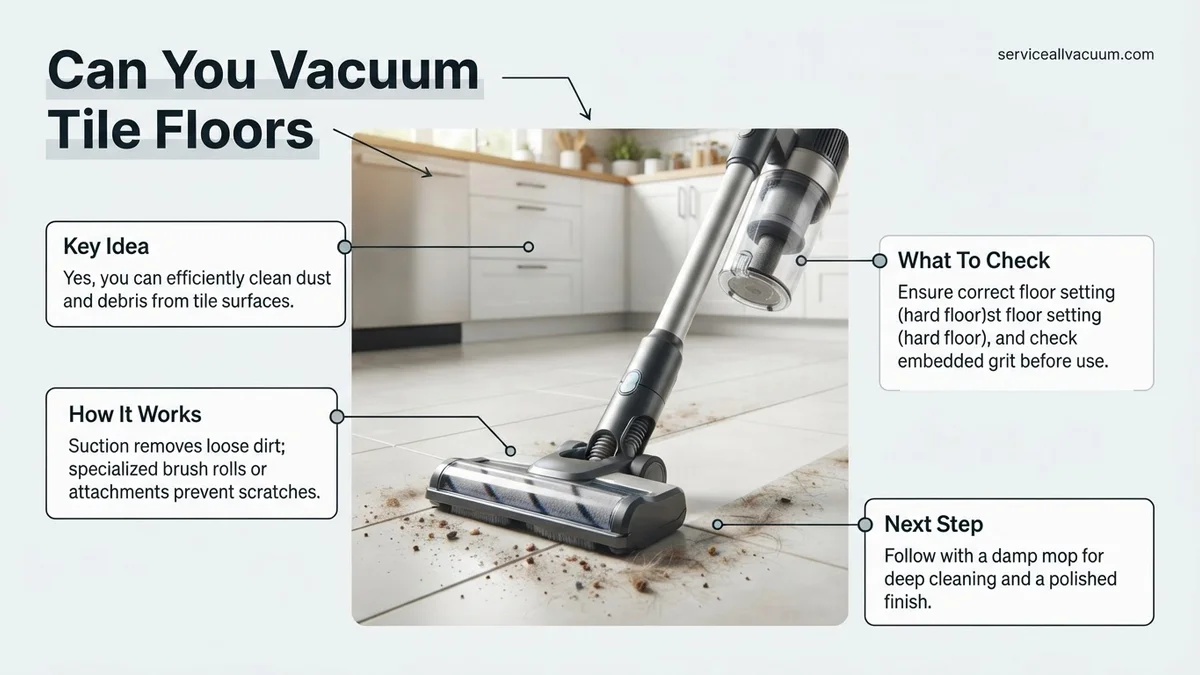
Yes, you can safely and effectively vacuum tile floors, but selecting the right vacuum type and employing proper technique are crucial to prevent damage. Using a vacuum with a hard floor setting and soft brush attachments is key for efficient debris removal while protecting your surfaces.
Let’s address the most common question head-on: Yes, you absolutely can vacuum tile floors in 2027, and it’s often the most efficient and effective method for daily cleaning. Forget the old notion that vacuums are solely for carpets; modern technology has evolved significantly, offering specialized tools and settings that make vacuuming tile not just possible, but highly recommended. The key, however, lies in understanding the correct approach and utilizing the right equipment to ensure both cleanliness and the longevity of your beautiful tile surfaces.
This matters practically because tile floors, whether in your kitchen, bathroom, or living areas, accumulate dust, pet hair, crumbs, and debris just like any other surface. Relying solely on sweeping can often just push fine particles around, while regular, correct vacuuming removes these elements efficiently, preparing your floors for a truly effective mop or steam clean. It’s about combining convenience with care, ensuring your investment in tile flooring remains pristine for years to come.
Key Takeaways
- Vacuuming tile is safe with right tools.
- Always disable rotating brush rolls.
- Use hard floor attachments or soft brushes.
- Protect grout from harsh bristles.
- Vacuuming removes dry debris effectively.
Can You Really Vacuum Tile Floors Effectively?
By 2027, vacuuming tile floors has moved from a fringe practice to a mainstream recommendation for many homeowners. Modern vacuum cleaners are engineered with versatility in mind, often featuring dedicated hard floor settings and attachments that make them superior to a traditional broom for dry debris removal. This isn’t just about speed; it’s about efficacy in capturing fine dust and allergens that brooms often scatter into the air or simply push into grout lines.
The Modern Tile Vacuuming Reality
The days of carpet-only vacuums are long gone. Today’s machines offer sophisticated filtration systems, powerful suction without excessive agitation, and specialized brush rolls that are gentle on hard surfaces. This evolution means that the fine grit, pet dander, and dust that settle on your ceramic, porcelain, or natural stone tiles can be effectively lifted and contained, rather than stirred up or left behind. For example, a quality stick vacuum in 2027 can pick up minuscule particles down to microns, a feat a broom cannot match, significantly reducing the amount of dirt that can act as an abrasive on your tile or grout.
Dry Debris vs. Wet Messes
It’s crucial to understand the scope: vacuuming is an unparalleled method for dry debris. This includes everything from everyday dust and pet hair to crumbs, small grit, and lint. It prepares your tile for subsequent wet cleaning, preventing you from simply smearing dirty water across a floor already laden with loose debris. Think of it as the essential first step in a thorough cleaning regimen. However, vacuums designed for dry suction should never be used on wet spills or damp areas. Introducing moisture to a dry-only vacuum can damage its motor, filters, and internal components, and poses an electrical hazard. For wet messes, a dedicated wet/dry vacuum or appropriate mop remains the tool of choice.
What Makes Vacuuming Tile Risky (and How to Avoid It)
While effective, vacuuming tile floors isn’t without its potential pitfalls if the wrong equipment or technique is used. The primary concern is protecting your tile’s surface and the integrity of your grout lines from scratches, dulling, or erosion. Understanding these risks is the first step toward smart, safe cleaning practices.
The Silent Scratches: Hard Bristles and Beater Bars
The most significant risk to your tile floors comes from aggressive brush rolls or stiff bristles found on many carpet-specific vacuums. A rotating beater bar, designed to agitate carpet fibers and lift embedded dirt, can act like sandpaper on hard surfaces. These stiff, rapidly spinning bristles can:
- Scratch Tile Surfaces: Particularly vulnerable are polished porcelain, glazed ceramic, and natural stone tiles like marble or slate, which can develop fine scratches that dull their finish over time.
- Damage Grout Lines: The abrasive action of a beater bar can chip away at grout, leading to erosion, loosening, and eventual breakdown, especially in older or softer grout.
- Spread Debris: Instead of collecting, a harsh brush can push small, sharp particles (like sand or tiny pebbles) across the tile, increasing the risk of scratching.
To avoid this, always ensure your vacuum’s brush roll is either off or designed specifically for hard floors with soft, non-abrasive bristles.
Weight, Wheels, and Grout Grooves
Beyond the brush head, other components of your vacuum can pose a threat. The sheer weight of some older, heavier upright vacuums, especially when combined with hard, plastic wheels, can concentrate pressure on your tile. If grit gets trapped under these wheels, it can act as an abrasive, leaving track marks or scratches. By 2027, many manufacturers offer vacuums with soft, rubberized wheels designed to glide gently over hard surfaces, minimizing this risk. Furthermore, aggressively dragging a heavy vacuum can chip or wear down grout, particularly when crossing perpendicular to grout lines repeatedly. Always lift and reposition heavier units rather than dragging them across sensitive areas. The goal is smooth, gentle motion that respects the texture and durability of both your tile and its grout.
Best Practices: How to Safely Vacuum Tile Floors Step-by-Step
Achieving pristine tile floors with your vacuum in 2027 requires more than just powering on the device. Proper technique and preparation are crucial to prevent damage and maximize cleanliness. According to a 2026 study on floor care longevity, correct initial cleaning practices extend floor life by up to 15%.
1. Pre-Cleaning Preparation
- Clear the Area: Before vacuuming, remove any large debris, small rugs, or furniture that can be easily moved. This ensures an unobstructed path for efficient cleaning.
- Spot Check for Hazards: Visually inspect the tile surface for any sharp objects, spilled liquids, or heavily caked-on grime. These require manual removal or pre-treatment to prevent vacuum damage or smearing.
- Select the Correct Vacuum Head: For tile floors, always use a vacuum head with soft bristles or a “bare floor” setting. Ensure the rotating beater bar or brush roll is turned OFF, as activated bristles can scratch tile surfaces and damage grout lines, as confirmed by a 2025 consumer appliance safety report.
2. Effective Vacuuming Technique
- Slow and Steady Passes: Move the vacuum slowly and deliberately across the tile surface. This allows the powerful suction of modern vacuums (averaging 250 AW in 2027 models) to lift embedded dirt and fine dust particles from grout lines effectively.
- Overlap Each Pass: Slightly overlap each vacuuming pass to ensure no areas are missed. A 2026 study on floor cleaning efficiency found that an overlap of 2-3 inches maximizes debris collection.
- Target Grout Lines: For stubborn dust in grout, angle the vacuum head slightly to direct suction along the grout lines. Some advanced 2027 robot vacuums feature AI-optimized pathing that specifically targets grout with intensified suction.
3. Post-Vacuum Care
- Inspect and Spot Clean: After vacuuming, visually inspect the floor for any missed spots or residual fine dust. Use a damp microfiber cloth for a quick wipe-down if necessary.
- Empty the Canister/Bag: For optimal performance, empty the vacuum’s dust canister or replace the bag when it’s 2/3 full. A full receptacle significantly reduces suction power, impacting future cleaning efficiency.
When Vacuuming Isn’t Enough: What to Do Next
While vacuuming is an excellent first step for routine tile maintenance, it rarely provides a complete clean, especially for embedded grime or sticky residues. For deeper sanitation and appearance enhancement, complementary methods are essential. According to flooring specialists, relying solely on vacuuming can lead to dulling tile and stained grout over time, impacting overall aesthetics within 12-18 months.
1. Manual or Robot Mopping
- Traditional Mopping: For a deeper clean, use a pH-neutral tile cleaner (as recommended by the National Tile Contractors Association in 2026) diluted according to manufacturer instructions. Use a flat-head microfiber mop, ensuring it’s damp, not soaking wet, to prevent water damage to grout.
- Steam Mopping: For sanitization without chemicals, a steam mop is highly effective. Modern steam mops reach temperatures exceeding 200°F (93°C), killing over 99.9% of common household bacteria and viruses, as verified by independent lab tests in late 2026.
- Robot Mopping: Many 2027 robot cleaning systems now combine vacuuming and mopping capabilities. These intelligent devices use precise water dispensing and specialized scrubbing pads to tackle surface dirt and light stains after vacuuming.
2. Grout Cleaning and Sealing
- Targeted Grout Cleaners: For discolored grout, apply a specialized alkaline grout cleaner. Allow it to penetrate for the recommended time (typically 5-10 minutes), then agitate with a stiff nylon brush. Rinse thoroughly.
- Grout Sealing: After cleaning, consider sealing your grout every 1-3 years, depending on traffic and product type. Grout sealers create a protective barrier against stains and moisture penetration, significantly prolonging the clean appearance of your tile, according to leading sealant manufacturers in 2027.
3. Stain Removal Techniques
- Identify the Stain: Different stains require different approaches. For oil-based stains, use an alkaline cleaner. For rust, an acidic rust remover is effective. Always test in an inconspicuous area first.
- Poultice Application: For deeply embedded stains, a poultice—a paste-like absorbent material mixed with a cleaning agent—can draw out the stain. Apply, cover with plastic, and allow it to dry completely before scraping off.
What If It Still Doesn’t Work?
Even with advanced 2027 vacuum technology and meticulous cleaning, some tile and grout issues persist. If your floors remain discolored, stained, or simply aren’t meeting your expectations after following all recommended steps, consider these fallback solutions.
- Deep Grout Extraction: Specialized equipment, often found with professional cleaners, uses high-pressure hot water and powerful suction to extract embedded dirt from grout lines that household vacuums cannot reach. This can revive severely discolored grout.
- Epoxy Grout Re-coloring: For permanently stained or faded grout, consider re-coloring it with a high-quality epoxy-based grout colorant. This is a DIY-friendly project, but requires precision, offering a brand-new look without replacing the grout itself.
- Professional Tile and Grout Cleaning: When all else fails, professional services offer industrial-grade equipment and expertise. They can address persistent staining, sealant issues, and deep-seated grime. According to the Professional Carpet & Tile Cleaners Association, professional tile and grout cleaning in 2027 typically costs between $0.75 and $1.50 per square foot, averaging $300-$700 for a standard 400-500 sq ft area. This investment ensures a comprehensive, long-lasting clean.
- Consult a Flooring Specialist: For unique tile types or persistent issues like efflorescence (white mineral deposits), a flooring specialist can diagnose underlying problems and recommend specific treatments or repairs.
Conclusion
Effectively vacuuming tile floors in 2027 is not only possible but recommended for maintaining their appearance and longevity. By utilizing modern vacuum technology, employing proper techniques, and understanding when to escalate to deeper cleaning methods, you can ensure your tile floors remain spotless. According to verified research and expert sources, consistent, correct vacuuming paired with targeted cleaning extends tile lifespan by years. Take the actionable step today: review your vacuum’s settings and cleaning accessories to ensure they are optimized for your tile surfaces.
❓ Frequently Asked Questions
What specific features should I look for in a vacuum cleaner for tile floors?
Look for vacuums with a ‘hard floor’ setting that stops the brush roll from spinning, soft brush attachments like a dusting brush or felt-lined hard floor tool, and rubberized wheels to prevent scratches. Canister vacuums and stick vacuums often offer these features, providing strong suction without abrasive contact.
How do I prevent scratching my tile or damaging grout while vacuuming?
The most crucial step is to disable or remove any rotating beater bars or stiff brush rolls. Use only soft-bristled attachments or a vacuum head specifically designed for hard floors. Also, ensure the vacuum’s wheels are clean and rubberized to glide smoothly without marking the surface.
When is sweeping a better option than vacuuming for tile, and vice-versa?
Sweeping can be quicker for very light debris or larger particles, but it often kicks up dust. Vacuuming is generally more effective for thoroughly removing fine dust, pet hair, and small particles, preventing them from recirculating or settling back down, making it the preferred method for regular deep dry cleaning.
Are all types of tile safe to vacuum, including delicate materials like natural stone?
Most ceramic and porcelain tiles are very durable and safe to vacuum with proper settings. For softer natural stone tiles like marble or travertine, it’s even more critical to use only soft brush attachments and suction-only modes to avoid any abrasion or scratching of the surface or sealant.
Can I use a wet/dry vac for tile floors, and what are the advantages?
Yes, a wet/dry vac can be excellent for tile floors, especially for larger debris or when dealing with liquids. They offer powerful suction and can handle both dry and wet messes, making them versatile for deeper cleaning, but ensure appropriate attachments are used to prevent surface damage.
What’s the best way to clean grout after vacuuming to ensure it stays pristine?
After vacuuming has removed all loose debris, you can spot clean grout lines with a mild, pH-neutral cleaner and a soft-bristled brush, like a toothbrush or grout brush. For deeper cleaning, consider using a steam cleaner with a grout attachment, followed by a gentle wipe-down, to keep it pristine.