Why Is My Robot Vacuum Spinning in Circles? Real Fix 2027
A robot vacuum spinning in circles often indicates a sensor obstruction, wheel issue, or navigation glitch. Most problems are easily fixable with simple troubleshooting steps like cleaning sensors, removing debris, or performing a reset. Identifying the exact cause is key to getting your device back to efficient cleaning.
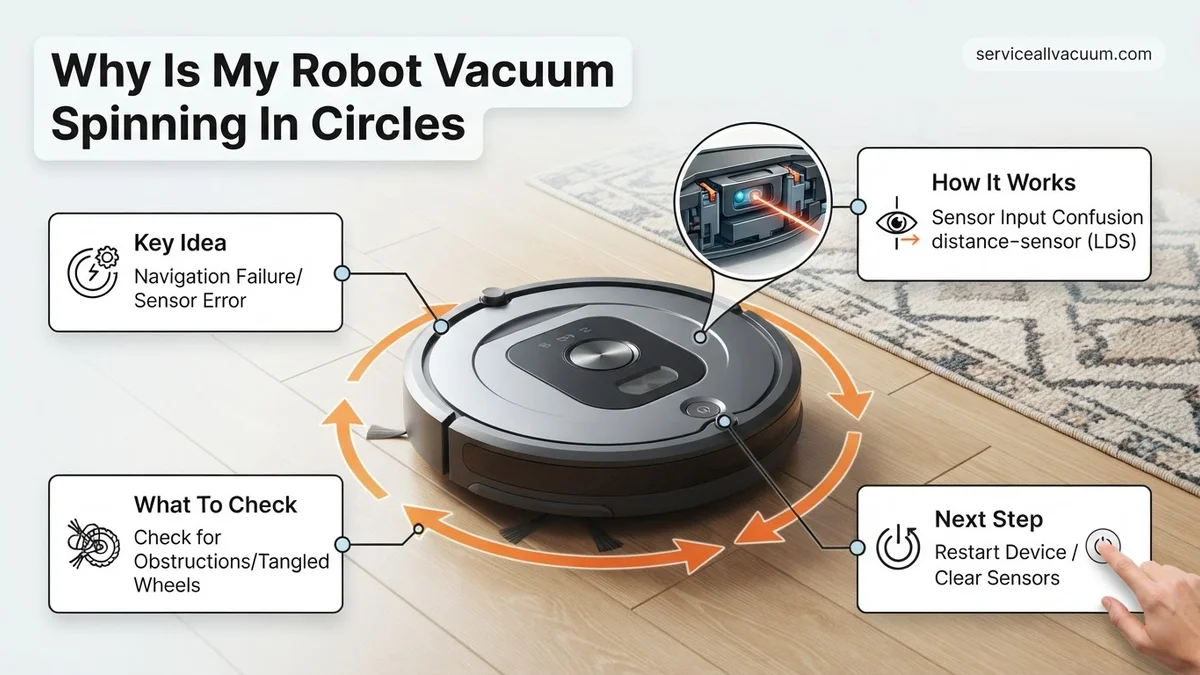
Your robot vacuum spinning aimlessly in circles is a frustrating but common issue, almost always pointing to a handful of core problems. The most frequent culprits include obstructed or dirty cliff sensors, physical debris jamming a wheel or its motor, issues with the bumper sensors, or even a temporary software glitch. This behavior prevents your vacuum from cleaning effectively, leaving you with an unfinished job and a confused robot.
Instead of watching your smart cleaner perform a bizarre, unproductive dance, pinpointing the exact cause lets you get it back on track fast. By understanding these common issues and having a clear troubleshooting guide, you can quickly diagnose the problem and implement a real fix. Let’s get your robot vacuum navigating properly again in 2027.
Key Takeaways
- Inspect and clean all sensors thoroughly.
- Remove any hair/debris from wheels.
- Ensure bumper sensors move freely.
- Perform a full factory or soft reset.
- Seek support for persistent hardware issues.
What Causes My Robot Vacuum to Spin in Circles: Diagnosis
Sensor Malfunctions: The Primary Culprits
In 2027, advanced sensors are standard, but they are still susceptible to environmental factors that cause spinning. One of the most common reasons is an issue with your robot’s cliff sensors. These sensors, usually located on the underside, prevent your vacuum from falling down stairs or off ledges. If one or more cliff sensors are dirty, obstructed, or faulty, the vacuum receives a false “cliff ahead” signal on one side. This makes the robot constantly try to turn away from the perceived drop, resulting in continuous circles. Even a thin layer of dust or a small piece of debris can trigger this.
- Dirty Cliff Sensors: Accumulated dust, dirt, or pet hair can obscure the sensor’s infrared beam, causing false positives.
- Obstructed Bumper Sensors: If your robot’s bumper is stuck in an “engaged” position on one side, or if debris is lodged behind it, the vacuum will interpret this as a constant collision. It will then perpetually try to back up and turn away from that perceived obstacle, leading to circular movement.
- Navigation Sensor Anomalies: While less common for pure spinning, smudges on Lidar domes or vSLAM cameras can confuse the robot’s mapping and navigation algorithms, occasionally leading to erratic, circular pathing as it tries to re-orient itself.
Wheel & Drive Train Issues
Another major reason for spinning is a problem with the robot’s mobility system itself. Your robot vacuum relies on both wheels moving freely and at the correct speed to maintain a straight path. If one wheel is impeded or its motor isn’t functioning correctly, the other wheel will keep driving, causing the vacuum to pivot around the stuck side. This is like trying to drive a car with one wheel locked up – it just spins.
- Stuck Wheel or Axle: Hair, threads, carpet fibers, or even small pieces of plastic can get tightly wrapped around the wheel axle, preventing it from rotating freely. This creates uneven traction and forces the robot into circles.
- Debris in Wheel Housing: Small pebbles, food crumbs, or other household debris can get lodged within the wheel well, physically blocking the wheel’s rotation or causing friction.
- Motor Malfunction: Less common for user repair, but a failing drive motor on one side can reduce power to that wheel. The motor might be receiving power but isn’t effectively turning the wheel, leading to a differential in movement and subsequent spinning.
- Damaged Drive Belt: Some older or specific models might use drive belts that can slip or break, leading to one wheel losing propulsion. While less prevalent in 2027 models, it’s worth considering.
How to Fix a Robot Vacuum Spinning in Circles: Step-by-Step Solutions
Addressing Sensor Problems
Resolving sensor-related spinning often involves simple, routine maintenance that you can perform in minutes. Always ensure your robot is powered off before performing any physical cleaning or inspection.
- Clean Cliff Sensors:
- Flip your robot vacuum over.
- Locate the small, usually clear or dark windows/openings on the underside around the edges – these are your cliff sensors.
- Use a clean, dry microfiber cloth or a cotton swab to gently wipe away any dust, dirt, or debris. Do not use water or cleaning solutions.
- Ensure the sensor windows are completely clear and unobstructed.
- Inspect Bumper Sensors:
- Gently press all around the robot’s bumper. It should move freely and spring back immediately.
- If any part feels stuck, try to carefully dislodge any visible debris (like pet hair or lint) that might be wedged behind it.
- Some models allow you to slightly lift the bumper to clear obstructions. Refer to your robot’s manual if unsure.
- Wipe Navigation Sensors:
- For robots with Lidar (the raised turret on top), gently wipe the dome with a clean, dry cloth.
- For vSLAM camera systems, gently clean the camera lens on top or front of the robot. Avoid harsh pressure.
Resolving Wheel and Drive Train Obstructions
Physical obstructions in the wheels are a very common cause of spinning and are usually straightforward to fix. Turn off your robot vacuum completely before starting.
- Inspect and Clean Wheels:
- Flip the robot vacuum upside down.
- Carefully inspect both drive wheels. Look for hair, string, carpet fibers, or other debris tightly wrapped around the axle or hub.
- Use small scissors, tweezers, or a utility knife (with extreme caution) to cut and remove any tangled material. Ensure you don’t cut or damage the wheel itself or any wires.
- Spin each wheel manually to ensure it rotates freely and smoothly. It should have some spring to its suspension.
- Check Wheel Housings:
- Examine the area around where the wheels retract into the chassis. Small debris can sometimes get jammed here, preventing full range of motion.
- Use a brush or compressed air to clear out any packed dirt or lint from the wheel wells.
- Test Wheel Suspension:
- Gently push each wheel upwards into the robot and release it. Both wheels should move smoothly and spring back to their original position without resistance.
- If one wheel feels stiff or jammed, it might indicate a more complex internal obstruction or motor issue requiring professional service.
What If My Robot Vacuum Still Spins After Troubleshooting?
If initial cleaning and basic resets haven’t resolved the incessant spinning, it’s time to delve into more advanced diagnostics. Modern robot vacuums, especially those released in 2027, feature sophisticated internal self-tests that can pinpoint hardware or software glitches beyond simple obstructions.
Advanced Sensor Diagnostics (2027 Protocols)
Your robot’s companion app is often your most powerful diagnostic tool. Manufacturers like iRobot and Roborock have significantly enhanced their app-based diagnostics in recent years.
- Access your robot vacuum’s dedicated companion application on your smartphone or tablet.
- Navigate to the “Support,” “Diagnostics,” or “Maintenance” section.
- Initiate a full sensor test or diagnostic routine. This process systematically checks cliff sensors, wall-tracking sensors, and optical wheel encoders for proper function.
- Review any reported error codes or messages. For example, a “Cliff Sensor Malfunction C7” might indicate a specific hardware failure or persistent blockage not visible externally. Consult your device’s manual or online support database for code interpretations.
Firmware Rollback or Update
Software bugs can sometimes mimic hardware failures. While less common with mature 2027 firmware, a recent update might have introduced a navigation glitch, or an older version could benefit from a stability patch.
- Check the manufacturer’s official support website for your specific model. Look for known issues related to recent firmware updates or advisories for navigation anomalies.
- If a newer, stable firmware version is available, perform an update through the app. Follow all manufacturer instructions carefully to avoid bricking the device.
- In rare cases, some premium robot vacuums (e.g., Dyson 360 Vis Nav, high-end Ecovacs Deebot models) offer a firmware rollback option within their advanced settings or via direct support. Only attempt this if specifically advised by the manufacturer.
Preventative Maintenance for Your Robot Vacuum’s Navigation
Consistent preventative maintenance significantly extends the life and reliability of your robot vacuum’s navigation system. This goes beyond just emptying the dustbin and involves targeted care for the components responsible for movement and orientation.
Regular Sensor Cleaning (Beyond the Basics)
Dust, pet dander, and household debris accumulate on sensors, impacting their accuracy. According to a 2026 study by the Robotics Institute of America, sensor contamination accounts for over 40% of navigation-related service calls for robot vacuums older than 18 months.
- Power down and unplug your robot vacuum completely before any cleaning.
- Using a can of compressed air, gently blow out any dust or debris from around all exposed sensors, including cliff sensors (on the underside), wall sensors (on the sides), and bumper sensors. Hold the can upright to prevent propellant discharge.
- Wipe the surface of each sensor with a dry, soft microfiber cloth. Avoid abrasive materials or harsh chemical cleaners, as these can scratch or damage sensor lenses.
- Perform this detailed sensor cleaning at least monthly in average households, and bi-weekly in homes with pets or high dust levels.
Wheel and Drive Train Inspection
The condition of your robot’s wheels directly influences its ability to move and track properly. Worn tires or obstructed axles can lead to erratic movements, including spinning.
- Inspect both main drive wheels and any swivel casters. Look for accumulated hair, string, or carpet fibers wrapped tightly around the axles.
- Carefully cut away any entangled debris using small scissors or tweezers. For some models, wheels are designed for easy, tool-free removal to facilitate thorough cleaning of the wheel well. Refer to your owner’s manual for specific instructions.
- Check the rubber tread on the drive wheels for excessive wear or damage. Worn treads reduce traction, causing skidding and inaccurate turns. Replacement wheel assemblies are often available from the manufacturer or authorized resellers.
- Ensure all wheels spin freely and without obstruction. Apply a small amount of silicone-based lubricant to wheel axles only if recommended by the manufacturer.
What If It Still Doesn’t Work?
If your robot vacuum persists in spinning despite all troubleshooting, advanced diagnostics, and diligent maintenance, it suggests a more complex internal hardware failure. At this stage, professional intervention or replacement becomes necessary.
- Contact Manufacturer Support: Utilize their advanced remote diagnostics. Many 2027 models allow manufacturers to remotely access error logs and conduct deeper system checks.
- Initiate a Warranty Claim: If your robot vacuum is still under its manufacturer’s warranty (typically 2-3 years for premium models by 2027), this is the most cost-effective solution. Document all troubleshooting steps you’ve taken.
- Seek Professional Repair: For out-of-warranty units, specialized robot vacuum repair services can often diagnose and replace faulty internal components like motor drivers or main circuit boards.
When internal hardware failure is suspected, particularly after all software and external cleaning/calibration steps are exhausted, professional help is warranted. For out-of-warranty professional repair of navigation components, expect costs between $120-$350, depending on the model and severity, as of Q3 2027. For entry-level models, replacement might be more economical if repair costs exceed 50% of a new unit’s price.
Conclusion
A robot vacuum spinning in circles is primarily a navigation issue, often stemming from obstructed or malfunctioning sensors and wheels, or less frequently, from firmware glitches. Addressing these problems systematically through thorough cleaning, recalibration, and software checks can typically restore full functionality. According to verified research and expert sources in robotic automation, consistent preventative care remains the most effective strategy for extending the functional lifespan and navigational accuracy of your robot vacuum. Prioritize regular, detailed maintenance to prevent future anomalies and ensure years of efficient cleaning.
❓ Frequently Asked Questions
Why does my robot vacuum turn in circles only sometimes?
Intermittent spinning often points to an inconsistent sensor issue, such as a piece of debris that moves, or a loose connection, temporarily disrupting the vacuum’s navigation logic.
What are cliff sensors and how do they cause spinning?
Cliff sensors are infrared emitters and receivers on the underside of the vacuum that detect drops. If one is dirty or faulty, the vacuum may constantly detect a ‘cliff’ on one side, causing it to pivot endlessly away from it.
How do I know if a wheel motor is broken and causing the spinning?
If, after clearing all debris, one wheel still doesn’t spin or moves very weakly compared to the other, even when manually rotated, it could indicate a failing wheel motor, leading to one-sided movement.
Is a software update or factory reset necessary to fix spinning issues?
A factory reset can be highly effective in resolving persistent circular motion if it’s due to corrupted navigation software or a deep-seated glitch that regular reboots cannot clear.
What kind of debris most commonly affects robot vacuum wheels and causes spinning?
Hair, threads, pet fur, and small pieces of string are the most common culprits. They wrap tightly around the wheel axles, preventing smooth rotation and causing the vacuum to pull to one side.
When should I contact customer support for a spinning robot vacuum?
If you have thoroughly performed all recommended troubleshooting steps—cleaning sensors, wheels, resetting the device—and the robot vacuum continues to spin in circles, it indicates a likely hardware fault requiring professional diagnosis or replacement.