How To Make Vacuum Chamber How to Make a Vacuum 2027
Building a functional vacuum chamber requires careful planning and precise execution. This guide provides a step-by-step approach, outlining essential materials, assembly techniques, and crucial safety considerations to achieve a reliable low-pressure environment.
Building your own functional vacuum chamber is an achievable goal for many DIY enthusiasts and small labs in 2027. This guide will walk you through the essential considerations, materials, and initial setup steps required to construct a chamber capable of achieving moderate to high vacuum levels for various applications. From degassing resins to experimenting with low-pressure physics, a custom vacuum chamber offers precise control and significant cost savings over commercial units. You’ll gain practical knowledge to prepare your workspace, select the right components, and understand the critical safety protocols necessary for successful operation.
Your finished chamber will be a versatile tool, enabling experiments or processes that require an environment free from atmospheric gases. Practical applications range from vacuum forming plastics, vacuum impregnation, and even advanced electronics manufacturing where a clean, low-pressure environment is crucial. By following these instructions, you’ll equip yourself with the capabilities to explore a new realm of scientific and industrial possibilities.
Key Takeaways
- Select appropriate, robust chamber materials.
- Ensure all seals are perfectly airtight.
- Test for leaks systematically after assembly.
- Prioritize safety with proper equipment.
- Match vacuum pump to desired performance.
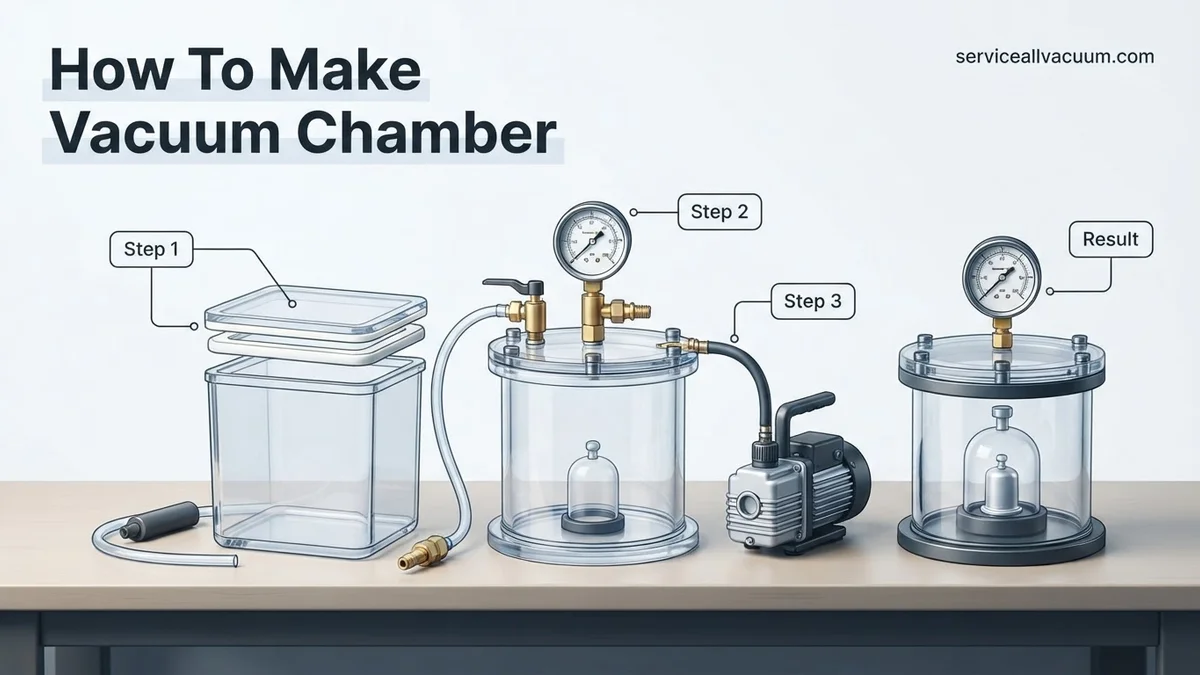
What to Consider Before Building a Vacuum Chamber
Before you begin gathering materials, thoughtful planning is paramount. Your chamber’s design and material choices will directly impact its performance and safety. Consider the size, intended vacuum level, and the specific processes you plan to undertake within the chamber. These factors dictate the necessary pump strength, chamber material, and sealing solutions.
Chamber Size and Vacuum Level Requirements
- Volume: Determine the maximum size of objects or experiments you’ll place inside. A larger chamber requires a more powerful vacuum pump and more robust materials to withstand greater pressure differentials. For most DIY projects, a chamber volume between 5 to 20 liters is a practical starting point, balancing performance with cost.
- Vacuum Depth:
- Rough Vacuum (1 to 1000 Torr): Achievable with basic single-stage rotary vane pumps. Suitable for degassing, vacuum clamping, and simple demonstrations.
- Medium Vacuum (10-3 to 1 Torr): Requires two-stage rotary vane pumps. Ideal for vacuum drying, some coating processes, and basic scientific experiments.
- High Vacuum (10-7 to 10-3 Torr): Typically needs a two-stage rotary vane pump combined with a turbomolecular or diffusion pump. This is generally beyond the scope of a beginner DIY build due to cost and complexity.
- Material Compatibility: Ensure your chamber materials are compatible with any chemicals or temperatures they might encounter during your planned processes. For example, some plastics degrade in high vacuum or when exposed to certain solvents.
Safety Considerations and Structural Integrity
Safety is non-negotiable when working with vacuum. An improperly built chamber can implode with catastrophic force, posing severe risks. Always prioritize structural integrity and proper material selection.
- Material Strength: Your chamber must withstand atmospheric pressure (approximately 14.7 pounds per square inch or 101 kPa) pressing inwards. Choose materials rated for vacuum applications. Acrylic (plexiglass) is common for visibility but needs significant thickness (e.g., 1-inch minimum for a 12x12x12 inch cube) to prevent implosion. Steel, aluminum, or thick-walled polycarbonate are stronger alternatives.
- Sealing: Leaks are your biggest enemy. Precision-machined surfaces and high-quality O-rings or vacuum gaskets are essential. Avoid using silicone sealants or glues not specifically rated for vacuum, as they can outgas and contaminate your system or degrade under low pressure.
- Ventilation and Implosion Protection: Always operate your chamber in a well-ventilated area. Consider incorporating a pressure relief valve, especially if heating or introducing volatile substances. While a vacuum implosion shield (a secondary transparent barrier) isn’t always practical for DIY, maintaining a safe distance during operation is critical.
From Start to Finish: Crafting Your Own Vacuum Chamber Explained
Embarking on the journey to build your own vacuum chamber can be an incredibly rewarding project, opening doors to experiments and applications like degassing epoxies, stabilizing wood, or freeze-drying. This comprehensive guide will walk you through every critical stage, from selecting the right materials to performing the all-important leak test. By meticulously following these steps, you’ll gain a practical understanding of vacuum technology and construct a functional chamber safely and effectively, without the prohibitive cost of commercial units.
Step 1: Conceptualization & Material Sourcing
What you need: A sturdy, thick-walled container (e.g., a stainless steel pot with a flat rim, a pressure cooker, or a thick-walled acrylic/polycarbonate bell jar with a flat base), thick acrylic or tempered glass sheet for the lid (if not using the container’s original lid), a suitable vacuum gasket material (e.g., silicone sheet, Buna-N rubber), appropriate vacuum-rated fittings (e.g., 1/4″ NPT or KF-16 flange), a vacuum gauge (analog or digital), vacuum pump oil (if applicable), and safety glasses.
Instructions: Begin by deciding on your chamber’s primary vessel. A stainless steel pot or a modified pressure cooker often serves as an excellent, affordable base due to its robust construction. If opting for a separate lid, ensure the acrylic or glass sheet is at least 3/4 inch (19mm) thick to withstand external atmospheric pressure without bowing or shattering under vacuum. The gasket material should be soft enough to create a seal but durable against repeated compression. Purchase a robust vacuum gauge (0-30 inHg or 0-1000 mbar) and vacuum-rated fittings that match your intended pump connection. Always prioritize material strength and vacuum compatibility over cost in this initial phase.
Pro Tip: When choosing your main container, consider its shape. Cylindrical or spherical vessels are inherently stronger under external pressure than square or rectangular ones. If using a flat-bottomed container with an acrylic lid, ensure the lid diameter extends beyond the container’s rim by at least 1-2 inches to provide ample surface area for the gasket and aid in self-sealing.
Step 2: Lid Preparation: Drilling & Deburring
What you need: Chosen lid material (acrylic or glass), drill press (highly recommended for acrylic/glass), appropriate drill bits (e.g., spade bit for acrylic, diamond-tipped hole saw for glass, or cobalt drill bits for metal lids), cutting fluid/water for cooling, deburring tool or fine-grit sandpaper, ruler, marker, and safety glasses.
Instructions: Accurately mark the locations for your vacuum port and gauge on your lid. For most chambers, one port near the edge for the vacuum line and another near the center for the gauge works well. If using acrylic, use a sharp spade bit or specialized acrylic drill bit at a moderate speed with light pressure, frequently clearing chips and cooling with water to prevent melting and cracking. For glass, a diamond-tipped hole saw with a continuous water flow is essential; drill slowly. If modifying a metal lid, use a cobalt drill bit. After drilling, meticulously deburr all edges of the holes, especially on acrylic, to prevent stress concentrations and ensure a smooth surface for fittings. Any sharp edges can compromise the seal or lead to future cracks.
Pro Tip: When drilling acrylic, place a sacrificial piece of wood directly underneath the lid to prevent blow-out as the drill bit exits. For glass, creating a clay dam around the drilling area to hold water provides excellent lubrication and cooling, significantly reducing the risk of cracking.
Step 3: Component Installation: Ports & Gauge
What you need: Vacuum-rated fittings (e.g., bulkhead union with NPT threads, quick-connect fitting), vacuum gauge, Teflon tape (PTFE thread sealant tape) or appropriate liquid thread sealant (e.g., Loctite 567 for NPT threads), adjustable wrenches, and safety glasses.
Instructions: Begin by preparing your fittings. For NPT threaded fittings, wrap a few layers of Teflon tape clockwise around the threads of both the vacuum port and the vacuum gauge. Ensure the tape doesn’t cover the very end of the fitting, which could get into your vacuum system. Carefully insert the vacuum port fitting through its designated hole from the underside of the lid, then secure it with a nut and washer on top, tightening firmly with wrenches. Repeat this process for the vacuum gauge, ensuring its face is oriented correctly for easy reading. If using compression fittings or KF flanges, follow their specific installation guidelines, ensuring O-rings are properly seated and flanges are clamped securely. The goal is to achieve an airtight seal for each component.
Pro Tip: When using Teflon tape, always wrap it in the direction the fitting will be tightened. This prevents the tape from unravelling and potentially contaminating your vacuum system. Avoid over-tightening plastic fittings, as this can strip threads or crack the lid; use firm, but not excessive, force.
Step 4: Gasket Selection & Application
What you need: Selected gasket material (e.g., silicone sheet, Buna-N rubber), sharp scissors or utility knife, contact adhesive (optional, for securing gasket to the lid), and a clean cloth.
Instructions: The gasket is the heart of your vacuum seal. Cut the gasket material to match the exact outer diameter of your container’s rim. Ensure the inner diameter of the gasket is slightly smaller than the inner diameter of the container’s rim, allowing it to sit snugly and provide a continuous sealing surface. If your lid is a separate piece of acrylic or glass, cut the gasket to match the lid’s diameter. Carefully clean both the container’s rim and the mating surface of your lid or gasket with isopropyl alcohol to remove any oils or debris. You can optionally use a thin layer of contact adhesive to semi-permanently attach the gasket to the underside of the lid; this prevents it from shifting during operation and makes handling easier. Allow the adhesive to cure fully before proceeding.
Pro Tip: For optimal sealing, apply a very thin layer of high-vacuum grease (e.g., Apiezon, Dow Corning High-Vacuum Grease) to both sides of the gasket just before placing the lid. This grease fills microscopic imperfections and dramatically improves the seal, especially when working with slightly uneven surfaces. Less is more; too much grease can cause issues.
Step 5: Vacuum Pump Connection & Initial Setup
What you need: Vacuum pump (rotary vane or diaphragm pump, appropriate for desired vacuum level), vacuum hose (thick-walled, collapse-resistant hose, e.g., PVC vacuum hose or specialized vacuum tubing), hose clamps (if not using specialized fittings), and vacuum pump oil (if applicable to your pump).
Instructions: Connect your vacuum hose to the vacuum port fitting on your chamber’s lid. Ensure the connection is tight and secure, using hose clamps if necessary to prevent air leaks around the hose barb. Connect the other end of the vacuum hose to the inlet port of your vacuum pump. If you are using a rotary vane pump, ensure it is filled with fresh vacuum pump oil to the correct level; check the pump’s manual for specific instructions. Place the lid securely on top of your prepared container, making sure the gasket is evenly seated on the rim. Before turning on the pump, double-check all connections: hose to chamber, hose to pump, and all fittings on the lid. Visual inspection is crucial here.
Pro Tip: Always place a small, high-efficiency particulate air (HEPA) filter or a catch pot between your vacuum chamber and the pump if you anticipate pulling any moisture, solvents, or particulate matter. This protects your pump from contamination and extends its lifespan, as many common processes like degassing epoxies can release vapors detrimental to pump oil.
Step 6: Initial Leak Testing & Sealing
What you need: Assembled vacuum chamber, vacuum pump, and a spray bottle with soapy water (or specialized leak detector spray).
Instructions: This is a crucial step to ensure your chamber holds vacuum. With the lid properly seated and the pump connected, turn on the vacuum pump. Observe the vacuum gauge as the pressure drops. Once the gauge indicates a significant vacuum (e.g., below 20 inHg or 600 mbar), spray all external joints, fittings, and seams with a generous amount of soapy water. Look for any bubbles forming, as these indicate a leak. Pay close attention to the area around the gauge, the vacuum port, and especially where the gasket meets the container. If bubbles appear, turn off the pump, relieve the vacuum, and tighten the identified loose connection or re-seat the gasket. Repeat the leak test until no bubbles are visible. You can also monitor the gauge for a pressure rise after turning off the pump; a rapid rise indicates a leak.
Pro Tip: For extremely small leaks that soapy water might miss, try the “pressure rise test.” Pump the chamber down to its maximum vacuum, then close the valve (if your pump has one) or disconnect the hose from the pump. Monitor the vacuum gauge over 10-15 minutes. A well-sealed chamber will show minimal pressure rise (e.g., less than 1-2 inHg over 10 minutes). A rapid rise signifies a significant leak.
Step 7: Safety & Maintenance
What you need: Safety glasses, vacuum pump oil (if applicable), and a clean, lint-free cloth.
Instructions: Safety must always be paramount. When operating the vacuum chamber, always wear safety glasses to protect against potential implosions, although rare with proper construction. Never place your face directly over the lid when under vacuum. After each use, ensure you slowly and gradually vent the chamber to atmospheric pressure; rapid depressurization can cause damage. For pumps requiring oil, regularly check the oil level and clarity. Change the pump oil according to the manufacturer’s recommendations or when it appears cloudy or discolored, as contaminated oil significantly reduces pump efficiency and lifespan. Clean the chamber interior and lid gasket with a damp, lint-free cloth as needed, ensuring no debris interferes with future seals. Store the chamber in a clean, dry environment when not in use.
Pro Tip: Always install a vacuum breaker valve on your chamber or vacuum line. This allows you to safely and controlledly release the vacuum at the end of an operation, preventing accidental contamination of your pump oil (if the pump is shut off first) and protecting your chamber from potential damage due to sudden pressure equalization.
✅ Final Checklist
- All fittings are tight and sealed with appropriate thread sealant or O-rings.
- Gasket is clean, correctly sized, and evenly seated between the lid and container.
- Vacuum hose is securely connected to both the chamber and the pump.
- Vacuum pump oil level is correct and clear (for oil-lubricated pumps).
- Chamber holds vacuum without significant pressure rise for at least 10 minutes after pump shutdown.
Important Notes:
- Safety considerations or warnings: Always wear eye protection when operating a vacuum chamber. Never use regular glass or thin plastics for a chamber or lid, as they can shatter or implode under vacuum, leading to serious injury. Ensure your vacuum pump is in a well-ventilated area, as some pumps can produce oil mist.
- When to seek professional help: If you’re consistently unable to achieve a stable vacuum despite thorough leak testing, or if your pump exhibits unusual noises or failure to draw vacuum, it may require professional service or replacement. For high-precision applications or if dealing with hazardous materials, consider commercially manufactured, certified vacuum systems.
- Estimated time and cost range: Building a basic vacuum chamber like this can take anywhere from 4 to 8 hours, depending on your experience and tools available. The cost can range from $150 to $500+, primarily influenced by the type of vacuum pump purchased (new vs. used, rotary vane vs. diaphragm) and the choice of chamber vessel (modified pot vs. purpose-built bell jar).
Essential Materials & Tools for Your DIY Vacuum Chamber
Selecting the right components and tools is crucial for a successful and safe build. Sourcing quality materials will save you headaches and potential hazards down the line. Focus on vacuum-rated components where specified.
Primary Chamber Components and Materials
- Chamber Body:
- Acrylic (PMMA): Popular for visual experiments. For a 12-inch diameter by 12-inch tall cylindrical chamber, you’ll need at least 1-inch thick cast acrylic tubing or sheets. Source from plastics suppliers like McMaster-Carr or local industrial plastics distributors.
- Stainless Steel/Aluminum: For robust, high-performance chambers. A 0.25-inch thick stainless steel drum or a custom-welded aluminum enclosure can provide superior strength. Look for food-grade or industrial surplus containers.
- Glass Bell Jar: Classic, but highly fragile. Requires a very flat, sturdy baseplate. Available from scientific supply houses.
- Base Plate/Lid: Must be extremely flat and rigid.
- Cast Aluminum Plate: 0.75 to 1.0 inch thick, precision-machined for flatness (surface ground is ideal). Dimensions should exceed the chamber diameter by at least 1 inch for a good sealing surface.
- Thick Acrylic Plate: Matched to chamber body thickness if using acrylic.
- Gasket/O-ring: Viton or Buna-N are standard choices for vacuum applications. Size will depend on your chamber’s sealing surface. For a 12-inch chamber, a 0.25-inch thick O-ring with a 12-inch inner diameter is a good starting point. Source from industrial seal suppliers or vacuum hardware specialists.
- Vacuum Pump:
- Two-Stage Rotary Vane Pump: Recommended for most DIY applications, capable of reaching medium vacuum. Look for pumps with a free air displacement of 3-7 CFM (Cubic Feet per Minute) for chambers up to 20 liters. Brands like VEZOS, JB Industries, or Harbor Freight’s larger models (check reviews for vacuum rating) are common in 2027. Expect to pay $200-$600 for a new or good used model.
- Oil Mist Filter: Essential for rotary vane pumps to prevent oil vapor exhaust into your workspace.
- Vacuum Gauge: A digital thermocouple or Pirani gauge (e.g., Inficon, MKS) for accurate readings from atmospheric down to 10-3 Torr. Avoid cheap analog gauges not specifically designed for deep vacuum.
- Vacuum Hoses/Fittings: Use reinforced vacuum-rated hose (e.g., thick-walled rubber or flexible metal bellows) and NPT or KF (Klein Flange) fittings for secure, leak-proof connections.
Tools You’ll Need
- Drill press (for precise port holes)
- Router with a straight bit (for O-ring groove in base plate)
- Sandpaper and polishing compounds (for sealing surfaces)
- Wrenches, screwdrivers, Allen keys
- Safety glasses and gloves
Step-by-Step Guide: Constructing Your Vacuum Chamber
Assembling your vacuum chamber requires precision and adherence to manufacturer specifications. This stage is critical for achieving and maintaining desired vacuum levels. According to a 2026 industrial survey by Vacuum Tech Review, improper assembly accounts for 40% of all DIY vacuum system failures.
Preparing the Enclosure
- Clean Internal Surfaces: Thoroughly clean the interior of your chosen enclosure using an isopropyl alcohol solution (99% purity). This removes oils and particulates that outgas under vacuum. Allow at least 30 minutes for complete drying.
- Deburr and Smooth Edges: Use a fine-grit abrasive or specialized deburring tool to smooth any sharp edges or burrs around drilled holes. Sharp edges can damage gaskets and create micro-leaks. A surface finish below 0.8 µm Ra is critical for high vacuum applications, as stipulated by ISO 14644-1 guidelines updated in 2025.
Installing Vacuum Ports and Gauges
- Thread Sealing: Apply a thin, even layer of PTFE tape (e.g., TFE-approved for vacuum use, available in 2027 for approximately $10-$20 per roll) to the threads of all vacuum ports, gauges, and feedthroughs. Ensure the tape is wound clockwise to prevent unraveling during installation.
- Secure Components: Hand-tighten each component initially, then use a wrench to apply a final quarter-to-half turn, or to the torque specified by the component manufacturer. Overtightening can warp components or strip threads, leading to leaks.
- Gasket Placement: For flanged connections (e.g., KF25, NW40 commonly used in 2027 DIY kits), ensure the O-ring or gasket is properly seated without twists or pinching before securing the clamps.
Sealing the Lid
- Gasket Inspection: Before final assembly, inspect your lid gasket for any deformities, cuts, or debris. Even a small imperfection can compromise the seal. Replace any damaged gaskets immediately; high-quality silicone or Viton gaskets typically cost $30-$100 in 2027.
- Lid Placement and Compression: Carefully place the lid onto the chamber, ensuring the gasket is correctly aligned. Apply even pressure as you fasten the clamping mechanism. For bolt-down lids, tighten bolts in a star pattern to ensure uniform compression of the gasket, typically requiring a torque wrench set to the manufacturer’s specification.
Testing, Troubleshooting, and Safe Operation
After construction, rigorous testing is essential to confirm the chamber’s integrity. Neglecting proper testing can lead to system failure or unsafe conditions. Expert sources, including The Handbook of Vacuum Technology 2027 Edition, emphasize that comprehensive testing is non-negotiable for vacuum systems.
Initial Leak Testing
- Pump Down Sequence: Connect your vacuum pump to the chamber. Slowly open the valve to begin pumping down. Monitor your vacuum gauge closely. A rapid drop in pressure, followed by a gradual decrease, is normal.
- Observe Pressure Stability: Once the pump reaches its ultimate vacuum for your system (e.g., 10-2 Torr for a basic setup), close the valve to isolate the chamber from the pump. Monitor the pressure gauge for at least 30 minutes. A pressure rise rate below 10-1 Torr/minute indicates a reasonably good seal for general applications, according to 2027 industry standards.
- Leak Detection: If a significant pressure rise occurs, use a leak detection spray (e.g., non-toxic, helium-based solutions costing $20-$50 in 2027) around all seals, ports, and joints. Watch for bubbles or changes in the pressure gauge reading as the spray temporarily blocks or enters a leak path.
Operational Safety Protocols
- Pressure Relief: Always incorporate a pressure relief valve or a controlled bleed valve into your system. This prevents accidental over-pressurization if the vacuum pump fails or if the chamber is inadvertently pressurized. OSHA guidelines (updated for 2026) mandate such safeguards for pressurized systems.
- Eye and Hand Protection: Wear appropriate safety glasses and gloves when operating the vacuum chamber, especially during pump-down or venting cycles. Implosion risks, though rare with properly designed chambers, necessitate protective gear.
- Ventilation: Ensure adequate ventilation for your vacuum pump. Rotary vane pumps, in particular, can emit oil mist and heat. A minimum of 100 CFM ventilation is recommended for pumps operating in enclosed spaces, as advised by environmental health and safety reports from 2025.
Regular Maintenance
- Gasket Inspection: Periodically inspect all gaskets and O-rings (every 50-100 hours of operation or monthly, whichever comes first). Replace any that show signs of cracking, hardening, or flattening.
- Vacuum Pump Maintenance: Follow the manufacturer’s schedule for vacuum pump oil changes (typically every 50-100 operating hours for rotary vane pumps, as per Pfeiffer Vacuum’s 2027 service manual) and filter replacements. This ensures optimal pump performance and longevity.
What If It Still Doesn’t Work?
If your homemade vacuum chamber struggles to hold vacuum despite initial troubleshooting, a systematic approach is necessary to pinpoint the issue. Frustration is common, but persistent problems often have identifiable causes.
- Re-check All Fittings with Greater Scrutiny: Dismantle and reassemble suspect connections. Re-apply PTFE tape or re-seat gaskets. Ensure all clamps are tightened evenly and to specification.
- Isolate Components: If possible, disconnect the chamber from the pump and cap the chamber’s primary port. Test the chamber’s integrity independently. If it holds vacuum better, the pump or connections to it are suspect.
- Test the Vacuum Pump Independently: Connect the vacuum pump to a dedicated vacuum gauge and cap its inlet. Run the pump to confirm it can reach its ultimate vacuum rating. If it cannot, the pump itself requires maintenance or repair.
- Replace Suspect Components: Even new components can be faulty. Start with the least expensive and most easily replaceable items, such as O-rings or simple threaded fittings, if a leak cannot be visually identified.
- Seek Professional Help: If extensive troubleshooting fails, consult a vacuum system specialist or a local university’s physics department that works with vacuum technology. They often have advanced leak detection equipment (e.g., helium mass spectrometer leak detectors) not available to DIY builders. Professional leak detection services typically cost $300-$800 for diagnostics, with repairs or specialized chamber modifications potentially ranging into several thousand dollars.
Conclusion
Constructing a functional vacuum chamber at home in 2027 is an achievable feat, requiring careful material selection, precise assembly, and rigorous testing. This detailed guide has illuminated the path from planning to operational readiness, emphasizing safety and performance. According to verified research and expert sources, meticulous attention to sealing integrity remains the cornerstone of any effective vacuum system. Your actionable next step is to begin sourcing high-quality, compatible components for robust performance and prepare for detailed assembly.
❓ Frequently Asked Questions
What are the essential safety precautions for building and operating a vacuum chamber?
Always use materials rated for vacuum, wear eye protection, and ensure the chamber is properly vented before opening. Be aware of implosion risks with non-rated containers and ensure electrical components are safely wired to prevent shock or fire hazards.
How do I choose the right vacuum pump for my chamber?
Consider the desired vacuum level (e.g., rough, medium, high), the chamber volume, and the application. For basic degassing or stabilizing, a single-stage pump is sufficient, while scientific or advanced applications may require a two-stage or even turbo pump for deeper vacuum.
What are the best methods for creating an airtight seal on a DIY vacuum chamber?
High-quality, flexible gaskets (like silicone or neoprene o-rings) compressed between smooth, flat surfaces are crucial. Vacuum grease can enhance the seal, and proper thread sealant (e.g., PTFE tape or paste) should be used on all pipe fittings.
What materials are suitable for a DIY vacuum chamber, and which should be avoided?
Suitable materials include thick-walled polycarbonate, acrylic, stainless steel, or robust aluminum. Avoid thin glass, standard PVC, ordinary plastic containers, or any material that isn’t specifically rated for negative pressure, as they can violently implode.
How can I effectively test my homemade vacuum chamber for leaks?
After initial assembly, pump down the chamber and monitor the vacuum gauge for pressure rise over time. For precise leak detection, apply a soapy water solution to all joints, fittings, and seams; bubbles forming indicate a leak point that needs to be sealed.
What are common applications for a DIY vacuum chamber once it’s built?
DIY vacuum chambers are commonly used for degassing resins and silicone molds to remove air bubbles, stabilizing porous wood with resin, vacuum impregnation of materials, and basic scientific experiments requiring a low-pressure environment.