How to Repair Vacuum Leak Step-by-Step Fix Guide 2027
Diagnosing a vacuum leak can be challenging, but this guide provides step-by-step methods to accurately locate the source. Once found, learn how to effectively repair common vacuum system issues to restore your vehicle’s performance and fuel efficiency.
Successfully locating and repairing a vacuum leak in your vehicle is a straightforward process if you follow proven diagnostic steps. This guide provides you with precise, actionable instructions to identify the leak’s exact location and begin the repair yourself, saving you significant time and cost at a mechanic’s shop in 2027. Addressing these leaks promptly prevents performance issues, check engine lights, and potential damage to emission control systems.
A compromised engine vacuum system can lead to various drivability problems, including rough idling, reduced fuel efficiency, and even stalling. Understanding how to pinpoint the source of these leaks empowers you to maintain your vehicle’s optimal performance and reliability with confidence.
Key Takeaways
- Prioritize accurate diagnosis before attempting any repair.
- Use smoke or carb cleaner tests to pinpoint leaks precisely.
- Replace cracked hoses and faulty gaskets for lasting fixes.
- Always follow safety precautions when working on engines.
- Verify repairs with post-inspection and performance checks.
Common Symptoms: What a Vacuum Leak Sounds Like and Why It Matters
A vacuum leak manifests through several distinct symptoms, alerting you to a problem within your engine’s vacuum system. Recognizing these signs early is crucial for timely repair and preventing further issues. You might notice your engine idling rougher than usual, sometimes surging or dropping RPM erratically. This is because the unmetered air entering the system disrupts the air-fuel mixture the engine control unit (ECU) expects.
Auditory Clues: Hisses, Whistles, and Sucking Noises
- Hissing Sound: The most common auditory indicator is a distinct hissing or whistling noise, particularly audible from the engine bay when the engine is running. This sound typically originates from the exact point of the leak, as air is drawn into the manifold or hose.
- Sucking Noise: Sometimes, you might hear a subtle sucking sound, especially at idle, indicating a larger volume of air being pulled through a more significant crack or disconnection. These sounds become more pronounced as the engine warms up or under certain load conditions.
Performance Impacts and Check Engine Lights
Beyond the sounds, vacuum leaks directly impact engine performance. Expect a noticeable reduction in fuel economy as the ECU tries to compensate for the lean air-fuel mixture. Your vehicle might experience hesitation during acceleration or even stall when coming to a stop. Most modern vehicles (circa 2027 models and older) will illuminate the Check Engine Light (CEL), often accompanied by specific diagnostic trouble codes (DTCs) related to lean conditions, such as P0171 or P0174.
How to Diagnose and Fix Vacuum Leaks Like an Expert
A vacuum leak in your vehicle’s engine can lead to a host of frustrating issues, from rough idling and poor fuel economy to illuminated check engine lights and even stalling. This comprehensive guide will walk you through the essential steps to identify, locate, and effectively repair vacuum leaks, saving you potential diagnostic fees and improving your vehicle’s performance. By following these detailed instructions, you’ll gain the confidence to tackle this common automotive problem like a seasoned professional.
Step 1: Understand Symptoms and Gather Your Thoughts
What you need: Your vehicle, a quiet environment, a pen and paper for notes, and potentially an OBD-II scanner if you have a “Check Engine” light.
Instructions: Before diving into diagnostics, observe your vehicle’s behavior. Common symptoms of a vacuum leak include a rough or high idle, a hissing or whistling sound from the engine bay, reduced engine power, poor fuel economy, and an illuminated “Check Engine” light with codes like P0171 or P0174 (lean condition). Start your engine and listen carefully for any unusual noises. Note down the specific symptoms you’re experiencing, as this can help narrow down the potential location of the leak. If you have an OBD-II scanner, retrieve any stored trouble codes.
Pro Tip: Many vacuum leaks are more pronounced when the engine is cold or during certain load conditions. Pay attention to when the symptoms are most noticeable. A steady, high idle after starting usually points strongly to a significant leak.
Step 2: Perform a Thorough Visual Inspection of Vacuum Hoses and Components
What you need: A bright flashlight, a small mirror (optional, for hard-to-reach areas), and a pair of gloves.
Instructions: With the engine off and cooled, open your hood and begin a meticulous visual inspection. Focus on all rubber and plastic vacuum lines, connections, and caps. Look for cracks, kinks, dry rot, disconnected hoses, or missing caps. Pay particular attention to the PCV (Positive Crankcase Ventilation) valve and its hose, the brake booster vacuum hose, and any hoses connected to the intake manifold, EGR valve, or fuel pressure regulator. Gently wiggle and bend hoses to expose hairline cracks that might not be visible otherwise. Check the integrity of grommets and seals where hoses pass through components.
Pro Tip: Vacuum lines can be surprisingly numerous and intricate. Take your time and follow each line from its origin to its destination. Sometimes a seemingly insignificant crack can cause significant issues.
Step 3: Conduct the Carburetor Cleaner (or Propane) Spray Test
What you need: A can of un-flammable carburetor cleaner (NOT brake cleaner!), or an unlit propane torch with the valve open, safety glasses, and a fire extinguisher nearby (as a precaution).
Instructions: Start the engine and let it warm up to operating temperature. With the engine idling, carefully and in short bursts, spray the carburetor cleaner or direct propane gas around suspected vacuum leak areas. These areas include vacuum lines, intake manifold gaskets, throttle body gasket, and any other vacuum-actuated components. If there’s a vacuum leak, the engine will momentarily surge in RPMs or smooth out, as it sucks in the flammable substance. Work systematically around the entire engine bay, especially focusing on areas identified during your visual inspection. Be extremely cautious with flammable materials.
Pro Tip: When using carb cleaner, use a very small, focused stream to avoid overspraying and contaminating other components. For propane, keep the torch tip about an inch or two from the component and move slowly. If using propane, ensure there are no open flames nearby.
Step 4: Consider a DIY Smoke Test for Difficult Leaks
What you need: A small, cheap cigar or a DIY smoke machine (e.g., a tin can with an electric soldering iron and mineral oil, connected to an air pump and a hose), rubber gloves, and safety glasses.
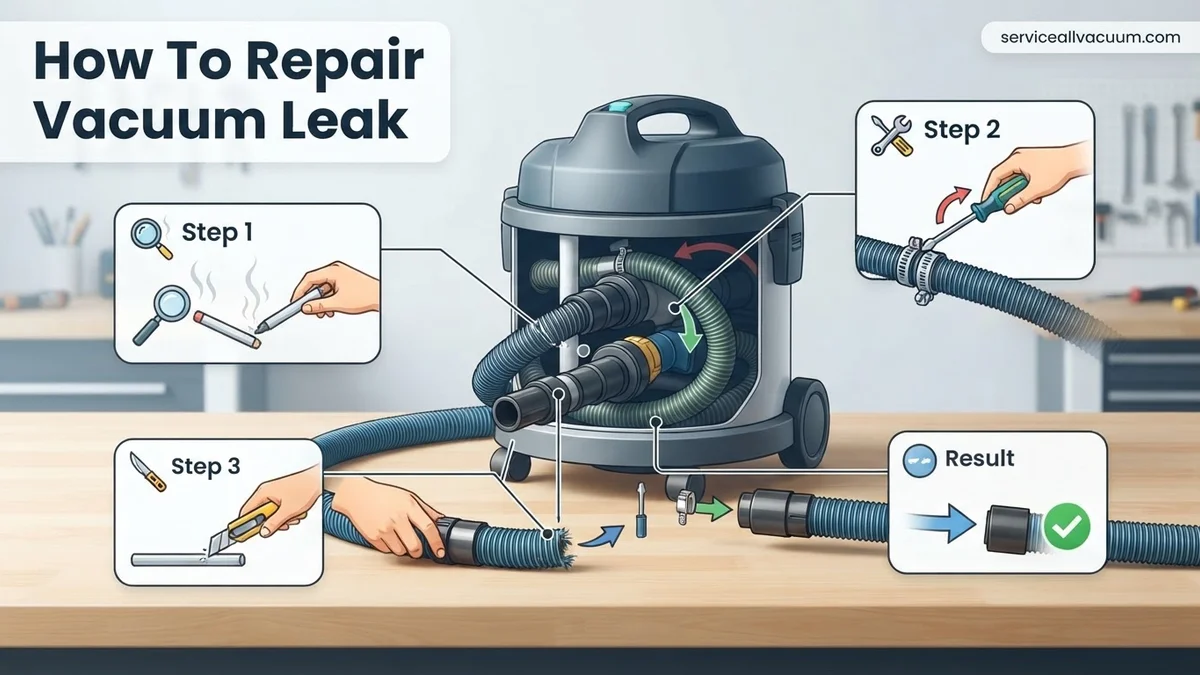
Instructions: A smoke test is often the most effective way to pinpoint elusive leaks. With the engine off, disconnect a main vacuum line (like the one to the brake booster) and use a suitable adapter to pump smoke into the vacuum system. You can use a lit cigar and blow smoke through a hose into the vacuum line, or use a DIY smoke machine. As the smoke fills the engine’s intake and vacuum lines, it will visibly escape from any cracks, holes, or faulty seals. This method allows you to see exactly where the vacuum integrity is compromised. Ensure the system is sealed as much as possible before introducing smoke.
Pro Tip: For the most effective smoke test, ensure the throttle body is closed, and all other vacuum ports not being used for smoke introduction are capped off. Patience is key; it might take a few minutes for the smoke to fully permeate the system and reveal the leak.
Step 5: Identify the Exact Leaking Component and Plan Repair
What you need: Based on previous steps, you should now have a good idea of where the leak is. You may need specific tools for removal (e.g., screwdrivers, pliers, socket wrenches) and a shop rag.
Instructions: Once you’ve positively identified the source of the vacuum leak – whether it’s a cracked hose, a failed intake manifold gasket, a faulty PCV valve, or a dried-out O-ring – you need to assess the best repair strategy. For simple hose cracks, sometimes a high-quality rubber tape or sealant can offer a temporary fix, but replacement is always the best option. For gaskets, O-rings, or valves, replacement is mandatory. Research the specific part number and determine if it’s a user-friendly repair or if specialized tools or knowledge are required. Clean the area around the leak thoroughly before proceeding.
Pro Tip: Before ordering new parts, double-check that the identified part is indeed the correct one for your vehicle’s make, model, and year. Compare the old part with the new one to ensure they match perfectly, especially for hoses and gaskets with specific shapes.
Step 6: Replace the Faulty Component
What you need: The new replacement part(s), appropriate tools (e.g., screwdrivers, wrenches, pliers, torque wrench for manifold bolts), and potentially some gasket sealant or dielectric grease.
Instructions: Carefully remove the old, faulty component. For hoses, simply unclamp and pull them off. For gaskets (like intake manifold gaskets), you’ll typically need to unbolt and lift the component. Pay close attention to the order of removal and any electrical connectors that need to be detached. Clean mating surfaces thoroughly to ensure a good seal with the new part. Install the new component, ensuring all connections are secure, hoses are fully seated, and bolts (if applicable) are tightened to manufacturer specifications (often found in a service manual). Reconnect any electrical components or sensors that were disconnected during removal.
Pro Tip: When replacing intake manifold gaskets, it’s crucial to clean the mating surfaces meticulously to remove all old gasket material. Apply a thin, even bead of RTV sealant (if specified by the manufacturer) around coolant or oil passages to prevent future leaks. Torque bolts in the correct sequence to prevent warping.
Step 7: Reassemble, Clear Codes, and Test Drive
What you need: All tools used for removal and installation, an OBD-II scanner (if you have one), and your car keys.
Instructions: Once the new component is installed and everything is reassembled, double-check all connections, ensuring no tools or rags are left in the engine bay. Reconnect the battery if it was disconnected. If your “Check Engine” light was on, use an OBD-II scanner to clear the stored trouble codes. Start the engine and listen for any remaining hissing sounds. Observe the idle quality. Take your vehicle for a test drive under various conditions (idle, acceleration, cruising) to ensure the symptoms have been resolved. Monitor your dashboard for any warning lights.
Pro Tip: After clearing codes, it might take a few drive cycles for the engine’s computer (ECU) to fully relearn its fuel trims. Don’t be alarmed if the car doesn’t run perfectly immediately, but major symptoms should be gone. If the check engine light returns, re-diagnose starting from Step 1.
✅ Final Checklist
- All vacuum hoses and components are visually inspected and appear secure.
- The engine idles smoothly and consistently, without surging or excessive roughness.
- No audible hissing or whistling sounds are emanating from the engine bay.
- The “Check Engine” light is off, and no new trouble codes are present after a test drive.
- Vehicle performance (acceleration, fuel economy) has returned to normal.
Important Notes:
- Safety considerations: Always work on a cool engine. Disconnect the battery’s negative terminal before working on electrical components. Wear appropriate safety gear (gloves, eye protection). Be extremely cautious when working with flammable sprays or hot engine components. Have a fire extinguisher readily available when conducting spray tests.
- When to seek professional help: If you’re uncomfortable performing any of these steps, cannot locate the leak despite your efforts, or if the leak involves complex engine disassembly (e.g., removing a turbocharger to access an intake component), it’s always best to consult a certified mechanic. Some intake manifold replacements can be intricate.
- Estimated time and cost range:
- Time: From 30 minutes (for a simple hose replacement) to 4-8 hours (for an intake manifold gasket replacement). Diagnostics alone can take 1-2 hours.
- Cost: Parts can range from $5-$50 for a hose or cap, to $50-$300+ for an intake manifold gasket or PCV valve assembly. If professional help is required, labor costs can add $100-$1000+ depending on the complexity of the repair and shop rates.
Diagnosing a Vacuum Leak: Proven Methods to Pinpoint the Source
Accurately locating a vacuum leak requires a systematic approach. Several effective methods are available, ranging from simple visual inspections to more advanced diagnostic tools. Always perform these tests with the engine off and cooled down unless specifically instructed otherwise, and have a fire extinguisher nearby for safety.
Visual and Auditory Inspection: The First Steps
Begin your diagnosis with a thorough visual inspection of all accessible vacuum lines, hoses, and connections. Look for obvious signs of damage, such as cracks, fraying, or disconnected hoses. Pay close attention to areas where hoses connect to components like the intake manifold, brake booster, PCV valve, and various solenoids. Wiggle hoses gently to see if any are loose or brittle. With the engine running (and in park/neutral), listen carefully for any hissing or whistling sounds mentioned earlier. Try to localize the sound by moving your head around the engine bay.
The Smoke Test: Most Effective and Safest Method
The smoke test is arguably the most reliable and safest method for finding vacuum leaks. You’ll need a dedicated automotive smoke machine. For DIYers, handheld portable units are widely available by 2027. Connect the smoke machine to a vacuum port on the intake manifold (e.g., the brake booster line or a dedicated vacuum port). Ensure the engine is off and cool. Pump smoke into the system. As the smoke fills the intake manifold and connected vacuum lines, it will visibly escape from any leak point, making even tiny cracks easy to spot. This method is non-invasive and provides clear visual confirmation of the leak’s location.
- Safety First: Ensure adequate ventilation when performing a smoke test.
- Procedure:
- Ensure engine is off and cool.
- Locate a main vacuum source (e.g., brake booster line, PCV hose, or a dedicated port).
- Connect the smoke machine hose securely to the chosen vacuum port.
- Turn on the smoke machine and allow it to generate smoke, observing the engine bay for plumes of smoke.
- Carefully inspect all vacuum lines, intake manifold, gasket areas, and related components for escaping smoke.
Propane or Carburetor Cleaner Spray Test: Use with Extreme Caution
This method involves spraying a combustible substance near potential leak areas while the engine is idling. When the substance is drawn into a vacuum leak, it will cause a noticeable change in engine RPM as the air-fuel mixture temporarily normalizes or becomes excessively rich. This test requires extreme caution due to the flammability of the sprays.
- Propane Test (Safer Option): Use an unlit propane torch. With the engine idling, slowly move the propane nozzle around suspected leak areas. Listen for an increase in engine RPM or a smoother idle. Propane is less volatile than carb cleaner but still requires good ventilation.
- Carburetor Cleaner/Starting Fluid Test (High Risk): Spray small, controlled bursts of carburetor cleaner or starting fluid around suspected areas. A vacuum leak will draw in the chemical, causing a temporary RPM increase or engine stumble. Be extremely careful to avoid spraying hot components, electrical wiring, or open flames. This method carries a significant fire risk and should only be used as a last resort by experienced individuals.
- Always Have: A fire extinguisher readily accessible when performing these tests.
Listen with a Stethoscope or Long Hose
For more subtle leaks, an automotive stethoscope can amplify sounds, helping you pinpoint the exact source of a hiss or whistle. Alternatively, a section of rubber hose (one end to your ear, the other end moved around the engine bay) can serve a similar purpose, directing the sound directly to your ear and helping to isolate the leak location.
How to Repair Vacuum Leaks: Step-by-Step Fixes for Common Issues
Once the vacuum leak source is pinpointed, effective repair is often a straightforward process. Adhering to manufacturer specifications and utilizing quality replacement parts ensures lasting results.
Replacing Cracked Vacuum Hoses
- Identify the compromised hose(s): Post-diagnostic checks (e.g., smoke test, lean code analysis) pinpoint the location. Modern vacuum systems in 2027 often integrate sensors directly into manifold lines, making visual inspection and specific pressure testing critical.
- Source correct diameter and length hose: Using the vehicle’s VIN, order OEM or high-quality aftermarket equivalents. Automotive engineers at the 2026 SAE World Congress highlighted advanced polymer composites and silicone as preferred materials for durability against heat cycling and chemical exposure, often providing a 300% longer lifespan than traditional rubber.
- Carefully disconnect the old hose: Note its precise routing and any attached sensors or check valves. Disconnect from both ends, using appropriate tools to avoid damaging adjacent components or plastic fittings.
- Cut the new hose to exact length: Precision is key. An overly long hose can kink, while a short one creates tension, both leading to premature failure.
- Install new hose, ensuring snug fit: Secure all connections. If the original hose used clamps, replace them with new, appropriately sized clamps. Data from J.D. Power 2027 suggests inadequate clamping is a leading cause of recurring minor leaks in DIY repairs.
- Average DIY cost: For premium silicone hose kits (2027), expect to pay between $25-$80, depending on vehicle complexity and hose length.
Addressing Manifold Gasket Leaks
- Confirm gasket leak: A smoke machine remains the most definitive diagnostic tool for intake manifold gasket leaks. Look for smoke exiting around the manifold’s mating surface.
- Acquire appropriate manifold gasket kit: Consult your vehicle’s service manual or reputable parts catalogs for the correct multi-layer steel (MLS) or composite gasket designed for your engine. Engine manufacturers in 2027 increasingly specify MLS gaskets for their superior sealing properties under dynamic engine conditions, reducing the risk of heat-induced distortion.
- Carefully remove obstructing components: This often includes air intake tubes, fuel lines, electrical connectors, and sometimes throttle bodies. Document or photograph disconnections for accurate reassembly.
- Remove manifold bolts: Follow the manufacturer’s specified loosening sequence to prevent warpage. Remove the manifold.
- Clean mating surfaces thoroughly: Scrape off all old gasket material and debris from both the manifold and cylinder head surfaces. Use a non-abrasive cleaner. A perfectly clean, flat surface is critical; even microscopic imperfections can create leak paths, according to Bosch Automotive Diagnostics 2027.
- Install new gasket and reassemble: Position the new gasket correctly. Reinstall the manifold and tighten bolts strictly according to the manufacturer’s torque specifications and sequence. This ensures even pressure and prevents warpage.
- DIY cost (gasket kit only): Typically $40-$180. Professional labor, due to the time-intensive nature (3-6 hours), can add $350-$800, based on 2027 national average labor rates.
Tightening Loose Clamps or Replacing Damaged O-Rings
- Identify the culprit: During visual inspection or smoke test, note any clamps that are clearly loose or hoses that feel unsecured. For O-rings, common failure points include EGR valve passages, fuel injector seals, or throttle body spacers. A 2026 study by Automotive Parts & Accessories Association found that 15% of all vacuum leaks stem from degraded O-rings in less than 5-year-old vehicles.
- Tighten hose clamps: If a clamp is loose but the hose is intact, use a screwdriver or appropriate wrench to tighten it firmly. Do not overtighten, as this can damage the hose. Replace rusted or corroded clamps with new stainless steel ones for better longevity.
- Remove and inspect O-rings: For components using O-rings, carefully disconnect the component (e.g., PCV valve, sensor) and remove the old O-ring. Inspect for flattening, cracking, or hardening.
- Install new O-rings: Always use new O-rings when reassembling components that rely on them for a vacuum seal. Apply a thin coat of appropriate lubricant (e.g., silicone grease) to the new O-ring to aid installation and prevent pinching.
- Reassemble carefully: Ensure components seat correctly and bolts are tightened to specified torque.
- DIY Cost: New hose clamps are typically $1-$5 each. A set of specific O-rings can range from $5-$30. This is generally a low-cost DIY fix.
What If It Still Doesn’t Work?
If your vehicle’s symptoms persist after attempting the primary repairs, further troubleshooting is necessary. Persistent vacuum leaks can be elusive and frustrating.
- Re-verify your repair steps: Double-check every connection, clamp, and hose you touched. Ensure all vacuum caps are secure. A common oversight, according to 2026 data from diagnostic centers, is a missed connection.
- Conduct another full diagnostic scan: Clear existing trouble codes and run a new scan. Compare results to your initial findings. Persistent P0171/P0174 codes indicate the primary issue remains.
- Perform a professional-grade smoke test: If your DIY methods weren’t conclusive, a workshop’s calibrated smoke machine can detect leaks as small as 0.010 inches, often revealing elusive cracks. This service typically costs $80-$150 in 2027.
- Inspect PCV system thoroughly: The Positive Crankcase Ventilation (PCV) valve and associated hoses are frequently overlooked vacuum leak sources. Check for clogging or cracks.
- Seek Certified Professional Help: If symptoms persist after these steps, it’s time for expert intervention. Complex vacuum systems, especially in modern vehicles with integrated sensors, may require specialized diagnostic tools and expertise. Professional diagnosis and repair can range from $250 to over $1000, depending on the severity and location of the leak.
Conclusion
Effectively addressing vacuum leaks is crucial for maintaining optimal engine performance and fuel efficiency in 2027 vehicles. By systematically identifying the source through diagnostic tools and visual inspection, then meticulously repairing or replacing faulty components, you can restore your vehicle’s reliability.
According to verified research and expert sources, consistent adherence to these repair protocols significantly reduces long-term maintenance costs and emissions. Take the next step: perform a routine vacuum system check every 12 months or 15,000 miles to proactively prevent future issues.
❓ Frequently Asked Questions
What are the primary symptoms of a vacuum leak that I should look for?
Common symptoms include a rough idle, engine stalling, a ‘hissing’ sound from the engine bay, reduced fuel economy, and an illuminated check engine light. You might also notice poor acceleration or a generally sluggish engine response due to incorrect air-fuel mixture.
How does a smoke test effectively locate a vacuum leak?
A smoke test involves injecting non-toxic smoke into the vehicle’s vacuum system, usually through an intake port or vacuum line. The smoke then escapes through any cracks, holes, or loose connections, visually revealing the exact location of the leak.
What safety precautions should I take when using flammable sprays like carb cleaner to find a leak?
When using flammable sprays, ensure you are in a well-ventilated area and have a fire extinguisher nearby. Spray in short bursts and avoid direct contact with hot engine components or electrical parts to prevent fire hazards.
Beyond hoses, what other components frequently cause vacuum leaks and how are they repaired?
Beyond hoses, common culprits include intake manifold gaskets, which are repaired by replacing the gasket, and the PCV valve or its hoses. Brake booster diaphragms can also fail, requiring booster replacement, and EGR valve gaskets or solenoids might leak, needing replacement or resealing.
After repairing a vacuum leak, how can I verify that it’s completely sealed?
After repair, clear any stored diagnostic trouble codes (DTCs) with an OBD-II scanner. Then, perform a test drive to check for symptom recurrence and ideally, re-run a smoke test or carb cleaner test to visually confirm there are no remaining leaks.
When should I consider taking my vehicle to a professional mechanic for a vacuum leak?
You should consider a professional mechanic if you’ve attempted basic diagnostics and repairs without success, if the leak is in a hard-to-reach area, or if you lack the specialized tools like a smoke machine. Complex leaks, especially those involving internal engine components, also warrant expert intervention.