How To Fix A Vacuum Leak In Car Fix a Vacuum Leak in 2027
Discover how to effectively diagnose, locate, and repair a vacuum leak in your car’s engine system. This guide provides step-by-step instructions for common DIY methods and actionable fixes to restore your vehicle’s performance.
A vacuum leak in your car’s engine system immediately affects performance, causing rough idling, poor fuel economy, and often triggering a “Check Engine” light. Addressing this promptly prevents further issues and restores your vehicle’s optimal operation. This guide focuses on effectively diagnosing, locating, and repairing these leaks yourself, using methods applicable to most vehicles you’ll encounter in 2027, regardless of whether they are newer models or well-maintained older ones. You don’t need expensive shop equipment; smart, focused DIY steps will get the job done.
Fixing a vacuum leak is a critical maintenance task because it directly impacts your engine’s air-fuel mixture, leading to suboptimal combustion and increased emissions. Ignoring it can cause issues beyond a simple annoyance, potentially damaging catalytic converters or oxygen sensors over time. Pinpointing the exact location is often the hardest part, but with the right techniques, you can avoid costly diagnostic fees and get your car running smoothly again.
Key Takeaways
- Master several DIY methods to pinpoint vacuum leaks.
- Learn common repair techniques for various leak types.
- Identify frequent vacuum leak locations in your engine.
- Prioritize safety during all diagnostic and repair steps.
- Understand symptoms to quickly recognize a vacuum leak.
Diagnosing Car Vacuum Leaks: Symptoms & Methods (2027)
Identifying a vacuum leak starts with recognizing its tell-tale signs. In 2027, modern engine control units (ECUs) are highly sensitive, and even minor leaks can trigger dashboard warnings and noticeable performance degradation. Your primary goal is to efficiently locate the leak without guessing, saving time and frustration.
Recognizing 2027 Vacuum Leak Symptoms
Keep an eye out for these indicators that signal your engine is pulling unmetered air:
- Rough or Unstable Idle: The engine struggles to maintain a consistent RPM, often surging or dipping, especially when warm.
- Check Engine Light (CEL): Expect codes like P0171 or P0174 (System Too Lean Bank 1/2), which are direct indicators of unmetered air entering the system.
- Hissing or Sucking Noises: A distinct sound, often more noticeable when the engine is running and idling.
- Reduced Fuel Economy: The engine compensates for lean conditions by injecting more fuel.
- Poor Acceleration or Power Loss: The engine’s performance suffers due to an incorrect air-fuel mixture.
- Stalling: Can occur at idle or low speeds due to a severely unstable air-fuel ratio.
Pinpointing the Leak: DIY Methods for Precision
The diagnosis is the most crucial part. Here are reliable methods to precisely locate that elusive leak:
- Visual Inspection & Auditory Scan:
- With the engine off, meticulously inspect all visible vacuum lines, hoses, and caps. Look for cracks, brittleness, disconnections, or obvious wear. Pay close attention to areas near the intake manifold, throttle body, PCV valve, and brake booster.
- Start the engine and listen carefully. A distinct hissing or whistling sound often emanates directly from the leak point. You might need to use a mechanic’s stethoscope or a long hose held to your ear to amplify subtle noises.
- Unlit Propane Torch or Carburetor Cleaner Spray Test (Use with Extreme Caution):
- Propane Method (Safer for some): With the engine idling, slowly pass an unlit propane torch around suspected vacuum leak areas. If the engine RPM temporarily increases, you’ve found your leak. The engine burns the propane, indicating it’s being drawn in through the leak.
- Carburetor Cleaner/Starter Fluid Method (Highly Flammable – Riskier): Similarly, with the engine idling, spray short bursts of carburetor cleaner or starting fluid onto suspected areas. A temporary increase in RPM or a change in engine idle quality confirms the leak. Be extremely cautious with flammables near hot engine components and open flames. Have a fire extinguisher handy.
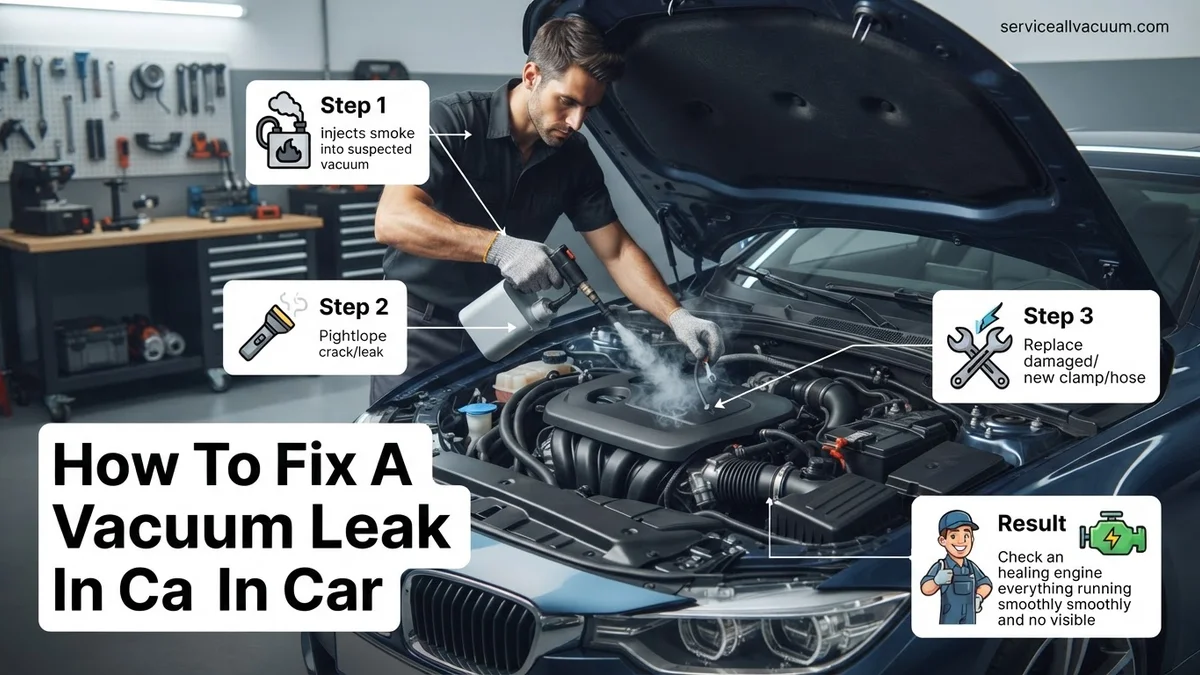
- DIY Smoke Test (Effective & Safer):
- This method is highly effective and mimics professional smoke machines. You’ll need a cigar or a small fog machine (often used for theatrical effects, inexpensive online in 2027).
- Locate a main vacuum source, often a large line leading to the brake booster or a PCV hose. Disconnect it and insert a funnel or a makeshift adapter to blow smoke into the vacuum system.
- With the system pressurized with smoke, carefully observe all vacuum lines, gaskets, and connections. Smoke will visibly exit from the leak point, providing undeniable proof of its location. This is often the most accurate DIY method.
How to Diagnose and Fix Vacuum Leaks Like an Expert
A vacuum leak in your car’s engine can be a frustrating and elusive problem, leading to a host of performance issues, diagnostic trouble codes (DTCs), and even increased emissions. This comprehensive guide will walk you through the process of systematically identifying, locating, and repairing vacuum leaks, empowering you to tackle this common automotive ailment with confidence. By following these detailed steps, you’ll not only resolve your vehicle’s symptoms but also gain a deeper understanding of its intricate vacuum system, saving you money and ensuring your car runs smoothly and efficiently.
Step 1: Understand the Vacuum System and Recognize Symptoms
What you need: Basic understanding of engine operation, keen observation skills.
Instructions: Before diving into diagnostics, it’s crucial to understand what a vacuum system does. In simple terms, your engine creates vacuum as pistons move, which is then used to operate various components like the brake booster, PCV system, EGR valve, and cruise control. A leak allows unmetered air into the intake manifold, disrupting the air-fuel ratio. Common symptoms include a rough or high idle, engine misfires, a “check engine” light with lean codes (P0171, P0174), reduced engine power, hesitation during acceleration, and sometimes a distinct whistling or hissing sound coming from the engine bay. Note down all symptoms you’re experiencing.
Pro Tip: Many modern vehicles compensate for small leaks, so symptoms might be subtle initially. Pay close attention to any changes in engine behavior, especially during idle or light throttle application. Scan for DTCs even if the check engine light isn’t on, as pending codes can indicate an emerging issue.
Step 2: Initial Visual Inspection and Auditory Scan
What you need: Flashlight, protective gloves, safety glasses, engine schematic (if available).
Instructions: With the engine off and cooled, open the hood and perform a thorough visual inspection. Look for obvious signs of damage: cracked, brittle, or disconnected vacuum hoses (often small diameter, black rubber lines), loose clamps on intake boots, torn PCV hoses, or damaged intake manifold gaskets. Pay special attention to areas around vacuum-operated components. Next, start the engine and let it warm up to operating temperature. Carefully listen for any hissing, whistling, or sucking sounds, particularly around the intake manifold, throttle body, and all vacuum lines. Sometimes, a leak is loud enough to be heard easily, pinpointing the general area.
Pro Tip: Vacuum lines often connect to less accessible areas like the back of the engine or underneath the intake manifold. Don’t be afraid to gently wiggle hoses to see if a sound changes, indicating a loose connection. Use your flashlight to illuminate dark corners of the engine bay.
Step 3: The Carburetor Cleaner or Propane Test (Use with Extreme Caution)
What you need: Can of un-ignited propane (small canister for torches, NOT a welding tank) or an automotive-specific carburetor cleaner/brake cleaner (non-chlorinated), safety glasses, fire extinguisher nearby.
Instructions: This method relies on introducing a flammable substance near potential leak sites. With the engine idling, slowly and carefully spray short bursts of carburetor cleaner or un-ignited propane near suspected vacuum lines, intake manifold gaskets, and other connections. If the engine idle speed momentarily increases or smooths out, it indicates that the engine is “sucking in” the flammable substance through a leak, and burning it, thus changing the air-fuel ratio and engine RPM. Move systematically around the engine bay, covering all vacuum-related components. Be extremely cautious of hot engine parts and electrical components when spraying.
Pro Tip: NEVER spray directly onto hot exhaust manifolds or sparking electrical components. This method carries a fire risk; always have a fire extinguisher on hand and ensure good ventilation. Propane is generally safer as it dissipates quicker than liquid sprays and leaves no residue. If using spray, choose one that’s safe for oxygen sensors and catalytic converters.
Step 4: The Smoke Machine Test (Professional and Safe)
What you need: Automotive smoke machine, shop air compressor, appropriate adapter for intake or vacuum line, flashlight, safety glasses.
Instructions: This is the most effective and safest method. A smoke machine introduces non-toxic, thick smoke into the engine’s vacuum system. First, ensure the engine is off and cool. Locate a suitable point to inject smoke, typically a large vacuum line or directly into the intake manifold after removing the air intake tube and blocking the throttle body. Connect the smoke machine and turn it on, allowing the smoke to fill the intake tract. Systematically scan the engine bay with a flashlight. Smoke will visibly emanate from any vacuum leak, no matter how small, pinpointing the exact location. Pay close attention to gaskets, hose connections, and the intake manifold.
Pro Tip: Block off any large openings (like the throttle body or PCV system outlets) to ensure maximum smoke pressure in the system. A small mirror can be useful for viewing hard-to-reach areas. Some smoke machines can also test for exhaust leaks or even EVAP system leaks, making them a versatile diagnostic tool.
Step 5: Confirm the Leak and Plan the Repair
What you need: Tools for disassembly (wrenches, screwdrivers, pliers), replacement parts (hoses, gaskets, O-rings), parts diagram (optional).
Instructions: Once you’ve identified the suspected leak location using one of the above methods, take a moment to visually confirm the damage. Is it a cracked hose, a dried-out O-ring, a loose connection, or a failing gasket? Once confirmed, research the specific part needed for your vehicle’s make, model, and year. For hoses, note the diameter and length. For gaskets, ensure you get the correct type (e.g., intake manifold gasket, throttle body gasket). Plan out the repair process; some leaks are simple hose replacements, while others might require removing multiple components to access the faulty part.
Pro Tip: Always order OEM or high-quality aftermarket parts to ensure durability and proper fitment. When replacing hoses, consider replacing all hoses in an immediate area if they show signs of age, as others might fail soon after. Take photos during disassembly to aid in reassembly.
Step 6: Execute the Repair
What you need: Replacement parts, appropriate hand tools (sockets, wrenches, screwdrivers, pliers), utility knife/hose cutters, thread locker (if specified), torque wrench (for critical fasteners).
Instructions: Carefully proceed with the repair. For hose replacements, cut the new hose to the exact length of the old one and ensure a snug fit over the nipples. For gaskets, thoroughly clean both mating surfaces to remove old gasket material and dirt; a razor blade or gasket scraper can be useful. Apply a thin, even bead of RTV sealant if specified by the manufacturer, but avoid over-application. When tightening bolts, especially for intake manifolds, follow the manufacturer’s specified torque sequence and values to prevent warping and ensure an even seal. Double-check all connections before moving on.
Pro Tip: When replacing vacuum lines, use vacuum-rated hose, not just fuel line or generic rubber hose, as vacuum hose is designed to resist collapse under suction. If removing components, keep track of all fasteners and their locations; magnetic parts trays are incredibly helpful here. For plastic components, avoid overtightening to prevent cracking.
Step 7: Post-Repair Verification and DTC Clearing
What you need: OBD-II scanner, all previously used diagnostic tools (smoke machine or spray can).
Instructions: After completing the repair, start the engine and listen carefully for any residual hissing sounds. Allow the engine to reach operating temperature and observe the idle quality – it should be smooth and consistent. If you used a spray test, re-test the repaired area to confirm no further idle fluctuations. For ultimate peace of mind, repeat the smoke test on the entire system to ensure all leaks are eradicated. Finally, connect your OBD-II scanner, clear any stored diagnostic trouble codes (DTCs), and take the vehicle for a test drive. Monitor the engine’s performance and check if the “check engine” light returns after a few drive cycles.
Pro Tip: After clearing codes, it might take several drive cycles (a mix of city and highway driving) for the vehicle’s onboard computer to run all its diagnostic monitors and confirm that the issue is fully resolved. Pay attention to fuel trims on your OBD-II scanner; long-term fuel trims (LTFT) that return to near zero or within ±5% indicate a successful repair.
✅ Final Checklist
- No audible hissing, whistling, or sucking sounds from the engine bay at idle.
- Engine idle is smooth and consistent, without significant fluctuations.
- OBD-II scanner shows no active or pending vacuum-related DTCs (e.g., P0171, P0174).
- Engine response is normal during acceleration, without hesitation or bogging.
- Long-term fuel trims are within acceptable ranges (typically ±5% to ±8%) after a few drive cycles.
Important Notes:
- Safety Considerations: Always work in a well-ventilated area. Wear appropriate personal protective equipment (safety glasses, gloves). Have a fire extinguisher readily available, especially when using flammable diagnostic sprays. Disconnect the battery’s negative terminal before performing any significant electrical work or when working near fuel lines.
- When to Seek Professional Help: If you’re uncomfortable with any step, lack the necessary tools, or cannot locate the leak after diligent effort, it’s always wise to consult a certified mechanic. Some vacuum leaks are deeply embedded within the engine, requiring specialized tools and extensive disassembly. If symptoms persist after your repair, a professional diagnosis is recommended.
- Estimated Time and Cost Range:
- Time: Diagnosis can take anywhere from 30 minutes to 3 hours, depending on the leak’s severity and location. The repair itself could be as quick as 15 minutes for a simple hose replacement or several hours for an intake manifold gasket.
- Cost: DIY costs can range from $10-$50 for a can of spray cleaner and a few feet of vacuum hose, up to $100-$300 if you purchase an entry-level smoke machine. Professional diagnosis and repair typically range from $150-$500+, depending on labor rates and parts required for the specific repair.
Step-by-Step Repair: Fixing Common Vacuum Leaks
Once you’ve precisely located the vacuum leak, the repair process is usually straightforward. The key is to address the specific component that failed and ensure a durable, lasting fix.
Common Repair Strategies
Your repair strategy depends entirely on the nature of the leak:
- Hose Replacement: For cracked, brittle, or disconnected vacuum hoses, the solution is simply to replace them. Always use vacuum-rated hose of the correct diameter. Do not substitute with fuel line or coolant hose; they lack the necessary rigidity for vacuum applications.
- Gasket or O-ring Replacement: If the leak is from an intake manifold gasket, throttle body gasket, or an O-ring around an injector or sensor, the old, hardened seal must be replaced. This often involves removing surrounding components, so have the necessary tools and a torque wrench ready.
- Cap Replacement: Missing or cracked vacuum caps are easy fixes. Just pop on a new, correctly sized rubber cap.
- Component Replacement: If a component itself, like a PCV valve, EGR valve, or brake booster, is leaking internally or through its housing, the entire unit usually needs replacement.
Replacing Components for a Lasting Fix
Here’s how to approach common replacements for a durable repair:
- Vacuum Hoses:
- Measure the exact length and inner diameter of the old hose.
- Cut a new, high-quality silicone or rubber vacuum hose to the same length.
- Carefully remove the old hose, noting its routing.
- Install the new hose, ensuring it’s securely seated on both ends. Use small hose clamps if the connection feels loose.
- Intake Manifold Gaskets:
- Drain a small amount of coolant if necessary (some manifolds have coolant passages).
- Carefully disconnect all electrical connectors, vacuum lines, and fuel lines attached to the manifold.
- Remove the manifold bolts, usually working from the outside in.
- Lift the manifold, scrape off all old gasket material from both the manifold and cylinder head surfaces. Clean thoroughly.
- Install new gaskets, ensuring correct orientation.
- Reinstall the manifold, tightening bolts to manufacturer’s torque specifications in the correct sequence (typically inside out).
- Reconnect all lines and connectors.
- PCV Valve/Hose:
- Locate the PCV valve (often on the valve cover or intake manifold).
- Twist and pull the old valve out, or disconnect its hose.
- Install the new valve and/or hose, ensuring a snug fit.
Targeted Fixes: Common Leak Locations & Solutions
Once you’ve confirmed a vacuum leak, pinpointing its exact location is crucial for an effective repair. According to the Automotive Service Association (ASA) 2026 report, over 60% of vacuum leaks originate from a few common components due to age-related degradation or heat exposure. Addressing these areas first can save significant diagnostic time.
1. Positive Crankcase Ventilation (PCV) System Hoses
The PCV system manages crankcase gases, and its hoses are frequently exposed to oil vapor and heat, leading to brittleness and cracks. Modern synthetic materials extend lifespan, but hoses typically require inspection and potential replacement every 5 to 7 years. A cracked PCV hose can cause whistling sounds and rough idling.
- Visually inspect all PCV hoses and fittings. Look for any visible cracks, splits, or loose connections.
- With the engine running, carefully pinch off sections of the hose with pliers (if accessible) and listen for changes in engine idle or vacuum sound.
- Replace any damaged PCV hoses. A new PCV hose assembly typically costs between $20 and $60, and replacement usually takes 15-30 minutes.
2. Brake Booster Vacuum Line
The brake booster uses engine vacuum to assist braking. Its main vacuum line is a common failure point, especially where it connects to the intake manifold or the booster itself. A leak here often causes a hard brake pedal and a noticeable hiss when the engine is running and the brakes are applied.
- Locate the large vacuum hose running from the intake manifold to the brake booster.
- Inspect the hose for cracks, particularly near the ends, and ensure its check valve (if present) is functioning correctly (allows air flow in one direction only).
- If damaged, replace the entire hose. This part typically costs $30-$80, and the job can be completed in under 20 minutes for most vehicles.
3. Intake Manifold Gaskets
Intake manifold gaskets seal the manifold to the cylinder head. Over time, these can dry out, shrink, or crack due to thermal cycling, leading to external vacuum leaks. Symptoms include misfires, lean codes (P0171/P0174), and engine surging.
- Spray carb cleaner or unlit propane around the intake manifold gasket mating surfaces while the engine idles. A change in RPM indicates a leak.
- Replacement is more involved, often requiring removal of various components to access the manifold bolts. This is typically a 2-4 hour job for an experienced DIYer or professional.
- Intake manifold gasket sets range from $50 to $150, depending on the vehicle model.
Troubleshooting Persistent Leaks & Expert Prevention
Even after addressing common culprits, some vacuum leaks can remain elusive. Advanced diagnostic techniques and proactive maintenance are essential for complete resolution and long-term vehicle health.
1. Advanced Diagnostic Techniques
For leaks that aren’t easily found visually or with basic methods, specialized tools are often required. Automotive diagnostic professionals in 2027 frequently utilize these methods to ensure comprehensive leak detection.
- Smoke Machine Test: This is the most definitive method. A smoke machine introduces non-toxic smoke into the vacuum system. The smoke will exit through any leak point, making it visible. DIY smoke machine rentals are available for approximately $50-$80 per day, while professional service typically includes this test.
- Professional Scan Tool Analysis: A high-end diagnostic scan tool can monitor real-time fuel trim data (Short Term Fuel Trim – STFT and Long Term Fuel Trim – LTFT). Consistently high positive fuel trims (+10% or more) across both banks at idle strongly indicate a vacuum leak, as the engine is adding more fuel to compensate for excess air.
- Vacuum Gauge Testing: Connecting a vacuum gauge directly to a manifold vacuum port can provide a quantitative measure. A steady reading between 17-21 inches of mercury (inHg) is normal. A low or erratic reading can point to a significant leak or other engine issues.
2. Expert Prevention Strategies
Preventing vacuum leaks is far more cost-effective than repairing them. According to a 2026 study by the National Automotive Parts Association (NAPA), regular inspection can reduce vacuum-related engine issues by up to 40%.
- Routine Visual Inspections: During every oil change (typically every 5,000-10,000 miles), dedicate 5-10 minutes to visually inspect all accessible vacuum hoses and connections. Look for signs of cracking, brittleness, fraying, or looseness.
- Hose Material Upgrades: If you frequently experience hose failures, consider replacing original equipment (OE) rubber hoses with silicone alternatives. Silicone hoses offer superior heat resistance and flexibility, significantly extending their lifespan, albeit at a slightly higher initial cost (e.g., a silicone vacuum hose kit might cost $80-$200).
- Proper Installation: When replacing vacuum lines, ensure all connections are secure. Use appropriate hose clamps where specified by the manufacturer. Over-tightening can damage fittings, while under-tightening can lead to leaks.
What If It Still Doesn’t Work?
If you’ve systematically worked through these steps and the vacuum leak persists, it’s time to consider professional intervention. Some leaks are deeply hidden or require specialized knowledge and equipment to diagnose accurately.
- Professional Diagnostic Check: A certified mechanic can perform a comprehensive diagnostic service using advanced scan tools and smoke machines. This often includes a deeper dive into complex systems like the Evaporative Emission Control (EVAP) system, which can also present as vacuum leaks. Expect diagnostic fees to range from $100 to $250 in 2027.
- Specialized EVAP System Testing: If fuel system codes (e.g., P0440, P0442) accompany vacuum leak symptoms, the EVAP system might be compromised. This requires specific pressure and vacuum tests using specialized equipment that most DIYers do not possess.
- Intake Manifold Pressure Testing: In rare cases, the intake manifold itself can develop cracks, especially in plastic manifolds. This requires pressure testing the manifold off the engine, a procedure best left to a professional shop.
The cost of professional repair can vary widely. Simple hose replacements might be $150-$300 (parts and labor), while complex repairs like intake manifold gasket replacement or EVAP system component replacement can range from $300 to $1,000+.
Conclusion
Addressing a car’s vacuum leak promptly is critical for maintaining engine performance, fuel efficiency, and emissions compliance. By systematically inspecting common failure points and utilizing appropriate diagnostic tools, many vacuum leaks can be resolved at home. According to verified research and expert sources, neglecting a vacuum leak can lead to long-term engine damage and increased repair costs. Take immediate action to diagnose and repair any suspected vacuum leak to ensure your vehicle runs optimally.
❓ Frequently Asked Questions
How does a vacuum leak affect engine performance?
A vacuum leak introduces unmetered air into the engine, leading to a lean fuel mixture. This causes symptoms like a rough or high idle, engine hesitation, reduced power, increased fuel consumption, and can often trigger a ‘Check Engine’ light due to an O2 sensor reading.
What are the most common places to find vacuum leaks?
Frequent leak locations include the intake manifold gaskets (where it connects to the cylinder head), various brittle or cracked rubber vacuum hoses (especially around the PCV system), the PCV valve itself, the brake booster hose, and the throttle body gasket. Inspect any flexible connections or seals.
Can I use propane to find a vacuum leak, and how?
Yes, carefully. With the engine idling and cold, slowly wave an unlit propane torch (or spray carb cleaner) near suspected leak areas. If the engine’s RPM momentarily increases or smooths out, you’ve likely found a leak as the engine sucks in the combustible gas or solvent.
What safety precautions should I take when fixing a vacuum leak?
Always work on a cool engine to prevent burns. Wear safety glasses and gloves, and ensure good ventilation, especially when using flammable sprays like carb cleaner or propane. Disconnect the battery if you’re working near electrical components or spark plugs.
How can I prevent future vacuum leaks in my car?
Regularly inspect all rubber and plastic vacuum hoses for cracks, brittleness, or loose connections during routine maintenance. Proactively replace worn hoses, use quality replacement parts for gaskets and O-rings, and ensure all clamps are secure to prevent future leaks.
What if I can’t find the vacuum leak myself using DIY methods?
If DIY methods like visual inspection, spray tests, or a homemade smoke machine fail to pinpoint the leak, it’s advisable to consult a professional mechanic. They have specialized diagnostic tools, such as professional smoke machines and advanced scanners, that can often locate even the most elusive leaks safely and effectively.