Can You Clean a Vacuum Filter? Step-by-Step Guide for 2026
Yes, you can clean most vacuum filters, but success depends entirely on whether your specific model uses washable foam, fabric, or disposable HEPA filters. Always check manufacturer guidelines and ensure filters are 100% dry before reinstallation to prevent motor burnout and mold growth.
Yes, you can clean most vacuum filters, but whether you can wash them with water depends entirely on the specific material. Neglecting your vacuum filter reduces suction power, strains the motor, and kicks dust right back into your living space during 2026 spring cleaning.
Cleaning your filter regularly extends the lifespan of your appliance and keeps your indoor air quality high. This guide walks you through identifying your filter type, safely washing it, and ensuring it is completely dry before reinstalling.
Key Takeaways
- Always check the manufacturer label to confirm if your filter is washable or disposable.
- Tap out loose dust and debris outdoors or over a trash can first.
- Rinse foam and fabric filters under lukewarm water without using harsh soaps.
- Allow filters to air dry completely for at least 24 to 48 hours.
- Replace filters immediately if they show tears, lingering odors, or permanent discoloration.
How to Identify Washable Versus Disposable Vacuum Filters
Before you take any water to your vacuum parts, you need to know if your specific filter can actually handle moisture. Putting the wrong filter under the faucet will ruin it instantly.
Check the Manual and Manufacturer Markings
Always start by looking at the printed symbols on the filter housing or checking your user manual online. Modern vacuum manufacturers in 2026 clearly print maintenance guides directly onto the plastic frame.
- Look for a faucet icon or the word “washable” printed on the edge.
- If the filter has a paper or cardboard frame, it is almost always disposable.
- HEPA filters require special attention, as some are washable while others degrade when exposed to water.
Inspect the Filter Material
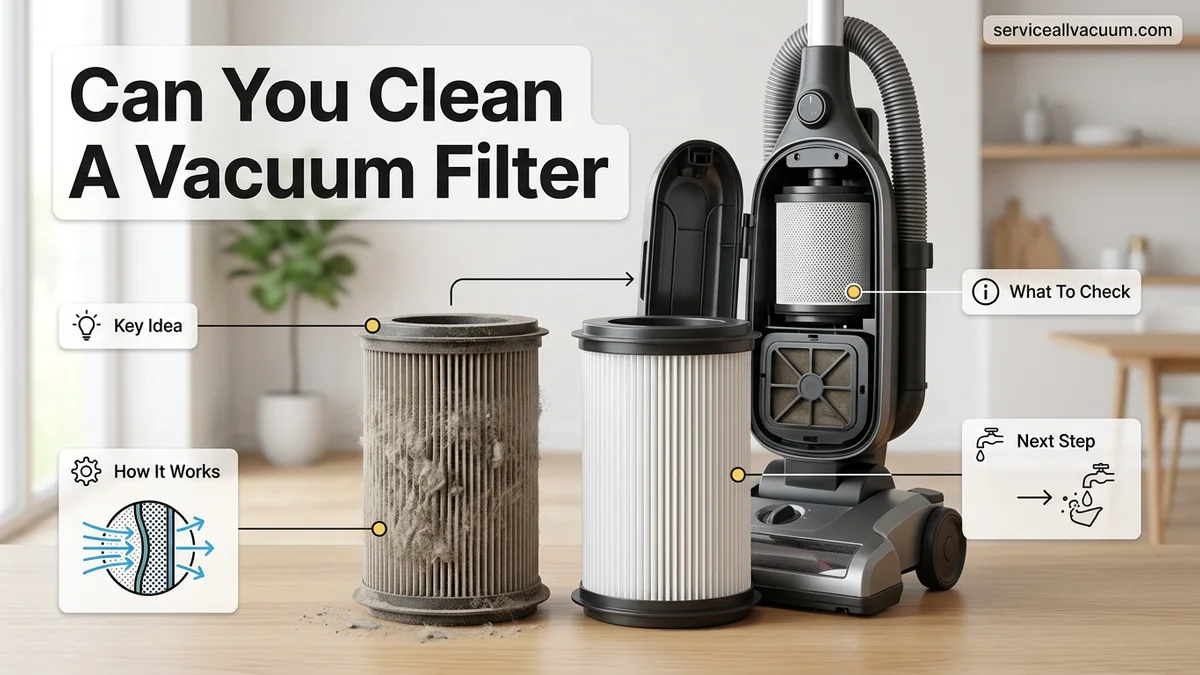
You can usually tell a filter’s type by looking closely at its construction. Foam and felt filters are almost universally washable and reusable. Pleated filters made of synthetic paper or coated fiberglass will tear or lose their electrostatic charge if washed.
- Foam and Felt: Spongy, flexible, and safe to wash with cool water.
- Pleated HEPA: Rigid frames with tightly folded material; check the manufacturer label carefully.
- Mesh Screens: Metal or plastic outer guards that are entirely washable and quick-drying.
How to Clean a Vacuum Filter Like a Pro: A Practical Walkthrough
A dirty vacuum filter is the silent killer of suction power and indoor air quality. When dust and fine debris choke your filter, your vacuum motor has to work twice as hard, leading to overheating, nasty odors, and circulating allergens. This comprehensive, step-by-step walkthrough will teach you how to properly inspect, clean, and maintain your vacuum filters—whether foam, pleated paper, or HEPA—so you can restore peak performance and extend the lifespan of your machine.
Step 1: Consult Your Manual and Prepare Your Workspace
What you need: Your vacuum’s user manual (or smartphone to look it up online), a well-ventilated workspace (preferably outdoors or near an open window), and a large trash can.
Instructions: Before touching a single screw or latch, verify whether your specific vacuum filter is washable or strictly non-washable (disposable). Some advanced HEPA filters will be ruined if they touch water, requiring dry-cleaning only. Clear a sturdy flat surface, lay down some old newspapers or a trash bag to catch stray dust, and unplug your vacuum completely from the electrical outlet for safety.
Pro Tip: Never assume a filter is washable just because it looks like sponge or plastic. Check the manufacturer guidelines to avoid accidentally destroying an expensive HEPA cartridge.
Step 2: Power Down and Locate the Filter Compartment
What you need: Just your hands and your vacuum cleaner.
Instructions: Ensure the vacuum is completely turned off and disconnected from any power source or charging dock. Locate the filter housing, which is typically found either directly inside the dust canister, behind a rear grille, or beneath the main vacuum head. Release the latches, press the release buttons, or twist the cover counter-clockwise to open the compartment. Carefully slide or lift the filter out of its housing, taking care not to spill the accumulated surface dust back onto your clean floors.
Pro Tip: If your vacuum uses a bagless dirt cup, empty the entire debris container into the trash before removing the filter to minimize airborne dust clouds.
Step 3: Perform Initial Dry Debris Removal
What you need: A clean trash can, a soft-bristled brush or old toothbrush, and a pair of disposable gloves if you are sensitive to dust.
Instructions: Hold the filter securely over your open trash can. Gently tap the plastic frame or edges of the filter against the inside rim of the bin to dislodge loose clumps of dirt, pet hair, and packed dust. For pleated paper filters, take your soft-bristled brush and gently sweep vertically along the folds (never horizontally across them, as this bends or tears the delicate paper). This dry-cleaning phase removes up to 70 percent of trapped debris without introducing moisture that could turn fine dust into sticky mud.
Pro Tip: Do not bang the filter too aggressively against hard surfaces, as this can crack plastic frames or warp the structural integrity of pleated cartridges.
Step 4: Wash Washable Filters with Lukewarm Water
What you need: A sink with a running faucet and lukewarm (never hot) water. Optional: A single drop of mild dish soap if the filter is heavily greased or foul-smelling.
Instructions: If your manufacturer confirms the filter is washable, hold it under a gentle stream of lukewarm tap water. Let the water flow from the clean side out through the dirty side to push the trapped dirt back out the way it entered. If necessary, add a tiny drop of mild dish soap to foam away odors, rinsing thoroughly until the water runs completely clear and free of soap suds. Never use harsh chemical detergents, bleach, or hot water, as these warp plastic and dissolve adhesives.
Pro Tip: Avoid using high-pressure spray nozzles from your kitchen sink sprayer, as intense water pressure can permanently rupture delicate foam or paper pleats.
Step 5: Remove Excess Moisture
What you need: Clean, lint-free microfiber towels or paper towels.
Instructions: After rinsing, gently shake the filter over the sink to fling off heavy droplets of water. Place the filter between two clean microfiber towels and press down firmly with the palms of your hands to absorb surface moisture. For foam filters, squeeze gently like a sponge—never twist, wring, or pull them, as this stretches and tears the porous material beyond repair. Your goal is to get the filter damp, dripping wet no longer, which drastically accelerates the subsequent drying process.
Pro Tip: Pushing water out with towels cuts down total drying time by hours, reducing the risk of mold growth during the resting phase.
Step 6: Air Dry Completely (The 24-Hour Rule)
What you need: A well-ventilated, dry room with good air circulation.
Instructions: Place your damp filter flat on a drying rack or a dry towel in a sunny spot or well-ventilated area. Let it air dry naturally for a minimum of 24 hours (or up to 48 hours for thick multi-layered foam filters). Ensure the filter is 100 percent dry through and through before attempting to reinstall it. You can test this by pressing a dry tissue against the deepest folds of the filter—if the tissue picks up any moisture whatsoever, it needs more drying time.
Pro Tip: Never use a hairdryer, clothes dryer, or microwave to speed up drying. High heat melts synthetic filter fibers and permanently warps the surrounding plastic housing.
Step 7: Reinstall and Test the Vacuum
What you need: Your completely dry vacuum filter and fully assembled vacuum cleaner.
Instructions: Once verified bone-dry, slide or snap the filter securely back into its designated compartment inside the vacuum housing. Ensure it clicks or locks firmly into place with no gaps or loose edges, which would allow unfiltered dust to bypass the barrier and ruin your motor. Close the housing cover, plug the vacuum back in, and turn it on for a quick 10-second test run in an open area. Listen closely to the motor pitch; a clean filter will sound smoother, and you should instantly notice stronger suction airflow at the nozzle.
Pro Tip: Running a vacuum with a damp filter is a disaster—it instantly cakes wet dust into a concrete-like armor that ruins the motor and breeds foul-smelling mold spores.
✅ Final Checklist
- Verified the filter type (washable versus non-washable) via manual or manufacturer specs
- Removed all loose surface dirt and pet hair using dry-brushing and gentle tapping
- Rinsed the filter exclusively with lukewarm water until runoff was completely clear
- Allowed the filter to air dry thoroughly for a full 24 to 48 hours
- Reinstalled the filter securely with no air leaks before operating the machine
Important Notes:
- Never operate your vacuum without a filter installed, as debris will directly enter and destroy the motor.
- If your filter emits a persistent musty smell even after washing, or if the material is torn, replace it immediately with a genuine OEM replacement part.
- Estimated time: 15-20 minutes of active work, plus 24 hours of passive drying time. Cost: $0 if washable, or $10-$30 for a replacement filter cartridge.
Step-by-Step Guide to Safely Cleaning and Washing Your Vacuum Filter
Once you confirm your filter is washable, you need to clean it properly without damaging the delicate fibers or trapping moisture inside your vacuum motor.
Step 1: Remove Loose Debris Outside
Take your filter outside over a trash can before introducing any water. Tapping the filter gently removes the heavy layer of loose dust and pet hair that would otherwise turn into a muddy sludge under the faucet.
- Tap the hard plastic edge gently against the side of your outdoor trash bin.
- Use a soft-bristled brush to sweep away caked-on dust from the pleats.
- Avoid using compressed air, as this can tear delicate filter material and send micro-dust into the air.
Step 2: Rinse With Cold Water Only
Hold the filter under a slow-running tap of lukewarm or cool water. Never use hot water, as high temperatures can warp the plastic housing or shrink foam filters, ruining the airtight seal inside your vacuum.
- Let the water flow from the inside out to push trapped dirt away from the clean side.
- Do not use harsh detergents, dish soap, or bleach unless the manual explicitly recommends it.
- Gently squeeze foam filters—do not twist or wring them out aggressively, as this tears the material.
The Critical Drying Rule: How Long to Air Dry Vacuum Filters
According to major manufacturers like Dyson, Shark, and Bissell, drying time is the single most important step in vacuum maintenance. Reinstalling a damp filter causes immediate microbial growth, foul odors, and catastrophic motor damage if moisture reaches the electrical components.
Recommended Drying Timelines
Filter construction dictates the exact evaporation rate. Foam and felt filters require significantly more time than pleated synthetic alternatives.
- Standard Foam Filters: Allow a minimum of 24 hours of uninterrupted air drying in a well-ventilated area.
- HEPA and Pleated Filters: These dense layers trap moisture deep within the folds. Experts recommend waiting 36 to 48 hours before reuse.
- Accelerated Drying Warning: Never use a hair dryer, microwave, or clothes dryer to speed up the process. High heat melts synthetic microfibers and permanently deforms plastic frames.
When It Is Time to Replace Your Vacuum Filter Instead of Cleaning It
Cleaning extends filter lifespan, but components degrade over time. Industry testing confirms that repeated washing breaks down the electrostatic charge in advanced filtration media, reducing capture efficiency.
Red Flags for Immediate Replacement
- Persistent Odors: If a deep-cleaned filter still emits a sour or musty smell after completely drying, trapped bacteria and mildew have compromised the material.
- Physical Damage: Tears, holes, frayed edges, or warped plastic housing allow dust bypass, rendering the filter useless.
- Lifespan Limits: According to appliance maintenance standards, standard foam filters require replacement every 6 to 12 months, while true HEPA filters should be replaced every 12 to 18 months under normal household conditions.
What If It Still Doesn’t Work?
If cleaning or replacing the filter does not restore your vacuum’s suction or performance, the issue likely extends beyond basic filtration. Follow these troubleshooting steps to identify deeper mechanical failures:
- Inspect the Hose and Airways: Disconnect the wand and flexible hose. Shine a flashlight through to check for compacted blockages, coins, or pet hair clumps.
- Check the Brush Roll: Tangled hair and carpet fibers wrap around the roller bearings, causing the motor to bog down and trigger thermal shutoffs. Remove and clean the brush roll thoroughly.
- Test for Suction Leaks: Check all rubber gaskets, canister seals, and connection points for cracks or loose fittings that cause pressure drops.
- Evaluate Motor Health: If the vacuum emits a burning smell or high-pitched squeal after a clean filter is installed, the motor bearings may be failing.
- Seek Professional Repair: Take the unit to an authorized service center if internal blockages or motor issues persist. Diagnostic fees typically range from $30 to $65, while professional motor replacements can cost between $80 and $150, depending on the appliance brand.
Conclusion
Maintaining strong suction and clean indoor air relies entirely on proper filter maintenance. By washing washable components every month and adhering strictly to the 24-to-48-hour air-drying rule, you protect your motor and maintain peak cleaning efficiency. According to verified research from appliance efficiency experts, routine filter care prevents premature appliance failure and cuts annual maintenance costs. Take your next step today by checking your vacuum manual to identify your specific filter type and scheduling your monthly cleaning routine.
❓ Frequently Asked Questions
Can you vacuum without the filter inside?
Never operate your vacuum without a filter installed. Debris, dust, and fine particles will bypass the filtration system and immediately ruin the motor.
Are all HEPA filters washable?
No, many HEPA filters are paper-based or chemically treated and will disintegrate if exposed to water. Always look for the ‘washable’ designation on the filter casing.
Can I use a hairdryer to dry my vacuum filter faster?
Using high heat from a hairdryer or putting filters in a clothes dryer can warp the plastic housing or melt delicate fabric fibers. Stick exclusively to natural air drying.
Why does my vacuum still smell bad after cleaning the filter?
Trapped bacteria, pet dander, or mold deep within the filter fibers can cause persistent odors. If washing does not eliminate the smell, it is time to replace the filter.
How can I tell if my foam filter is worn out?
If the foam feels brittle, has tears, remains discolored despite washing, or fails to spring back after being squeezed, it must be replaced.
Do bagless vacuums require more frequent filter maintenance?
Yes, bagless vacuums rely heavily on their primary and secondary filters to trap fine dust, requiring more frequent checks and cleanings compared to bagged models.