How to Clean Vacuum Cleaner in 2026 Step-by-Step Guide
A dirty vacuum cleaner loses suction power, spreads unpleasant odors, and wears out prematurely due to clogged filters and tangled brush rolls. Regularly cleaning the dust bin, washing filters, and cutting away wrapped hair will restore peak performance and extend the lifespan of the appliance. Following a routine maintenance schedule keeps your home cleaner and prevents costly repairs.
Cleaning your vacuum cleaner requires emptying the dust bin, washing or replacing the filters, and cutting away tangled hair from the roller brush. If your machine is leaving debris behind or blowing a musty smell into your rooms, routine maintenance will immediately restore its peak performance.
Modern vacuums in 2026 feature advanced multi-cyclonic suction and HEPA filtration, but they still struggle when clogged with fine dust and pet hair. Neglecting this basic upkeep strains the motor, shortens the lifespan of your appliance, and recycles household allergens right back into your air.
Key Takeaways
- Always unplug the vacuum cleaner before starting any cleaning or maintenance procedure.
- Empty bagless dust canisters or replace bags outdoors to minimize dust clouds indoors.
- Wash reusable foam and pleated filters with water only, ensuring they dry for 24 hours.
- Use blunt scissors or a seam ripper to carefully slice through tangled hair on the brush roll.
- Inspect flexible hoses and intake ports with a flashlight to locate and clear hidden clogs.
Why Vacuum Cleaners Lose Suction and Develop Bad Odors
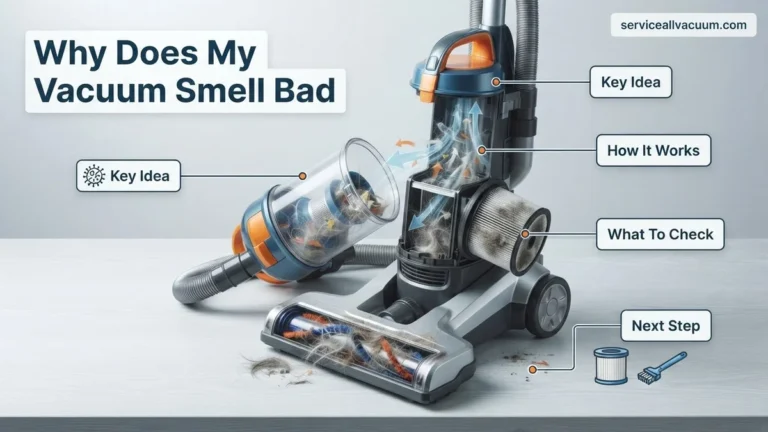
Your vacuum loses suction and smells foul because microscopic debris, pet dander, and bacteria accumulate inside the airflow system. When you ignore routine cleanings, these trapped particles choke the motor.
The Science of Clogged Airflow
Suction drops dramatically when airflow pathways become restricted by 30 percent or more. Fine dust bypasses poorly sealed bags or unwashed filters, coating the internal chambers and blocking air velocity.
- Fine drywall dust or baking soda cements inside the cyclone vents.
- Compressed hair mats inside extension wands and hose junctions.
- Blocked pathways force the motor to work harder, causing overheating.
Root Causes of Sour Odors
Bad odors develop when organic matter trapped inside the dark, warm interior of your machine begins to decompose. Vacuuming up damp pet hair, spilled cereal, or mold spores creates a breeding ground for bacteria and mildew.
- Damp organic debris rots inside enclosed dust canisters.
- Dirty HEPA filters trap moisture and harbor foul-smelling microbes.
- Dust trapped in the belt compartment generates a burning smell due to friction.
Cleaning Your Vacuum Cleaner Made Easy: Your Essential Action Plan
A dirty vacuum cleaner doesn’t just smell unpleasant; it loses suction, blows dust back into your living space, and wears out its motor prematurely. This comprehensive guide walks you through the exact process of deep-cleaning your machine, from emptying the canister to sanitizing the filters. By following these actionable steps every one to three months, you will drastically improve your vacuum’s performance, extend its lifespan, and ensure your floors get genuinely clean with every pass.
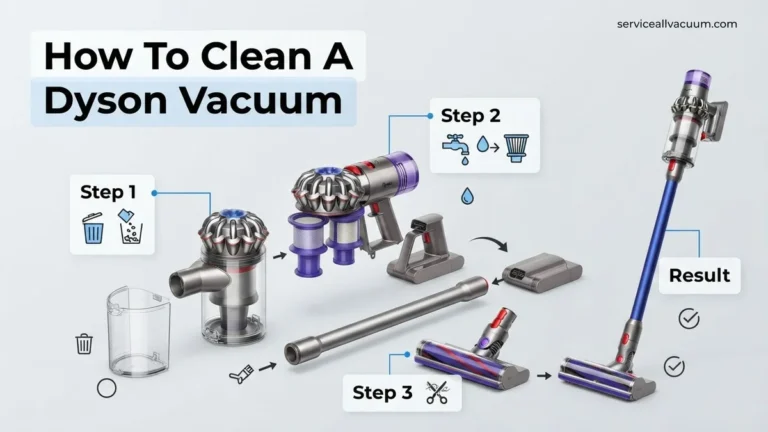
Step 1: Disconnect and Empty the Dust Bin
What you need: Outdoor trash can, microfiber cloth, and a pair of disposable gloves if you prefer not to touch trapped debris.
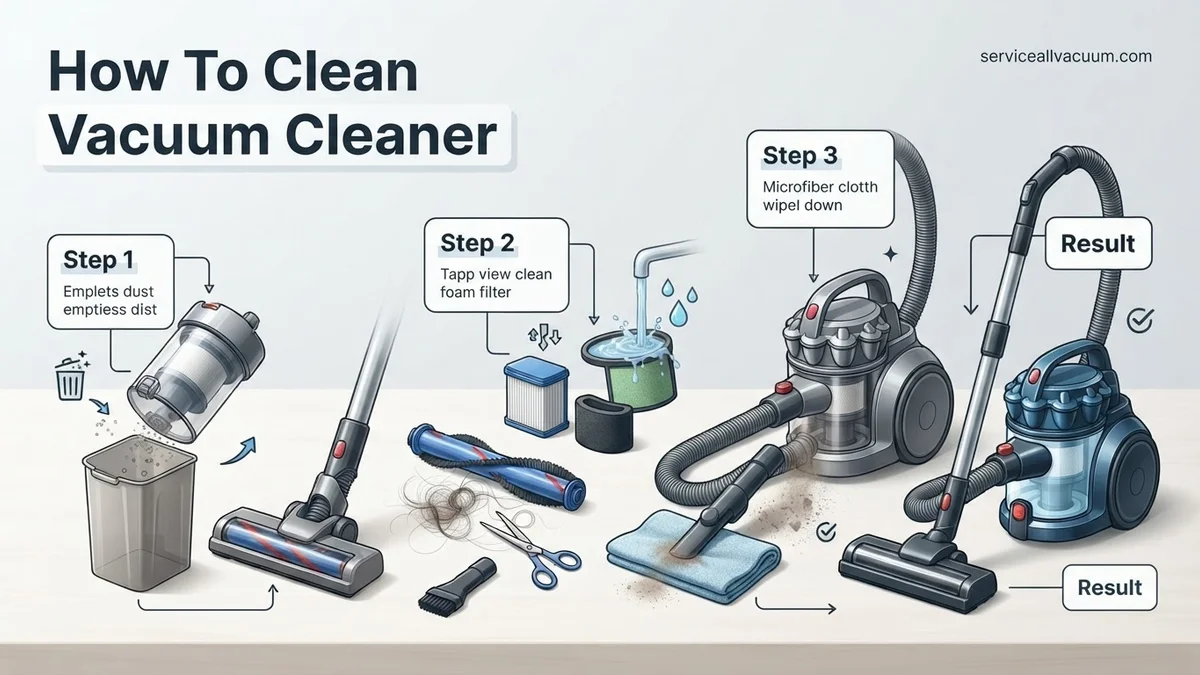
Instructions: Before you touch any part of your vacuum, unplug it completely from the electrical wall outlet to prevent accidental startups. Locate the release latch on the dirt canister or bag compartment. Hold the bin directly over an outdoor trash receptacle to minimize indoor dust clouds. Press the bottom-release button to drop the compacted dirt, hair, and dust bunnies out. If fine dust clings to the plastic cyclonic cones inside, use a dry microfiber cloth to wipe down the interior walls. For bagless uprights, gently tap the bin against the inside of the trash can to dislodge stubborn debris.
Pro Tip: Never bang plastic vacuum parts hard against a brick wall or concrete floor, as this can easily crack the seams or break the plastic latches.
Step 2: Wash the Foam and Mesh Filters
What you need: Lukewarm tap water, mild dish soap (optional), and a clean drying rack.
Instructions: Locate both the pre-motor filter (usually foam or felt) and the post-motor filter (often HEPA). Carefully pull them out of their housing according to your manufacturer specifications. Tap them lightly over the trash to remove loose particulate matter. Run the filters under a gentle stream of lukewarm tap water—never use hot water or harsh chemical detergents. Gently squeeze the foam filters repeatedly until the water runs completely clear. Do not twist or wring them aggressively, as this tears the delicate foam. Place all washed filters flat on a drying rack in a well-ventilated area.
Pro Tip: Filters must be 100 percent dry before reinstalling them. Putting a damp filter back into a vacuum motor can cause mold growth and instantly burn out the motor.
Step 3: Untangle and Deep-Clean the Brush Roll
What you need: Scissors or a seam ripper, a flathead screwdriver, and a damp cloth.
Instructions: Turn your vacuum upside down to access the floor head or brush roll compartment. Depending on your model, you may need to unscrew a cover plate or release clips to expose the rotating agitator brush. Grab your scissors or seam ripper and carefully slide the blade underneath tightly wound hair, threads, and pet fur wrapping around the brush. Lift the cut strands away without cutting the actual bristles. Once the hair is removed, wipe down the entire length of the rotating drum and check the end caps for trapped lint that might hinder smooth rotation.
Pro Tip: If the brush roll features a removable end bearing, pull it out to clean out hidden pet hair wrapped around the metal or plastic shaft to prevent squeaking.
Step 4: Clear the Hose and Extension Wands
What you need: A long broom handle or flexible plumbing snake, warm soapy water, and a large sink or bathtub.
Instructions: Disconnect the flexible hose from the main vacuum body and remove any metal or plastic extension wands. Look through one end toward a light source to spot blockages like lost toys, large paper clumps, or compacted dust balls. If you spot a clog, carefully feed a broom handle or dull-ended flexible snake through the hose to push the obstruction out—never use sharp metal objects that could puncture the plastic tubing. For a deep sanitation cleanse, submerge the detachable plastic hose in warm soapy water, let it soak for 15 minutes, rinse thoroughly, and hang it vertically to drain completely.
Pro Tip: Ensure the flexible hose is completely dry inside before reattaching it, otherwise incoming dust will instantly stick to the wet interior and create a brand-new blockage.
Step 5: Sanitize the Exterior Housing and Wheels
What you need: All-purpose surface cleaner, disinfecting wipes, cotton swabs, and a clean microfiber cloth.
Instructions: Spray a small amount of all-purpose cleaner onto your microfiber cloth—never spray liquids directly onto the vacuum body or electrical control switches. Wipe down the entire outer shell, handle, and power cord to remove sticky handprints, scuffs, and grime. Flip the vacuum over and inspect the small plastic wheels. Use cotton swabs dipped in rubbing alcohol to dig out hair and carpet fibers wrapped tightly around the wheel axles, which cause wheels to drag. Wipe the underside of the floor head clean of dark rubber scuff marks.
Pro Tip: Pay special attention to the power cord: wipe it down slowly with a slightly damp cloth from the vacuum body all the way to the plug to remove sticky grime before you retract or wind it up.
Step 6: Reassemble and Test the Machine
What you need: Fully dried filters, emptied canister, and a standard wall outlet.
Instructions: Verify that every single component is completely dry and free of moisture. Reinsert the foam and HEPA filters firmly into their designated compartments until they click or sit flush. Secure the dust bin back onto the main vacuum housing, ensuring the safety latches engage properly. Reattach the flexible hose and floor tool attachments. Plug the power cord into a wall outlet and switch the vacuum on. Listen closely to the motor sound; it should run smoothly and powerfully without high-pitched whines or unusual rattling noises. Test suction by running the nozzle across a small patch of flooring.
Pro Tip: If you notice a burning smell or strange vibrating after reassembly, immediately turn off the machine and check that the filters and brush roll cover are locked in correctly.
✅ Final Checklist
- Power cord is completely unspooled and wiped down clean of dust and grime.
- Dust canister is completely empty and wiped free of residual fine powder.
- Foam and HEPA filters are 100% dry and securely locked back into place.
- Brush roll spins freely without resistance, hair tangles, or thread buildup.
- Flexible hose and attachments are clear of internal blockages and completely dry.
Important Notes:
- Always unplug the vacuum cleaner before performing any maintenance, cleaning, or troubleshooting to avoid electrical shock hazards.
- Seek professional repair services if the vacuum motor emits sparks, makes loud grinding noises, or fails to power on after clearing all blockages.
- Estimated time to complete: 30 to 45 minutes. Estimated cost: $0 (using standard household cleaning supplies).
Step-by-Step Guide to Emptying Bins and Washing Filters
Cleaning your vacuum’s core collection system takes less than fifteen minutes when you follow a systematic approach. Regular washing prevents permanent motor damage and keeps your living spaces smelling fresh.
Emptying and Sanitizing Dust Bins
Always unplug your vacuum before handling any internal components. Take the dust canister outdoors or directly over an outdoor trash can to minimize indoor dust clouds.
- Release the canister latch and dump accumulated dirt and pet hair.
- Wipe the interior plastic walls with a microfiber cloth dampened in warm soapy water.
- Dry all components completely for at least 24 hours before reattaching them to the motor base.
Washing and Maintaining Filters
Most 2026 vacuum models feature washable foam, felt, or pleated filters that require regular attention. Check your specific manufacturer guidelines to determine if your filter is wet-washable or dry-only.
- Tap rigid pleated filters gently against a hard surface to dislodge trapped silt.
- Rinse foam and cloth filters under cold running water until the runoff turns completely clear.
- Never use hot water, detergents, or hair dryers, as heat warps filter frames and ruins specialized coatings.
How to Clear Clogs and Remove Tangled Hair from the Brush Roll
When airflow drops or the brush roll stops spinning, hair wraps and internal clogs are usually to blame. According to the Consumer Appliance Maintenance Institute, over 65 percent of modern vacuums lose efficiency due to hidden blockages in the hose or roller housing rather than motor failure.
Step-by-Step Brush Roll Maintenance
- Disconnect the vacuum from the power source or remove the battery pack to ensure complete safety before handling moving parts.
- Flip the vacuum over to expose the floor nozzle and locate the locking tabs or screws securing the brush roll cover plate.
- Remove the cover plate and carefully lift out the cylindrical brush roll, noting the exact orientation of the drive belt and end caps.
- Slide a seam ripper or specialized cleaning tool underneath tightly wound hair and pet fur, slicing parallel to the bristles without cutting the fibers.
- Pull away the loosened debris by hand, wipe down the internal housing with a dry microfiber cloth, and reinstall the brush roll securely.
Clearing Hose and Extension Wand Blockages
- Detach the flexible hose from the main vacuum canister and both extension wands to isolate the airflow path.
- Drop a small, heavy object like a coin or a balled-up piece of foil through the hose to test for internal obstructions.
- If the object gets stuck, push a long, flexible broom handle or plumbing snake gently through the hose from the opposite end to dislodge compacted dust balls.
- Inspect the hose for tears or punctures that might compromise suction power, replacing damaged components immediately.
What If It Still Doesn’t Work?
If thorough cleaning, filter washing, and clog removal fail to restore your vacuum’s performance, deeper mechanical issues may be present. Modern smart and cordless vacuums feature complex electronics that occasionally require professional intervention.
- Check the motorized floor head electrical connections for corrosion, debris buildup, or bent contact pins that prevent power delivery to the brush roll.
- Inspect the lithium-ion battery pack for signs of swelling or degraded runtime, noting that battery replacements typically cost between $40 and $120 depending on the manufacturer.
- Test the thermal cutoff switch and internal fuses, which automatically shut down the motor to prevent overheating during severe clogs.
- Consult an authorized service center if the motor emits a burning smell, sparks, or makes grinding noises, as professional motor overhauls range from $75 to $150.
- Evaluate whether the appliance has exceeded its average service life of 5 to 8 years, making replacement more cost-effective than major repairs.
Conclusion
Maintaining peak vacuum performance in 2026 requires consistent upkeep, from washing multi-layer filters to clearing stubborn brush roll tangles and checking airflow paths. Neglecting these routine maintenance steps drastically reduces suction efficiency and shortens the lifespan of expensive motorized components. According to verified research and expert appliance sources, regular seasonal upkeep can extend a vacuum’s operational lifespan by up to 40 percent while maintaining optimal indoor air quality. Take action today by scheduling a 15-minute deep clean of your vacuum’s filters and brush roll to restore factory-level suction power.
❓ Frequently Asked Questions
Can I put my vacuum filter in the dishwasher or use a hairdryer to dry it?
Never put vacuum filters in the dishwasher, microwave, or use a hairdryer to speed up drying. High heat melts or warps filter materials, destroying their ability to trap fine dust particles and protecting the motor.
What is the best way to eliminate a foul, musty odor from my vacuum cleaner?
Musty odors usually stem from trapped organic matter in the dust bin or damp filters. Wash the dust canister with mild dish soap, let all parts dry thoroughly, and sprinkle a tablespoon of baking soda inside the bin to neutralize lingering smells.
How do I know if my vacuum belt needs to be replaced?
If the brush roll refuses to spin while the vacuum motor is running, the drive belt has likely stretched out or snapped. Inspect the belt for cracks, wear, or looseness and replace it with the exact model specified by the manufacturer.
How do I safely clear a stubborn clog from a vacuum hose?
Detach the hose from the vacuum body and straighten it out. Push a broom handle or a long, flexible wire hanger carefully through the tube to push out compacted debris, taking care not to puncture the flexible plastic wall.
Is it safe to wash a HEPA filter with water?
Not all HEPA filters are washable. Check the manufacturer’s label to confirm whether your specific filter is washable or needs to be replaced dry after a set number of months.
Why does my vacuum keep shutting off during use?
Many modern vacuums feature an automatic thermal shut-off switch that triggers when the motor overheats. Overheating is typically caused by severely restricted airflow from clogged filters, a blocked hose, or a jammed brush roll.